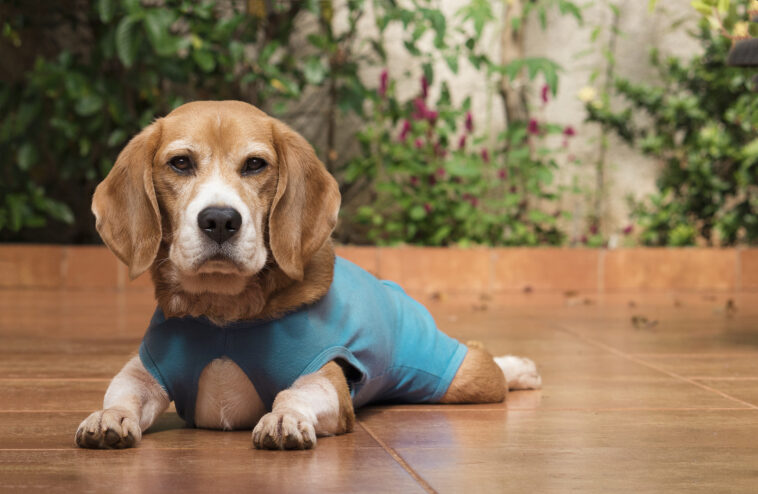
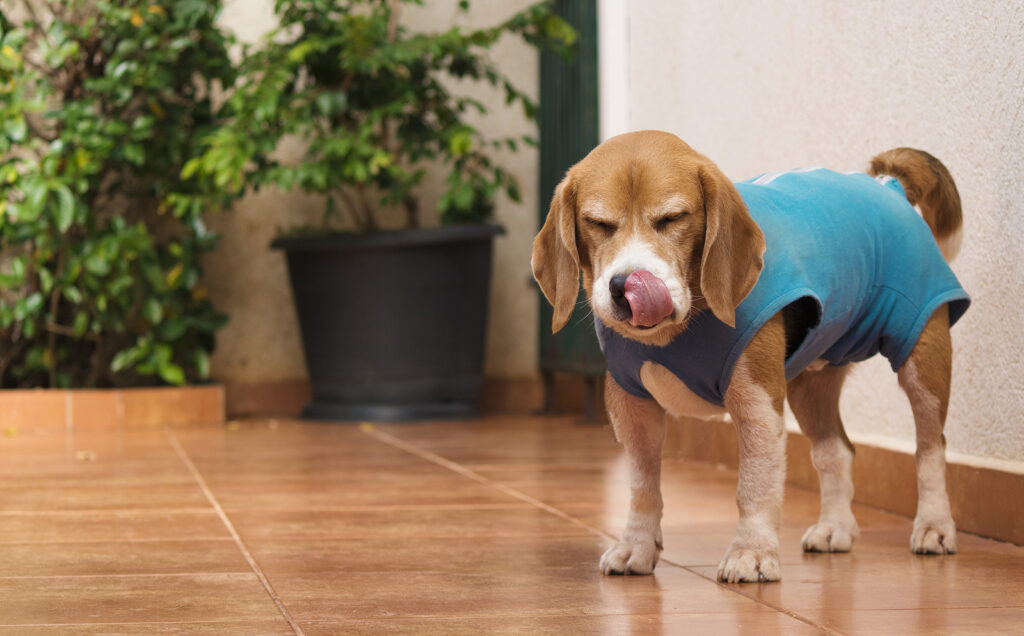
DIY Dog Onesie After Surgery
When my beloved furry friend had to undergo surgery, whether it was a routine spaying/neutering or a more complex procedure, their comfort and safety during the recovery period became my top priorities. I wanted to make sure I could provide the best care for my dogs while keeping them stylishly cozy.
So, I decided to create a DIY dog onesie after surgery. In this comprehensive guide, I'll walk you through the process of making a comfortable and safe onesie for your canine companion. These step-by-step instructions helped me, and I hope they'll assist you in caring for your pet during their recovery period.
Why a DIY Dog Onesie?
Before we delve into the details of creating a DIY dog onesie after surgery, let's explore why it's an excellent choice for post-operative care dogs and cats after surgery.
Protection
A DIY dog onesie after surgery provides essential protection for your pet. After surgery, dogs wear often have a strong instinct to lick or bite at their surgical site. This natural behavior can be detrimental to the healing process, as it can introduce bacteria, cause infections, and even damage the incision area.
A well-fitted onesie acts as a physical barrier, preventing your dog from accessing their wounds and promoting a clean and hygienic environment for healing.
Comfort
Comfort is a key factor in your dog's recovery. Post-surgery, your dog may experience discomfort, sensitivity, and irritation in the operated area. A soft and snug onesie can offer them much-needed comfort and support. It can also help alleviate the irritation caused by stitches or staples, reducing the likelihood of your dog scratching or pawing at the surgical site.
Hygiene
Maintaining proper hygiene around the surgical site is crucial for preventing infections and ensuring a swift recovery. diy baby onesies for dogs and cats of a cone help keep the surgical area clean and free from dirt, debris, and contaminants. This is especially important if your dog spends time outdoors or in areas where they could come into contact with potentially harmful substances.
Style
Who said medical attire can't be fashionable? While the primary focus is on your dog's health and comfort, a DIY dog onesie after surgery allows for a touch of personalization and style. You can customize the onesie with fabric patterns, colors, and even decorative elements that showcase your pet's unique personality. This not only enhances their overall look but also adds a bit of fun to the recovery process.

Materials You'll Need
Before diving into the DIY process, gather the necessary materials to ensure a smooth and efficient project. Here's a more detailed list:
- Soft, breathable fabric: Choose a fabric that is gentle on your dog's skin and allows for proper airflow. Cotton or a cotton-blend fabric is an ideal choice, as it is comfortable and easy to work with.
- Measuring tape: An accurate set of measurements is essential for creating a onesie that fits your dog perfectly.
- Scissors: Sharp scissors are essential for cutting the fabric cleanly and accurately.
- Thread and sewing machine: A sewing machine will make the process quicker and more precise, but you can also hand-sew if you prefer.
- Velcro or snaps: These will serve as closures for the onesie, making it easy to put on and take off your dog.
- Elastic cord: Elastic cord is used to create leg holes that fit snugly without being too tight or restrictive.
- Buttons or embellishments (optional): If you want to add a personal touch to your dog's onesie, consider decorative elements like buttons, patches, or appliques. However, ensure these decorations are securely attached and do not pose any choking hazards.
- Dog measurements: Take detailed measurements of your dog's length, chest girth, and neck girth to ensure a proper fit.
Check out our post on DIY Scratch Pad for Dogs
Step-by-Step Guide to Making a DIY Dog Onesie
Creating a DIY dog onesie after surgery involves several steps, each of which requires attention to detail. Let's explore each step in more depth:
Measure Your Dog
Accurate measurements are the foundation of a well-fitting onesie. Take your time to measure your dog properly to ensure their comfort. Here's how to do it:
- Length: Measure from the base of your dog's neck to the base of their tail. This measurement will determine the onesie's overall length.
- Chest girth: Measure the widest part of your dog's chest, usually just behind their front legs. This measurement will determine the width of the onesie.
- Neck girth: Measure the circumference of your dog's neck. This measurement will be crucial for creating the neck opening.
Create the Pattern
With your dog's measurements in hand, it's time to create a pattern for the onesie. You can either use an existing dog shirt as a template or draw one from scratch on a large sheet of paper. Ensure that your pattern includes allowances for seams to accommodate the thickness of the fabric and prevent the onesie from being too tight links to the full project more diys.
Cut the Fabric
Now that you have your pattern, it's time to cut the fabric. Lay your chosen fabric flat, and place the pattern on top. Using sharp scissors, carefully cut out the fabric following the lines of your pattern. Take your time and make precise cuts to ensure the pieces fit together seamlessly during sewing being neutered keep dog from licking.
Sew the Onesie
Sewing the onesie is a critical step in the process. It's where you'll bring all the pieces together to create a functional and comfortable garment for your dog. Here's a more detailed breakdown of this step:
- Fold the Fabric: Start by folding the fabric in half, inside out. This means that the side of the fabric with the pattern or design should be on the inside. This will hide the seams when you turn the onesie right side out.
- Align the Edges: Align the edges of the fabric carefully. The folded fabric should form a shape that resembles the onesie, with the fold serving as the centerline for your dog's back. Take your time to ensure the edges match up perfectly.
- Sew Along the Sides: Using your sewing machine (or hand-sewing if you prefer), begin sewing along the sides of the folded fabric, following the lines of your pattern. Leave openings for the legs and tail, as these will be the areas your dog's limbs and tail will go through. Reinforce the seams by going over them a second time to ensure durability, as the onesie will be subject to some stretching when your dog moves.
- Leg and Tail Openings: Creating openings for your dog's legs and tail is essential for their comfort and mobility. Here's how to do it:
- Leg Holes: Measure your dog's legs and cut elastic pieces accordingly. Sew these pieces into the leg holes, ensuring a snug fit without being too tight. The elastic will help keep the onesie securely in place without causing discomfort or constriction.
- Tail Opening: Your dog's tail should be able to move freely without restriction. To create a tail opening, fold the fabric at the rear of the onesie and stitch it securely. Be mindful of making this area comfortable and non-irritating for your dog.
Attach Closures
The closures you choose will make it easy to put the onesie on your dog and take it off when necessary. The choice between Velcro, snaps, or buttons depends on your preference and your dog's comfort. Here's how to attach them:
- Velcro: If you opt for Velcro closures, sew one side of the Velcro strips to the edges of the onesie's opening and the corresponding side to the opposite edge. Ensure that the Velcro is securely attached to prevent it from coming loose during wear.
- Snaps: For snap closures, use a snap kit to attach the snaps to the onesie's edges. Make sure they are aligned properly for easy fastening and unfastening.
- Buttons: If you prefer buttons, sew buttonholes on one side and attach buttons on the other side of the onesie's opening. Ensure that the buttons are securely sewn to prevent them from coming loose.
Customize and Decorate
Now that the practical aspects of your DIY dog onesie after surgery are complete, you can let your creativity shine. Customizing and decorating the onesie allows you to add a personal touch and showcase your pet's unique style. Here are some ideas:
- Fabric Patterns: Choose a fabric pattern that reflects your dog's personality. Whether it's a playful polka dot, a classic plaid, or a vibrant floral print, the options are endless.
- Colors: Consider your dog's favorite colors or colors that complement their fur. A well-chosen color scheme can make your pet look both stylish and adorable.
- Embellishments: If you want to take customization to the next level, consider adding decorative elements such as buttons, patches, or appliques. These can be sewn onto the onesie to create a one-of-a-kind look. However, always ensure that any embellishments are securely attached and do not pose any choking hazards.
Tips for Caring for Your Dog in the Onesie
Your DIY dog onesie after surgery is complete, but the care and comfort of your pet don't end there. Here are some important tips to keep in mind:
Regular Cleaning
The onesie will get dirty over time, especially if your dog wears it regularly. Proper cleaning is essential to maintain hygiene and ensure your dog's comfort. Follow these steps for effective cleaning:
- Remove Stains: Promptly treat and remove any stains on the onesie. Stains can attract bacteria and cause odors.
- Machine Wash: Check the care instructions for the fabric you used, but most cotton or cotton-blend fabrics can be machine-washed. Use a mild detergent and wash the onesie separately from other laundry items to prevent lint transfer.
- Gentle Cycle: Use a gentle cycle with cold or lukewarm water to prevent damage to the fabric.
- Air Dry: Avoid using a dryer, as high heat can shrink the fabric or damage any elastic or decorative elements. Instead, air dry the onesie by hanging it on a clothesline or laying it flat on a clean surface.
- Inspect After Washing: After washing, inspect the onesie for any loose threads, loose closures, or signs of wear and tear. Repair or replace any damaged components to maintain its functionality.
Supervision
While the onesie is effective in preventing your dog from accessing their surgical site, always supervise them when they are wearing it. Dogs can be surprisingly resourceful when it comes to trying to remove clothing, and they may attempt to chew or pull at the onesie. Regularly check for signs of wear and ensure that the onesie remains securely fastened.
Comfort is Key
The comfort of your dog should be your top priority when they are wearing the onesie. Here are some additional tips to ensure their comfort:
- Check Fit: Periodically check the fit of the onesie to ensure it hasn't become too tight or too loose. Your dog should be able to move comfortably and breathe easily while wearing it.
- Avoid Allergies: If your dog has sensitive skin or allergies, be mindful of the fabric you choose for the onesie. Opt for hypoallergenic materials to minimize the risk of irritation.
- Watch for Signs of Discomfort: Pay attention to your dog's behavior while they are wearing the onesie. If they seem uncomfortable, restless, or agitated, it may be a sign that the onesie is causing discomfort or irritation. In such cases, remove the onesie and consult with your veterinarian for guidance on alternative solutions.
Check for Irritation
Regularly inspect your dog's skin, especially in areas covered by the onesie, for signs of irritation or chafing. Common areas to watch include the neck, leg openings, and the tail area. If you notice any redness, rash, or signs of discomfort, it's essential to address the issue promptly. You can make adjustments to the onesie or consult with your veterinarian for guidance on preventing and treating skin irritation.
Check out our post on Doghouse DIY
Frequently Asked Questions (FAQs)
1. Why should I consider making a DIY dog onesie after surgery?
A DIY dog onesie serves as a versatile and practical solution for post-operative care. It provides essential protection, comfort, and hygiene for your dog during the recovery period. Additionally, it allows you to showcase your pet's unique style with customized designs.
2. Can I use any fabric for the DIY dog onesie?
While you have some flexibility in choosing the fabric, it's essential to prioritize your dog's comfort. Soft and breathable fabrics like cotton or cotton-blend are ideal choices. Avoid materials that could cause skin irritation or allergies.
3. How do I ensure a proper fit for the onesie?
To ensure a proper fit, take accurate measurements of your dog's length, chest girth, and neck girth. Use these measurements to create a pattern that matches your dog's size. Be precise in your cutting and sewing to ensure a snug yet comfortable fit.
4. Are there any safety concerns with using closures like Velcro, snaps, or buttons?
While closures like Velcro, snaps, or buttons are convenient for fastening the onesie, safety should be a priority. Ensure that any closures are securely attached to prevent them from coming loose and posing a choking hazard to your dog. Regularly inspect the onesie for any loose closures.
5. Can I wash the DIY dog onesie in a washing machine?
Yes, you can wash the onesie in a washing machine, but be sure to follow the care instructions for the fabric you used. Use a mild detergent and wash it separately from other laundry items to prevent lint transfer. Opt for a gentle cycle with cold or lukewarm water to maintain the fabric's integrity.
6. How often should I clean the onesie?
The frequency of cleaning depends on your dog's activities and the extent of dirt or stains. In general, it's advisable to clean the onesie regularly, especially if it becomes soiled or odorous. Promptly address any stains to prevent bacterial growth and maintain hygiene.
7. Can my dog wear the onesie continuously, or should I remove it at times?
While the onesie is effective in providing protection and comfort, it's essential to allow your dog some breaks. Remove the onesie periodically to give your pet's skin a chance to breathe and prevent any potential rubbing or irritation. Supervise your dog when the onesie is off to ensure they don't disturb their surgical site.
8. What should I do if my dog shows signs of discomfort while wearing the onesie?
If your dog exhibits signs of discomfort, restlessness, or agitation while wearing the onesie, it's crucial to address the issue promptly. Check for any areas of irritation or chafing and make necessary adjustments to the onesie. If discomfort persists, consult with your veterinarian for alternative solutions to ensure your dog's well-being during the recovery process.
9. Can I use the DIY dog onesie for dogs of all sizes and breeds?
The DIY dog onesie can be tailored to fit dogs of various sizes and breeds by adjusting the measurements and pattern. Whether you have a small Chihuahua or a large Labrador, you can customize the onesie to suit your dog's specific dimensions.
10. Are there any alternatives to a DIY dog onesie for post-operative care?
While a DIY dog onesie is an effective option, there are alternatives you can explore. Your veterinarian may recommend e-collars (Elizabethan collars) or medical pet shirts as alternatives for post-operative care. These options can be discussed with your vet to determine the most suitable choice based on your dog's needs.
Final Thoughts
In summary, crafting a DIY dog onesie after my pet's surgery was a heartfelt journey of love and care. My main goal was to ensure my furry friend's comfort and safety during recovery, and the onesie provided essential protection, comfort, and hygiene. What began as a practical necessity turned into an opportunity for personalization and style, allowing me to showcase my pet's unique personality.
Beyond the creative process, this project deepened my bond with my loyal companion. Every stitch and design choice represented my devotion to their well-being. It also instilled daily rituals of care, including regular cleaning and vigilant supervision, as we navigated the post-surgery recovery together. Crafting this DIY dog onesie was not just about crafting a garment; it was about creating lasting moments of connection and love with my beloved canine companion.
Sources
https://www.ncbi.nlm.nih.gov/pmc/articles/PMC7070745/
https://www.sydney.edu.au/news-opinion/news/2020/03/13/the-cone-of-shame-makes-pets-miserable.html
https://www.seattle.gov/animal-shelter/spay-and-neuter/post-surgery-instructions


