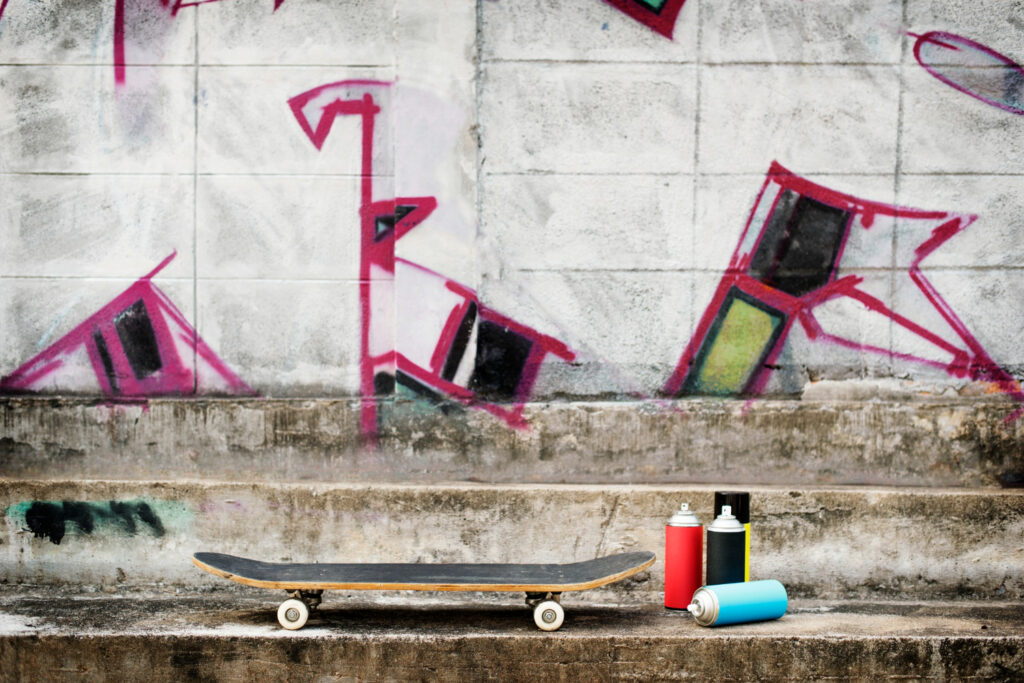
Skateboarding isn't just a sport to me; it's a way of life that I'm deeply passionate about. One of the skills that has become incredibly important in my skateboarding journey is mastering the art of the manual. The manual is a trick that challenges me to balance on the two back wheels of my skateboard while moving forward, all without using the tail or nose of the board to touch the ground. To hone this skill and take my skateboarding to the next level, I knew I needed a DIY manual pad.
In this guide, I want to share my personal experience and take you through the process of creating your very own DIY manual pad. Whether you're an experienced skateboarder like me or just starting out on this incredible journey, I believe this guide will help you construct a robust and functional manual pad that will not only enhance your skateboarding experience but also become a source of pride and accomplishment. Let's dive into the steps together and bring this project to life!
The Importance of a DIY Manual Pad
A DIY manual pad is a crucial addition to any skateboarder's arsenal for several reasons. Let's delve deeper into these reasons:
Skill Development
Practicing manuals on a manual pad allows skateboarders to hone their balance and control. It's an excellent tool for beginners to learn the basics and for advanced skaters to perfect their techniques. The manual pad provides a controlled environment where skaters can focus on mastering the delicate balance required for manuals. This repetitive practice helps improve muscle memory and coordination, essential for executing other advanced tricks.
Versatility
A manual pad can be used for various tricks, not just manuals. You can use it for grinds, slides, and flip tricks, making it a versatile training ground for improving your skateboarding skills. By constructing a well-designed manual pad, you open up a world of possibilities for perfecting a wide range of tricks. Its versatility ensures that your skateboarding sessions remain engaging and challenging.
Accessibility
Having your own manual pad means you can skate whenever you want, without depending on skate parks or other facilities. It's a cost-effective solution for skaters of all levels. Not only does it save you time and money in the long run, but it also allows you to practice at your own pace and on your terms. This accessibility fosters a stronger sense of independence and commitment to your skateboarding journey.
Explore our latest post on DIY Electric Skateboard
Tools and Materials Needed DIY Manual Pad
Before you start building your DIY manual pad, gathering the necessary tools and materials is crucial. Let's explore these in more detail:
Tools
- Circular saw or jigsaw: A reliable saw is essential for cutting plywood sheets and lumber accurately. A circular saw or jigsaw is ideal for this purpose.
- Drill with assorted drill bits: You'll need a drill for making holes and attaching components securely.
- Measuring tape: Accurate measurements are vital to ensure that your manual pad is level and balanced.
- Level: A level helps you confirm that your manual pad is even and doesn't have any slopes or uneven surfaces.
- Screwdriver: A screwdriver is necessary for tightening screws and ensuring the structural integrity of your manual pad.
- Clamps: Clamps come in handy when securing components together, especially during the frame assembly.
- Safety gear (goggles, ear protection, gloves): Safety should always be a top priority. Invest in high-quality safety gear to protect yourself during the construction process.
Materials
- Plywood sheets (3/4 inch thick): Plywood forms the base of your manual pad, providing a sturdy surface for skateboarding.
- 2×4 lumber: 2×4 lumber is used to create the frame, providing support and stability for your manual pad.
- Screws (2.5-inch and 3-inch): Screws are essential for attaching the frame, plywood, and masonite sheets securely.
- Plywood adhesive: Adhesive ensures that the plywood and masonite sheets adhere firmly to the frame, preventing any unwanted movement.
- Masonite sheets: Masonite sheets, when added to the top surface, enhance the smoothness and durability of your manual pad.
- Metal coping (optional): Metal coping can be attached to the edges of your manual pad for grinds and slides, adding an extra layer of versatility to your setup.
- Paint and sealant: Painting the surface with skateboard-friendly paint and applying a sealant protects it from the elements and wear, prolonging the lifespan of your manual pad.
- Sandpaper: Sandpaper helps you smooth out any rough edges or imperfections on the manual pad's surface, ensuring a safe and enjoyable skateboarding experience.
DIY Manual Pad Choosing the Right Location
Selecting the right location for your DIY manual pad is crucial for a safe and enjoyable skateboarding experience. Let's explore some key factors to consider:
Flat Ground
Look for a flat and level surface in your backyard or garage. Uneven ground can affect the stability of your manual pad and make it difficult to practice tricks consistently. Ideally, your chosen location should have a smooth and level foundation to ensure that your manual pad sits evenly.
Space
Ensure you have enough space to skate comfortably without obstacles or hazards. Measure the area to confirm that it accommodates both the manual pad's dimensions and provides sufficient room for maneuvering and practicing tricks. Adequate space contributes to a safe and enjoyable skateboarding experience.
Accessibility
Make sure the location is easily accessible for you to transport materials and work on the project. Easy access simplifies the construction process and minimizes any logistical challenges you may encounter. Having your tools and materials nearby saves time and effort, allowing you to focus on building your manual pad efficiently.
Designing Your Manual Pad
The design of your manual pad can vary based on your preferences and skill level. Here are some considerations to help you craft the perfect design:
Dimensions
A standard manual pad is around 8 feet long, 2 feet wide, and 6 inches high. However, these dimensions can be adjusted to suit your specific needs and available space. Taller or wider manual pads can provide additional challenges for experienced skaters, while beginners may prefer a smaller, more manageable size.
Shape
While most manual pads have a rectangular shape, you have the creative freedom to experiment with different shapes. Adding curves or angles to your manual pad can create unique challenges and opportunities for creative tricks. Consider your skill level and the types of tricks you want to practice when deciding on the shape.
Materials
Decide if you want to use metal coping for grinds or stick to a wooden surface for a smoother ride. Metal coping adds durability and a professional touch to your manual pad, allowing for an authentic skateboarding experience. However, it's important to ensure that it is securely attached to prevent any accidents during tricks.
DIY Manual Pad Building the Frame
Building a sturdy frame is essential to support your manual pad effectively. Here's an in-depth look at how you can construct a robust frame:
Frame Design
Begin by cutting the 2×4 lumber into pieces to create the frame's perimeter. It's crucial to ensure that the corners are square and level. The use of clamps can help hold the frame's components in place during assembly. Once the corners are aligned correctly, drill pilot holes and secure them with screws. This step establishes the foundation of your manual pad's structure.
Adding Legs
To raise the manual pad to the desired height, attach legs to the frame. Properly positioning the legs ensures that the manual pad remains level and stable during use. Use screws to secure the legs in place, and consider adding cross bracing if additional stability is required. The structural integrity of the frame directly influences the overall performance and safety of your manual pad.
DIY Manual Pad Constructing the Surface
The surface of your manual pad is where you'll perform your tricks. Let's explore the process of constructing this critical component in more detail:
Plywood Sheets
Cut plywood sheets to match the dimensions of your manual pad. These sheets form the foundation of the manual pad's surface, providing a sturdy and reliable base. Applying plywood adhesive to the frame and then placing the plywood sheets on top ensures a secure bond. To reinforce this connection, secure the plywood sheets with screws, making sure they are evenly spaced to distribute weight and stress effectively.
Masonite Sheets
Cut masonite sheets to the same dimensions as the plywood sheets. Masonite is an excellent choice for the top surface as it enhances smoothness and durability. Just like with the plywood, apply adhesive to the plywood surface and place the masonite sheets on top. Press down firmly to ensure a strong bond and secure the masonite sheets with screws evenly across the surface. This combination of materials results in a skateable surface that offers both stability and a smooth ride.
Adding Finishing Touches
To make your DIY manual pad more skate-friendly and aesthetically pleasing, consider these finishing touches:
Metal Coping
For skaters who enjoy grinds and slides, attaching metal coping to the edges of your manual pad is a valuable addition. Metal coping not only provides a satisfying sound when you land a trick but also adds durability to the edges, preventing damage from repeated use. Ensure that the metal coping is securely fastened with screws to maintain its integrity during skate sessions.
Paint and Sealant
To protect your manual pad from the elements and wear, consider painting the surface with skateboard-friendly paint and applying a sealant. Skateboard-friendly paint provides the right level of grip and durability for skating, enhancing the overall experience. The sealant helps prevent water damage and ensures that the paint remains vibrant over time. This step not only contributes to the longevity of your manual pad but also adds a touch of customization to your setup.
Grip Tape
For enhanced traction and control during tricks, add grip tape to the top surface of your manual pad. Grip tape is essential for maintaining a secure footing while performing manuals and other maneuvers. Apply the grip tape evenly to the surface, ensuring that it adheres securely. Properly installed grip tape enhances safety and enables skaters to execute tricks with confidence.
Maintenance and Safety Tips
To keep your DIY manual pad in top condition and ensure your safety while skating, follow these maintenance and safety tips:
Regular Inspection
Regularly inspect your manual pad to identify any loose screws or structural issues. Tighten screws as needed to prevent wobbling or instability during use. Address any signs of wear and tear promptly to maintain the pad's performance and safety.
Cleaning
Keep the surface of your manual pad clean from dirt and debris that can affect your ride. Regularly sweep or wipe down the pad to remove any accumulated particles. A clean surface ensures that you have a consistent and predictable ride every time you skate.
Safety Gear
Wear appropriate safety gear, including a helmet, knee pads, and elbow pads, to prevent injuries while skating on your manual pad. Safety gear provides essential protection in case of falls or accidents, allowing you to skate with confidence and reduce the risk of injuries.
FAQs (Frequently Asked Questions)
In this section, we'll address some common questions about building a DIY manual pad for skateboarding:
Q1: How much will it cost to build a DIY manual pad?
The cost of building a DIY manual pad can vary depending on the materials and tools you choose. On average, you can expect to spend between $100 to $300 for materials, including plywood, lumber, screws, and optional additions like metal coping. The cost may also vary based on your location and where you source your materials.
Q2: What tools do I need for building a DIY manual pad?
You will need essential tools such as a circular saw or jigsaw, drill with assorted drill bits, measuring tape, level, screwdriver, clamps, and safety gear (goggles, ear protection, gloves). Having the right tools ensures a smooth construction process and safety.
Q3: Can I adjust the dimensions of the manual pad to suit my space?
Yes, you can adjust the dimensions of your manual pad to fit your available space and skill level. While a standard manual pad is typically around 8 feet long, 2 feet wide, and 6 inches high, you can customize these dimensions based on your preferences and requirements.
Q4: Do I need to add metal coping to my manual pad?
Adding metal coping to your manual pad is optional. Metal coping enhances the durability of the edges and allows for grinds and slides. Whether or not you choose to include metal coping depends on your skating style and preferences. It's an excellent addition for those who enjoy these types of tricks.
Q5: How long does it take to build a DIY manual pad?
The time required to build a DIY manual pad depends on your experience and the complexity of your design. A simple manual pad can be completed in a weekend, while a more elaborate design with custom features may take a bit longer. Be prepared to invest time and effort to ensure a sturdy and well-constructed manual pad.
Q6: Can I move the manual pad once it's built?
While it is possible to move a DIY manual pad, keep in mind that they are relatively heavy and may require disassembly for transport. Consider the weight and size of your manual pad when planning its location, as moving it frequently may become challenging.
Q7: How do I maintain my DIY manual pad?
Regular maintenance is essential to ensure the longevity and safety of your manual pad. Inspect it regularly for loose screws or structural issues. Tighten screws as needed and keep the surface clean from dirt and debris. Additionally, reapply paint and sealant as necessary to protect the wood from the elements.
Q8: Can beginners use a DIY manual pad?
Yes, beginners can certainly benefit from using a DIY manual pad. In fact, it's a great tool for learning and mastering the basics of skateboarding, including balance and control. Start with basic manuals and gradually progress to more advanced tricks as your skills improve.
Q9: Are there any safety precautions I should take when using a manual pad?
Safety should always be a priority when skateboarding. Ensure that you wear appropriate safety gear, including a helmet, knee pads, and elbow pads. Additionally, inspect your manual pad for any issues before each use and maintain it properly to minimize the risk of accidents.
Q10: Can I customize the design of my manual pad?
Absolutely! DIY manual pads offer the opportunity for creative customization. You can experiment with different shapes, paint designs, and even incorporate additional features to make a manual pad out of a pallet unique and suited to your personal style.
Conclusion
Building your DIY manual pad is not just a practical project; it's an investment in your skateboarding skills and enjoyment. By following the detailed steps outlined in this guide and paying attention to maintenance and safety, you'll have a durable and functional DIY manual pad ready to take your skateboarding skills to the next level. Whether you're a beginner looking to improve your balance or an experienced skater seeking new challenges, a well-constructed manual pad is a valuable addition to your skateboarding journey.
Incorporate your creativity into the design, and customize your manual pad to suit your preferences and goals. With the right tools, materials, and a bit of patience, you can create a manual pad that not only enhances your skateboarding experience but also becomes a testament to your dedication to the sport.