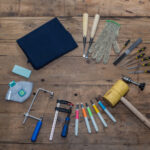
Best Way to Clean Jewelry DIY
Jewelry holds a special place in my heart as a homeowner. It's not just a beautiful accessory; it's an investment, a precious sentiment, and a reflection of my personal style. However, over time, my jewelry can lose its shine due to exposure to everyday dirt, oils, and environmental factors.
While there are commercial diy jewelry cleaners available, I've always been cautious about using them, as they often contain harsh chemicals that could potentially harm my beloved pieces. In this comprehensive guide, I'll share the best DIY (Do It Yourself) methods I've discovered to clean my jewelry naturally and effectively. These methods will help me maintain the sparkle of my favorite pieces without compromising their integrity.
Why Opt for DIY Jewelry Cleaning?
Opting for DIY jewelry cleaning offers a range of compelling advantages that make it a preferred choice for many jewelry enthusiasts. Here's a closer look at the key reasons why you might want to consider cleaning your jewelry at home:
- Cost-Effective Savings: Professional jewelry cleaning services can often come with a hefty price tag. Learning how to clean your jewelry at home not only provides satisfying results but also helps you save a significant amount of money in the long run.
- Convenient Flexibility: DIY jewelry cleaning allows you to maintain your precious pieces at your convenience. You no longer need to worry about adhering to store hours or appointment schedules, as you can tackle the task whenever it suits your schedule.
- Preservation of Beauty: Home cleaning methods are generally gentler on your jewelry. They help preserve the original beauty, longevity, and overall value of your cherished pieces, ensuring they remain as stunning as the day you acquired them.
- Enhanced Safety: Many commercials to clean costume jewelry contain potentially harmful chemicals that can be harsh on both your skin and the environment. In contrast, DIY cleaning methods often involve natural, eco-friendly ingredients, making them safer choices for both personal use and the planet's well-being.
Read also our post on DIY Jewelry
The Benefits of DIY Jewelry Cleaning
Cleaning your jewelry at home using DIY methods offers a range of advantages that make it a practical and appealing choice for jewelry enthusiasts. Let's explore these benefits in more detail:
Cost-Effective
One of the most significant advantages of DIY jewelry cleaning is its cost-effectiveness. Professional jewelry cleaning services can be quite pricey, especially if you have a collection of jewelry that requires regular maintenance. By learning how to clean your jewelry at home, you can save a substantial amount of money over time. The materials and tools needed for DIY cleaning are typically affordable and readily available, making it an economical choice for everyone.
Convenience
Cleaning your jewelry at home provides unparalleled convenience. You are no longer tied to the hours of operation of a jewelry store or cleaning service. Instead, you can clean your jewelry whenever it suits you best, whether it's early in the morning, late at night, or on the weekend. This flexibility allows you to maintain your jewelry on your schedule, ensuring that it always looks its best.
Preservation of Beauty and Value
DIY cleaning methods are gentler on your jewelry compared to some commercial cleaners. Harsh chemicals found in certain commercial cleaning solutions can potentially damage the materials and gemstones in your jewelry. In contrast, DIY methods often utilize natural and mild cleaning agents, reducing the risk of harm to your precious pieces. By preserving the integrity of your jewelry, you are also preserving its beauty and value, which is particularly important if you own heirloom or high-end pieces.
Safety
Commercial jewelry cleaners often contain chemicals that can be harmful to your skin, as well as the environment. Some individuals may experience allergic reactions or skin irritations when exposed to these chemicals. DIY methods, on the other hand, typically involve the use of natural ingredients that are gentler on your skin and safer for the environment. This makes DIY jewelry cleaning a responsible choice for both personal and environmental well-being.
Customization
When you clean your jewelry at home, you have full control over the cleaning process. This means you can tailor your cleaning method to suit the specific needs of each piece of jewelry. For example, you can adjust the cleaning solution, scrubbing intensity, and soaking duration based on the materials and condition of your jewelry. This customization ensures that you are treating your jewelry with the care and attention it deserves, leading to better results.
Learning Experience
Learning how to clean your jewelry DIY style is not just a practical skill; it's also an educational experience. You gain a deeper understanding of the materials, gemstones, and care requirements of your jewelry collection. This knowledge can help you make informed decisions when purchasing new pieces and ensure that you can properly care for and maintain your existing ones. Over time, you'll become more confident in your ability to keep your jewelry in pristine condition.
Soap and Water – A Thorough Jewelry Cleaning Guide
Cleaning your jewelry at home can be an easy and effective way to maintain its luster and shine. One of the most commonly used methods is the soap and water technique. Here's a detailed step-by-step guide on how to clean your jewelry using this method:
What You'll Need:
- Mild dish soap: Opt for a gentle, non-abrasive dish soap to avoid any potential damage to your jewelry.
- Warm water: Use warm water to help loosen dirt, grime, and oils from your jewelry.
- Soft-bristle toothbrush: A soft-bristle toothbrush is essential for gently scrubbing away residue without scratching your precious pieces.
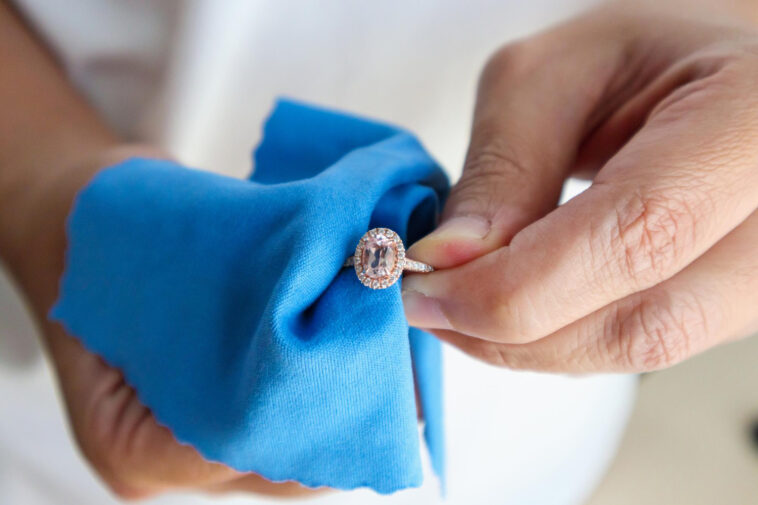
- Microfiber cloth: This lint-free cloth will be used to dry and polish your jewelry.
Step-by-Step Instructions:
- Prepare the Cleaning Solution: Start by filling a bowl with warm water. Add a few drops of mild dish soap to create a soapy solution. The warm water will effectively help in loosening dirt and grime, while the mild dish soap is gentle enough for most types of jewelry.
- Soak Your Jewelry: Carefully place your jewelry pieces into the soapy water. Make sure each item is fully submerged. Allow them to soak for approximately 10-15 minutes. This soaking period helps in softening and loosening any dirt, oils, or residue that may have accumulated on your jewelry.
- Gentle Scrubbing: After the soaking time is up, take a soft-bristle toothbrush. Gently but thoroughly scrub your jewelry. Pay close attention to crevices, settings, and any intricate details where dirt tends to hide. The soft bristles of the toothbrush will effectively remove residue without causing scratches or damage.
- Rinse Thoroughly: Rinse your jewelry under lukewarm running water. Ensure that you remove all traces of soap residue. Be thorough in your rinsing to guarantee a clean and residue-free finish.
- Drying and Polishing: To finish the cleaning process, pat your jewelry dry using a clean microfiber cloth. It's essential to ensure that each piece is completely dry to prevent water spots or streaks from forming. Additionally, you can gently buff your jewelry with the cloth to bring out its natural shine.
Read also our post on DIY Ring Size Adjuster
Baking Soda and Aluminum Foil – A Powerful Tarnish Removal Technique
Cleaning tarnished silver jewelry can be an effective DIY project, especially when using the baking soda and aluminum foil method. This method is known for its ability to restore the shine to clean silver jewelry. Here's a comprehensive guide on how to use baking soda and aluminum foil to clean your tarnished jewelry:
What You'll Need:
- Baking soda: A versatile household ingredient that helps break down tarnish.
- Aluminum foil: Serves as a crucial catalyst in the tarnish removal process.
- Boiling water: Provides the heat necessary for the chemical reaction.
- A bowl: To create the cleaning solution and facilitate the tarnish removal process.
Step-by-Step Instructions:
- Prepare the Setup: Line a bowl with aluminum foil, making sure that the shiny side is facing upward. The aluminum foil acts as a catalyst in this method, facilitating the tarnish removal process.
- Place Your Tarnished Jewelry: Carefully lay your tarnished silver jewelry pieces on top of the aluminum foil in the bowl. Ensure that the jewelry is in direct contact with the foil.
- Generously Apply Baking Soda: Sprinkle a generous amount of baking soda over the jewelry, ensuring that all tarnished areas are covered. Baking soda's mild abrasive properties help break down tarnish without scratching the metal.
- Add Boiling Water: Carefully pour boiling water over the jewelry to completely immerse it. You'll notice a chemical reaction occurring as tarnish begins to transfer from your jewelry to the aluminum foil. This reaction is essential for restoring the jewelry's shine.
- Allow Soaking: Allow your jewelry to sit in this solution for a few minutes, or until you observe a visible improvement in tarnish removal. The duration may vary depending on the extent of tarnish.
- Remove and Rinse: Once you see that tarnish has transferred to the foil and your jewelry appears cleaner, carefully remove your jewelry from the bowl. Rinse the jewelry thoroughly with cold water to remove any residual baking soda.
- Dry and Polish: Finally, dry your jewelry with a soft cloth to ensure it is completely free of moisture and streaks. You'll be amazed at how the tarnish has been replaced with the jewelry's natural shine.
Read also our post on DIY Beads
Vinegar and Baking Soda – A Natural Jewelry Cleaning Powerhouse
Cleaning your jewelry with a mixture of vinegar and baking soda is not only effective but also environmentally friendly. This method harnesses the power of natural ingredients to restore your jewelry's sparkle. Here's a comprehensive guide on how to use vinegar and baking soda to clean your precious pieces:
What You'll Need:
- White vinegar: A gentle acid that helps dissolve grime and tarnish.
- Baking soda: A versatile household cleaner known for its mild abrasive properties.
- A bowl: To create the cleaning solution and facilitate the cleaning process.
- Soft cloth: To dry and polish your jewelry.
Step-by-Step Instructions:
- Prepare the Cleaning Mixture: In a bowl, combine equal parts white vinegar and baking soda. The combination of these two natural ingredients creates a powerful and non-toxic cleaning solution that is safe for most jewelry types.
- Submerge Your Jewelry: Carefully place your jewelry into the vinegar and baking soda mixture, ensuring that each piece is fully covered. Allow them to soak for approximately 2-3 hours. This soaking period allows the mixture to break down dirt, grime, and tarnish, making it easier to remove.
- Gentle Scrubbing: After the soaking time is up, use an old toothbrush or a soft brush to gently scrub your jewelry. Pay particular attention to any areas with stubborn residue or intricate details. The mild abrasive action of the baking soda helps in dislodging and removing residue.
- Rinse Thoroughly: Rinse your jewelry thoroughly under cold running water to remove any traces of the cleaning mixture. Ensure that you rinse it well to prevent any lingering residue.
- Dry and Polish: Pat your jewelry dry with a soft cloth. Make sure it is completely dry before storing or wearing it. This step also provides an opportunity to gently buff the jewelry to reveal its natural shine.
Toothpaste – A Safe and Simple Jewelry Cleaning Solution
Toothpaste, when used correctly, can be an effective and accessible solution for cleaning your jewelry. However, it's crucial to select the right type of toothpaste and follow proper techniques to avoid potential damage. Here's an in-depth guide on how to use toothpaste for jewelry cleaning:
What You'll Need:
- Non-abrasive toothpaste (avoid gel-based): Choose a toothpaste that does not contain harsh abrasives or baking soda, as these can potentially scratch your jewelry.
- Soft-bristle toothbrush: A soft-bristle toothbrush is essential to ensure gentle yet effective cleaning without causing scratches.
- Water: You'll need water for rinsing and diluting the toothpaste.
- Soft cloth: Use a soft cloth for drying and polishing your jewelry.
Step-by-Step Instructions:
- Choose the Right Toothpaste: Start by selecting a non-abrasive toothpaste. Avoid gel-based toothpaste and those with harsh abrasives, as they can potentially damage your jewelry. The goal is to find a mild toothpaste that is safe for both your teeth and your precious pieces.
- Apply Toothpaste: Apply a small amount of the selected non-abrasive toothpaste to your jewelry. You can use your finger or a soft cloth to do this. Ensure that you cover the areas that require cleaning.
- Gentle Scrubbing: Use a soft-bristle toothbrush to gently scrub your jewelry. Pay close attention to areas with stubborn dirt, oils, or residue. The soft bristles of the toothbrush are less likely to scratch your jewelry while effectively removing debris.
- Rinse Thoroughly: After scrubbing, rinse your jewelry thoroughly under lukewarm running water. Ensure that you remove both the toothpaste and any loosened debris. This step is crucial to prevent any toothpaste residue from drying and sticking to your jewelry.
- Dry and Polish: Pat your jewelry dry with a soft cloth, making sure it is completely free of moisture and streaks. This final step not only removes excess water but also allows you to gently polish your jewelry, bringing out its natural shine.
Ammonia Solution – A Powerful Yet Cautionary Approach to Jewelry Cleaning
Cleaning your jewelry with an ammonia solution can be highly effective for removing tarnish and restoring shine to various metals. However, it's important to use this method with caution, as ammonia can be harsh on certain materials. Here's a detailed guide on how to use an ammonia solution to clean your jewelry:
What You'll Need:
- Ammonia solution (1 part ammonia to 6 parts water): This diluted ammonia solution is suitable for removing tarnish from metals.
- A bowl: Use a bowl to create the cleaning solution and facilitate the cleaning process.
- Soft cloth: A soft cloth is essential for drying and polishing your jewelry.
Step-by-Step Instructions:
- Prepare the Ammonia Solution: In a bowl, mix one part ammonia with six parts water. This diluted ammonia solution is effective for removing tarnish from metals while minimizing the risk of damage.
- Submerge Your Jewelry: Carefully place your jewelry into the ammonia solution, ensuring that each piece is fully submerged. However, be cautious not to exceed a soaking time of 15-20 seconds. Prolonged exposure to ammonia can potentially harm certain materials, especially porous stones or delicate jewelry components.
- Gentle Scrubbing: After the brief soaking, remove your jewelry from the ammonia solution. Use a soft brush to gently scrub the jewelry, focusing on areas with stubborn residue or tarnish. The soft brush will help dislodge any remaining debris without causing damage.
- Thorough Rinse: Rinse your jewelry thoroughly under running water to remove any traces of the ammonia solution. This step is crucial to prevent any lingering ammonia residue.
- Dry and Polish: Pat your jewelry dry with a soft cloth. Ensure that it is completely dry before wearing or storing it. This final step also offers an opportunity to gently polish your jewelry, enhancing its natural shine.
Pros and Cons of DIY Jewelry Cleaning
Cleaning your jewelry at home using DIY methods offers various advantages, but it also comes with some potential drawbacks. Let's explore the pros and cons of DIY jewelry cleaning in more detail:
Pros:
Cost-Effective: DIY jewelry cleaning methods are budget-friendly and can save you money compared to professional cleaning services, which often come with a price tag.
Convenience:Cleaning your jewelry at home means you can do it at your convenience, without being restricted by store hours or appointment schedules. This flexibility is especially useful for those with busy lifestyles.
Preservation:DIY cleaning methods are generally gentler on your jewelry. They help maintain the beauty, longevity, and overall value of your pieces, as they do not subject them to harsh chemicals or excessive abrasion.
Safety: Many commercial jewelry cleaners contain chemicals that can be harmful to your skin and the environment. DIY methods typically use natural and safer ingredients, making them a more environmentally friendly and skin-friendly choice.
Customization: DIY methods allow you to tailor the cleaning process to the specific needs of your jewelry. You can choose the method that best suits the materials and condition of your pieces.
Cons:
Time-Consuming: DIY jewelry cleaning methods can be time-consuming, especially if you have a large jewelry collection or if your pieces require extensive cleaning.
Skill and Knowledge Required: Effective DIY cleaning requires some knowledge of jewelry materials and cleaning techniques. Using the wrong method or mishandling your jewelry can result in damage.
Risk of Mistakes: There's a risk of making mistakes when cleaning jewelry at home. Using the wrong cleaning agent or technique can potentially damage your jewelry or gemstones.
Conclusion
As a homeowner deeply connected to my jewelry, I've found that DIY jewelry cleaning resonates with my values and preferences. Beyond being a mere accessory, my jewelry carries emotional significance and reflects my personal style. Commercial cleaners, often laden with harsh chemicals, have made me wary, leading me to explore natural methods that align with my eco-friendly mindset.
Opting for DIY jewelry cleaning not only saves money and provides flexibility but also ensures the preservation of my jewelry's beauty and value. Though there's a learning curve involved, the satisfaction of seeing my beloved pieces regain their sparkle through gentle, personalized care is immensely gratifying. It's a journey that deepens my connection to my jewelry, reinforces my commitment to sustainability, and allows me to cherish these treasures for years to come as a proud homeowner.
Sources
https://www.wikihow.com/Clean-Jewelry
https://www.gia.edu/gia-news-research-secrets-keep-diamond-sparkling
https://diamondsforeversandiego.com/blog/how-to-clean-jewelry/