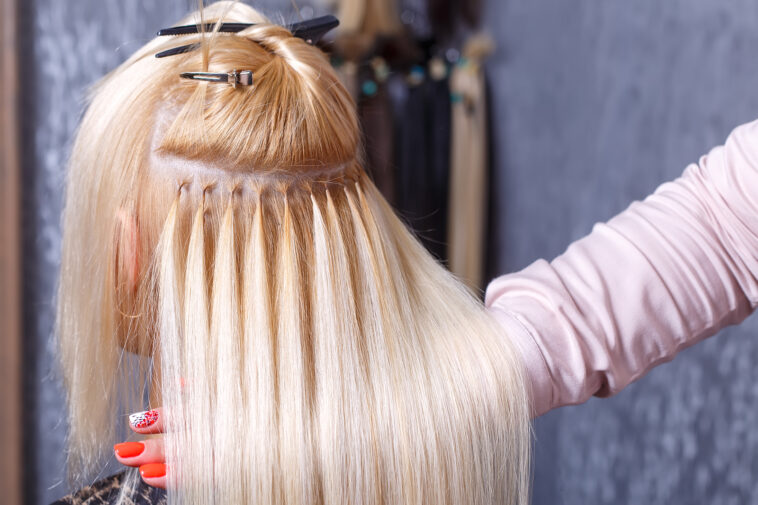
How to Remove Tape in Extensions DIY
I've been a big fan of tape-in hair extensions in recent years, and I can't deny the incredible boost they give to my hair's length and volume. What's fantastic about these extensions is that they offer that instant transformation without committing to long-term extensions like sew-ins or bonded ones. They also manage to look pretty natural when done correctly.
However, there always comes a time when you need to say goodbye to them, whether it's because they've grown out, need some maintenance, or simply crave a new hairstyle. So, here's my go-to guide, based on my own experiences, on how to safely and effectively remove tapein hair extensions at home while ensuring the health and well-being of your natural hair throughout the entire process.
Why Remove Tape-In Hair Extensions?
Remove tape in hair extensions is a necessary process for various reasons, all of which contribute to maintaining both the appearance and health of your natural hair. Here are some key factors that explain why you might need to remove your beloved tape-in hair extensions:
- Maintenance and Refreshment: Tape-in hair extensions, like any other type of hair extensions, require periodic maintenance to ensure they continue to look and feel their best. This maintenance involves removing and reapplying the extensions, which is the initial step in refreshing your overall look and preserving the health of your natural hair.
- Outgrowth of Natural Hair: Over time, as your natural hair continues to grow, the tape-in extensions will gradually move away from your scalp. This can result in an unnatural and uncomfortable appearance, necessitating the removal and repositioning of the extensions to maintain a seamless blend between your natural hair and the extensions.
- Desire for a New Style: Hairstyle enthusiasts often enjoy experimenting with their hair, whether it's trying out a new hairstyle, changing the color, or exploring different types of extensions. Removing tape-in extensions is the first step towards achieving your desired new look, allowing you to embark on a fresh style journey with your natural hair as a base.
Now that we've clarified why you might want to remove your tape-in hair extensions, let's delve into a more detailed step-by-step guide on how to do it safely and effectively at home.
See also our post on DIY Lash Extensions
Step-by-Step Guide: How to Remove Tape-In Extensions DIY
Removing tape-in hair extensions yourself at home can be a straightforward process when executed correctly. It's crucial to take your time and follow these detailed steps to ensure you preserve the health of your natural hair throughout the process:
Step 1: Gathering Your Supplies
Preparing for the tape-in hair extension removal process involves assembling a set of essential tools and materials. Properly gathering these supplies is crucial for a successful and safe removal. Here's a detailed list of what you'll need:
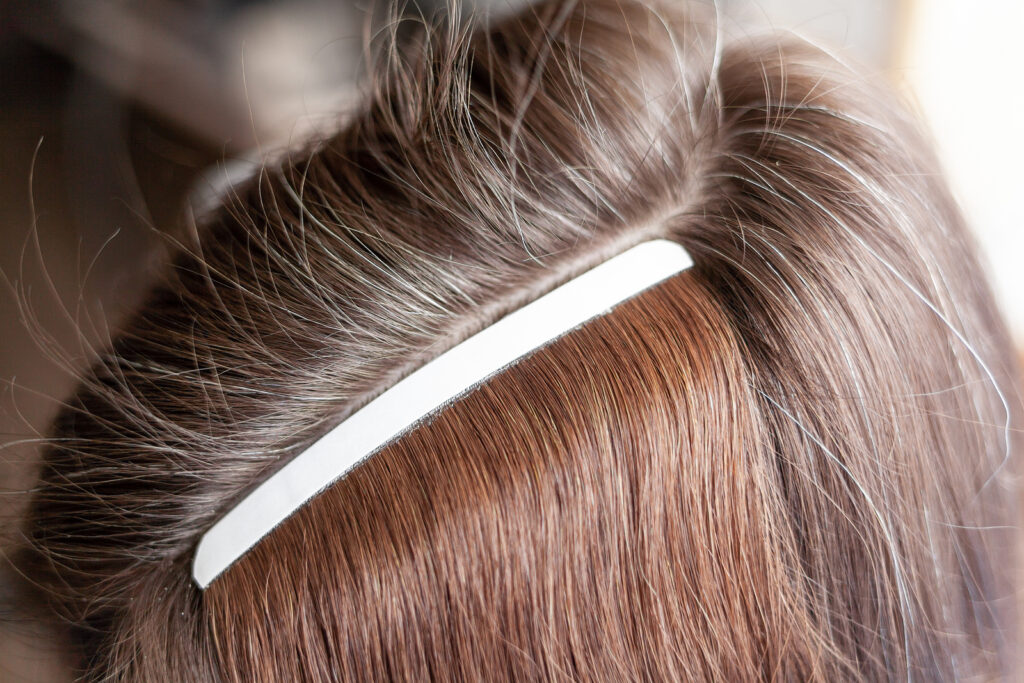
- Tape-In Hair Extension Remover Solution: To start, acquire a high-quality hair extension remover solution from a trusted supplier. This specialized solution is formulated to effectively dissolve the adhesive used in the extensions, ensuring a gentle removal process that won't harm your natural hair.
- Fine-Tooth Comb: A fine-tooth comb is an indispensable tool during this process. It aids in delicately separating your natural hair from the extensions and helps in detangling any knots or tangles that may have formed.
- Hair Clips: Invest in a set of sturdy hair clips. These clips will be your allies for sectioning off your hair. By dividing your hair into manageable sections, you can work systematically and avoid feeling overwhelmed during the removal process.
- Mirror and Adequate Lighting: Ensure you have access to a well-lit area with a mirror. Having proper visibility is essential for precision and accuracy during the removal process. It allows you to see exactly what you're doing, reducing the risk of mistakes.
- Patience: Patience is a valuable asset during the removal of tape-in extensions. This process can be time-consuming, especially if you want to preserve the health of your natural hair. Being patient throughout ensures that you handle each step carefully, minimizing the potential for unintentional damage to your hair.
Step 2: Section Your Hair
With your supplies at hand, it's time to begin the removal process. Start by dividing your hair into manageable sections. Use your hair clips to secure the top layers of your hair away, leaving only the bottom layer exposed. This strategic sectioning will make it easier to work with smaller portions of hair, ensuring a more controlled and effective process.
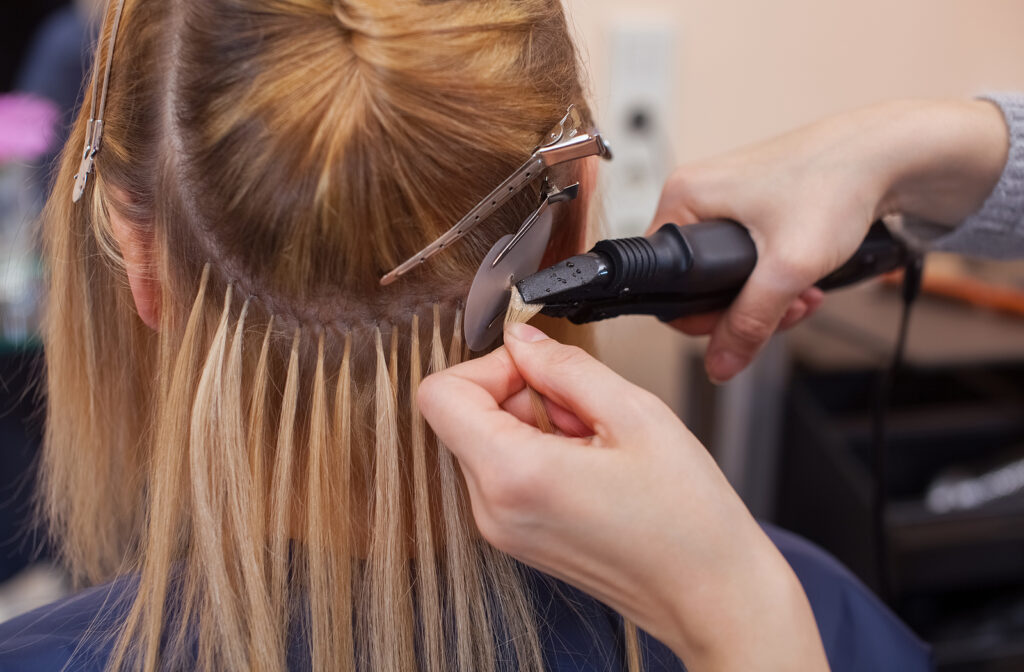
Step 3: Applying the Remover Solution
With your hair appropriately sectioned, take a small amount of the tape-in hair extension remover solution and gently apply it to the top of the tape-ins. Ensure that you saturate the adhesive area entirely with the solution. Allow the solution to sit for a few minutes, allowing it to soften and weaken the adhesive's grip on your hair.
Step 4: Gently Detach the Extensions
Once the remover solution has had time to work its magic, use your fingers to carefully and gently separate the tape-in extensions from your natural hair. Begin at one end and slowly work your way up the extension, keeping the hair taut but not excessively tugging or pulling. Should you encounter any resistance, it's important to avoid forcing the extension off; instead, apply a bit more remover solution and wait for a few additional minutes before attempting again.
Step 5: Comb Out Any Residue
After successfully removing the tape-in extensions, it's essential to comb through your natural hair thoroughly to ensure that no adhesive residue remains. A fine-tooth comb is particularly helpful for this step. If you notice any sticky residue, apply a small amount of remover solution and comb through the affected area again until your hair is entirely clean and residue-free.
Step 6: Wash and Condition Your Hair
Following the removal process, it's time to pamper your natural hair. Wash and condition it using a gentle sulfate-free shampoo and a hydrating conditioner. This will help nourish and rejuvenate your natural hair, leaving it soft, healthy, and ready for your next hairstyle adventure. Allow your hair to air dry or use a low heat setting on your hairdryer to minimize any potential heat damage.
Step 7: Assess Your Extensions
While your natural hair is drying, take a moment to assess the condition of your tape-in extensions. Remove any remaining adhesive residue from the extensions using the remover solution. If the extensions still appear to be in excellent condition, you can proceed with cleaning and reusing them. However, if you notice signs of wear and tear or diminished quality, it may be time to consider investing in a fresh set of tape-in extensions to maintain the best possible look.
Maintaining Your Removed Tape-In Extensions
Maintaining your tape-in hair extensions after removal is essential for ensuring their longevity and preserving their quality. Here's a more detailed look at how to care for your extensions:
Cleaning and Storing
Properly cleaning your removed extensions is the first step in maintaining their condition. Use a sulfate-free shampoo and conditioner to gently wash them. Be careful not to rub or tangle the hair during this process. After rinsing, allow them to air dry thoroughly. Make sure there is no moisture left, as damp extensions can develop an unpleasant odor or even mold.
Once they are clean and dry, store your tape-in extensions in a safe and controlled environment. A cool, dry place away from direct sunlight is ideal. Avoid folding or creasing the extensions, as this can lead to damage. Consider using a dedicated storage container or bag designed for hair extensions to keep them protected.
Re-Taping Process
If you plan to reuse your extensions, the re-taping process is crucial. Invest in high-quality tape tabs that are specifically designed for hair extensions. Carefully remove any remaining adhesive residue from the wefts using a remover solution and a soft cloth. Then, apply the new tape tabs securely but not overly sticky to the cleaned wefts. This ensures that your extensions are ready for their next use, looking and feeling as good as new.
Professional Inspection
To maintain the health and appearance of your extensions, consider having them professionally inspected and maintained. Over time, extensions can experience wear and tear. A professional stylist can assess their condition, trim any split ends, and make necessary repairs. This proactive approach ensures that your extensions remain in optimal condition, offering you the best results when you wear them again.
See also our post on Easy Tape Review
Potential Challenges and Solutions
While the removal process for tape-in extensions is generally straightforward, various challenges may arise. It's essential to be aware of these potential issues and their solutions to ensure a smooth experience:
Stubborn Adhesive
In some cases, the adhesive used to attach tape-in extensions can be particularly stubborn. If you find that the extensions aren't coming off easily, don't force them. Instead, exercise patience. Apply additional remover solution and wait for it to soften the adhesive further. Attempting to remove them forcefully can lead to damage or hair loss.
Tangled Hair
Detangling your natural hair from the extensions can be a delicate process. To make it easier, use a detangling spray or a leave-in conditioner. Start detangling from the tips of your hair and work your way up to the roots. This approach minimizes the risk of breakage and discomfort.
Residue on Extensions
If you notice adhesive residue on your tape-in extensions after removal, it's crucial to handle it with care. Soak a cotton ball in the remover solution and gently rub it on the residue. Take your time to ensure that the adhesive is entirely removed without causing damage to the wefts. Rinse the extensions thoroughly afterward.
Proper Disposal of Old Extensions
When your tape-in hair extensions have reached the end of their usable life, it's crucial to think about their responsible disposal. Haphazardly tossing them in the trash can have detrimental environmental effects, particularly considering the synthetic materials often used in these extensions. Here are eco-friendly disposal options to consider:
Recycling
Investigate whether your local area offers recycling programs that accept hair extensions. Some recycling initiatives repurpose hair for various eco-friendly applications. For example, hair can be utilized to create biodegradable mats for gardening or to aid in cleaning up oil spills. By recycling your extensions, you contribute to environmental sustainability, ensuring they serve a meaningful purpose even after removal.
Donation
An alternative to recycling is donating gently used extensions to organizations that specialize in providing wigs for individuals experiencing hair loss due to medical conditions. Your extensions can significantly impact someone's life by restoring their confidence and self-esteem during a challenging time. It's a compassionate way to extend the life of your extensions and benefit others in need.
The Importance of Aftercare
Proper aftercare is crucial once you've successfully removed your tape-in hair extensions. Taking care of your natural hair ensures its health and appearance remain at their best. Here's a more comprehensive guide to aftercare:
- Regular Trims: It's essential to schedule regular trims with a professional hairstylist every 6-8 weeks. This routine maintenance helps keep your natural hair in optimal condition. Trimming eliminates split ends and prevents breakage, fostering healthy growth and ensuring your hair maintains a polished and well-maintained appearance.
- Deep Conditioning: Show your natural hair some love with regular deep conditioning treatments. These treatments play a vital role in combating potential damage caused by wearing extensions. Deep conditioners are rich in nourishing ingredients that hydrate and revitalize your hair. By using them consistently, you can keep your hair soft, shiny, and resilient, even after the removal of extensions.
- Avoid Excessive Heat Styling Excessive use of heat styling tools such as flat irons and curling wands can weaken your natural hair over time. To minimize this risk, consider limiting the frequency of heat styling. When you do use heat styling tools, apply a quality heat protectant spray to shield your hair from heat damage. Additionally, use the lowest heat settings necessary to achieve your desired look, reducing the stress on your hair.
- Protective Hairstyles: Embrace protective hairstyles that reduce the strain on your natural hair. Styles like braids, twists, or buns help shield your hair from daily wear and tear, reducing the risk of breakage and split ends. These hairstyles also offer a trendy and versatile look while maintaining your hair's health.
- Nutritional Support: Pay attention to your diet and ensure it includes essential nutrients for hair health. A balanced intake of vitamins, minerals, and proteins can promote hair growth and overall vitality. Consider supplements if needed, but consult a healthcare professional for guidance.
- Gentle Hair Care Routine: Use gentle hair care products and techniques. Opt for sulfate-free shampoos and conditioners designed for your hair type. Be cautious when detangling your hair, using a wide-tooth comb or your fingers to avoid unnecessary stress and breakage.
Professional Help vs. DIY Removal
While this guide predominantly explores DIY removal of tape-in hair extensions, it's essential to delve into the advantages of seeking professional assistance for a more comprehensive perspective:
The Expertise of Professionals
Licensed hairstylists and extension specialists bring a wealth of expertise to extension removal. With extensive experience and specialized training, they possess the skills and knowledge necessary to execute a seamless removal process. Their professional touch reduces the risk of damaging your natural hair during the procedure.
Customized Solutions
Professionals can provide tailor-made solutions and recommendations based on your unique circumstances. They take into account factors such as your hair type, the condition of your extensions, and your desired outcome. If any unexpected challenges arise during the removal process, they are equipped to handle them effectively.
Time and Convenience
Professional removal often proves to be faster and more convenient, particularly for individuals with hectic schedules or extensions that require special attention. The efficiency of experts can save you valuable time and ensure the removal is carried out with precision.
Peace of Mind
Entrusting a skilled professional with the removal process can offer peace of mind, especially if you have concerns about potential hair damage. Knowing that your hair is in the hands of a trained specialist can alleviate anxiety and enhance your confidence in the outcome.
Extension Salvage
In some cases, professionals may be able to salvage and reapply extensions if they are still in good condition. This can extend the life of your extensions and potentially save you money in the long run.
Conclusion
Removing tape-in hair extensions yourself, DIY style, can be a simple and stress-free process when you follow these comprehensive steps and use the appropriate products and tools. Patience is key to ensuring that the removal is painless and doesn't cause any damage to your natural hair. Always prioritize the health and well-being of your natural hair throughout the entire removal process.
With this detailed and extensive guide, you can confidently and skillfully remove your tape-in extensions at home, maintaining the stunning appearance and condition of your hair. Whether you're seeking a fresh hairstyle, need to reposition your extensions, or simply desire a change, you now possess the knowledge and expertise to achieve your desired look safely and effectively.
Sources
https://www.wikihow.com/Take-Hair-Extensions-Out
https://googoohair.com/blogs/news/how-to-remove-tape-in-hair-extensions-at-home-with-no-damage