To me, dogs are more than just pets; they are cherished members of our family. As a devoted dog owner, I understand the importance of ensuring their mental and physical well-being. That's why I want to share with you a wonderful project that has brought immense joy to my furry friend: creating a DIY scratch pad and activity center.
Crafting this scratch pad isn't just about keeping my dog entertained; it's about enhancing his overall quality of life. It's a labor of love that has countless benefits. Not only does it provide hours of amusement, but it also helps reduce his stress and anxiety. Plus, it's fantastic for his dental health.
Let me guide you through the process, sharing the steps I've taken to create this multifunctional tool that has made my dog's life happier and healthier.
Why a DIY Scratch Pad for Dogs?
Creating a DIY scratch pad for your beloved canine companion offers numerous benefits that cater to their physical and mental well-being. Let's delve into the compelling reasons why this endeavor is a valuable choice for pet owners:
Mental Stimulation
Dogs, just like humans, require mental stimulation to lead fulfilling lives. A DIY scratch pad serves as an excellent source of mental exercise for your furry friend. It presents them with engaging challenges, helping to keep their cognitive abilities sharp and active.
Physical Exercise
The regular use of a scratch pad provides your dog with a vital form of physical exercise. It encourages them to engage in stretching, scratching, and movement, all of which are crucial for maintaining their physical health. This added activity can also help manage their weight and energy levels.
Stress and Anxiety Reduction
Scratching and chewing are instinctual stress-relief behaviors for dogs. By providing a scratch pad, you offer your pet a dedicated outlet for these natural tendencies. This can promote relaxation, reduce anxiety, and minimize destructive behaviors that may arise from pent-up stress.
Dental Health
Chewing on a scratch pad can significantly contribute to your dog's dental health. It aids in preventing the buildup of plaque and tartar on their teeth, potentially reducing the need for costly dental procedures down the road. Ensuring good oral health can also enhance your dog's overall well-being.
Cost-Effectiveness
DIY scratch pads prove to be a cost-effective solution compared to purchasing store-bought toys and accessories. You have the flexibility to tailor the scratch pad to your dog's specific preferences and requirements, all while staying within your budget. This not only saves you money but also allows you to craft a personalized experience for your furry companion.
Materials You'll Need
Gathering the necessary materials is a crucial first step before embarking on your DIY dog scratch pad project. Here's a comprehensive list of the items you'll need:
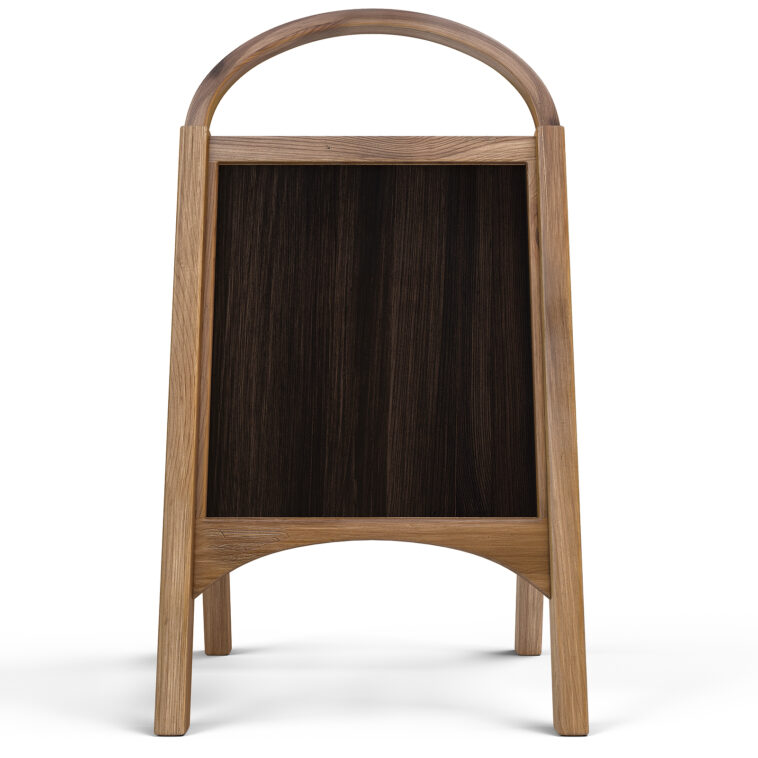
- Plywood or Cardboard: This material will form the foundation of your scratch pad. The size of the plywood or cardboard should be chosen according to the desired dimensions of your scratch pad. Consider the available space and your dog's size for an appropriate selection.
- Sisal Rope or Carpet: When it comes to the scratching surface, you have two main options. Sisal rope is a popular choice due to its durability and the satisfying texture it offers for your dog's scratching needs. Alternatively, you can opt for carpet, which also provides a suitable scratching surface.
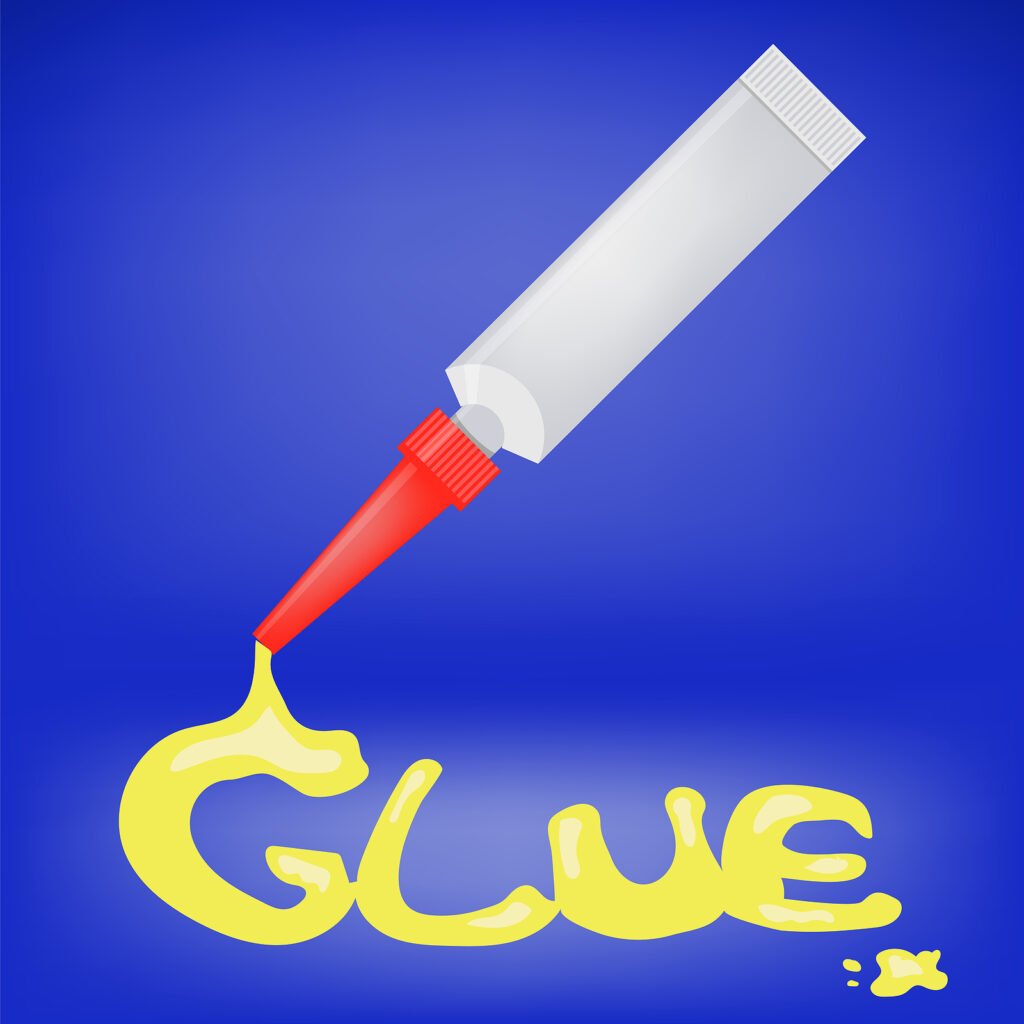
- Adhesive: You'll require a strong adhesive to securely attach the chosen scratching material (sisal rope or carpet) to the base. Hot glue or industrial strength glue is recommended for a sturdy and long-lasting bond.
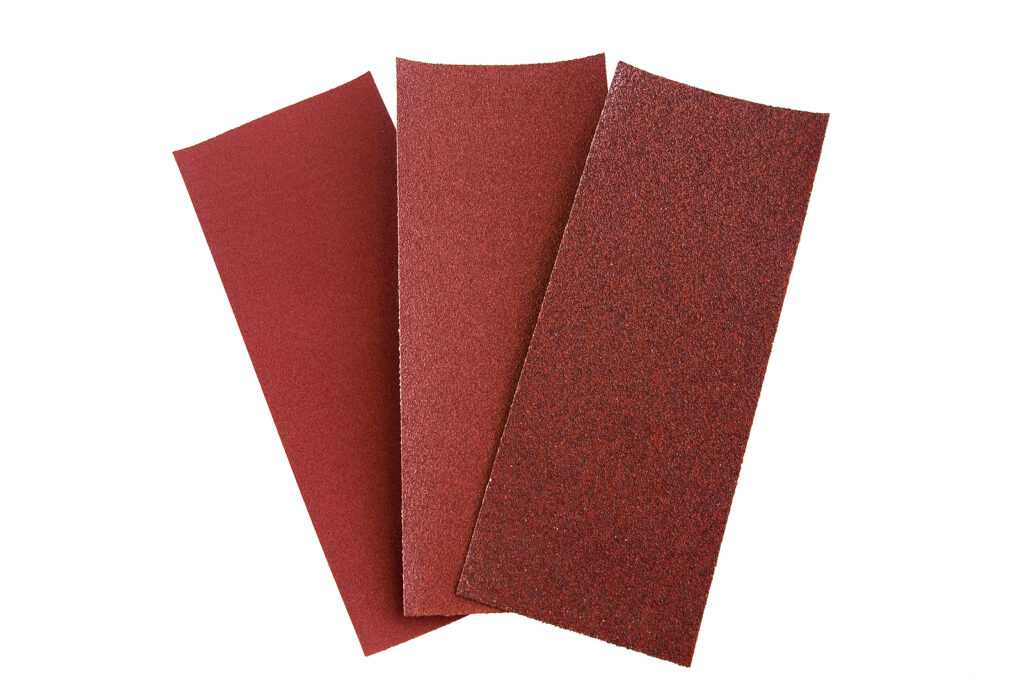
- Cutting Tools: To shape and size the scratching material, you'll need a pair of scissors or a utility knife. These tools will help you precisely cut the sisal rope or carpet to fit your scratch pad dimensions.
- Decorative Elements (Optional): If you want to add a personal touch to your dog's scratch pad, consider decorative elements. Safe options include ribbons, bells, or pet-safe paint. Be sure that any decorative items you choose are pet-friendly and won't pose any harm to your dog.
- Wall Mounts or Hooks (Optional): If your plan is to hang the scratch pad on the wall, you'll need suitable wall mounts or hooks. These accessories ensure the scratch pad is securely attached to the wall, providing stability and convenience for your dog.
Step-by-Step Guide to Creating a DIY Scratch Pad for Dogs
Creating a scratch pad for your beloved dog can be a rewarding DIY project that provides both mental and physical stimulation for your furry friend. Follow these detailed steps to construct a personalized scratch pad tailored to your dog's needs and preferences:
Determine the Size and Base Material
Start by selecting the appropriate size for your scratch pad. For small to medium-sized dogs, a 2×3 feet base should suffice, but if you have a larger dog or want a more extensive scratching area, adjust the dimensions accordingly. Choose between plywood or cardboard for the base, keeping your dog's size and strength in mind.
Select the Ideal Scratching Material
Decide on the scratching material you want to use for the pad's surface. While carpet is an option, sisal rope is highly recommended due to its exceptional durability and the satisfying texture it offers to dogs. If you opt for carpet, ensure it's securely attached and won't unravel easily.
Attach the Chosen Scratching Material
Depending on whether you're using sisal rope or carpet, follow these guidelines:
- For Sisal Rope: Begin by applying a small amount of adhesive glue to one end of the rope. Press it firmly onto the edge of the plywood or cardboard. Continue wrapping the rope tightly around the base, adding glue as necessary to maintain its security. Slightly overlap the rope to eliminate any gaps, and when you reach the end, secure it with additional glue.
- For Carpet: Cut the carpet to fit the base and securely glue it down. Ensure there are no loose edges that could tempt your dog to pull on them.
Incorporate Creative Elements
If you'd like to add a personal touch to your scratch pad, now is the time to get creative. Consider attaching ribbons, bells, or painting the pad in your dog's favorite colors. However, exercise caution when adding small objects to prevent any potential choking hazards for your pet.
Optional Mounting
If you plan to mount the scratch pad on the wall to save floor space or create a vertical scratching option, attach wall mounts or hooks to the back of the base. Ensure that it's securely fastened to prevent accidents and guarantee your dog's safety.
Introduce Your Dog to the Scratch Pad
With your DIY scratch pad now complete, it's time to introduce it to your furry friend. Show them how to use it by gently scratching or rubbing it with your hand. Praise and reward your dog when they interact with the scratch pad, reinforcing positive behavior and encouraging them to use it regularly for their enjoyment and well-being.
Tips for Customizing Your DIY Scratch Pad
Designing a DIY scratch pad for your canine companion can be a delightful project that can significantly elevate their engagement and enjoyment. To ensure your dog's scratch pad is perfectly tailored to their preferences, consider these comprehensive tips:
Size Matters
When selecting the ideal scratch pad dimensions, it's crucial to take your dog's size and activity level into account. Smaller dog breeds may find compact pads more comfortable, while larger, more energetic dogs may benefit from a spacious surface area. To ensure the pad accommodates your furry friend's needs, make certain it allows for comfortable stretching and scratching.
Experiment with Textures
While sisal rope remains a popular choice for scratch pads, don't be afraid to explore a variety of textures. Each dog has unique preferences when it comes to the feel of their scratching surface. Some dogs may prefer coarser textures, while others may favor softer ones. You can elevate the experience further by creating a multi-textured pad that combines materials such as rope and carpet, offering your dog diverse scratching sensations.
Incorporate Inviting Scents
To make the scratch pad even more enticing, consider introducing scents that your dog adores. Spraying a dog-friendly fragrance or applying a small amount of their favorite treat or toy scent can amplify your dog's interest in the pad. This olfactory customization adds an extra layer of appeal, making the pad irresistible to your furry friend.
Personalize with Decorations
Elevate the scratch pad's appeal by infusing it with personalized decorations that align with your dog's interests. If your dog has a penchant for toys or treats, you can attach small pockets or pouches to the pad to hold these items. Get creative in your decorative choices, but always prioritize safety by ensuring that all attachments are securely fastened to prevent any potential choking hazards. By incorporating these personalized touches, you can make the scratch pad a true reflection of your dog's unique preferences and personality.
Training Your Dog to Use the Scratch Pad
Introducing your dog to the scratch pad can be a rewarding experience but requires careful training and patience, particularly if your canine companion is unfamiliar with such objects. Below, we provide a step-by-step guide to help your dog become thoroughly acquainted with their new activity center:
Creating a Positive Association
To kickstart the training process, strategically place the scratch pad near your dog's preferred resting spot or play area. Foster a sense of curiosity and attraction by generously sprinkling the pad with their favorite treats or scattering toys around it. This initial setup aims to establish a positive association between the scratch pad and enjoyable experiences.
Demonstrative Scratching
Show your dog the ropes by gently demonstrating how to scratch the pad. You can do this either by using your hand or by enticing your pup with their cherished toys or treats and guiding them across the surface of the pad. While doing so, maintain an enthusiastic and encouraging tone to convey the idea that scratching the pad can be a delightful activity.
Reward and Praise System
Whenever your dog displays interest in the scratch pad or takes the initiative to use it, promptly reward their efforts with treats, lavish praise, or affectionate gestures. The key here is to establish a direct link between engaging with the scratch pad and receiving positive reinforcement. This reinforcement will further solidify the idea that the pad is associated with pleasurable experiences.
Consistency Is Crucial
Consistency is the cornerstone of effective training. Encourage your dog to use the scratch pad consistently and regularly. Over time, they will develop a healthy habit of turning to the pad for exercise and stress relief. By maintaining a consistent training routine, you'll ensure that your furry friend fully embraces this new addition to their life.
Maintenance Tips
Maintaining your DIY scratch pad is crucial to ensure its longevity and safety for your beloved furry friend. Follow these comprehensive maintenance tips to keep the scratch pad in top-notch condition:
- Frequent Inspection: Regularly examine the scratch pad for any signs of wear and tear. Pay close attention to loose or frayed materials that could pose choking hazards to your dog. Promptly replace or repair any damaged areas to maintain a safe environment.
- Hygiene Matters: Maintain cleanliness by vacuuming or shaking out loose debris from the scratch pad on a routine basis. This not only ensures your dog's comfort but also prevents the accumulation of dirt and allergens that can affect your pet's health.
- Rotate and Reposition: To prevent excessive wear in one particular area, periodically rotate and reposition the scratch pad. This not only extends the pad's lifespan but also keeps your dog engaged and interested in using it.
- Supervision is Key: Especially during the initial introduction to the scratch pad, it's essential to supervise your dog closely. Ensure they are using it safely and not exhibiting any behaviors that could harm them. Gradually familiarize your pet with the pad to make it a positive and enjoyable experience.
FAQs (Frequently Asked Questions)
We understand that creating a DIY scratch pad for your dog may raise some questions. Here are answers to the most commonly asked questions to help you along the way:
1. How long does it take to make a DIY scratch pad for my dog?
The time it takes to create a DIY scratch pad depends on your crafting skills and the complexity of your design. On average, it can take anywhere from 1 to 3 hours, including gathering materials and allowing glue to dry.
2. Can I use other materials besides sisal rope or carpet?
Absolutely! While sisal rope and carpet are popular choices, you can experiment with other pet-safe materials such as jute, burlap, or even denim. Just ensure that the material you choose is safe for your dog to scratch.
3. How do I clean the scratch pad?
Cleaning your DIY scratch pad is simple. For sisal rope, use a brush or vacuum cleaner to remove loose debris. For carpet, vacuuming is the most effective method. If the pad becomes heavily soiled, you can spot clean with a mild pet-safe cleaner.
4. My dog is not showing interest in the scratch pad. What should I do?
It's common for dogs to take some time to warm up to a new object. Try sprinkling treats or toys on the scratch pad to make it more appealing. Demonstrating how to use it with your hand or a favorite toy can also encourage your dog's interest. Patience and positive reinforcement are key.
5. Is the DIY scratch pad safe for puppies?
Yes, the scratch pad can be safe for puppies, but you should supervise them closely during their initial interactions. Make sure there are no loose or small parts that they can chew on or swallow. Additionally, puppies may require more guidance and training to use the scratch pad effectively.
6. Can I make a scratch pad for multiple dogs?
Absolutely! You can create a larger scratch pad or multiple scratch pads to accommodate multiple dogs. Ensure that the size and design of the scratch pad(s) are suitable for the combined size and activity levels of your dogs.
7. What if my dog chews on the scratch pad?
Chewing on the scratch pad is a natural behavior for dogs and can be a sign of enjoyment. However, if your dog starts to chew excessively and you're concerned about them ingesting material, monitor their use and consider offering chew toys as an alternative.
8. How often should I replace the scratch pad?
The frequency of replacement depends on your dog's activity level and the quality of materials used. Inspect the scratch pad regularly for wear and tear. If you notice significant damage, loose materials, or signs of wear, it's time to replace it to ensure your dog's safety.
9. Can I make a portable scratch pad for travel?
Yes, you can create a portable scratch pad by using a smaller base and lightweight materials. Consider making a smaller, foldable version that can be easily packed for trips or outings to keep your dog entertained on the go.
10. Is there a specific age when I should introduce a scratch pad to my dog?
You can introduce a scratch pad to dogs of all ages, but the timing may vary. Puppies can start using a scratch pad once they are comfortable with it, while older dogs can benefit from it as a form of exercise and mental stimulation. Adjust the introduction based on your dog's individual needs and comfort level.
Conclusion
In conclusion, crafting a DIY scratch pad for my beloved dog has been a heartwarming journey filled with love and dedication. It's a testament to the special bond we share, and it's about so much more than just a scratch pad. My furry companion is an integral part of my family, and providing him with this activity center has brought us both immeasurable joy.
Witnessing his curiosity, the stress relief he finds in scratching, and the smiles he shares as he engages with his personalized creation have made it all worthwhile. This DIY project symbolizes our unique connection, and it's a reminder of the effort we put into enhancing each other's lives.
So, I encourage every pet owner to embark on this journey, embrace the moments, and relish in the satisfaction of watching your dog thrive both mentally and physically with a scratch pad made with love. Your dog will undoubtedly express their gratitude with wagging tails, loving glances, and a newfound zest for life.