DIY Champagne Wall
When it comes to celebrating those unforgettable moments in life, I've always believed in adding a dash of elegance and extravagance to make them truly special. One trend that's captured my heart is the DIY Champagne Wall – a creative and visually stunning feature that's been stealing the spotlight at weddings, anniversaries, birthdays, and even corporate gatherings.
So, I embarked on the journey to create my very own Champagne Wall, and I'm thrilled to share my comprehensive guide with you. From gathering the materials and preparing the setup to adding those final, exquisite touches, I've got you covered. Let's work together to ensure your next special occasion is nothing short of spectacular.
Why a DIY Champagne Wall?
Creating a DIY Champagne Wall is not just a trendy idea; it's a multifaceted concept that offers several advantages and unique features. Let's delve deeper into why this DIY project is gaining popularity:
The Wow Factor
A Champagne Wall is an attention-grabbing centerpiece that can instantly elevate the ambiance of any event. Its dazzling appearance and sheer elegance showcase your commitment to detail and aesthetics, leaving a lasting impression on your guests.
Interactive Experience
One of the most compelling aspects of a Champagne Wall DIY is the interactive element it brings to your event. Your guests can serve themselves, turning the act of getting a drink into a fun and engaging experience. This interactive feature not only adds excitement but also serves as an excellent conversation starter, encouraging attendees to mingle and connect.
Personalization
When you create your own Champagne Wall, you have complete creative control. You can tailor its design, size, and aesthetics to match the theme and color palette of your event perfectly. This level of personalization ensures that the Champagne Wall seamlessly integrates into the overall decor, enhancing the overall atmosphere.
Cost-Effective
Building a DIY Champagne Wall often proves to be a cost-effective alternative to renting one. By sourcing the materials yourself and putting in the effort to construct it, you can save on rental fees. Additionally, the versatility of a DIY Champagne Wall means you can reuse it for future occasions, further maximizing its value and cost-effectiveness.

Materials You'll Need
Embarking on the journey of creating your own Champagne Wall requires the right materials. Here's a comprehensive list of what you'll need to bring your vision to life:
Wooden Backboard
The foundation of your Champagne Wall, a sturdy wooden board is essential. Consider using materials like plywood or medium-density fiberboard (MDF) based on your size and style preferences. Ensure it's spacious enough to accommodate the number of glasses you intend to display securely.
Champagne Glasses
These are the stars of the show. You have several options here, ranging from traditional champagne flutes to practical plastic ones or even stylish stemless wine glasses. Your choice should align with both your aesthetic preferences and budget constraints.
Brackets or Holders
To securely fasten the glasses to the board, you'll need brackets or holders. You have the flexibility to choose between materials like metal brackets for a robust look, acrylic holders for a sleek appearance, or you can get creative and repurpose other materials to add unique character to your Champagne Wall.
Paint and Decorations
Elevate the visual appeal of your Champagne Wall by carefully selecting paint colors and decorations that harmonize with your event's theme. From the timeless elegance of metallic finishes to the whimsy of glitter and sequins, you have endless possibilities. Consider adding LED lights to infuse a captivating glow into the display.
Tools
Equip yourself with the necessary tools to build your Champagne Wall with precision. These tools include a drill for making holes, screws for securing brackets or holders, a saw if you need to resize the wooden board, and a level to ensure that your Champagne Wall is not only stylish but also secure and perfectly level.
Champagne
Last but certainly not least, stock up on the bubbly! Don't forget to purchase enough champagne bottles to fill all the glasses on your Champagne Wall and keep them chilled. After all, the main purpose of this dazzling feature is to serve your guests the finest sparkling wine in style.
Materials You'll Need
- Plywood or Foam Board: Choose a sturdy material that can serve as the base for your champagne wall. The size will depend on how many bottles you want to display.
- Acrylic Shelves or Flutes Holders: These will hold the champagne flutes. You can purchase pre-made acrylic shelves or make your own from acrylic sheets.
- Champagne Flutes: The number of flutes you need will depend on the size of your champagne wall.
- Decorative Elements: This can include flowers, greenery, fairy lights, or any other decorations you want to add.
- Champagne Bottles: You'll need enough champagne bottles to fill your wall. Consider the size and shape of the bottles, as they will affect how the wall is designed.
- Double-sided Tape or Adhesive: To attach the acrylic shelves and decorative elements to the base.
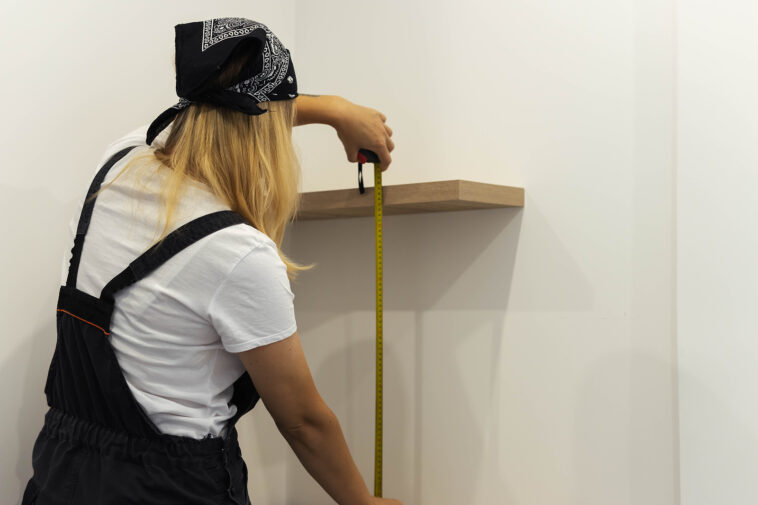
- Level, Measuring Tape, and Pencil: For accurate measurements and leveling.
- Paint and Brushes (Optional): If you want to paint or decorate the base material.
Step-by-Step Guide to Creating Your DIY Champagne Wall
Elevate the ambiance of your upcoming event, whether it's a wedding, birthday bash, or any special occasion, with DIY champagne wall measurements. This creative addition not only adds a touch of elegance but also serves as a captivating centerpiece. To help you bring this concept to life, follow our detailed step-by-step guide:
Step 1: Deliberate on Your Design
Begin by determining the dimensions and shape of your to make a champagne wall for wedding. Carefully consider its placement within your event space and the number of champagne bottles and flutes you intend to showcase. To better visualize your design, sketch a preliminary layout on paper.
Step 2: Ready the Foundation
Next, take your chosen material, which can be plywood or foam board, and cut it to the exact size and shape you've envisioned. If you opt for plywood, consider painting or decorating it to harmonize with the theme of your event. Ensure the paint or decoration is allowed ample time to dry completely.
Step 3: Affix Acrylic Shelves or Flute Holders
Now, attach the acrylic shelves or flute holders to your prepared base. Use double-sided tape or adhesive to secure them firmly in place. It's vital to ensure the shelves or holders are evenly spaced and level, as they will be responsible for holding your DIY champagne balloon wall flutes securely.
Step 4: Stabilize the Champagne Bottles
Place your champagne bottles onto the base, situating them between the acrylic shelves or flute holders. Confirm that they are sturdily positioned and won't tip over. If needed, employ double-sided tape or adhesive to provide additional stability.
Step 5: Enhance with Decorative Accents
To augment the visual allure of your champagne wall, introduce decorative elements. These can encompass a wide range of items such as fresh flowers, lush greenery, delicate fairy lights, or any other embellishments that complement the thematic aesthetics of your event. These adornments will elevate the overall presentation of your DIY champagne wall, making it a true showstopper at your gathering.
Pros and Cons of DIY Champagne Wall
Pros of DIY Champagne Wall:
- Customization: You have complete creative control over the design, size, and aesthetics, allowing you to tailor the Champagne Wall to match the theme and style of your event perfectly.
- Cost-Effective: Building a DIY Champagne Wall can be more budget-friendly compared to renting one, especially if you already have some of the materials and tools needed.
- Unique and Memorable: A Champagne Wall adds a unique and memorable element to your event, leaving a lasting impression on guests and making it a conversation starter.
- Interactive Experience: Guests can serve themselves, turning the act of getting a drink into a fun and engaging experience, encouraging social interaction and mingling.
- Versatility: You can reuse your DIY Champagne Wall for future events, maximizing its value and reducing waste.
- Personal Touch: Creating the Champagne Wall yourself adds a personal touch to your event, showcasing your commitment to detail and aesthetics.
Cons of DIY Champagne Wall:
- Time-Consuming: Building a Champagne Wall can be time-consuming, especially if you're not experienced in DIY projects. It may require several hours of preparation and construction.
- Skill and Tools: You need some DIY skills and access to the necessary tools to build a Champagne Wall successfully. This can be a barrier for those who lack experience or tools.
- Logistics: Transporting and setting up a DIY Champagne Wall can be challenging, especially if it's large or heavy. You'll need to plan logistics carefully.
- Safety Concerns: Ensuring the stability and safety of your Champagne Wall is crucial. If not properly secured, it can pose a risk of accidents or damage to glassware and bottles.
Tips for Success
To ensure the success of your DIY champagne wall and create an unforgettable experience at your event, consider these comprehensive guidelines:
Prioritize Safety
Safety should be paramount. Securely anchor your Champagne Wall to the wall or a robust frame to prevent any accidents or mishaps. Ensuring its stability is essential to the overall success of your project.
Test for Stability
Before introducing champagne to your wall, conduct a stability test. Gently shake the structure to confirm that the champagne glasses are firmly and securely fastened. This precautionary measure can prevent potential disasters during your event.
Temperature Control
If your event is scheduled outdoors or in warm weather, take temperature control into account. Consider incorporating a cooling system to maintain the champagne at the perfect, refreshing temperature throughout your celebration. Guests will appreciate the attention to detail.
Cater to All Tastes
Acknowledge that not all guests may consume alcohol. To cater to a wider range of preferences, include non-alcoholic beverage options like sparkling water or juices alongside the champagne. This thoughtful touch ensures that everyone can partake in the celebration.
Supervise Refills
Maintain the pristine presentation of your Champagne Wall by assigning someone to oversee refills. This dedicated individual can ensure that empty glasses are promptly replenished, keeping the display looking its best and the champagne flowing seamlessly.

Choosing the Right Location
Selecting the ideal location for your DIY Champagne Wall is a pivotal decision that can significantly influence the overall impact of your event. To ensure you make the right choice, carefully consider the following factors:
- Visibility: The visibility of your Champagne Wall is paramount. It should serve as a captivating focal point that can be easily seen by all your guests. Opt for a location that allows everyone to admire and interact with it effortlessly. A well-placed Champagne Wall can set the tone for the entire event.
- Accessibility: Prioritize accessibility when determining the placement of your Champagne Wall. Ensure it's positioned where your guests can reach it conveniently. This accessibility not only promotes interaction with the display but also minimizes congestion and ensures a smooth flow of the event.
- Background: The backdrop against which your Champagne Wall is displayed plays a crucial role in its overall aesthetic impact. Consider whether a neutral background will allow the bottles and glasses to shine, or if a contrasting wall will make the Champagne Wall stand out even more. Your choice of background can amplify the visual appeal of the display.
- Lighting: Lighting can make or break the visual appeal of your Champagne Wall, especially for evening events. Adequate and strategic lighting can create a stunning ambiance that enhances the display's allure. Consider using soft, warm lighting to highlight the bottles and glasses, making them even more enticing to your guests.
- Theme and Decor: Take into account the overall theme and decor of your event. Your Champagne Wall should harmonize with the event's style and aesthetics. Whether it's a rustic, elegant, or modern setting, aligning the Champagne Wall with the theme enhances its impact and creates a cohesive atmosphere.
- Traffic Flow: Analyze the flow of guests throughout your event space. Ensure that placing the Champagne Wall doesn't disrupt the natural traffic patterns or create bottlenecks. It should complement the event layout, allowing guests to comfortably navigate the area.
- Proximity to Bar or Serving Area: If you have a dedicated bar or serving area, consider placing the Champagne Wall nearby. This ensures that guests can easily refill their glasses without inconvenience. It also provides a seamless transition between the bar and the Champagne Wall, enhancing the overall guest experience.
FAQs – DIY Champagne Wall
What is a DIY Champagne Wall, and how does it enhance events?
A DIY Champagne Wall is a captivating and artistic feature frequently employed at various special occasions, including weddings, birthdays, and corporate gatherings. It involves the creative presentation of champagne glasses and bottles, serving as a captivating focal point for the event, delighting attendees with its visual appeal and interactivity.
What are the compelling reasons to consider crafting a DIY Champagne Wall?
Crafting a DIY Champagne Wall offers a multitude of advantages. It not only introduces a “wow” factor to your event but also provides an engaging experience for your guests. Furthermore, it allows for personalized design choices that align with your event's theme, all while being a cost-effective alternative to renting a pre-made one.
What materials are necessary to construct a DIY Champagne Wall?
To bring your DIY Champagne Wall to life, you'll need materials such as a wooden backboard, champagne glasses, brackets or holders, paint and decorative elements, essential tools like a drill, screws, and a level, and, of course, an ample supply of champagne bottles.
Can I tailor the design of my DIY Champagne Wall to suit my event's theme?
Absolutely! The beauty of a DIY Champagne Wall lies in its customizability. You have complete creative control over its design, size, and aesthetics, ensuring it harmonizes flawlessly with the event's color palette and theme.
What measures should I take to ensure the safety of my DIY Champagne Wall?
Safety is paramount. It's crucial to securely fasten your Champagne Wall to the wall or a sturdy frame to prevent any accidents. Prior to the event, perform stability tests to confirm that the glasses are firmly attached and won't pose a risk.
How can I maintain the champagne at the ideal temperature?
For outdoor events or those in warm climates, consider implementing a cooling system to keep the champagne at the perfect serving temperature. Refreshingly chilled champagne is a must for a delightful guest experience.
What if some of my guests do not consume alcohol?
To cater to a diverse range of preferences, include non-alcoholic beverage options such as sparkling water or fruit juices alongside the champagne on your Champagne Wall.
What factors should I consider when selecting the ideal location for my Champagne Wall?
When choosing the perfect spot for your Champagne Wall, take into account factors like visibility, accessibility, background aesthetics, lighting conditions, alignment with the event's theme and decor, guest traffic flow, and proximity to the bar or serving area.
Is it advisable to designate someone for glass refills on the Champagne Wall?
Assigning someone to oversee refills is a smart move. This individual can ensure that empty glasses are promptly replenished, maintaining the aesthetic appeal of the display and ensuring a seamless flow of champagne throughout the event.
Can I reuse my DIY Champagne Wall for future events?
Certainly! One of the key advantages of crafting your own Champagne Wall is its versatility and reusability. You can employ it for upcoming special occasions, maximizing its value and cost-effectiveness over time.
Conclusion
In conclusion, crafting a DIY Champagne Wall is not just a creative project; it's an opportunity to infuse your special event with elegance, interactivity, and a personalized touch. The journey of creating this dazzling centerpiece allows you to tailor every detail to match your event's theme and color palette, ensuring it leaves a lasting impression on your guests.
As someone who has embarked on this exciting DIY endeavor, I can attest to the sense of accomplishment and pride that comes with seeing your vision come to life. Building a Champagne Wall is not just about showcasing champagne; it's about creating a memorable experience that encourages mingling, conversation, and celebration.
With careful planning, attention to safety, and a thoughtful approach to design and location, your DIY Champagne Wall can be the star of your event, a conversation starter, and a symbol of your commitment to making every moment special. So, raise a glass to the possibilities and let your creativity flow as you embark on this extraordinary journey of crafting your own Champagne Wall. Cheers to unforgettable celebrations and the joy of DIY craftsmanship!


