
DIY WonderBag
In today's fast-paced world, I've come to truly appreciate the convenience of slow cooking. As a homeowner, I've found that the slow cooker or crockpot has become an indispensable kitchen tool, allowing me to prepare delicious meals without the constant need for electricity.
However, what if I told you that there's an eco-friendly alternative that allows you to create your slow cooker, known as a WonderBag, with just a few simple materials and a touch of DIY magic?
In this comprehensive guide, I'll take you through the process of making your very own DIY WonderBag, step by step. It's a fantastic way to cook without relying on additional energy sources and still enjoy mouthwatering, slow-cooked meals.
What Is a WonderBag?
A WonderBag, also known as make a wonder box or a heat-retention cooker, is a low-tech, highly energy-efficient cooking device that allows you to slow-cook food without electricity or a gas stove. It was initially developed in Africa as a sustainable cooking solution for communities with limited access to modern energy sources.
The History of the WonderBag
The WonderBag concept dates back to the early 20th century when the need for energy-efficient cooking methods was pressing. However, it gained widespread recognition and popularity in recent years as a sustainable solution for both everyday and off-grid cooking needs. The journey of the WonderBag from its humble origins to a global phenomenon is a testament to the power of innovation.
How Does a WonderBag Work?
Understanding the science behind a WonderBag is essential to appreciate its effectiveness. When you bring your food to a boil and transfer it into the WonderBag, the insulated container traps the heat inside, allowing the food to continue cooking slowly without additional energy input. This unique method not only saves energy but also contributes to tastier and healthier meals.
Check out our post on Most Efficient DIY Alcohol Stove
The Benefits of Using a DIY WonderBag
Before we dive into creating your DIY WonderBag, let's explore some of the advantages of using one:
Energy Efficiency
The cornerstone of the WonderBag's appeal is its remarkable energy efficiency. Once your food reaches the boiling point, you can transfer it to the WonderBag, and the retained heat will continue to cook the meal without any additional energy input. This can lead to significant energy savings in the long run, making it a cost-effective cooking solution.
Retains Nutrients and Flavor
Unlike traditional cooking methods that may overcook or dry out dishes, a WonderBag helps retain the natural flavors and nutrients in your food. The slow-cooking process in a WonderBag preserves the integrity of your ingredients, resulting in healthier and more delicious meals.
Portability and Versatility
WonderBags are not limited to kitchen use. They are portable and perfect for camping trips, picnics, or outdoor cooking adventures. The ability to take your DIY WonderBag with you wherever you go ensures that you can enjoy homemade meals on the road or in the great outdoors.
Hands-Free Cooking
With a WonderBag, there's no need for constant monitoring or stirring. Once you've set up your meal in the bag and sealed it, you can go about your day without worrying about your food burning or sticking to the bottom of a pot. This hands-free approach to cooking allows you to multitask or relax while your meal simmers to perfection.
Materials You'll Need for DIY WonderBag
To get started with your DIY WonderBag project, you'll need the following materials:
Fabric Selection and Considerations
Choosing the right fabric is crucial for the effectiveness and durability of your WonderBag. Opt for a heavyweight, heat-resistant material like cotton, denim, or canvas. Ensure that the fabric is at least twice as wide as your cooking pot and long enough to wrap around it with some extra room for insulation.
Cotton – A Classic Choice
Cotton is a traditional choice for WonderBag fabric due to its excellent heat resistance and breathability. It's a natural material that provides both durability and ease of use, making it a popular choice among DIY enthusiasts.
Denim – A Durable Option
Denim fabric, known for its sturdiness, is another great choice for your WonderBag. Its rugged texture and heat-resistant properties make it suitable for this project. Plus, the durability of denim ensures your WonderBag will last for years.
Canvas – A Robust Alternative
Canvas is favored for its strength and durability. It can withstand the rigors of heat and repeated use, making it an excellent choice for a long-lasting WonderBag. The tight weave of canvas fabric helps maintain the heat inside, enhancing the cooking process.
Check out our post on Microwave Magic
Insulation Material
You'll need an insulating material to line your WonderBag. Popular options include:
Polyester Fiberfill – Lightweight and Effective
Polyester fiberfill is a commonly used insulating material in DIY WonderBags. It is lightweight, affordable, and offers excellent heat-retaining properties. This material is easy to work with and provides the necessary insulation for your slow-cooking adventures.
Foam Insulation – Superior Heat Retention
Foam insulation is a premium choice for those seeking maximum heat retention. While it may be slightly more expensive than other options, its ability to trap heat effectively ensures that your meals will stay warm for an extended period. Foam insulation also provides a higher level of insulation, making it ideal for outdoor and off-grid cooking scenarios.
Reflective Bubble Wrap – Innovative Insulation
Reflective bubble wrap is an innovative insulation choice that offers both heat retention and flexibility. Its reflective surface enhances heat reflection, while the air-filled bubbles provide insulation. This lightweight and easy-to-handle material can help maintain consistent cooking temperatures within your WonderBag.
Sewing Supplies
Gather your sewing essentials, including:
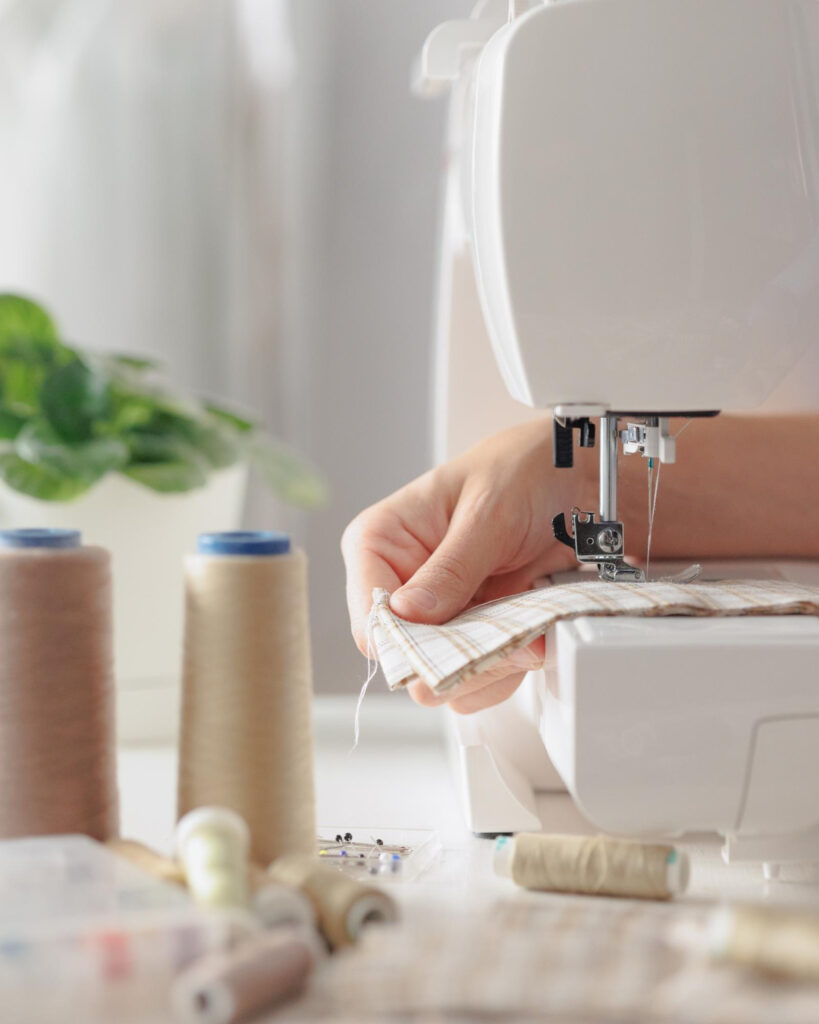
Sewing Machine or Needle and Thread – Sewing Made Easy
A sewing machine can significantly expedite the assembly of your WonderBag, ensuring neat and secure seams. If you prefer a more hands-on approach, a needle and strong thread will work just as well.
Scissors – Precision Cutting
A sharp pair of scissors is essential for accurate cutting of fabric and insulation materials. Clean and precise cuts will contribute to the overall quality and appearance of your WonderBag.
Pins – Holding It All Together
Pins are invaluable for holding fabric layers and insulation in place while you sew. They help ensure that your project remains aligned and tidy throughout the sewing process.
Measuring Tape and Ruler – Precision Measurement
Accurate measurements are critical when creating your WonderBag. A measuring tape and ruler will help you determine the appropriate dimensions for your fabric and insulation pieces, ensuring a snug fit for your cooking pot.
Drawstring or Zipper
You'll need a drawstring or zipper to seal your WonderBag and keep the heat inside. The choice between a drawstring or zipper closure depends on your personal preference and sewing skills. Both options are effective in securing the contents of your WonderBag.
Drawstring Closure – Simple and Traditional
A drawstring closure is a straightforward and traditional choice for sealing your WonderBag. It consists of two channels sewn into the top of the bag, allowing you to cinch it closed with a cord. This closure method is easy to create and maintain, making it suitable for beginners.
Zipper Closure – Secure and Professional
A zipper closure offers a more secure and professional look to your WonderBag. While it requires some sewing expertise, it provides a reliable seal and ensures that the heat remains trapped inside. If you have experience working with zippers, this option can enhance the overall functionality and appearance of your DIY WonderBag.
Step-by-Step Guide to Making a DIY WonderBag
Making your own DIY WonderBag is an immensely satisfying project that can bring a significant upgrade to your cooking experience. This comprehensive guide provides detailed, step-by-step instructions and essential considerations to ensure a successful and enjoyable crafting process.
Selecting the Right Fabric for Your DIY WonderBag
Choosing the appropriate fabric is the foundation of creating an effective WonderBag. The fabric should not only serve as an outer covering but also act as an insulator, helping to retain heat during cooking. Here's a more in-depth look at what to consider:
- Fabric Dimensions: Begin by measuring the dimensions of your cooking pot. To create effective insulation, cut two identical rectangles of fabric, each approximately twice the height of your pot. This extra space allows for an ample insulation layer.
- Fabric Characteristics: The choice of fabric is crucial. To ensure your DIY WonderBag can withstand the rigors of cooking, prioritize fabrics with specific qualities:
- Heat Resistance: Opt for materials like cotton, denim, or canvas that can handle high temperatures without deteriorating.
- Durability: Select a sturdy fabric to guarantee the longevity of your DIY WonderBag.
- Breathability: Balancing heat retention and breathability is vital to maintaining optimal cooking conditions inside the WonderBag.
Cutting and Preparing the Fabric with Precision
Before you dive into sewing, taking precise measurements and preparing the fabric correctly is key to achieving a polished final product:
- Precise Measurements: The old adage “measure twice, cut once” is especially relevant here. Double-check your measurements before making any cuts to avoid costly errors.
- Marking the Fabric: To ensure clean and straight edges, use a fabric pencil or chalk to mark the cutting lines on the wrong side of the fabric. This simple step goes a long way in achieving a professional look.
- Cutting with Precision: The quality of your cuts matters. Use sharp scissors to cut along the marked lines, ensuring smooth, even edges that will contribute to the overall aesthetics of your DIY WonderBag.
- Insulation Material: In addition to the fabric, you'll also need to cut two identical rectangles from your chosen insulation material, making sure they match the size of your fabric rectangles.
Sewing the Fabric Together with Care
Sewing is a critical aspect of creating a functional and attractive WonderBag. Paying attention to the following details will help you achieve strong, secure seams:
- Seam Allowance: Establishing an appropriate seam allowance, typically ranging from 1/2-inch to 5/8-inch, is crucial for creating durable seams that will withstand the test of time.
- Stitching Method: You have the option of using a sewing machine or hand-sewing. Each method has its advantages:
- Sewing Machine: If you opt for a sewing machine, you'll benefit from speed and precision. Use a straight stitch with an adjusted length for strong, consistent seams.
- Hand-Sewing: Hand-sewing, on the other hand, offers more control. Use a strong, durable thread and secure each stitch with knots at the beginning and end of every seam.
- Creating a Fabric Pouch: Sew along three sides of the fabric rectangles, leaving one short end open. This will form a fabric pouch, a fundamental element of your DIY WonderBag.
Reinforcing Seams for Extra Durability
To ensure your WonderBag lasts for many cooking adventures, consider reinforcing the seams:
- Machine Stitch (Zigzag Stitch): If you're using a sewing machine, contemplate reinforcing the edges of your seams with a zigzag stitch. This added step helps prevent fraying and enhances the overall durability of your creation.
- Hand-Sewing (Backstitch): If you prefer hand-sewing, implement the backstitch technique at the beginning and end of each seam. This technique creates robust, long-lasting seams that will withstand the test of time.
Preparing and Assembling the Insulation
Now that your fabric is prepared and sewn together, it's time to focus on the insulation component of your WonderBag:
- Turning the Insulation Inside Out: Reverse the insulation pouch so that the smooth side faces outward. This step ensures direct contact with your cooking pot, facilitating effective heat retention.
- Inserting the Insulation: Carefully place the insulation pouch inside the fabric pouch, making sure it fits snugly with no gaps. This snug fit is essential for optimal insulation.
Assembling the DIY WonderBag for the Perfect Finish
With the fabric and insulation components in place, it's time to bring your DIY WonderBag together:
- Folding and Sewing the Open Ends: Fold the open ends of both the fabric and insulation pouches inward to create a clean edge. Sew these ends together, leaving the top open, to seal the pouch securely.
- Creating the Opening for Closure: At the top of your DIY WonderBag, sew around the opening to reinforce it for added durability. This step ensures that your WonderBag will withstand the test of time and many cooking sessions.
- Drawstring Installation: If you prefer a drawstring closure, thread the cord through the channels at the top of the WonderBag. Make sure it's long enough to securely close the bag, and tie knots at both ends to prevent it from slipping.
- Zipper Installation: For those who opt for a zipper closure, follow the manufacturer's instructions meticulously to sew the zipper in place. This step ensures a smooth and secure closure, adding convenience to your WonderBag's functionality.

Using Your DIY WonderBag
Using your WonderBag is as simple as following these steps:
- Heat your meal on the stove until it reaches a boil.
- Place your pot inside the DIY WonderBag, making sure it's centered.
- Pull the drawstring or zip up the bag to seal in the heat.
- Leave the WonderBag undisturbed for the recommended cooking time.
The retained heat will continue cooking your meal to perfection, allowing the flavors to meld and the ingredients to tenderize slowly.
Recommended Cooking Times
Each recipe may have different cooking times, but as a general guideline:
- For meats and stews: Allow for at least 3-4 hours in the WonderBag.
- For grains and legumes: 2-3 hours of cooking time may be sufficient.
- For vegetables: Shorter cooking times of 1-2 hours can yield delectably tender results.
Experiment with your favorite recipes to find the perfect cooking duration that suits your taste preferences.
Temperature Monitoring
While the WonderBag's heat-retention capabilities are impressive, it's a good practice to check the food's internal temperature using a food thermometer, especially when dealing with meats. Ensure that your dish reaches a safe and delicious temperature before serving.
Cooking Multiple Courses
The WonderBag's versatility extends beyond one-pot meals. You can cook multiple courses or components of a meal simultaneously. For example, start with a hearty soup or stew and add vegetables or grains later in the cooking process to create a complete, balanced dinner.
Check out our post on Elevate Your Appetizer
Maintenance and Care
Taking proper care of your DIY WonderBag will ensure its longevity and continued effectiveness. Here are some maintenance and care tips to keep in mind:
Spot Cleaning
Address any spills or stains promptly to prevent them from setting. Use a damp cloth or sponge with mild soap to gently clean the affected area. Avoid abrasive cleaners or harsh chemicals that may damage the fabric.
Avoid Washing the Entire Bag
It's crucial to avoid washing the entire WonderBag, as submerging it in water or machine washing can damage the insulation material and affect its heat-retention capabilities. Instead, focus on spot cleaning and maintaining the bag's exterior cleanliness.
Storage
When not in use, store your WonderBag in a cool, dry place away from direct sunlight. Ensure that it is fully dry before storing to prevent any mold or mildew growth. Folding the WonderBag neatly and placing it in a storage bag or container can help protect it from dust and debris.
Regular Inspection
Periodically inspect your WonderBag for any signs of wear and tear, especially around the drawstring or zipper area. Check for loose stitches or frayed edges and address any issues promptly to maintain the bag's structural integrity.
Refreshing the Insulation
Over time, the insulation material may compress or lose some of its heat-retention properties. To refresh the insulation, you can carefully open the seams and add additional insulation material as needed. Ensure that the new material is evenly distributed to maintain consistent heat retention.
Conclusion
Creating your own DIY WonderBag is a rewarding project that not only saves you energy but also opens up a world of convenient slow cooking. By following this detailed and comprehensive guide, you've acquired the skills to craft your own WonderBag and harness the benefits of energy-efficient, hands-free cooking. Whether you're at home, on the go, or exploring the great outdoors, your DIY WonderBag will be a valuable addition to your culinary toolkit.
Start your DIY WonderBag project today, and experience the magic of this innovative device that not only saves time and energy but also enhances the flavors and nutritional value of your meals. Enjoy delicious, flavorful dishes with ease, and savor the satisfaction of creating something unique and sustainable in your own kitchen.
Sources
https://www.climateaction.org/directory/wonderbag?supplier=Wonderbag