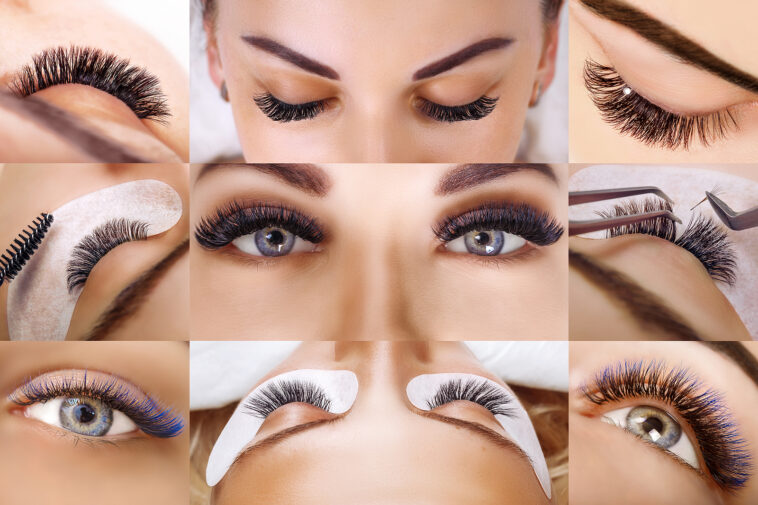
How to Remove DIY Lash Extensions Safely
Over the past few years, I've noticed that DIY lash extensions have gained popularity, and it's easy to see why. They offer an affordable and convenient way to achieve those stunning, long lashes we all desire, without the hassle of frequent salon appointments.
However, just as applying them requires attention and care, removing DIY lash extensions is equally important to protect your natural lashes. In this guide, I want to share my personal experiences and tips for safely taking off DIY lash extensions at home. By following these steps, you can keep your eyelashes healthy, lush, and beautiful.
Understanding the Importance of Safe Lash Extension Removal
Prior to delving into the specifics of do-it-yourself (DIY) lash extension removal, it is imperative to fully understand and appreciate the paramount importance of carrying out this process safely. The consequences of employing incorrect or aggressive removal techniques can be detrimental to your natural lashes, potentially leading to issues such as brittleness, sparsity, or even the loss of lashes.
As a result, it is essential to invest the time and effort in following the correct steps to ensure the preservation of your eyelashes' health and beauty. By doing so, you can continue to enjoy the enhancement they provide to your overall appearance while avoiding potential damage.
See also our post on DIY Lash Extensions
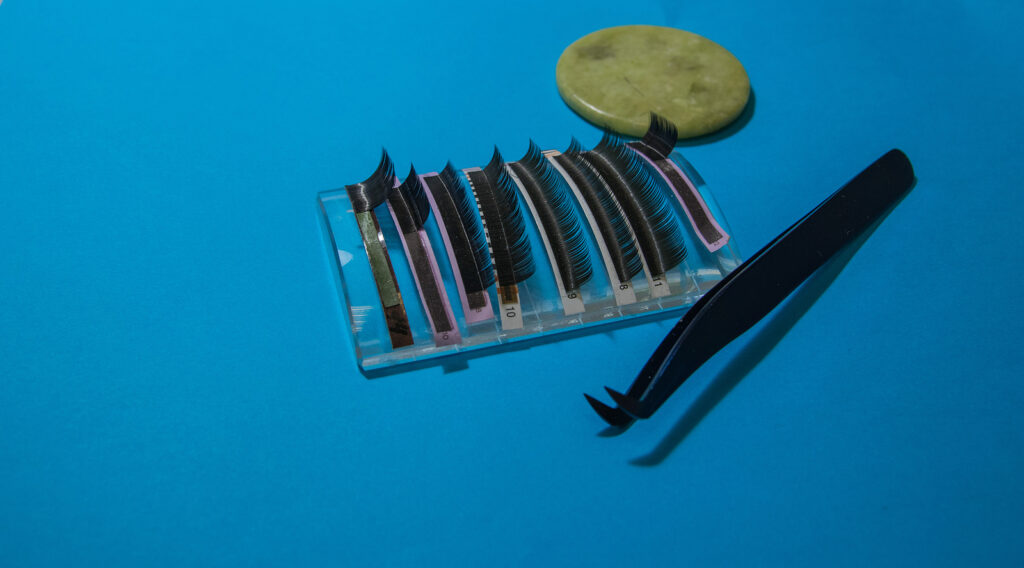
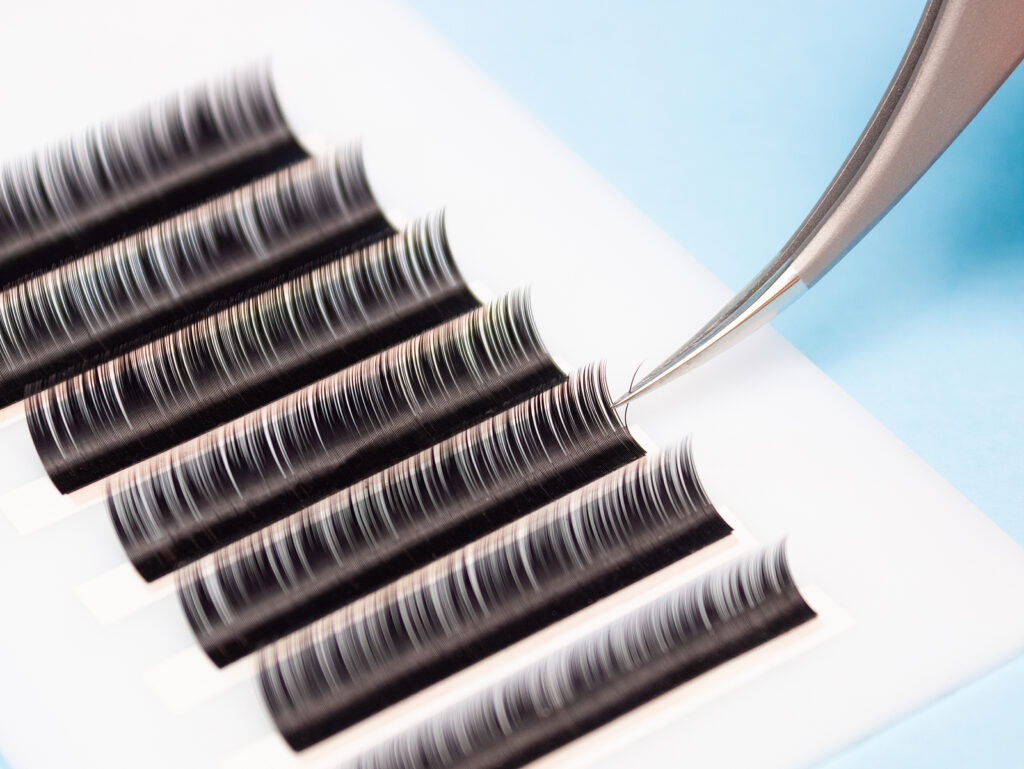
Gather the Necessary Tools and Supplies
Understanding the critical importance of safe DIY lash extension removal is just the beginning. To ensure a successful and safe removal process, it's essential to gather all the necessary tools and supplies beforehand. Having everything ready in advance will not only streamline the removal process but also significantly reduce the risk of any potential mishaps. Below is a detailed breakdown of the essential items you'll need to facilitate this process effectively:
- A Clean and Well-lit Workspace: Before embarking on the removal process, establish a dedicated, clean, and well-lit workspace where you can work comfortably without any distractions. Make sure this space is free from dust, debris, and any potential contaminants that could compromise the process.
- Oil-Free Makeup Remover: Start by using an oil-free makeup remover to gently eliminate any eye makeup, mascara, or eyeliner. Exercise caution during this step to avoid putting unnecessary strain on your lashes, which might already be sensitive from the extensions.
- A Bowl of Hot Water: You'll require a bowl of hot water to generate steam. The steam will play a crucial role in softening the adhesive used to attach the lash extensions securely.
- A Towel: Keep a towel on hand to drape over your head during the steam application. This makeshift steam room for your lashes will enhance the effectiveness of the removal process.
- Cotton Pad or Q-tip: Utilize a cotton pad or Q-tip to apply the chosen oil-based solution for lash extension removal.
- Gentle, Oil-Based Solution: Opt for a gentle and appropriate oil-based solution, such as olive oil, coconut oil, or a specialized lash extension remover. The choice of solution is pivotal in ensuring safe and effective removal.
- Mirror: Ensure you have access to a high-quality mirror positioned nearby. This will enable you to maintain clear visibility throughout the removal process, making it easier to monitor your progress.
- Clean Mascara Wand: A clean mascara wand will serve as a valuable tool to gently comb through your lashes. This action aids in loosening the extensions without causing any harm to your natural lashes.
- Spoolie Brush: Similar to the mascara wand, a spoolie brush can be employed to separate and remove extensions delicately, further safeguarding your natural lashes from any potential damage.
- Patience: Finally, bring a considerable amount of patience to the table. Rushing through any of the steps can lead to mistakes and undesirable outcomes. Take your time, follow each step carefully, and prioritize the health of your natural lashes throughout the process.
Step-by-Step Guide for Safe DIY Lash Extension Removal
Now that you have all the necessary tools and supplies prepared, let's delve into a detailed step-by-step guide for safely removing your DIY to remove eyelash extensions at home, ensuring the utmost care and success:
Immaculate and Well-Organized Space
Prior to initiating the removal process, it is crucial to ensure that your workspace is impeccably clean and well-organized. This environment sets the stage for a safe and effective procedure. Moreover, wash your hands thoroughly to eliminate any potential sources of contamination during the process.
Delicate Makeup Removal
Start the process by meticulously eliminating any eye makeup, mascara, or eyeliner using an oil-free makeup remover. Exercise utmost care around your eyes, refraining from any excessive rubbing or tugging that could potentially irritate your lashes.
Creating a Steam Environment
This pivotal step involves the creation of a steam environment to soften the adhesive used to attach your lash extensions. Here's how to execute it effectively:
- Boil a pot of water and transfer it to a bowl.
- Lean over the bowl, positioning your face above the rising steam.
- Cover your head with a towel, effectively establishing a small steam room for your lashes.
- Allow the steam to envelop your lashes for a duration of 5-10 minutes. The combination of heat and moisture gradually softens the adhesive, making it easier to remove.
Oil-Based Solution Application
With the adhesive now softened, it's time to apply the oil-based solution to further weaken the adhesive bonds. Here's the precise procedure:
- Dip a cotton pad or Q-tip into your selected oil-based solution (options include olive oil, coconut oil, or specialized lash extension remover).
- Gently and evenly apply the solution to your lash line, with particular focus on the areas where the extensions are attached. Ensure that the solution is distributed thoroughly across your lashes.
- Allow the oil to sit for an additional 5-10 minutes, granting it ample time to penetrate and further loosen the adhesive.
Lash Extension Removal
Now that the adhesive has been sufficiently weakened, it's time to commence the extension removal process with care:
- Employ a clean mascara wand or spoolie brush to gently comb through your lashes. Start the process from the base of your lashes and work your way towards the tips. This gentle brushing motion effectively aids in loosening the extensions.
- Exercise patience throughout this step, refraining from any tugging or pulling. If you encounter resistance, avoid forcing it. Instead, apply a bit more of the oil-based solution and continue the gentle brushing until the extensions effortlessly slide off.
Post-Removal Care
Congratulations on successfully removing your DIY lash extensions in a safe manner. Now, it's imperative to discuss what comes next to ensure the ongoing health and well-being of your natural lashes:
- Cleansing: Following the extension removal, cleanse your lashes meticulously using warm water and a mild cleanser. This will effectively eliminate any residual traces of oil and adhesive.
- Drying: Pat your lashes gently dry with a clean towel, avoiding any vigorous rubbing, as your lashes may still be sensitive.
- Lash Serum or Conditioner: Consider the application of a lash serum or conditioner to stimulate healthy regrowth. These products can bolster the strength of your natural lashes, fostering longer and thicker growth you remove eyelash extensions.
See also our post on DIY Beads
Common Mistakes to Avoid
While it's important to follow the detailed steps for a safe DIY lash extension removal process, it's equally crucial to be aware of common mistakes that many individuals make. Steering clear of these errors is essential for protecting your natural lashes and ensuring a successful removal process. Here are some common mistakes to avoid:
- Rushing the Process: Patience is key when removing lash extensions. Rushing through the removal process can lead to impatience, potentially causing unintentional damage to your natural lashes. Take the time needed to perform each step with care and precision.
- Using Harsh Chemicals: Avoid the temptation to employ harsh chemicals or glue removers in an attempt to speed up the removal process. These substances can be irritating to your eyes and can cause harm to your natural lashes. Opt for gentler, lash-safe products specifically designed for extension removal.
- Pulling or Tugging: Never resort to forceful pulling or tugging on your lash extensions. Doing so can result in not only the loss of your natural lashes but also potential damage to the delicate skin surrounding your eyes. Instead, follow the recommended removal techniques to ensure a gentle and safe process.
- Neglecting Aftercare: Post-removal care is just as critical as the removal process itself. Properly caring for your lashes after removal is essential for supporting healthy regrowth. Neglecting this crucial step could impede the recovery of your natural lashes and prolong the time it takes for them to return to their full, healthy state. Ensure you follow the recommended aftercare routines to promote optimal lash health and regrowth.
Alternatives to DIY Lash Extensions
When considering enhancing your eyelashes, DIY lash extensions may be a popular choice, but it's essential to explore various alternatives that can help you achieve stunning lashes without the commitment or potential risks associated with extensions. Here are some alternatives to consider:
- High-Quality Mascara: Investing in a quality mascara is a versatile option for instantly adding volume and length to your lashes. Unlike lash extensions, mascara doesn't require the same level of commitment and maintenance. Additionally, waterproof mascara can provide long-lasting results, making it suitable for various occasions.
- False Lashes: False lashes, whether in strip or individual form, offer a wide range of styles to choose from. They can be an excellent choice for special events or as part of your everyday makeup routine. False lashes provide a dramatic effect without the need for extension application and upkeep.
- Lash Lift: A lash lift is a semi-permanent treatment that works by curling your natural lashes upward, creating the illusion of longer and more defined lashes. This option is ideal for individuals looking for a low-maintenance solution that lasts for several weeks. Unlike lash extensions, you won't need to worry about fill-ins or potential damage to your natural lashes.
- Lash Tinting: Lash tinting involves applying a specialized dye to your natural lashes to darken their color. This process enhances the appearance of your lashes, making them look more prominent and defined. Lash tinting can be particularly beneficial for those with lighter-colored lashes, providing a natural and long-lasting effect.
Tips for Maintaining Healthy Lashes After Removal
Having successfully completed the DIY lash extension removal process, it's essential to take proactive steps to ensure the ongoing health and beauty of your natural lashes. Here are some additional insights and recommendations to consider:
Handle with Care
Be mindful of how you treat your lashes. Avoid overloading them with excessive mascara or using eyelash curlers frequently, as these practices can stress and weaken your lashes over time. Gentle care is essential for long-term lash health.
Lash Serums and Conditioners
To promote robust regrowth and enhance the appearance of your natural lashes, incorporate lash serums or conditioners into your routine. These specialized products contain nourishing ingredients that can strengthen and revitalize your lashes, contributing to their overall health.
Take Breaks from Extensions
While lash extensions can provide an instant boost to your lash appearance, it's advisable to grant your lashes occasional breaks from extensions. This respite allows them to fully recover, preventing overuse and potential damage. Consider adopting a schedule that alternates between extension application and natural lash care.
Maintain Good Eye Hygiene
Practicing excellent eye hygiene is crucial to prevent infections or irritation, which can negatively impact lash health. Always use clean, uncontaminated eye makeup products, and replace them regularly to avoid any potential bacterial buildup. Additionally, ensure that you remove makeup thoroughly before bedtime to maintain clean and clear lash follicles.
FAQs (Frequently Asked Questions)
Q1: Can I Safely Remove DIY Lash Extensions at Home?
A1: Yes, you can safely and effectively remove DIY lash extensions at home by following the comprehensive step-by-step guide provided in this article. It's crucial to exercise patience and gentleness during the removal process to avoid any potential harm to your natural lashes.
Q2: What Tools and Supplies Do I Need for DIY Lash Extension Removal?
A2: To successfully remove DIY lash extensions, you'll need a well-organized workspace with adequate lighting, oil-free makeup remover, hot water, a clean towel, cotton pads or Q-tips, a high-quality oil-based solution (such as olive oil or coconut oil), a mirror, a clean mascara wand, a spoolie brush, and, of utmost importance, an abundance of patience.
Q3: How Should I Prepare My Workspace for Lash Extension Removal?
A3: Ensure that your workspace is not only clean but also impeccably organized and well-illuminated. It should be entirely free from dust and contaminants. Prior to commencing the removal process, be sure to thoroughly wash your hands to prevent any potential contamination.
Q4: Is Using an Oil-Based Solution Necessary for Removal, or Can I Use Other Products?
A4: It is highly recommended to use a top-tier oil-based solution for the removal of Remove DIY Lash Extensions. This type of solution effectively softens the adhesive used in lash extensions without being harsh on your natural lashes. You have several suitable options, including olive oil, coconut oil, or specialized lash extension removers.
Q5: How Long Should I Steam My Lashes During the Removal Process?
A5: You should plan to steam your lashes for a duration of approximately 5-10 minutes. This period allows the heat and moisture to work their magic, gradually loosening the adhesive used for the lash extensions, facilitating a smoother removal process.
Q6: Can I Reuse My DIY Lash Extensions After Removal?
A6: It is not advisable to attempt the reuse of Remove DIY Lash Extensions after removal. During the removal process, they may lose their shape and quality. To achieve the best and most appealing results, it is recommended that you opt for new lash extensions if desired.
Q7: What Should I Do If I Encounter Resistance While Removing the Extensions?
A7: If you encounter any resistance while removing the lash extensions, it is crucial to refrain from applying excessive force. Instead, simply apply a bit more of the oil-based solution and continue to gently brush through your lashes until the extensions slide off smoothly and without any resistance.
Q8: How Can I Maintain Healthy Lashes After Removing DIY Extensions?
A8: To maintain the health and vitality of your natural lashes after the removal of DIY extensions, there are several steps you can follow: handle them with utmost care, avoid the excessive use of mascara and eyelash curlers, consider incorporating a lash serum or conditioner into your routine, take breaks between extensions, and practice good eye hygiene to prevent infections or irritation.
Q9: Can I Use Harsh Chemicals or Glue Removers to Speed Up the Removal Process?
A9: It is strongly discouraged to resort to harsh chemicals or glue removers for the removal of DIY lash extensions, as they can be irritating to your eyes and potentially damaging to your natural lashes. Sticking to the recommended oil-based solutions is the safest and gentlest approach to ensure a smooth and damage-free removal process.
Q10: How Often Can I Safely Apply DIY Lash Extensions?
A10: To safeguard the health of your natural lashes, it is advisable to provide them with sufficient time to recover between applications. Repeatedly applying Remove DIY Lash Extensions without allowing your lashes to fully recuperate can lead to damage over time. Therefore, it is recommended to reserve the use of extensions for special occasions rather than employing them as a daily beauty routine, thus promoting the long-term well-being of your lashes.
Conclusion
In my personal journey with Remove DIY Lash Extensions, I've come to appreciate the importance of safely removing them to preserve the health and beauty of my natural lashes. The allure of long, fluttery lashes is undeniable, but it's equally vital to focus on their gentle removal process. Rushing or using harsh methods can lead to damaged and sparse natural lashes. Through careful research and my own experiences, I've found that patience, the right tools, and a gentle touch are essential for a successful DIY lash extension removal.
As I continue to care for my lashes with serums and conditioners, I've realized that it's not just about achieving a stunning look but also about the journey of self-care and enhancement. I hope my personal insights and tips serve as a helpful guide to others on their own lash extension journey, ensuring that their eyelashes remain a beautiful and natural extension of their overall beauty.
Sources
https://greatist.com/health/how-to-remove-eyelash-extensions
https://divinelashes.ca/blog/how-to-remove-eyelash-extensions-at-home/
https://blogs.bcm.edu/2021/10/06/are-eyelash-extensions-safe/