DIY Beads
Are you, like me, a lover of all things shiny and a connoisseur of unique jewelry? Or are you just dipping your toes into the world of jewelry making, seeking a distinctive flair to make your pieces stand out? Regardless of your level of experience, diving into the art of making DIY beads can be a thrilling journey to enhance the personality of your creations.
Embarking on this adventure, I’ve found that crafting custom beads brings a splash of originality and a deeply personal touch to every piece. Whether you’re a seasoned artist or a beginner, there’s immense joy in letting your creativity flow and watching your unique jewelry visions come to life!
What are DIY Beads?
DIY beads, short for “Do It Yourself” beads, are versatile crafting materials that empower individuals to craft their own unique jewelry pieces. These beads offer a wide range of possibilities, allowing you to exercise creative control over their size, shape, and design.
With DIY beads, you have the opportunity to meticulously tailor your creations to align with your artistic vision, whether you're designing intricate earrings, statement necklaces, or charming bracelets. This level of customization not only adds a personal touch to your jewelry but also opens up a world of creative expression and endless design possibilities.
Benefits of DIY Beads
- Distinctive and Unique Designs: One of the most significant benefits of creating diy perler beads is the uniqueness they bring. Unlike mass-produced beads, where designs tend to be repetitive, DIY beads are inherently one-of-a-kind. Each bead you make is a testament to your creativity and individuality, ensuring that your creations will always stand apart from the rest.
- Cost-Effectiveness: Financially, crafting your beads can be an attractive option. Specialty beads available in stores or online can often come with a hefty price tag, especially if they are rare or imported. On the other hand, sourcing materials and making your beads can be considerably less expensive, allowing you to save money or even produce a larger quantity for the same cost.
- A Personal Touch: Beyond just aesthetics, diy crafts with beads infuse your jewelry with personal significance. Every bead you craft carries a bit of your story, passion, and effort. This personal touch is something that store-bought beads simply cannot replicate. Whether you're crafting for yourself or as a gift for someone else, the recipient will surely appreciate the thought, time, and love embedded in each handmade bead.
- Therapeutic and Relaxing: Engaging in the process of crafting diy fabric beads can be a therapeutic activity. Many enthusiasts find the act of bead-making to be a mindful and meditative process. It allows for a break from the digital world and provides a tactile, hands-on experience that can reduce stress and enhance focus.
- Environmentally Friendly: By making your beads, you often have the opportunity to use sustainable and eco-friendly materials. Moreover, DIY bead-making can involve upcycling old jewelry or other materials, which reduces waste and promotes a more sustainable approach to fashion.
- Customization to Suit Needs: Whether you're crafting jewelry for a specific occasion, outfit, or mood, DIY beads give you the flexibility to create exactly what you envision. You're not limited by what's available in stores; instead, the only limit is your imagination.
- Skill Development and Learning: Delving into bead-making can open the door to learning various techniques, materials, and styles. Over time, you'll develop a new skill set, which can be both personally fulfilling and potentially profitable if you decide to sell your creations.
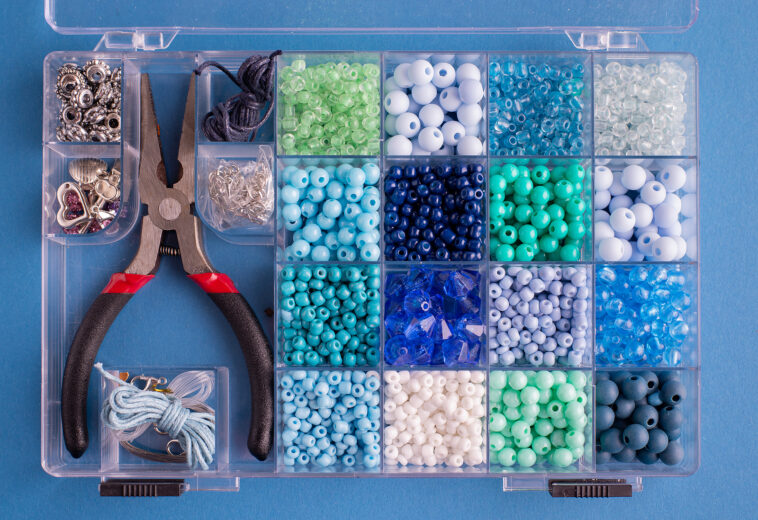
Materials You’ll Need for DIY Beads
Embarking on your bead-making journey requires careful preparation. The right materials not only ensure ease of crafting but also result in beads of superior quality. Here's a detailed list of materials you'll need:
Polymer Clay
This versatile medium is a favorite among bead artisans. It's widely used due to its soft and malleable nature, allowing for easy shaping and molding. Available in a plethora of colors and types, you can create virtually any design or pattern you imagine. It's also durable once cured, making it ideal for beads that can last stretchy beaded bracelets with elastic.
Needle or Beading Tool
A needle or specialized beading tool is essential for multiple tasks. While its primary purpose is to create holes in the beads for stringing, it can also be used for intricate detailing, sculpting, and patterning, ensuring that each bead is unique and well-crafted.
Baking Sheet
When using polymer clay, a dedicated baking sheet is essential. This sheet ensures that your beads remain in their desired shape and don't stick during the curing process. It's recommended to use a sheet specifically for crafting, separate from your kitchenware, to avoid any cross-contamination.
Oven
An essential component of working with polymer clay, the oven serves to cure or harden your beads. Proper curing ensures that your beads become durable and long-lasting. Some crafters opt for a dedicated craft oven or toaster oven, but a regular kitchen oven works well too. Just ensure you closely follow the manufacturer's recommended baking times and temperatures for the specific clay you're using beaded bracelets with elastic cord.
Varnish or Sealant
Once your beads are shaped, detailed, and cured, a finishing touch is often needed. A varnish or sealant serves two primary purposes:
- Aesthetics: It provides a glossy or matte finish based on your preference, enhancing the bead's visual appeal.
- Protection: A good-quality sealant protects your bead from moisture, UV light, and wear and tear, ensuring that your creations maintain their beauty for years to come.
Additional Materials to Consider:
- Work Surface: A clean, non-stick surface, such as a ceramic tile or acrylic sheet, is helpful when rolling and shaping your clay.
- Rolling Tool or Pasta Machine: For achieving consistent and smooth sheets of clay.
- Cutters: These can be used for creating beads of consistent sizes or unique shapes.
- Texture Sheets or Stamps: For adding patterns and textures to your beads.
Step-by-step Guide to Creating Polymer Clay Beads
Step 1: Preparing and Conditioning the Clay
Before you start, ensure your workspace is clean to avoid any unwanted particles getting embedded into the clay. Take the polymer clay and begin to knead it between your fingers. The conditioning process ensures the clay becomes soft, pliable, and easier to shape. Depending on the brand and age of the clay, this might take a few minutes.
Step 2: Molding Your Bead
With the conditioned clay, start shaping it into your preferred bead design. While traditional beads are spherical, you can experiment with different forms like cylinders, teardrops, or even more intricate designs like flowers, hearts, or abstract shapes. The beauty of polymer clay is in its versatility, so let your imagination guide you.
Step 3: Enhancing with Designs
To elevate the look of your bead, use various tools, textures, or stamps to imprint patterns onto the surface. You can also employ techniques like marbling colors together, attaching small clay pieces for a 3D effect, or delicately carving designs into the bead. Some artists also use mica powders or inks for added visual appeal DIY basically beaded jewelry kit stmt.
Step 4: Piercing the Bead
For your bead to be functional, it needs a hole. Using a thin needle, skewer, or specialized beading tool, carefully pierce a hole through the center of the bead. Rotate the tool to ensure the hole is smooth and free from obstructions. The size of the hole should be adequate for the type of thread or string you plan to use.
Step 5: Baking the Beads
Preheat your oven according to the polymer clay's package instructions. Place your beads on a parchment-lined baking sheet, ensuring they're spaced apart to prevent them from sticking together. Bake typically at 275°F (130°C) for 15-30 minutes, but this can vary depending on the clay brand and the bead's size. It's crucial not to overbake, as this can make the beads brittle.
Step 6: Finishing Touches
After baking, remove the beads and let them cool completely on a wire rack. This cooling process can take an hour or more. Once they're cool to the touch, consider applying a coat of varnish or sealant. This not only gives the bead a glossy, polished appearance but also offers a layer of protection against wear and tear.
Tips for Designing Unique DIY Beads
Artful Color Blending
One of the easiest ways to elevate the look of your beads is by playing with color. Instead of sticking to single-hued beads, mix and match different shades of clay. By kneading them together lightly, you can achieve a stunning gradient effect. For a more dramatic look, fold and twist contrasting colors to attain a marbled appearance. The possibilities are endless – from subtle pastels to bold and vibrant combinations.
Innovative Texture Techniques
Textures can add depth and character to your beads. You don't necessarily need specialized tools for this:
- Toothpicks can create fine lines, dots, or intricate patterns.
- Lace or mesh fabric pressed against the clay leaves a beautiful, delicate imprint.
- Rubber stamps or even everyday items like bottle caps, buttons, or leaves can be used to create unique impressions on the clay surface.
Diverse Size Offerings
Variety is key to making your bead designs stand out. Consider crafting beads in multiple sizes and shapes. Tiny beads can be perfect as spacers in jewelry, medium-sized ones as the main attraction, and larger beads can serve as statement pieces or focal points in necklaces or bracelets.
Push Boundaries with Experimentation
The world of DIY bead-making is vast and limitless. Beyond the basic techniques, challenge yourself to discover new forms and designs. Perhaps you want to mold the clay into shapes that mimic natural gemstones, or maybe you wish to incorporate other materials like metal foils, glitters, or resin.
Don't be confined to traditional methods or designs. Remember, each experiment, whether successful or not, teaches you something new and brings you one step closer to crafting your masterpiece.
Continuous Learning
Stay updated with the latest trends in bead-making by joining workshops, reading magazines, or engaging in online crafting communities. You'll find inspiration from fellow artisans, and by sharing your creations, you can also receive feedback to further refine your skills.
Personal Inspiration
Each bead can tell a story. Draw inspiration from personal experiences, memories, or places you've visited. Perhaps the azure blue of a bead reminds you of the sea on a summer vacation, or a multi-colored one mimics the hues of a sunset you once witnessed. Let your life experiences guide your artistic journey.
Caring for Your Custom Beads
Optimal Storage Conditions
Your custom beads are not just mere accessories; they're artistic creations that deserve the utmost care. Storing them in a cool, dry place is essential. Excess humidity can affect certain materials, causing them to degrade or alter in appearance. A controlled environment ensures that the bead's structure remains intact and its vibrant colors stay preserved. Consider using storage boxes with individual compartments or soft pouches to prevent scratches and ensure they don't rub against each other.
Gentle Cleaning Techniques
Over time, your beads may accumulate dirt, dust, or oils from the skin. When cleaning them, always opt for the gentlest method. Use a soft, lint-free cloth to wipe away any surface dirt. If deeper cleaning is required, dampen the cloth with a mixture of mild soapy water. Ensure the soap is free from harsh chemicals that could damage the bead’s surface. After cleaning, always wipe the beads with a dry cloth to remove any moisture.
Safeguarding from Sunlight
Just like many other materials, prolonged exposure to direct sunlight can have adverse effects on your beads, especially if they're made from organic materials or certain dyes. UV rays can cause the colors of your beads to fade or change over time. This is particularly true for vibrant or dark colors. Ensure that when you're not wearing or using the beads, they're stored away from windows or places where they might sit in direct sunlight.
Avoiding Chemical Exposures
Keep your custom beads away from chemicals such as perfumes, lotions, or hairspray. These can cause a reaction with some bead materials, leading to discoloration, dullness, or even structural damage. If you're wearing jewelry made from your custom beads, always apply personal care products first and allow them to dry before putting on the jewelry.
Periodic Inspection
Regularly inspect your custom beads for any signs of wear or damage. This can be particularly important if they're strung on jewelry pieces. The threads or wires can wear out over time, and catching this early can prevent potential loss or damage to the beads.
Handling with Care
Remember that some custom beads, especially those made of delicate materials, can be fragile. Handle them with care to prevent chipping or breaking. When wearing, putting on, or taking off jewelry made from your custom beads, do so gently and deliberately.
FAQs about DIY Beads
1. What are DIY beads?
DIY beads, or “Do It Yourself” beads, are beads that individuals craft themselves, allowing for complete customization in terms of size, shape, design, and materials.
2. Why should I consider making my own beads?
Making your own beads offers several benefits, including unique designs, cost-effectiveness, a personal touch to jewelry, therapeutic relaxation, environmentally friendly choices, customization options, and skill development.
3. What materials do I need to make polymer clay beads?
Key materials include polymer clay, a needle or beading tool, baking sheet, oven, and a varnish or sealant. Additional materials might include a work surface, rolling tool, cutters, and texture sheets or stamps.
4. How do I condition polymer clay?
Conditioning involves kneading the clay between your fingers until it becomes soft and pliable, which makes it easier to shape.
5. How long do I bake polymer clay beads?
Typically, polymer clay beads are baked at 275°F (130°C) for 15-30 minutes, but it's essential to follow the manufacturer's instructions for the specific type of clay you're using to avoid overbaking.
6. Can I add colors or patterns to my beads?
Absolutely! You can blend different clay colors, create gradients, marble effects, use stamps or texture sheets, or add mica powders and inks for various designs.
7. How do I store my DIY beads?
It's best to store your beads in a cool, dry place, ideally in storage boxes with individual compartments or soft pouches to prevent scratches.
8. Can I use other materials besides polymer clay for DIY beads?
Yes, while this guide focused on polymer clay, many other materials can be used to create beads, such as glass, wood, resin, fabric, paper, and more.
9. Is making DIY beads time-consuming?
The time it takes can vary based on the complexity of the design and the materials used. However, the process can be incredibly rewarding and therapeutic, making it a worthy investment of time for many crafters.
10. Can I sell jewelry made with my DIY beads?
Certainly! If you've developed a unique style or technique, selling your handcrafted jewelry can be a great way to share your art with others and potentially turn a profit.
Conclusion
Throughout my journey into the world of DIY bead-making, I've realized that every bead, color blend, and texture isn't just about crafting; it's about capturing memories, emotions, and personal stories. The beauty of DIY beads goes beyond their physical allure; it's the soulful connection they forge between the creator and the creation.
Whether you're a seasoned crafter or just embarking on this artistic path, always remember that each bead you mold is a reflection of your passion, imagination, and individuality. Every twist, imprint, and hue carries a piece of you, making your jewelry not just a fashion statement, but a narrative of your creative journey. So, let every bead you craft resonate with the love and care you pour into it, making it a timeless keepsake for you or someone special in your life. Happy beading!
Sources
https://www.ncbi.nlm.nih.gov/pmc/articles/PMC8792394/
https://www.canr.msu.edu/resources/crafts-around-the-world-series-africa-paper-beads
https://www.bath.ac.uk/case-studies/scientists-make-biodegradable-microbeads-from-cellulose/