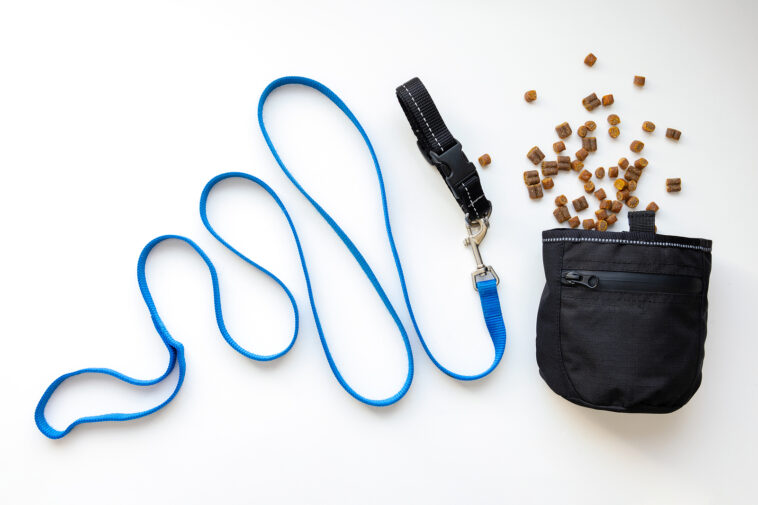
Being a pet owner comes with its unique set of joys and responsibilities. One of these responsibilities is treating our furry friends with delicious snacks and rewards. Whether it's for training purposes, walks, or just bonding time, having a convenient and stylish DIY treat pouch can enhance the experience for both you and your pet.
In this extensive guide, we'll delve deep into the world of DIY treat pouches, highlighting their significance, and offering creative and practical ideas to craft your personalized pouch. If you're a dedicated pet lover looking to add a dash of convenience and flair to your daily routines, you're in the right place.
The Importance of a Treat Pouch
Before we dive into the exciting world of DIY treat pouches, it's crucial to understand why these nifty accessories are indispensable for pet owners.
Efficient Training
Effective pet training relies on consistency and immediate reinforcement. A treat pouch allows you to keep treats at your fingertips, making it easier to reward positive behaviors promptly and address any undesirable ones.
When you're teaching your dog new tricks or working on obedience, having quick access to rewards can significantly speed up the learning process. Your pet will quickly associate good behavior with treats, and this positive reinforcement can lead to better results in a shorter time.
Hands-Free Convenience
Picture this: you're out on a walk with your dog, and you need both hands for managing the leash, opening gates, or even just keeping your balance. Instead of juggling a bag of treats or fumbling through pockets, a treat pouch securely fastened to your waist or belt allows you to be completely hands-free.
Whether you're hiking, running, or simply enjoying a leisurely stroll, having your treats within easy reach ensures that you can reward your pet swiftly without any hassle. This not only makes your outings more enjoyable but also enhances the safety and control you have over your pet.
Prevents Overfeeding
It's easy to get carried away with treating our pets, especially when they give us those irresistible puppy eyes. However, overfeeding can lead to weight issues and health problems down the road. A designated treat pouch helps you manage portion sizes and prevents you from accidentally overindulging your furry friend.
By preloading your pouch with a specific number of treats, you can keep track of how many you've given and ensure that your pet enjoys a balanced diet. This is particularly important for pets with dietary restrictions or weight management concerns.
Stylish Accessory
While functionality is paramount, a well-designed treat pouch can also double as a stylish accessory. Who says you can't look chic while taking care of your pet? With a plethora of designs, colors, and materials to choose from, you can find a treat pouch that complements your outfit and adds a touch of fashion to your pet outings.
Many pet owners take pride in coordinating their pet accessories, and a stylish treat pouch can be the perfect addition to your pet's wardrobe. Plus, it's a conversation starter – you can share your DIY creation with fellow pet enthusiasts!
Now that we've established the significance of a treat pouch, let's explore some exciting DIY options that you can try.
Creative DIY Treat Pouch Ideas
The Classic Fanny Pack
A classic fanny pack can be easily transformed into a versatile treat pouch with just a few modifications. Let's go through the steps in detail.
Materials Needed:
- A fanny pack
- Fabric paint or patches (optional)
- Ziplock bags or small containers
Step-by-Step Guide:
- Prepare the Fanny Pack: Start by cleaning and emptying the fanny pack. Ensure that it's in good condition and free from any debris.
- Personalize Your Pouch: This step is entirely optional but can add a unique touch to your treat pouch. You can use fabric paint to create custom designs or attach patches that reflect your pet's personality.
- Organize Treat Storage: Inside the fanny pack, consider using Ziplock bags or small containers to keep the treats securely in place. This prevents them from spilling or getting crushed during your adventures.
- Adjust the Fit: Most fanny packs come with adjustable waistbands, allowing you to find the perfect fit for your body. Make sure it's comfortably snug so that your treat pouch stays in place during your activities.
By following these straightforward steps, you can create a convenient and personalized treat pouch using a classic fanny pack.
Read also our post on Doghouse DIY
DIY Belt Pouch
Crafting a belt pouch from scratch offers complete creative control over the design and functionality of your treat pouch. Here's a more detailed guide on how to go about it.
Materials Needed:
- Sturdy fabric or leather
- Sewing machine or needle and thread
- Zipper or Velcro
- Belt or adjustable strap
- D-rings
Step-by-Step Guide:
- Choose Your Fabric: Begin by selecting a sturdy fabric or leather material that will serve as the foundation for your treat pouch. Consider the durability and aesthetics of the material when making your choice.
- Cut and Prepare the Fabric: Cut the chosen material into a rectangular shape, ensuring that it's large enough to comfortably hold an ample supply of treats. You'll need two identical pieces for the front and back of your pouch.
- Sew the Sides: Using a sewing machine or needle and thread, stitch up the sides of the fabric, leaving the top open. This forms the basic structure of your pouch.
- Add Closure: Decide on the type of closure you prefer – a zipper or Velcro works well. Attach it to the top opening of your pouch to ensure that the treats stay secure.
- Incorporate D-rings: To make your pouch wearable, attach D-rings to the back of the pouch. These rings will allow you to thread a belt or an adjustable strap through, ensuring a comfortable and secure fit around your waist.
- Personalize and Accessorize: Get creative and personalize your pouch by adding decorative elements or embellishments. You can sew on patches, embroider your pet's name, or experiment with various colors to make it uniquely yours.
- Test and Fill: Before using your DIY belt pouch in action, ensure that the closure works smoothly, and the D-rings are securely attached. Once you've checked everything, load it up with your pet's favorite treats.
Now, you have a customized treat pouch that matches your style and offers hands-free convenience during your pet adventures.
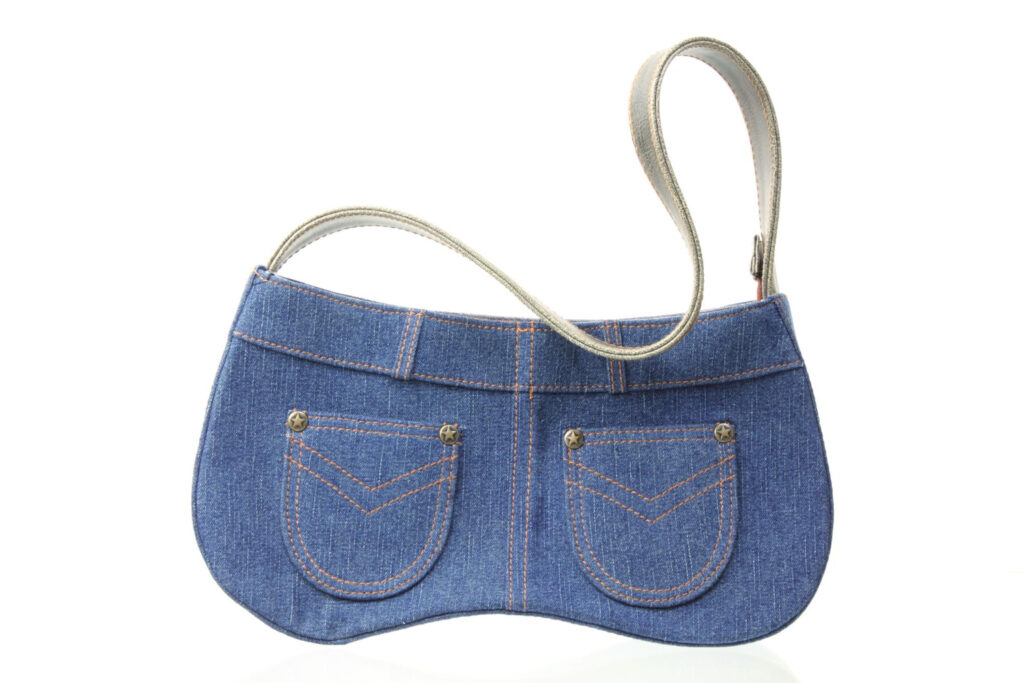
Denim Pocket Pouch
Upcycling an old pair of jeans into a treat pouch is a sustainable and trendy choice. Let's explore the step-by-step process in greater detail.
Materials Needed:
- Old jeans
- Scissors
- Sewing machine or needle and thread
- Velcro or buttons
- Decorative patches (optional)
Step-by-Step Guide:
- Select and Prepare Jeans: Choose a pair of old jeans that you no longer wear. Ensure that they are clean and free from stains or damage. Lay them flat on a surface.
- Cut the Fabric: Using scissors, carefully cut out a rectangular piece from the leg of the jeans. This will serve as the primary material for your treat pouch. The size of the fabric should be sufficient to comfortably hold your treats.
- Fold and Stitch: Fold the rectangular piece in half, with the inside of the jeans facing outwards. Using a sewing machine or needle and thread, sew up the sides of the fabric, leaving the top open. This creates the basic pouch structure.
- Choose a Closure: Decide on the type of closure you'd like for your denim pouch. You can opt for Velcro for easy access or buttons for a more rustic look. Attach the closure to the top opening.
- Add Personal Touches: This step is all about creativity! Consider adding decorative patches, embroidery, or even paint to give your denim pouch a unique and personalized appearance. You can showcase your pet's name or other fun designs.
- Attach a Belt Loop: To make your pouch wearable, sew or attach a belt loop to the back of the pouch. This loop will allow you to slide your belt or an adjustable strap through.
- Fill and Test: Before taking your denim pocket pouch on your pet adventures, ensure that the closure functions correctly and that the belt loop is secure. Finally, load it up with your pet's treats, and you're ready to go!
Creating a denim pocket pouch not only helps you repurpose old clothing but also adds a touch of eco-friendliness to your pet accessory collection.
Pouch with Built-in Poop Bag Dispenser
Why settle for just a treat pouch when you can combine functionality with convenience? Adding a built-in poop bag dispenser to your pouch is a brilliant idea for pet owners who value efficiency. Here's a more detailed guide on how to create this multitasking pouch.
Materials Needed:
- Sturdy fabric
- Sewing machine or needle and thread
- Zipper
- Poop bag roll
- Carabiner or clip
Step-by-Step Guide:
- Select Your Fabric: Start by choosing a sturdy fabric that can withstand the wear and tear of outdoor adventures. Consider a material that's easy to clean and maintain.
- Create Two Pouches: You'll need two separate pouches for this design – one for treats and one for poop bags. Cut two rectangular pieces of fabric, with one being larger than the other to accommodate the poop bag roll.
- Sew the Treat Pouch: Begin by sewing the larger fabric piece into a treat pouch, following similar steps as mentioned in the DIY belt pouch section. Make sure to leave the top open for easy access.
- Add a Zipper: Attach a zipper to the top of the poop bag dispenser pouch. This will allow you to load and access the poop bags conveniently.
- Insert Poop Bag Roll: Slide a poop bag roll into the dispenser pouch. Ensure that it's securely in place and easily accessible when needed.
- Attach a Carabiner or Clip: To make your pouch portable and easy to attach to your belt or leash, add a carabiner or clip to the dispenser pouch. This way, you can clip it on when you're on the go.
- Secure Both Pouches Together: Attach the treat pouch and poop bag dispenser pouch together, making sure they're secure and won't separate during use.
By following these steps, you'll have a treat pouch that not only carries your pet's favorite snacks but also ensures you're prepared for clean-up duty during walks and outings.
Choosing the Right Material for Your DIY Treat Pouch
When it comes to creating your DIY treat pouch, one of the critical decisions you'll face is selecting the appropriate material. The material you choose not only affects the durability of your pouch but also its overall look and feel.
- Fabric Options: You can opt for a variety of fabrics, ranging from cotton and canvas to more robust materials like nylon or neoprene. Consider the environment in which you'll be using your treat pouch. If you expect it to get wet or dirty frequently, a water-resistant or easy-to-clean material might be ideal.
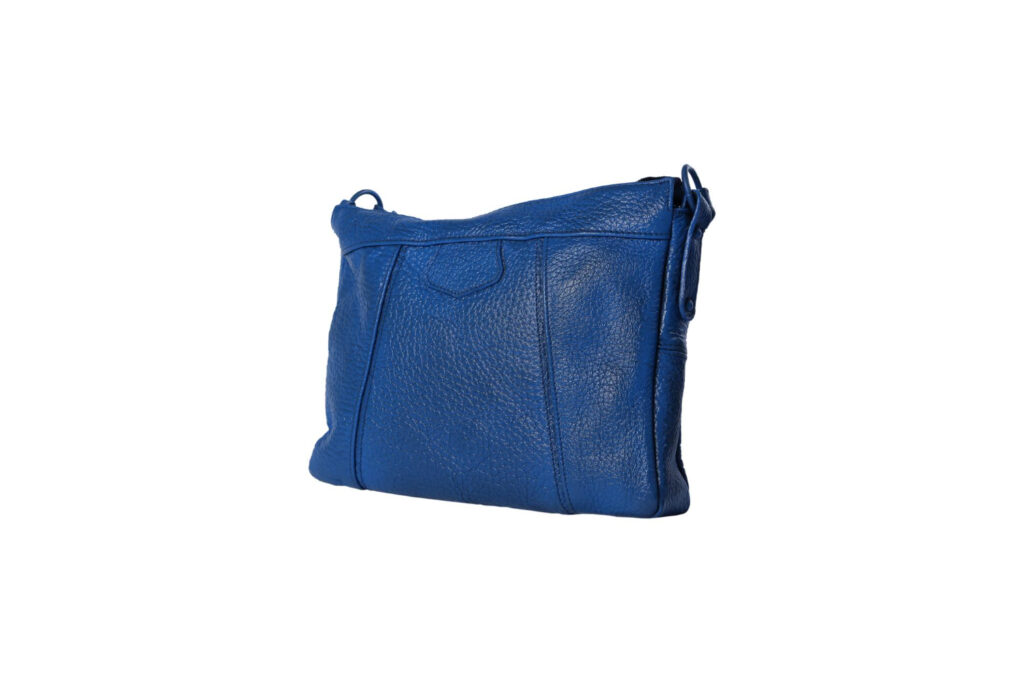
- Leather for Elegance: If you're looking to add a touch of elegance to your pouch, leather is an excellent choice. It not only looks stylish but also ages beautifully over time. Leather pouches are perfect for formal occasions or when you want to make a fashion statement.
- Reflect Your Pet's Personality: The material you choose can also reflect your pet's personality. For example, if you have a rugged, adventurous dog, a durable, weather-resistant material might suit them. On the other hand, a soft and comfortable fabric can be ideal for a more pampered pet.
- Environmental Considerations: If you're environmentally conscious, you can explore eco-friendly fabric options, such as recycled materials or organic cotton. This aligns with the trend towards sustainability and responsible consumer choices.
Remember that the material you select will impact how easy it is to clean and maintain your pouch, so choose wisely based on your pet's needs and your personal preferences.
Read also our post on DIY Dog Onesie
Adding Functional Features to Your DIY Treat Pouch
While the basic structure of a treat pouch serves the primary purpose of holding treats, you can enhance its functionality by adding some clever features.
Multiple Compartments
Consider incorporating multiple compartments within your treat pouch. This allows you to carry different types of treats or even separate treats for multiple pets. You can also include a small pocket for personal items like keys or your phone.
Treat Dispenser Mechanism
For added convenience during training sessions, you can experiment with a treat dispenser mechanism. This could be as simple as a drawstring closure that allows you to pull treats out with ease while keeping them secure when not in use.
Hydration Compatibility
If you're often on long walks or hikes with your pet, think about adding a water bottle holder to your pouch. Staying hydrated is as important for you as it is for your furry companion.
Built-in Clicker Holder
If you use a clicker as part of your training routine, consider adding a designated holder on your pouch. This ensures that you always have it within reach when needed.
Reflective or Glow-in-the-Dark Elements
For evening or early morning walks, safety is paramount. You can enhance the safety aspect of your treat pouch by incorporating reflective or glow-in-the-dark elements. This makes you and your pet more visible to others, reducing the risk of accidents.
By customizing your treat pouch with these additional features, you can make it even more functional and tailored to your specific needs.
Maintenance and Cleaning Tips for Your DIY Treat Pouch
Once you've created your perfect treat pouch, it's essential to know how to maintain and clean it effectively to ensure its longevity and hygiene.
- Regular Cleaning: Treat pouches can accumulate crumbs and residue over time. Empty your pouch after each use, removing any leftover treats or crumbs. Shake it out, if necessary, to get rid of debris.
- Spot Cleaning: For minor spills or stains, spot-clean your pouch with a damp cloth or sponge. Avoid using harsh chemicals or soaking the entire pouch unless your chosen material can handle it.
- Machine Washing: Some treat pouch materials, like cotton or canvas, are machine washable. Before tossing it in the washing machine, check the manufacturer's guidelines and remove any attached accessories or attachments.
- Leather Care: If you've opted for a leather treat pouch, maintaining its beauty is crucial. Use a leather cleaner and conditioner periodically to keep it looking its best. Avoid exposing leather to excessive moisture or direct sunlight, as this can damage it.
- Air Drying: After cleaning, always allow your pouch to air dry completely. Avoid using high heat or direct sunlight to speed up the drying process, as this can cause material damage or fading.
By following these maintenance and cleaning tips, you'll ensure that your DIY treat pouch remains in top-notch condition, ready for all your pet-related adventures.
Conclusion
In conclusion, a DIY treat pouch can be a game-changer for pet owners, providing convenience, style, and practicality all in one accessory. Crafting your own treat pouch allows you to customize it to your preferences and even gives you the opportunity to upcycle materials, contributing to a more sustainable lifestyle. The next time you embark on an adventure with your beloved pet, don't forget to bring along your personalized treat pouch.
While DIY options are fantastic and offer a sense of accomplishment, it's essential to acknowledge that there are also numerous stylish pre-made treat pouches available in the market. Whether you choose to craft your own or purchase one, the primary goal remains the same – enhancing the bond and communication between you and your pet, making training and outings more enjoyable for both parties.
Sources
https://www.fda.gov/animal-veterinary/animal-health-literacy/proper-storage-pet-food-treats
https://www.rover.com/blog/reviews/dog-treat-pouches/
https://www.agoodfeelingdogtraining.com/blog/diy-high-value-rewards-licki-pouches