Best DIY Replacement Windows
Are you thinking about improving your home, making it more energy-efficient, and increasing its overall value? Well, I've been considering a home improvement project, and I've found that DIY replacement windows can be a fantastic option that not only fits my budget but also ticks all the right boxes. In this detailed guide, I'd like to share what I've learned about DIY replacement windows.
Let's dive into the world of DIY replacement windows together. We'll explore the essential factors I've been keeping in mind while choosing the perfect windows for my project. I'll also share some of the top DIY replacement window brands I've come across during my research.
And finally, I'll walk you through a step-by-step installation guide that I plan to follow. By the end of this guide, you'll have a comprehensive understanding of DIY replacement windows, just like I do, and be well-prepared to embark on your home improvement journey.
Why Choose DIY Replacement Windows
DIY replacement windows offer homeowners several compelling reasons to undertake this project on their own:
Cost-Effectiveness
One of the most significant advantages of choosing DIY replacement windows is cost-effectiveness. By eliminating labor costs, you can allocate more of your budget to high-quality windows that enhance your home's aesthetics and energy efficiency.
Personal Satisfaction
Undertaking a DIY project can be deeply satisfying. The sense of accomplishment and pride you'll feel from completing a project that directly improves your living space is immeasurable.
Customization
DIY replacement windows put you in the driver's seat when it comes to customizing your home. You have control over the materials, style, and features, allowing you to tailor your windows to your specific preferences.
Flexibility
With a DIY approach, you can choose when to work on the project, ensuring it fits seamlessly into your schedule. This flexibility allows you to take your time, do thorough research, and make well-informed decisions throughout the process.
Factors to Consider When Selecting DIY Replacement Windows
Before you embark on your DIY replacement window project, it's crucial to understand the key factors that should guide your choices. These factors will help you select windows that not only meet your needs but also provide long-lasting benefits.
Energy Efficiency
Energy efficiency is a crucial consideration when choosing replacement windows. Energy-efficient windows can significantly impact your home's heating and cooling costs. Look for the following features:
- Energy Star ratings: Windows with the Energy Star label have been independently certified for their energy efficiency.
- Low U-factor and high R-value: The U-factor measures heat loss, and the R-value measures insulation. Opt for windows with a low U-factor and a high R-value.
- Double or triple glazing: Multiple layers of glass with inert gas between them provide better insulation.
- Low-emissivity (low-E) coatings: Low-E coatings help regulate heat transfer and UV radiation, improving energy efficiency.
Material
The material of your replacement windows plays a critical role in their durability, maintenance requirements, and overall aesthetics. Common window materials include:
- Vinyl: Vinyl windows are known for being low-maintenance, energy-efficient, and affordable.
- Wood: Wood windows offer a classic and aesthetically pleasing look but may require more maintenance, including regular painting or staining.
- Fiberglass: Fiberglass windows are durable and energy-efficient, offering a long lifespan with minimal maintenance.
- Aluminum: Aluminum windows are strong, lightweight, and corrosion-resistant. However, they are less energy-efficient.
- Composite: Composite windows combine the benefits of multiple materials, offering a good balance between durability and energy efficiency.
Style and Design
The style and design of your replacement windows should complement your home's architectural aesthetics. Consider factors such as:
- Architectural Style: Assess your home's architectural style to choose windows that seamlessly blend in or provide an appealing contrast.
- Frame Design: Determine whether you prefer a more traditional or contemporary frame design.
- Grid Patterns: Decide on grid patterns or decorative glass options, if desired.
- Color Options: Explore different color options to match or accentuate your home's exterior.
Window Type
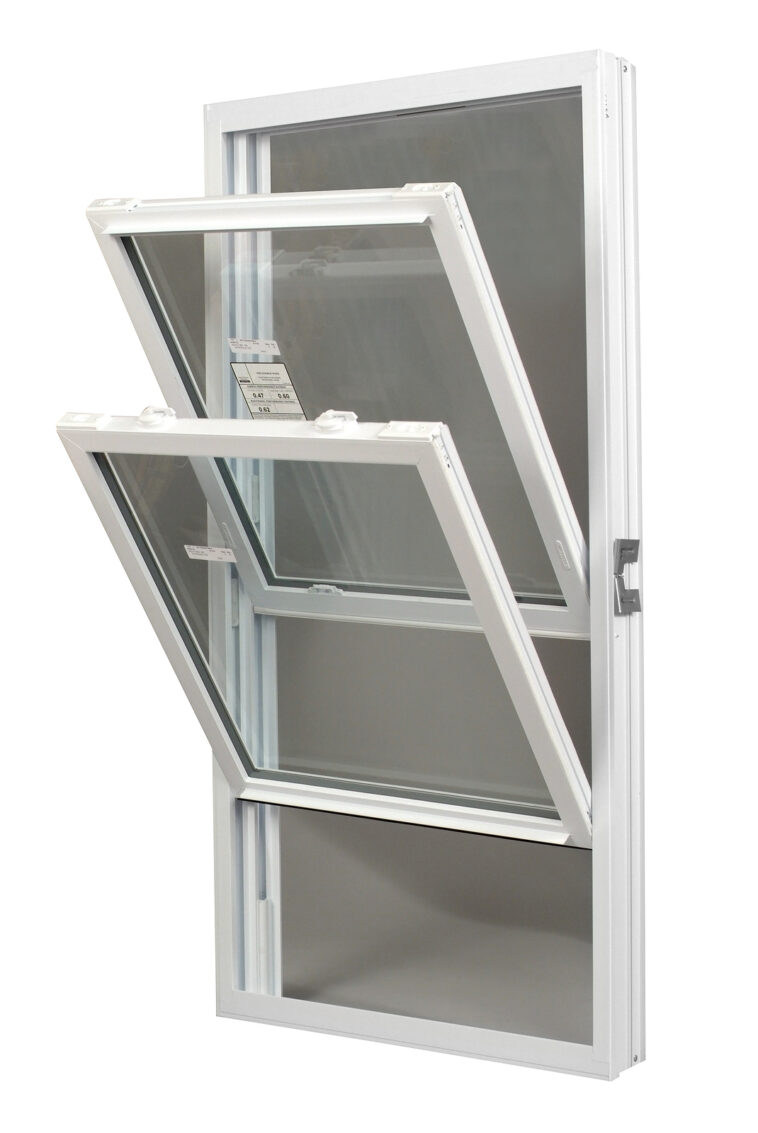
The type of window you choose depends on the function of each room and its layout. Common window types include:
- Double-Hung Windows: These windows have two vertically sliding sashes and are suitable for most rooms.
- Casement Windows: Casement windows open outward and are excellent for ventilation and unobstructed views.
- Slider Windows: Slider windows have one fixed sash and one sliding sash, making them ideal for tight spaces.
- Awning Windows: Awning windows hinge at the top and open outward from the bottom, providing excellent ventilation even during light rain.
- Picture Windows: Picture windows are fixed and provide expansive views with no ventilation.
- Bay or Bow Windows: Bay or bow windows create a charming alcove or curved space in your home, offering extra seating or display space.
- Custom Shapes: Custom-shaped windows can be designed to fit unique architectural features or design preferences.
Check out our post on DIY Window Tint Worth
Cost Comparison: DIY vs. Professional Window Replacement Which
When it comes to replacing your windows, one of the most significant decisions you'll face is whether to embark on a DIY project or hire a professional window installation service. Both options have their advantages and disadvantages, and your choice should depend on various factors, including your skills, project complexity, budget, and time constraints.
DIY Window Replacement
Pros:
- Cost Savings: DIY window replacement can be significantly more budget-friendly than hiring professionals since you're eliminating labor costs. You can allocate more of your budget to high-quality windows.
- Personal Satisfaction: There's a sense of accomplishment and pride that comes with completing a home improvement project on your own. It allows you to take full ownership of the process.
- Customization: DIY allows you to select and customize your windows according to your preferences. You have control over the materials, style, and features, ensuring they align with your vision.
- Flexibility: DIY projects allow you to choose when to work on them, accommodating your schedule and allowing you to take your time researching and making decisions.
Cons:
- Skill Requirement: Replacing windows correctly requires a certain level of DIY skill. If you're inexperienced, there can be a steep learning curve, and mistakes may increase the project's overall cost.
- Time-Consuming: DIY window replacement can be time-consuming, especially for first-timers. You'll need to invest time in measuring, ordering, and learning the installation process.
- Complexity: The complexity of the project can vary depending on factors such as the type of windows, custom sizing, and local building codes. Complex projects may not be suitable for DIYers.
- Risk of Errors: Errors in measurement, installation, or sealing can result in drafts, water leaks, and energy inefficiency. Proper installation is crucial for long-term performance.
Professional Window Replacement
Pros:
- Expertise: Professional window installers have the expertise and experience to ensure correct and efficient installation. They are well-versed in local building codes and regulations.
- Efficiency: Professionals can complete the installation quickly and efficiently, minimizing disruption to your daily life.
- Warranty Coverage: Many window manufacturers offer warranties that are contingent on professional installation. Hiring professionals can ensure that your warranty remains valid.
- Quality Assurance: Professionals have access to the necessary tools and equipment to achieve a high-quality, precise installation.
Cons:
- Higher Costs: Professional installation comes at a cost, which includes labor fees. This option may be more expensive than a DIY project.
- Less Personal Involvement: With professionals handling the project, you may have less direct control over the customization and decision-making process.
- Scheduling: You may need to align your schedule with the availability of the installation crew, which can result in some inconvenience.
- Less Personal Satisfaction: If you enjoy tackling DIY projects and take pride in your home improvements, you may miss out on the sense of personal satisfaction that comes with completing the project yourself.
Choosing Between DIY vs Professional Window Replacement
The decision between DIY and professional window replacement depends on your specific circumstances. Consider the following factors when making your choice:
- Skill Level: Assess your DIY skills honestly. If you have prior experience with home improvement projects and feel confident in your abilities, DIY may be a viable option. If not, professional installation might be a safer choice.
- Project Complexity: The complexity of the project is a crucial factor. Standard-sized, off-the-shelf windows may be suitable for DIY, while custom-sized or specialty windows may require professional installation.
- Budget: Consider your budget carefully. While DIY can save on labor costs, professionals can ensure a seamless installation that prevents future problems, potentially saving you money in the long run.
- Time and Convenience: Evaluate your availability and willingness to invest time in a DIY project. Professionals can complete the installation more efficiently, saving you time and effort.
- Local Building Codes: Familiarize yourself with local building codes and regulations. Complex projects or those requiring code compliance are better left to professionals who understand and adhere to these standards.
- Personal Preference: Ultimately, your personal preferences and the level of involvement you desire in the project play a significant role in your decision. Some homeowners take pride in handling DIY projects themselves, while others prefer the convenience of professional installation.
Top DIY Replacement Window Brands
Now that you're well-versed in the critical factors to consider, let's explore some of the top DIY replacement window brands, each known for its unique offerings, quality, and reliability.
Pella
Pella is a renowned window manufacturer that offers a wide range of window styles, materials, and customization options. Known for their commitment to energy efficiency, Pella's windows often come with high Energy Star ratings. Additionally, Pella provides innovative features and a comprehensive warranty, ensuring peace of mind for homeowners.
Andersen
Andersen windows have earned a reputation for their exceptional durability and longevity. With a variety of materials, including wood, vinyl, and fiberglass, Andersen offers solutions for every homeowner. Their patented Fibrex material combines the strength of wood with the low maintenance of vinyl, making their windows stand out in the market.
JELD-WEN
JELD-WEN is a trusted name in the window industry, known for providing affordable and stylish DIY replacement windows. They offer both vinyl and wood options, along with various design choices to suit your preferences. JELD-WEN windows are also celebrated for their ease of installation, making them a favorite among DIY enthusiasts.
Milgard
Milgard specializes in vinyl replacement windows, offering excellent energy efficiency and a wide range of customization options. Milgard's windows come with a full lifetime warranty, showcasing their commitment to quality and customer satisfaction.
Simonton
Simonton is a leading manufacturer of vinyl windows, prized for their energy efficiency and low maintenance requirements. With a range of styles and customization choices, Simonton provides homeowners with windows that combine functionality and aesthetics. Their strong warranty further reinforces the reliability of their products.
Check out our post on DIY Insulation
Installation Process Replacement Window Brands
Embarking on a DIY replacement window installation may seem intimidating, but with the right tools and step-by-step instructions, you can tackle the project successfully. Below is an extensive overview of the installation process:
Tools and Materials
Before you begin, gather the following tools and materials to ensure a smooth installation:
- Replacement windows
- Measuring tape
- Pry bar
- Screwdriver
- Caulk gun
- Insulation
- Shims
- Level
- Safety goggles and gloves
- Window trim and casing (if needed)
Measuring and Ordering Windows
Accurate measurements are paramount to a successful window replacement project. Follow these steps to ensure precise measurements:
- Measure the width and height of the window opening at three different points: the top, middle, and bottom. Record the measurements to the nearest 1/8 inch.
- If you plan to replace multiple windows, measure each one separately, as they may not all be the same size.
- Order replacement windows that match the measurements you've taken. Most window manufacturers provide sizing guides to help you select the right dimensions.
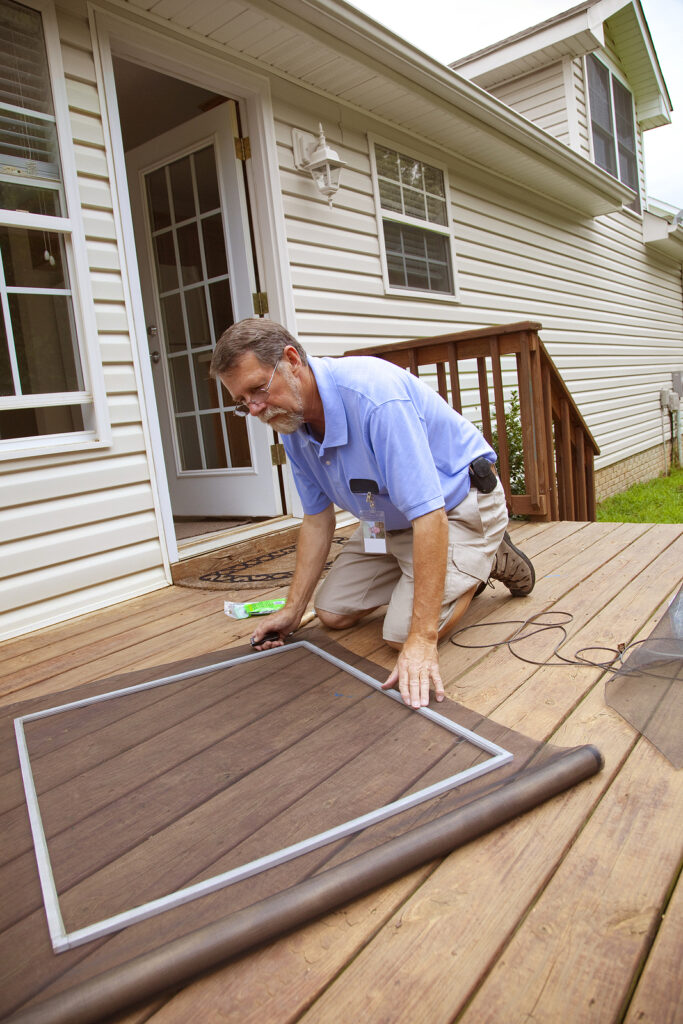
Removing Old Windows
The first step in the installation process is removing the old windows. Follow these steps for a smooth removal:
- Start by carefully removing the window trim and casing using a pry bar. Be cautious not to damage the surrounding wall.
- After removing the trim and casing, carefully remove the old window frame. You may need to use a utility knife to cut any caulk or sealant.
- Clean the opening thoroughly, removing any debris, nails, or old caulking.
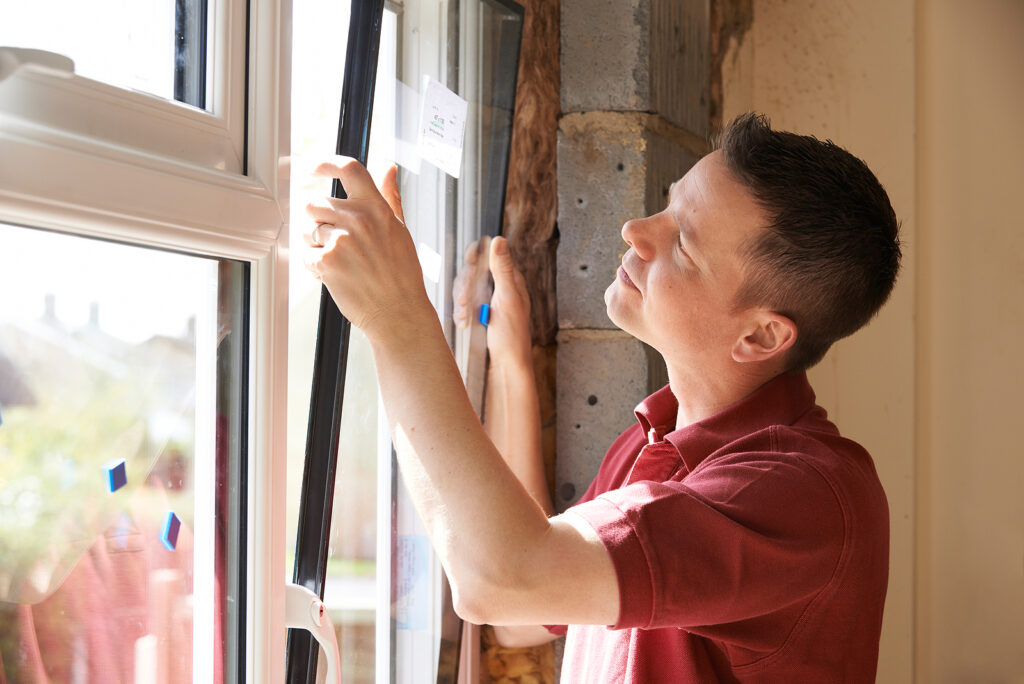
Installing New Windows
With the window opening prepped, you're ready to install your new windows. Follow these general steps:
- Apply a bead of caulk around the perimeter of the window opening. This helps create a seal to prevent drafts and moisture infiltration.
- Carefully insert the new window into the opening, ensuring it is level and square. This step is crucial for proper operation and a clean finish.
- Use shims to adjust and secure the window in place. Shims help ensure the window is level, plumb, and square. Place shims at the bottom, top, and sides as needed.
- Screw the window into the opening according to the manufacturer's guidelines. Pay attention to the recommended screw locations and ensure the window remains level during this process.
- Apply insulation between the window frame and the opening. Proper insulation is essential for energy efficiency and preventing drafts.
Sealing and Insulating
After the window is securely in place, take the following steps to seal and insulate around the window frame:
- Seal any gaps between the window frame and the opening using high-quality caulk. Ensure a continuous, airtight seal to prevent air and water infiltration.
- Insulate around the window frame with fiberglass or foam insulation. This step further enhances energy efficiency and minimizes drafts.
Finishing Touches
To complete your DIY window replacement project, follow these final steps for a polished look:
- Replace the trim and casing that you removed earlier. Use finishing nails or screws to secure them in place.
- Caulk the seams where the trim and casing meet the wall to create a seamless finish and enhance the window's weather resistance.
- Clean the window thoroughly, removing any caulk or residue. This final touch ensures your new windows look pristine.
Cost Comparison: DIY vs. Professional Installation
When considering a DIY replacement window project, it's essential to compare the costs and benefits of doing it yourself versus hiring a professional. The cost comparison between DIY and professional installation varies depending on several factors:
Skill Level
Your level of DIY expertise plays a significant role in the cost comparison. If you have prior experience with home improvement projects, you may feel confident tackling window replacement. However, if you lack experience, it's crucial to consider the learning curve and potential mistakes that could increase the project's overall cost.
Project Complexity
The complexity of the window replacement project also influences the cost. Simple, straightforward replacements with standard-sized windows may be well-suited for a DIY approach. However, more complex projects, such as custom-sized or specialty windows, may require professional installation to ensure proper fit and performance.
Type of Windows
The type of replacement windows you choose can impact the cost comparison. High-end, specialized windows may require professional installation to preserve warranties and ensure correct installation methods.
Building Codes and Regulations
Compliance with local building codes and regulations is essential when replacing windows. Professionals are well-versed in these requirements and can ensure that your project meets all necessary standards. DIYers must research and adhere to these codes, which can be time-consuming and may require additional expenses for inspections or revisions.
Time and Convenience
Consider your schedule and availability when deciding between DIY and professional installation. DIY projects require a significant time investment, while professionals can complete the job efficiently. Factor in the convenience and peace of mind of having experts handle the project.
Ultimately, the decision between DIY and professional installation depends on your individual circumstances, including your skill level, project complexity, and budget. Weigh the pros and cons carefully to make an informed choice that suits your needs.
Maintenance and Care Replacement Window Brands
To ensure that your DIY replacement windows provide long-lasting benefits and maintain their optimal performance, it's crucial to establish a comprehensive maintenance and care routine. Here, we provide detailed information and key tips on how to keep your windows in excellent condition:
Regular Cleaning
Frequent cleaning is essential to preserve the appearance and functionality of your replacement windows. Follow these steps for effective cleaning:
- Use a mild, non-abrasive detergent mixed with water to clean the window frames, sashes, and glass thoroughly. This step helps remove dirt, grime, and pollutants that accumulate over time.
- Rinse the cleaned surfaces thoroughly with clean water to ensure all detergent residue is removed.
- Dry the window surfaces using a lint-free cloth or a squeegee to prevent streaks and water spots.
- Pay special attention to cleaning and lubricating any moving parts, such as hinges, locks, or sliding tracks, as needed to ensure smooth operation. Neglecting these components can lead to operational issues.
Inspect and Replace Seals
Regularly inspect the weatherstripping and seals around your windows. These components play a critical role in preventing drafts and energy loss. Over time, they may wear out or become damaged. To maintain energy efficiency, follow these steps:
- Check the condition of the weatherstripping and seals periodically, especially after severe weather conditions.
- Promptly replace any damaged or deteriorated weatherstripping to ensure a proper seal and prevent air infiltration.
Repainting or Resealing (Wooden Frames)
If your replacement windows have wooden frames, they may require additional maintenance compared to other materials. Proper care can protect them from moisture and UV damage while enhancing their appearance:
- Inspect wooden frames regularly for signs of peeling paint, cracks, or other damage.
- Repaint or reseal wooden frames as needed to maintain their structural integrity and appearance. This step helps prevent moisture penetration and wood rot.
Addressing Condensation
Condensation on windows can be a common issue, particularly during temperature fluctuations. To address and mitigate condensation and potential moisture damage:
- Ensure proper ventilation in your home to reduce indoor humidity levels. Proper ventilation can significantly reduce the likelihood of condensation forming on your windows.
- Use a dehumidifier if necessary to control indoor humidity, especially in areas prone to excessive moisture.
- If condensation forms between double or triple-glazed windows, it may indicate a failed seal. In such cases, consult a professional to address the issue promptly and prevent further damage.
Follow the Manufacturer's Guidelines
Every window manufacturer provides specific guidelines for care and maintenance that are tailored to their products. It is essential to refer to the manufacturer's recommendations to ensure you are following the appropriate maintenance practices for your specific windows. Adhering to these guidelines can help you maintain your warranty and extend the lifespan of your replacement windows.
By diligently implementing these maintenance practices, you can significantly prolong the lifespan of your DIY replacement windows, ensuring that they continue to provide you with lasting benefits and optimal performance for years to come.
Conclusion
Choosing and installing DIY replacement windows is a significant undertaking that can enhance your home's energy efficiency, aesthetics, and overall value. By carefully considering factors such as energy efficiency, material, style, and window type, you can make informed choices that align with your preferences and needs.
Top DIY replacement window brands like Pella, Andersen, JELD-WEN, Milgard, and Simonton offer a wide range of options to suit various homeowners' preferences and budgets. Their reputations for quality and reliability make them worthy contenders for your DIY window replacement project.
It's worth noting that while DIY installation can be a fulfilling and cost-effective choice, it's not without challenges. Properly measuring, ordering, and installing windows requires attention to detail and a willingness to learn. If you're confident in your DIY skills and prepared to invest the necessary time and effort, the rewards can be substantial.
However, it's also essential to acknowledge the option of professional installation. Professional installers bring experience, expertise, and the assurance of code compliance to your project. While this route may come at a higher cost, the convenience and peace of mind it offers can be invaluable, particularly for more complex projects or homeowners with limited DIY experience.
Sources
https://bouldercolorado.gov/media/1139/download?inline
https://www.energy.gov/energysaver/update-or-replace-windows
https://www.energystar.gov/products/energy_star_home_upgrade/windows_and_storm_windows