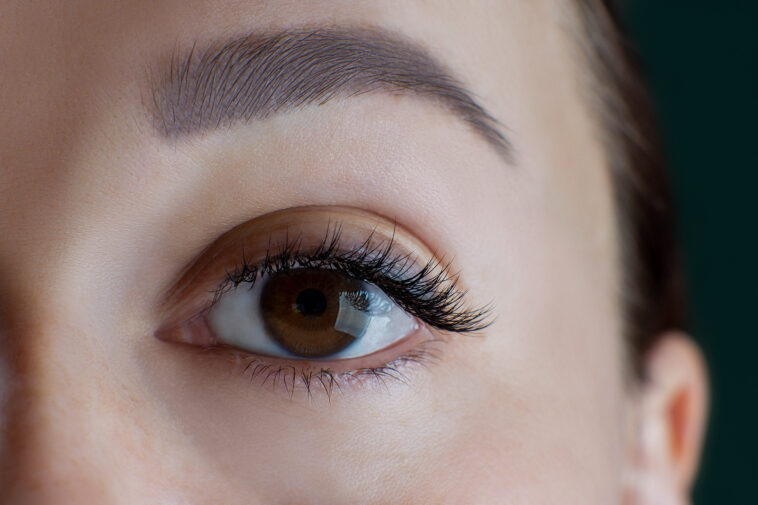
Best DIY Lash Extensions
Tired of those long hours spent at the salon just to get those perfect eyelash extensions? Well, I sure was! That's when I decided to take matters into my own hands and find a way to achieve stunning, long-lasting lashes right from the comfort of my own home.
If you're like me and want to enjoy luscious lashes without breaking the bank at the salon, you're in the right place. In this comprehensive guide, I'll walk you through the best DIY lash extensions process step by step, so you can finally say goodbye to those salon visits and hello to fabulous lashes on your own terms.
Understanding DIY Lash Extensions
Embarking on the journey of DIY lash extensions is an exciting venture, but it's imperative to gain a comprehensive understanding of this beauty practice before diving in. DIY lash extensions entail the meticulous process of attaching individual synthetic lashes to your natural ones, ultimately yielding a fuller and longer lash appearance. Here's a more in-depth look at what you should consider:
DIY vs. Professional Application
It's essential to distinguish between professional and DIY lash extensions. Professional lash extensions are administered by skilled technicians in a salon setting, while DIY lash extensions are self-applied at home. Opting for the DIY route can be cost-effective, but it necessitates a significant amount of patience and practice. Make sure you are prepared for the learning curve before choosing this path.
Variety of Lash Extension Materials
Lash extensions are available in various materials, each with its unique characteristics. These materials include synthetic, mink, and silk lashes. Synthetic lashes are a durable and budget-friendly option, while mink and silk offer a more natural look and feel. Prioritize researching these materials to determine which one aligns best with your desired outcome and preferences.
Safety Precautions
Your safety should always be a top priority when considering lash extensions. It's crucial to ensure you're not allergic to the adhesive or the lash material you plan to use. To do this, it is advisable to perform a patch test, applying a small amount of adhesive or lash material to a discreet area of your skin to check for any adverse reactions. This precautionary step can help prevent potential allergic reactions or irritations.
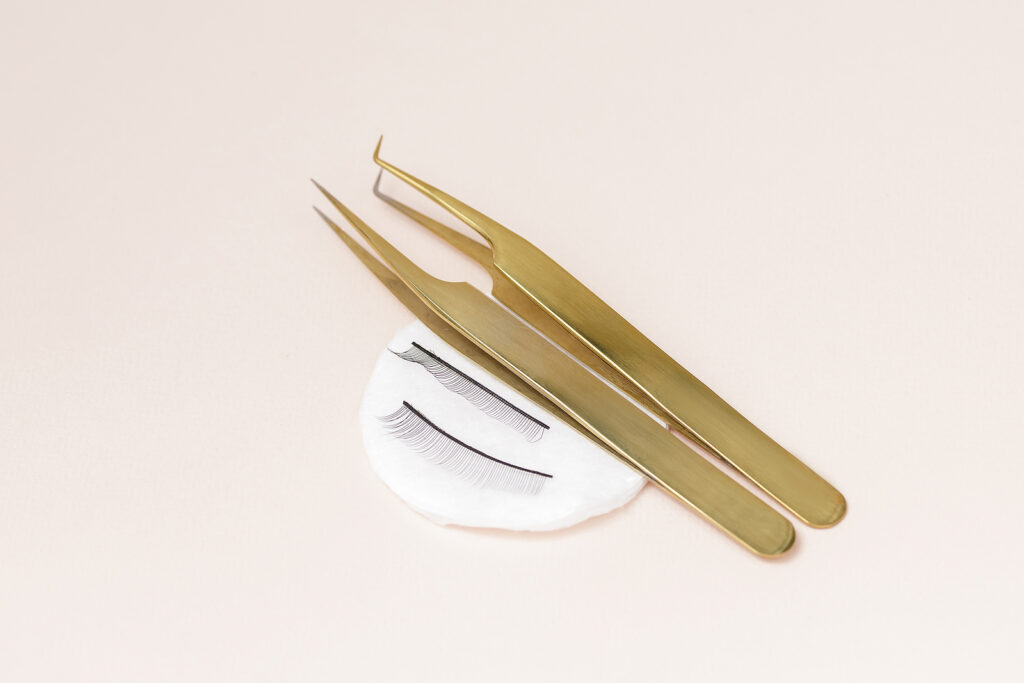
Gather Your Supplies
To embark on your DIY lash extension journey successfully, it's essential to meticulously gather all the supplies and set up your workspace. Here's an expanded checklist of what you'll need:
Eyelash Extensions: Select the type that best suits your desired look – whether it's synthetic for durability, mink for a natural feel, or silk for a balanced blend of both.
Adhesive: Ensure the adhesive you choose is latex-free, as this reduces the risk of allergies or irritations.
Tweezers: Equip yourself with fine-point and curved tweezers to handle the delicate lash extensions with precision.
Microfiber Brushes or Applicators: These tools aid in the careful placement and separation of lash extensions.
Eyelash Primer: A quality eyelash primer can enhance the longevity of your lash extensions by providing a clean base for the adhesive to bond.
Gel Eyeliner or Pencil: These are helpful for defining your lash line and creating a seamless look with your extensions.
Lash Comb: Use a lash comb to keep your extensions well-separated and perfectly groomed.
Scissors: Keep small scissors on hand for trimming lash extensions to your desired length.
Mirror: A good-quality mirror with adequate lighting is crucial for precise application.
Eye Makeup Remover: Have this ready to clean your natural lashes thoroughly before starting the application process.
Lash Adhesive Remover: In case you need to make adjustments or remove lashes, having a reliable adhesive remover is essential.
Disposable Lash Pads or Tape: These protect your lower lashes during application and help maintain a clean workspace.
Clean, Dry Workspace: Ensure your work area is free from dust, moisture, or any potential contaminants that could compromise the adhesive's effectiveness.
Prepping Your Natural Lashes
Achieving stunning DIY lash extensions begins with meticulous preparation of your natural lashes. Here's an in-depth guide to help you get your lashes ready:
Cleansing Your Lashes
Start by thoroughly cleansing your natural lashes. Remove all traces of makeup and oils using a gentle, eye-friendly makeup remover. Ensuring your lashes are impeccably clean and completely dry provides an ideal canvas for lash extension application.
Isolating Your Lashes
To prevent your upper and lower lashes from sticking together during the extension process, employ disposable lash pads or tape. These handy tools help create a clear boundary, ensuring your extensions adhere only to your upper lashes while maintaining a safe distance from the lower ones.
Trimming When Necessary
Assess the length of your lash extensions compared to your natural lashes. If any extensions are excessively long, carefully trim them to match the length of your natural lashes. This step ensures a harmonious and natural appearance once the extensions are applied.
Applying the Lash Extensions
The application phase is the pivotal moment in your DIY lash extension journey. Exercise patience and precision by adhering to these comprehensive steps:
Dipping the Extension
Begin by meticulously dipping the tip of the lash extension into the adhesive. It's vital to exercise restraint and use a minimal amount of adhesive to avoid the dreaded issue of excess glue.
Placement with Precision
Armed with fine-point tweezers, delicately place the extension on your natural lash, ensuring it is as close to the lash line as possible. Hold it steadfastly in place for a few seconds to allow the adhesive to securely bond.
Repeat and Progress
Proceed systematically by repeating the extension attachment process. Start from the inner corner of your eye and work your way outward. This methodical approach ensures a gradual and balanced enhancement of your lashes.
Maintaining Adequate Spacing
Throughout the application, maintain a small gap between each extension. This spacing is essential to prevent clumping, which can weigh down your natural lashes and potentially cause damage. The ideal result is a stunning, fluttery look that maintains the health and integrity of your natural lashes.

Maintenance and Aftercare
The allure of your DIY lash extensions can be prolonged with meticulous care. Here's an in-depth look at how to effectively maintain and ensure their longevity:
Initial Avoidance of Water
In the initial 24 hours after application, it's paramount to abstain from exposing your lash extensions to water. This grace period allows the adhesive to fully cure, ensuring a robust and long-lasting bond between your natural and synthetic lashes.
Gentle Handling
Treat your new lash extensions with tenderness. Avoid rubbing or tugging at your eyes, as this can dislodge both extensions and natural lashes. Instead, use a specialized lash comb to gently separate any crossed or clumped lashes when necessary.
Mindful Makeup Application
If you choose to wear makeup, exercise caution. Opt for oil-free makeup products, particularly around the eye area. When applying mascara, it's best to avoid direct contact with the extensions to prevent clumping and maintain their pristine appearance.
Regular Cleansing Routine
Incorporate daily cleansing into your lash extension maintenance routine. Use an eyelash extension-friendly cleanser to gently remove dirt, oil, and makeup residue. This practice not only keeps your extensions looking their best but also promotes overall eye hygiene.
Troubleshooting Common Issues
While DIY lash extensions can yield beautiful results, occasional hiccups can arise. Here's a closer look at common issues and effective troubleshooting solutions:
Clumping Lashes
Sometimes, lash extensions may stick together, creating an unnatural appearance. To address this issue, employ a lash comb with care. Gently comb through your lashes to separate any clumped extensions, restoring a more even and polished look.
Premature Lash Loss
If you notice that extensions are falling off earlier than expected, several factors may be at play. First, assess the quality of your adhesive, ensuring it's reputable and suitable for your chosen lash type. Additionally, confirm that you allowed sufficient curing time during application. Properly cured adhesive forms a robust bond, reducing the risk of premature detachment.
Allergic Reactions
In rare instances, you may experience redness, itching, or irritation associated with lash extensions. If this occurs, it's crucial to act promptly. Remove the extensions immediately, as they may be the source of the allergic reaction. Seek guidance from a dermatologist or healthcare professional to manage and alleviate any discomfort or concerns related to the reaction.
Tips for Long-Lasting Results
To maintain the allure of your DIY lash extensions for an extended duration, consider these advanced tips:
Adhesive Storage
Preserve the efficacy of your adhesive by storing it in a cool, dry place. Exposing adhesive to excessive heat or humidity can compromise its strength and shorten the lifespan of your lash extensions.
Avoid Heat and Steam
Steer clear of prolonged exposure to heat or steam, as it can weaken the adhesive bond. This means being cautious around hot showers, saunas, and steamy environments, as they can inadvertently reduce the longevity of your lash extensions.
Opt for Oil-Free Makeup Removers
Embrace oil-free makeup removers, especially when it comes to your eye area. Oil-based products can break down the adhesive, potentially causing premature lash extension loss. Choose gentle, oil-free formulas to effectively cleanse your face without compromising your extensions.
Lash Serum for Natural Lash Health
Elevate your lash game by incorporating a lash serum into your routine. These specialized products nourish and strengthen your natural lashes, promoting healthier growth. Stronger natural lashes not only enhance the overall appearance of your lash extensions but also contribute to their durability.
FAQs about Best DIY Lash Extensions
What are DIY lash extensions, and how do they differ from professional lash extensions?
DIY lash extensions involve attaching individual synthetic lashes to your natural ones at home, while professional lash extensions are applied by technicians in a salon. DIY extensions require self-application and practice, whereas professionals offer a quicker and more expert service.
What materials are lash extensions made of, and how do I choose the right type for me?
Lash extensions come in synthetic, mink, and silk materials. Synthetic lashes are durable and budget-friendly, while mink and silk offer a more natural look and feel. Choose the material that aligns with your desired outcome and preferences.
How can I ensure safety when using lash extensions at home?
Prioritize safety by performing a patch test with the adhesive or lash material to check for allergies. Use latex-free adhesive to reduce the risk of allergic reactions, and follow proper hygiene practices during application.
What supplies do I need for DIY lash extensions?
You'll need lash extensions, latex-free adhesive, tweezers, microfiber brushes, eyelash primer, gel eyeliner or pencil, lash comb, scissors, a good-quality mirror, eye makeup remover, lash adhesive remover, disposable lash pads or tape, and a clean, dry workspace.
How do I prepare my natural lashes for DIY lash extensions?
Prepare your natural lashes by cleansing them thoroughly, isolating upper and lower lashes, and trimming extensions if necessary. Clean, dry, and well-separated natural lashes provide an ideal canvas for extension application.
What's the step-by-step process for applying DIY lash extensions?
Dip the extension in adhesive, place it close to your natural lash line with tweezers, hold it for a few seconds to bond, and repeat systematically from the inner to the outer corner of your eye while maintaining adequate spacing.
How can I maintain and care for my DIY lash extensions?
Avoid water exposure in the initial 24 hours, handle them gently, use oil-free makeup products, cleanse daily with an eyelash extension-friendly cleanser, and consider lash serums for natural lash health.
What should I do if I encounter common issues like clumping lashes or premature lash loss?
To address clumping, use a lash comb with care. For premature lash loss, check the quality of your adhesive and ensure proper curing during application. If you experience allergic reactions, remove the extensions and seek advice from a healthcare professional.
How can I ensure long-lasting results with DIY lash extensions?
Store adhesive in a cool, dry place, avoid heat and steam, use oil-free makeup removers, and consider using lash serums for healthier natural lashes.
Any final tips for achieving the best results with DIY lash extensions?
Practice makes perfect, so be patient and persistent with your technique. With the right supplies and proper care, you can enjoy beautiful, long-lasting lashes without salon visits.
Conclusion
Embracing the world of DIY lash extensions has been a personal journey filled with empowerment and self-expression. It's not just about enhancing lashes; it's about breaking free from time-consuming salon visits and crafting stunning, long-lasting results from the comfort of home.
By understanding the materials, practicing safety precautions, and mastering the art of application and maintenance, I've discovered the joy of creating my own unique lash look. This DIY adventure has not only saved time and money but has also allowed me to nurture my creativity and individuality, making every day a “good lash day.” So here's to bidding farewell to the salon and welcoming the freedom of beautiful lashes on my own terms – it's a journey worth taking.
Sources
- https://www.thebrainyinsights.com/report/diy-eyelash-extension-market-12728
- https://www.ncbi.nlm.nih.gov/pmc/articles/PMC6592309/
- https://www.verifiedmarketresearch.com/product/lash-extension-market/
- https://training.gov.au/Training/Details/SHBBMUP001
- https://www.healthline.com/health/eye-health/eyelash-extensions-pros-and-cons