DIY Temporary Tattoos
I've really fallen in love with temporary tattoos lately. They've become such a trendy way to express yourself through body art without the commitment of a permanent inked design. Whether you're like me, wanting to test out a new tattoo idea before going all-in, or you simply enjoy the idea of adding a unique twist to your style, creating your own DIY temporary tattoos is a fantastic and artistic adventure.
In this detailed guide, I'll take you through the steps and share some insider tips to help you make amazing DIY temporary tattoos that not only look fantastic but also stay put for quite some time. Let's get started on this creative journey!
Understanding DIY Temporary Tattoos
What Are DIY Temporary Tattoos?
Temporary tattoos, as the name suggests, are designs or images that can be applied to the skin temporarily. Unlike permanent tattoos that require needles and ink, temporary tattoos offer a non-invasive and pain-free way to enjoy body art. They are typically created using specialized paper and adhesive that adhere to the skin for a specific duration, ranging from a few days to a couple of weeks.
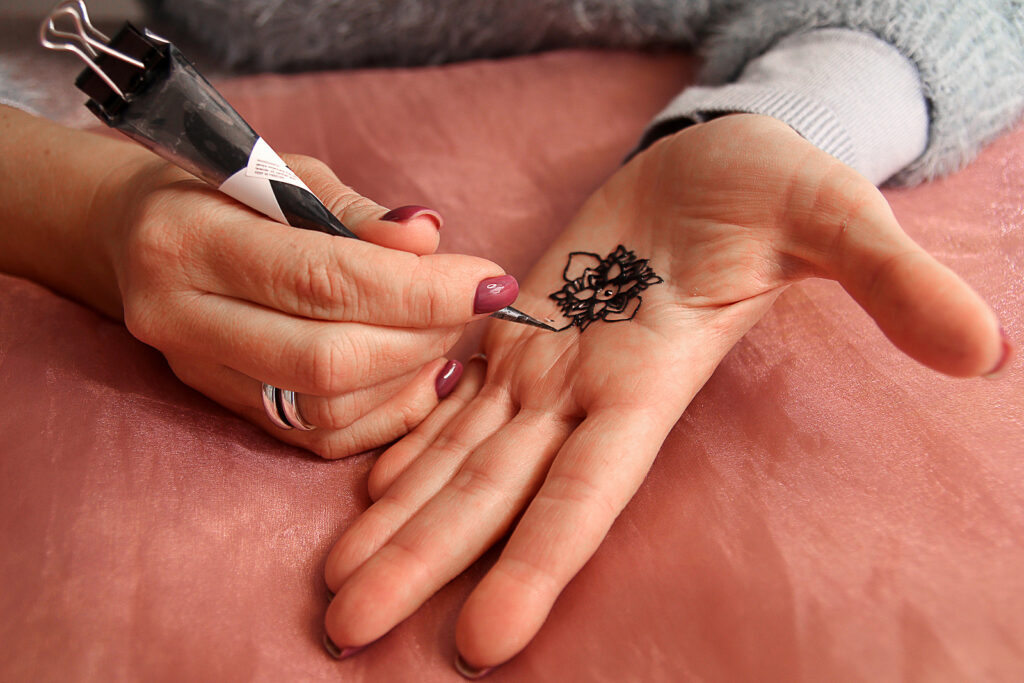
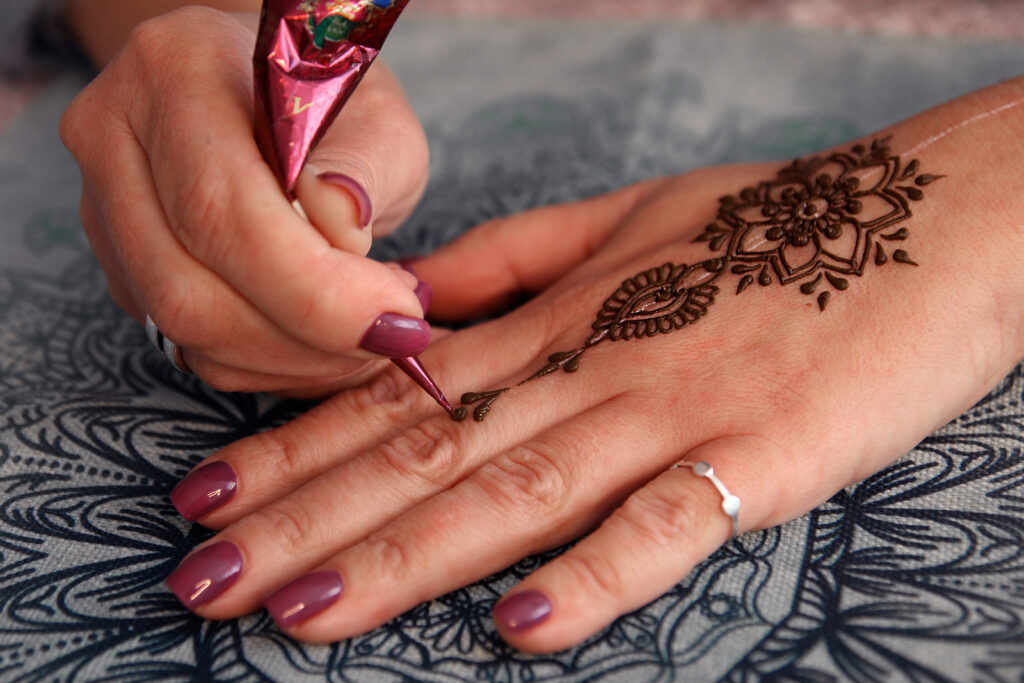
Temporary tattoos come in various forms, including water transfer tattoos, henna tattoos, and even airbrush tattoos. The beauty of these tattoos lies in their impermanence, making them perfect for those who want to experiment with different designs or simply enjoy a unique form of self-expression.
Benefits of DIY Temporary Tattoos
Creating your own DIY temporary tattoos provides several compelling advantages:
- Cost-Effective: Temporary tattoo paper and supplies are budget-friendly compared to the cost of getting a real tattoo from a professional artist.
- Customization: With DIY temporary tattoos, you have complete creative freedom to design and personalize your body art, allowing you to tailor it to your unique style and preferences.
- Temporary: Temporary tattoos are, by nature, not permanent. This means you can enjoy different designs whenever you like without a long-term commitment.
- Painless: Unlike the needle-induced discomfort of permanent tattoos, applying temporary tattoos is entirely painless, making it accessible to individuals of all ages.
- No Commitment: Temporary tattoos can be easily removed or replaced, giving you the freedom to change your body art whenever you desire.

Gathering Your Supplies
Before embarking on your journey to create DIY temporary tattoos, it's essential to gather all the necessary supplies. Ensuring you have the right materials at hand will make the process smoother and more enjoyable. Let's take a closer look at the supplies you'll need:
Temporary Tattoo Paper
At the core of your DIY temporary tattoo venture is the temporary tattoo paper. This specially designed paper allows you to transfer your chosen design effectively onto your skin. It is engineered to adhere to the skin's surface temporarily, giving you the look and feel of a real tattoo without the long-term commitment.
Temporary tattoo paper is available in various types and qualities, so be sure to choose one that suits your needs and budget. Some papers are better suited for intricate designs, while others are more durable and long-lasting.
Printer
To bring your tattoo design to life, you'll need a printer. Inkjet printers are typically recommended for this purpose, as they can produce high-quality, vibrant prints that adhere well to the temporary tattoo paper. Ensure that your printer is in good working condition and properly loaded with ink cartridges.
Image or Design
Selecting the right image or design is a crucial step in the tattoo-making process. Your choice could range from a hand-drawn sketch to a digital image, or even a piece of clip art. When selecting or creating your design, consider factors such as size, complexity, and color.
Scissors
Scissors are an essential tool for precision in the tattoo-making process. They will be used to cut out your tattoo design from the temporary tattoo paper. It's essential to have sharp, clean scissors to ensure clean edges on your tattoo.
Clear Adhesive Sheets
Clear adhesive sheets serve a dual purpose in the temporary tattoo process. They protect your tattoo design, preventing smudging and fading, and enhance its appearance. The adhesive sheets are applied over the printed design how to make diy temporary tattoos look more vibrant and last longer on your skin.
Bowl of Water
A bowl of water is a fundamental element in the application of DIY Temporary Tattoos. You'll use it to moisten the tattoo paper, facilitating the transfer of your design onto your skin.
Sponge or Cloth
To ensure a smooth and bubble-free application, you'll need a sponge or cloth. This tool helps evenly apply the tattoo and ensures that there are no air bubbles trapped beneath the surface.
Optional: Hairdryer
While not essential, a hairdryer can be a helpful addition to your tattoo-making toolkit. It can be used to expedite the drying process of your temporary tattoo once it's applied to your skin. Keep in mind that using the hairdryer on a cool or low setting is preferable to avoid discomfort or damage to the tattoo.
With your supplies gathered, you're now ready to delve deeper into the process of designing and creating your DIY temporary tattoos.
Designing Your Temporary Tattoo
Choose Your Design
The first step in your creative journey is selecting the design you want to transform into a temporary tattoo. Your design choice can be highly personal, and it might include symbols, text, or imagery that holds special meaning to you.
If you're not sure where to start, consider browsing through tattoo design websites, art books, or even consulting with a professional tattoo artist for inspiration. Remember that the success of your temporary tattoo relies on the clarity and simplicity of the design, especially if you're new to the process.
Image Editing Software
Once you've settled on a design or created your own, you may need to refine it using image editing software. Programs like Adobe Photoshop or free alternatives like GIMP can help you adjust the design's size, colors, and other elements to achieve your desired look.
Take your time during this step, as getting the design right is crucial to the final outcome of your temporary tattoo. Consider the placement of the tattoo on your body and any potential size adjustments to ensure it looks aesthetically pleasing once applied.
Sizing and Placement
As you prepare your design, consider the size and placement of your temporary tattoo on your body. Smaller tattoos are often easier to apply and tend to last longer, as they are subject to less friction and wear. Additionally, think about where you want to place the tattoo, as different body parts may require different design sizes and orientations.
Common areas for DIY temporary tattoos include:
- Forearm: This is a popular location for visible tattoos.
- Wrist: A smaller design can fit perfectly here.
- Shoulder: A larger design may be suitable for this area.
- Ankle: This location is great for smaller, discreet tattoos.
- Back: Larger designs can be showcased on your back.
With your design selected, edited, and ready for printing, it's time to move on to the next step: printing your DIY temporary tattoo.

Printing Your Temporary Tattoo
Load the Temporary Tattoo Paper
Before you print your design, carefully review the instructions provided with your chosen temporary tattoo paper. These instructions will guide you on how to load the paper correctly into your inkjet printer. Pay attention to details like which side of the paper to use and any specific printer settings recommended for optimal results.
Print Your Design
Once the temporary tattoo paper is properly loaded, proceed to print your design. To achieve the best results, configure your printer settings for high-resolution or photo-quality printing. This will ensure that your temporary tattoo looks sharp and vibrant once applied.
After printing, allow the design to dry completely before handling it. Wet ink can smudge or transfer onto your hands or other surfaces, potentially affecting the quality of your tattoo.
Preparing the Temporary Tattoo Paper
With your design successfully printed on the DIY temporary tattoos paper, it's time to prepare it for application.
Apply the Adhesive Sheet
To protect your tattoo design and enhance its appearance, cut a clear adhesive sheet to match the size of your printed design. Carefully apply the adhesive sheet over the printed design, taking care to avoid wrinkles, bubbles, or misalignment. This step ensures that your temporary tattoo remains vivid and durable.
Cut Out the Tattoo
Using your scissors, carefully cut out your tattoo design along its edges. Precision is key during this step, as any jagged or uneven edges could affect the final look and longevity of your temporary tattoo. Take your time and make clean, precise cuts.
Remove the Backing
After cutting out your tattoo design, gently peel off the backing from the adhesive sheet, leaving your tattoo design attached to the transparent adhesive. At this point, your DIY temporary tattoo is ready for application, and it should look vibrant and well-protected.

Applying Your DIY Temporary Tattoo
With your prepared DIY temporary tattoos at the ready, it's time to apply it to your skin. Follow these steps carefully for the best results:
Clean and Dry the Skin
Begin by thoroughly cleaning the area of your skin where you plan to apply the tattoo. Use mild soap and warm water to remove any dirt, oils, or lotions from the skin's surface. Afterward, pat the skin dry with a clean cloth to ensure it's completely dry before proceeding.
Position the Tattoo
Carefully place the tattoo design face down on your cleaned and dried skin in the desired location. Take your time to ensure that the tattoo is positioned correctly, as moving it once it makes contact with your skin may smudge the design.
Apply Water
Using a sponge or cloth, moisten the back of the temporary tattoo paper with water. Ensure that the entire design is evenly moistened, as this will facilitate the transfer of the design onto your skin.
Remove the Paper
Gently peel off the paper backing from the temporary tattoo. As you do this, be sure to apply consistent and gentle pressure to ensure that the inked design effectively transfers onto your skin. If any part of the design does not transfer, you can press it back down and apply more water as needed.
Allow to Dry
Once you've successfully removed the paper backing, allow your temporary tattoo to air dry on your skin. Typically, this process takes a few minutes. However, if you're in a hurry or prefer a quicker drying time, you can use a hairdryer on the cool or low setting to gently dry the tattoo. Be cautious not to use high heat, as it may cause discomfort or damage to the tattoo.
Maintaining Your DIY Temporary Tattoos
To ensure that your DIY temporary tattoo looks great and lasts as long as possible, it's crucial to take proper care of it. Here are some maintenance tips to keep in mind:
Avoid Abrasion
While your temporary tattoo is designed to be relatively durable, it's not impervious to wear and tear. Be mindful of activities that may cause friction or abrasion to the tattooed area. Tight clothing, heavy backpacks, or excessive rubbing can lead to premature fading or peeling.
Consider covering the tattooed area with clothing or a bandage if you anticipate activities that could be rough on your skin. This precaution will help preserve the integrity of your temporary tattoo.
Keep It Dry
While DIY temporary tattoos are water-resistant, excessive exposure to water can lead to fading or premature peeling. Be cautious when bathing, swimming, or participating in water-related activities. If the tattooed area gets wet, gently pat it dry rather than rubbing it, as this can help maintain the tattoo's longevity.
Gentle Cleansing
When cleaning the area with the DIY temporary tattoos, be gentle and use mild soap and water. Avoid vigorous scrubbing or using harsh chemicals, as these can affect the tattoo's appearance. Pat the tattooed area dry with a clean cloth after cleaning.
Removing Your Temporary Tattoo
If you decide that you want to remove your DIY temporary tattoos before it naturally fades, several methods can help you do so without causing discomfort or skin damage. Here are a few effective removal techniques to consider:
Use Baby Oil
One of the gentlest methods for removing a temporary tattoo is to apply a small amount of baby oil to the tattooed area. Gently rub the oil into the tattoo using a cotton ball or a soft cloth. The oil helps loosen the adhesive, making it easier to peel off the tattoo.
Rubbing Alcohol
Rubbing alcohol can also effectively remove a temporary tattoo. To use this method, apply a small amount of alcohol to a cotton ball and gently rub it over the tattoo. As the alcohol interacts with the adhesive, it should start to lift the tattoo off your skin.
Soap and Water
For those who prefer a gradual removal process, you can soak the tattooed area in warm, soapy water and gently rub it until the tattoo begins to peel away. This method takes a bit more time but can be less abrasive on the skin.
It's important to note that DIY temporary tattoos naturally fade and wear off over time, so these removal methods may not be necessary if you're willing to wait. Additionally, the ease of removal may vary depending on the type of temporary tattoo paper and adhesive used.

Tips and Best Practices
As you embark on your journey to create and maintain your DIY temporary tattoos, consider the following tips and best practices:
Test Before Applying
Before applying your design to your skin, it's a good practice to test it on a small, inconspicuous area. This allows you to ensure that you are satisfied with the results and that you do not experience any adverse reactions to the adhesive or ink.
Customize for Skin Tone
To make your DIY temporary tattoos look as realistic as possible, especially if it includes text or light colors, consider printing it in a color that matches your skin tone. This can help the tattoo blend seamlessly with your natural skin color.
Experiment with Colors
One of the advantages of DIY temporary tattoos is the ability to experiment with various colors and designs that you may not be willing to commit to permanently. Have fun with your creations, explore different color palettes, and express your unique style.
Store Your Tattoos Properly
If you have extra DIY temporary tattoos or want to save some for later use, it's essential to store them properly. Keep them in a cool, dry place away from direct sunlight to prevent premature fading or degradation. Consider using an airtight container or sealable plastic bag to protect your tattoos from external elements.
Conclusion
My journey into the world of DIY temporary tattoos has been an incredibly rewarding and creative adventure. Discovering the allure of DIY temporary tattoos as a trendy form of self-expression has allowed me to experiment freely with designs and styles while avoiding any long-term commitments. Through this experience, I've gained a deeper understanding of the various types of temporary tattoos and their numerous benefits.
Creating my own DIY temporary tattoos has been a joyful process, from selecting and designing the perfect artwork to the meticulous application and maintenance. I've come to appreciate the artistry behind these impermanent body adornments and the freedom they offer. Plus, the ability to effortlessly remove them when I'm ready for a change is truly liberating. Overall, DIY temporary tattoos have become a cherished canvas for my creativity and a delightful means of sharing my unique style with the world, all while celebrating the beauty of impermanence.
Sources
https://www.fda.gov/cosmetics/cosmetic-products/tattoos-temporary-tattoos-permanent-makeup


