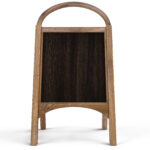
DIY Sandbag Alternatives
When it comes to my fitness journey and strength training, having the right equipment is absolutely crucial. I've always been interested in incorporating sandbags into my workouts, but I've found that they can be quite expensive and sometimes challenging to find. Thankfully, I've discovered a fantastic solution in the form of DIY sandbag alternatives that I can easily create at home, often using materials I already have on hand.
In this comprehensive guide, I want to share my experience and insights into these homemade weight options, as they've truly been a game-changer for me. Not only have they allowed me to save money, but they also give me the opportunity to customize my workout tools to fit my specific needs. Plus, there's something incredibly satisfying about getting creative and crafting your own fitness equipment.
So, if you're like me and you're looking to elevate your fitness routine without breaking the bank, or if you simply want to add a personal touch to your workout gear, I'm here to walk you through the step-by-step instructions on how to create these fantastic homemade weights. They've got me covered, and I'm excited to share this fitness DIY journey with you!
Why Homemade Weights?
The decision to opt for homemade weights presents a multitude of benefits that extend beyond mere affordability. Let's delve deeper into why DIY sandbag alternatives are a valuable choice for your fitness regimen:
Cost-Efficiency
Gym equipment can be exorbitantly priced, and amassing a collection of DIY Sandbag Alternatives or traditional weights can strain your wallet. Crafting your weights at home is a cost-effective solution that can result in substantial savings. This financial advantage frees up resources for other essential aspects of your fitness journey, such as quality nutrition or professional training.
Customization
Homemade weights provide an unparalleled level of customization. You have the power to fine-tune the weight according to your specific preferences by simply adding or removing material. This adaptability is particularly advantageous for beginners who may need to start with lighter resistance and gradually increase the load as their strength and endurance improve.
Accessibility
Not everyone enjoys convenient access to a gym or a fitness equipment store. For those residing in remote or underserved areas, the prospect of maintaining a consistent workout routine can be challenging. By fashioning your own weights, you eliminate the need to travel or wait for access to equipment, making it possible to exercise comfortably from the confines of your home. This accessibility ensures that geographical constraints do not hinder your commitment to a healthier lifestyle.
DIY Sandbag Alternatives
Creating your own DIY sandbag alternatives can be a cost-effective and customizable way to add resistance to your workouts. Here are several DIY options to consider, each with its unique characteristics and benefits:
Water-Filled Bags
Water-filled bags are a straightforward choice for homemade weights. To make them, obtain strong plastic bags, ideally using a double-bagging method for added durability. Fill these bags with water to your desired weight level and seal them tightly. These versatile water weights can be used for a variety of exercises, and you can easily adjust the weight by adding or removing water.
Rice Bags
If you prefer a more granular feel, rice bags are an excellent option. Simply fill a sturdy cloth bag with rice and secure it tightly. One of the advantages of rice bags is their adaptability; you can effortlessly modify the weight by adjusting the amount of rice inside. This flexibility makes them suitable for different workout routines.
Duct Tape Dumbbells
Duct tape dumbbells offer a creative and visually appealing solution for enhancing your workouts. Begin with a robust wooden or plastic handle, then wrap layers of colorful duct tape around it until you reach your desired weight. Not only are duct tape dumbbells functional, but they also allow you to add a personal touch with your choice of tape colors.
Brick Weights
If you have old bricks lying around, repurpose them into homemade weights. To prevent potential damage to surfaces and make them more comfortable to handle, wrap the bricks in thick fabric or duct tape. You can easily adjust the weight by using bricks of different sizes or stacking them, providing a customizable solution.
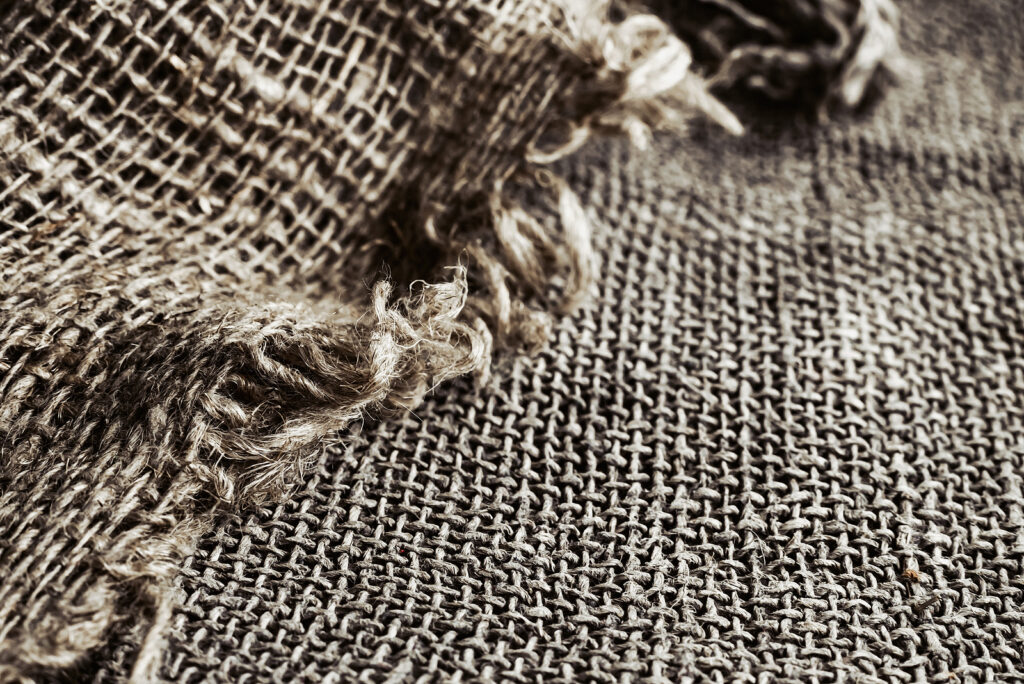
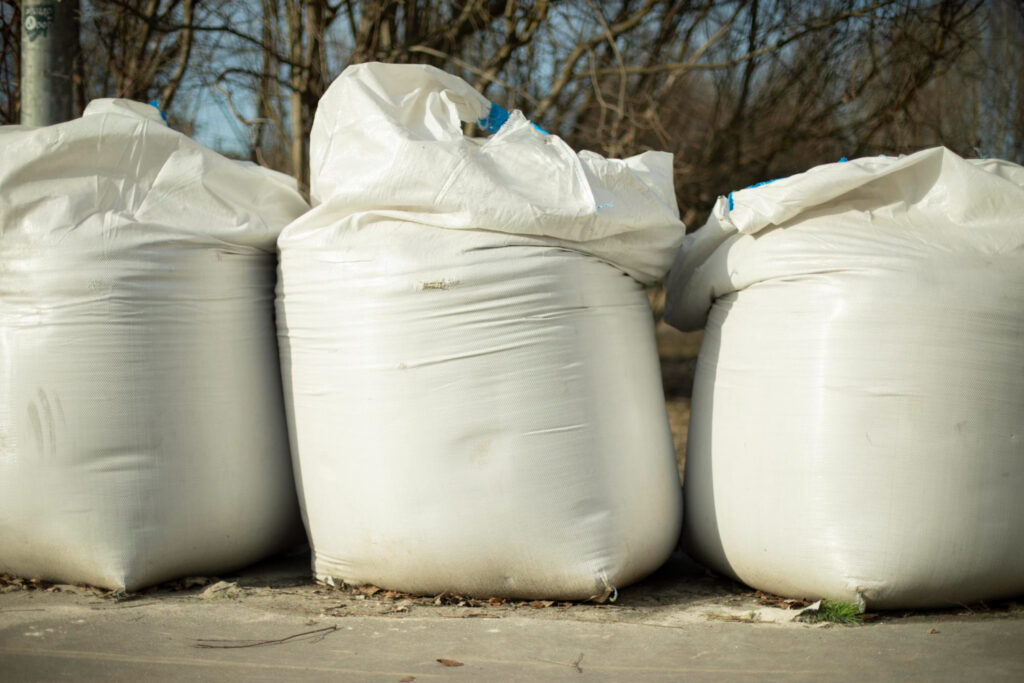
Pillowcase Sandbags
Pillowcase sandbags offer versatility and comfort. Fill a sturdy pillowcase with sand and securely tie it shut. The soft texture of the pillowcase makes it easy to grip and handle during workouts, and you can use it for a wide range of exercises.
How to Make Homemade Weights
Tools and Materials
Before embarking on your DIY weight-making project, it's crucial to gather a comprehensive list of tools and materials to ensure your homemade weights are both safe and effective. Here's a detailed rundown of what you'll need:
- Plastic Bags or Cloth Bags: These are the foundational components for creating your weights. You can use plastic bags for water-filled weights or cloth bags for other fillers like rice or sand.
- Water: If you're opting for water-filled bags, make sure you have access to a water source for filling them. You can adjust the weight by varying the amount of water you add.
- Rice: If you prefer rice bags, you'll need a sufficient quantity of rice. Rice is an excellent filler for homemade weights due to its density and easy adjustability.
- Duct Tape: For crafting duct tape dumbbells, you'll need a roll of sturdy duct tape. Duct tape offers durability and stability for your weight-building project.
- Bricks: If you plan to make brick weights, ensure you have an adequate number of bricks on hand. Bricks are a classic choice for DIY weights due to their substantial weight and availability.
- Sturdy Pillowcases: If you're considering pillowcase DIY sandbag alternatives, make sure you have durable pillowcases. These will hold the sand securely and prevent leaks.
- Scissors: A good pair of scissors is essential for cutting materials like plastic bags, cloth, and duct tape to the desired size and shape.
- Scale: To achieve precise weight measurements for your homemade weights, use a reliable scale. This will help you maintain consistency and ensure your weights meet your specific fitness goals.
Step-by-Step Instructions
Water Filled Bags
- Enhance durability by double-bagging plastic bags.
- Select one bag and fill it with water to your preferred weight.
- Seal the bags meticulously to prevent any leakage.
Rice Bags
- Opt for a robust cloth bag to withstand the weight.
- Fill the bag with rice, adjusting the quantity to achieve your desired weight.
- Seal the bag tightly, ensuring there are no openings.
Duct Tape Dumbbells
- Begin with a strong handle, such as a wooden dowel or plastic pipe.
- Layer duct tape around the handle until you reach your desired weight.
- Ensure that the layers are tightly wrapped and secure.
Brick Weights
- Wrap bricks in thick fabric or apply multiple layers of duct tape.
- Guarantee the covering is firmly secured, with no exposed edges or corners.
Pillowcase Sandbags
- Choose a durable pillowcase for this purpose.
- Fill the pillowcase with sand until you attain your desired weight.
- Tie the pillowcase securely, leaving no chance for sand to escape.
Workouts and Exercises
Now that you have your homemade weights ready, let's dive into a comprehensive range of workouts and exercises that can be seamlessly incorporated into your fitness routine. These exercises are designed to target various muscle groups and provide a well-rounded workout experience using your improvised equipment.
Full-Body Workout:
- Squats: Utilize water-filled bags or pillowcase DIY sandbag alternatives as resistance to engage your leg muscles.
- Lunges: Enhance leg strength with duct tape dumbbells or rice bags.
- Push-ups: Challenge your chest and triceps by performing push-ups with your hands resting on brick weights.
- Deadlifts: Engage your back and leg muscles by lifting water-filled bags or brick weights.
Core Strength:
- Russian Twists: Develop core stability and oblique strength using pillowcase DIY sandbag alternatives.
- Planks: Strengthen your core with added resistance by placing water-filled bags on your back.
- Leg Raises: Perform leg raises while holding duct tape dumbbells to target your lower abdominal muscles.
- Bicycle Crunches: Work on your obliques and abdominals using rice bags as resistance.
Upper Body Strength:
- Bicep Curls: Build bicep strength with duct tape dumbbells.
- Shoulder Presses: Develop shoulder muscles by lifting water-filled bags.
- Tricep Extensions: Strengthen your triceps using brick weights.
- Pull-ups: Challenge your upper body by performing pull-ups using a sturdy bar or tree branch.
Lower Body Strength:
- Step-ups: Enhance lower body strength and endurance by incorporating water-filled bags or brick weights.
- Wall Sits: Test your leg endurance and core stability by holding pillowcase DIY sandbag alternatives during wall sits.
- Glute Bridges: Activate your glutes by performing glute bridges with duct tape dumbbells.
- Calf Raises: Develop calf muscles with water-filled bags as resistance during calf raises.
DIY Sandbag Alternatives Safety Tips
Proper Form for Injury Prevention
Regardless of the homemade weight you choose to incorporate into your fitness routine, prioritizing proper form is paramount to prevent injuries. Engaging in exercises with correct form helps minimize the risk of strain or accidents. If you're unsure about the right technique, it's advisable to seek guidance from a certified fitness professional or utilize online tutorials to ensure you're performing exercises safely and effectively.
Gradual Progression for Improved Strength
Commence your homemade weight workouts with lighter loads and systematically increase the resistance as your strength and fitness level progress. This gradual approach to progression is vital to prevent overexertion and reduce the likelihood of straining muscles or incurring injuries. A well-structured routine will allow you to challenge your muscles safely and steadily.
Regular Inspections for Safety
Frequent inspections of your homemade weights are crucial to maintaining a safe workout environment. Check for any signs of wear and tear on the weight bags, duct tape, or coverings. Ensure that all components are securely fastened and not damaged. Promptly replace or repair any compromised parts to ensure the continued safety and effectiveness of your homemade weights during your exercise sessions. By staying vigilant and proactive, you can minimize potential hazards and enjoy a safer workout experience.
Maintenance and Longevity
Maintaining the durability and lifespan of your DIY homemade weights is crucial to ensure they remain safe and effective over time. Here is a comprehensive guide on how to care for your homemade weight alternatives:
- Proper Storage: To prevent moisture-related issues such as mold and material degradation, store your homemade weights in a dry and cool place. Avoid using them outdoors in wet or humid conditions, as exposure to moisture can compromise their integrity.
- Regular Cleaning: If your homemade weights are filled with materials like sand or rice, it's essential to be vigilant about potential pest infestations, such as insects or rodents. Periodically inspect and clean your weights to keep them free from any unwanted guests. Consider using airtight storage containers to prevent pests from accessing the filling material.
- Seal and Covering Inspection: Ensure the seals on your water-filled bags and the coverings on your other homemade weights are secure and intact. Over time, wear and tear may occur, leading to potential leaks or ruptures. Regularly check for any signs of damage and address them promptly to maintain the weights' structural integrity.
- Avoid Overloading: While customization is a significant advantage of homemade weights, it's important not to overload them with excessive materials. Overloading can put undue stress on the bags or coverings, increasing the risk of damage or rupture. Stick to recommended weight limits and guidelines for your DIY weights to ensure their longevity and safety.
The Environmental Aspect
When embarking on the journey of crafting your own weights, it's crucial to not only focus on their practical advantages but also to conscientiously examine the environmental implications of your choices. Utilizing recycled materials, such as plastic bags or repurposed old bricks, serves as a sustainable option that contributes to waste reduction. This eco-conscious approach not only minimizes your carbon footprint but also fosters a sense of responsibility towards the planet.
Moreover, the act of creating your own weights aligns with sustainable practices by reducing the demand for resource-intensive manufacturing and lowering the carbon emissions associated with transportation, often tied to commercial fitness equipment. By embracing DIY weights, you are indirectly helping to conserve natural resources and mitigate the ecological impact of conventional fitness equipment production.
Nonetheless, it's imperative to exercise responsible stewardship when your homemade weights reach the end of their usable life. Proper disposal methods must be adhered to, ensuring that materials like plastic bags and duct tape are either recycled or disposed of in an environmentally responsible manner. Old bricks should also be handled according to local regulations governing waste disposal, promoting sustainable waste management practices and safeguarding the environment for future generations.
FAQs (Frequently Asked Questions) DIY Sandbag Alternatives
1. Are homemade weights as effective as commercial gym equipment?
Yes, homemade weights can be just as effective as commercial gym equipment when used correctly. The key is to ensure that the weights you create are securely constructed and that you maintain proper form during exercises. Gradually increasing the resistance as your strength improves will help you achieve your fitness goals with homemade weights.
2. Can I adjust the weight of homemade weights?
Absolutely. One of the advantages of DIY weights is the ability to customize their weight to your preference. For water-filled bags, rice bags, and duct tape dumbbells, you can easily add or remove material to adjust the weight. This flexibility is ideal for both beginners and more experienced fitness enthusiasts.
3. Are homemade weights safe to use?
Homemade weights are safe to use when you follow proper safety guidelines, such as maintaining proper form, gradual progression, and regular inspections. It's crucial to ensure that the materials you use to create your weights are securely fastened and that there are no signs of wear and tear.
4. Can I use homemade weights for all types of exercises?
Yes, homemade weights can be used for a wide range of exercises, including strength training, resistance training, and even cardio workouts. They are versatile and can be incorporated into various exercises targeting different muscle groups.
5. How do I clean and maintain homemade weights?
Cleaning and maintaining your homemade weights is essential for their longevity. Use a damp cloth to wipe down the weights periodically. If you're using sand-filled or rice-filled bags, check for signs of pests and clean them as needed. Inspect seals and coverings for any damage and address it promptly to prevent issues.
6. What if I don't have the materials mentioned in the guide?
If you don't have the specific materials mentioned, don't worry. Be creative and resourceful. For example, you can use old clothing or fabric scraps instead of pillowcases, and you can substitute plastic bags with reusable cloth bags for water-filled options. The key is to ensure that the materials you choose are sturdy and can securely contain the weight.
7. Can I use homemade weights for advanced workouts?
Yes, homemade weights can be used for both beginner and advanced workouts. You can increase the intensity of your exercises by adding more weight or incorporating them into more complex movements. Homemade weights are adaptable and can grow with your fitness level.
8. What should I do with homemade weights that are no longer in use?
When your homemade weights are no longer in use, consider recycling or properly disposing of the materials. For materials like plastic bags and duct tape, follow local recycling guidelines. Bricks can often be reused for other purposes, such as landscaping or construction projects.
9. Are homemade weights environmentally friendly?
Creating homemade weights can be environmentally friendly, especially when you repurpose materials like plastic bags or bricks. By reducing waste and reusing items, you contribute to a more sustainable approach to fitness equipment. However, it's essential to dispose of these materials responsibly when they reach the end of their usable life.
10. Can children use homemade weights?
While children can use lightweight homemade weights under proper supervision, it's essential to ensure their safety. Make sure the weights are age-appropriate and that children are using them with the appropriate exercises and guidance. Always prioritize safety when involving children in fitness activities.
DIY Sandbag Alternatives Conclusion
In my personal fitness journey, crafting DIY sandbag alternatives has been a revelation. Beyond the financial savings, it's offered me the ability to customize my workouts precisely to my needs, making it a deeply rewarding endeavor. These homemade weights have become my trusty companions, transforming my home into a fitness sanctuary where creativity and sustainability thrive.
The satisfaction of repurposing materials and minimizing waste while enhancing my fitness has been truly gratifying. It's not just about exercising; it's about making a positive impact on both my well-being and the environment. So, for anyone seeking an affordable, adaptable, and eco-conscious approach to fitness, I wholeheartedly encourage exploring the world of DIY weights. It's a personal journey of empowerment, and it's made my path to a healthier lifestyle all the more fulfilling.
Sources
https://dem.nv.gov/uploadedfiles/demnvgov/content/Resources/Sandbag_Pamphlet.pdf
https://balranald.nsw.gov.au/wp-content/uploads/2016/11/Sandbagging-DIY-Factsheet.pdf