DIY Manual Log Splitter
Are you tired of the back-breaking, time-consuming chore of splitting logs with an axe? Or maybe you're fed up with the high costs of commercial log splitters? Well, I was in the same boat until I stumbled upon a brilliant solution that not only saved me money but also gave me a tremendous sense of accomplishment – building my very own DIY manual log splitter.
Let me take you on a journey through the step-by-step process of creating your own log splitter from scratch. I'll share all the valuable insights and tips I've learned along the way. By the time we're done here, you'll have all the knowledge you need to dive into this exciting DIY project and, like me, enjoy the rewards of both savings and satisfaction. So, let's get started!
Why Opt for a DIY Manual Log Splitter?
Before we dive headfirst into the construction process, it's essential to understand the key advantages of building your own manual log splitter:
Cost Savings: The financial benefits of a DIY approach cannot be overstated. Commercial log splitters can come with a hefty price tag, ranging from a few hundred to several thousand dollars, depending on their size and features. By constructing your own log splitter, you can drastically reduce costs while achieving the same results.
Customization: When you take the DIY route, you have the unique opportunity to customize your log splitter to meet your specific needs and preferences. Tailor its design, features, and capabilities to align perfectly with your log-splitting requirements.
Personal Satisfaction: Building a log splitter from scratch can be an immensely satisfying project. Not only will you acquire new skills and knowledge, but you'll also experience the pride and joy that come with creating a functional tool with your own two hands.
Portability: A DIY manual log splitter can be designed with portability in mind. This means you can effortlessly move it around your property or transport it to remote locations where logs need to be split, enhancing its versatility and usability.
Now that we've established the compelling reasons for building your own log splitter let's get into the detailed steps you'll need to follow to embark on this fulfilling journey.

Materials and Tools: What You'll Need
Before you roll up your sleeves and start crafting your DIY manual log splitter, it's crucial to gather all the necessary materials and tools. Having everything at your disposal will make the construction process smoother and more efficient.
Materials:
- Steel I-Beam: Your log splitter's foundation, the steel I-beam, should be sturdy and resilient. The choice of beam length and thickness will depend on your intended log splitter size and capacity.
- Hydraulic Cylinder: The heart of your log splitter, the hydraulic cylinder, must be chosen carefully. Select one with the appropriate force rating for your specific log-splitting requirements; a 20-ton hydraulic cylinder is a common choice for DIY log splitters.
- Hydraulic Pump: To power the hydraulic cylinder, you'll need a hydraulic hand pump or foot pump. Ensure it's compatible with the hydraulic cylinder you've selected.
- Control Valve: A control valve is essential for regulating the flow of hydraulic fluid. Depending on your needs, you can opt for a 2-way or 3-way valve.
- Hydraulic Hoses and Fittings: To connect the hydraulic components effectively, acquire the appropriate hydraulic hoses and fittings. Ensure they match the size and specifications of your chosen components.
- Welding Supplies: If you possess welding skills or plan to acquire them, you'll need welding equipment and supplies for assembling the frame and other structural components.
- Wheels and Axles: If portability is a priority, consider incorporating wheels and axles into your log splitter's design. This will facilitate easy movement around your property or to remote log-splitting locations.
- Wooden Beam: Your log splitter will require a hardwood beam to support the logs during splitting. Opt for a durable and robust wooden beam that can withstand the substantial pressure it will endure.
- Safety Gear: Never compromise on safety. Ensure you have welding gloves, safety glasses, and ear protection on hand to safeguard yourself during the construction process.
Tools:
- Welding Machine: If welding is part of your plan for assembling the frame, a welding machine is indispensable.
- Angle Grinder: An angle grinder equipped with cutting and grinding discs will be invaluable for shaping and smoothing edges, ensuring your log splitter's components fit together seamlessly.
- Drill: A drill is necessary for making holes in the steel frame, facilitating the assembly of hydraulic components.
- Wrenches and Socket Set: A comprehensive set of wrenches and sockets will be required for assembling the hydraulic components and ensuring secure connections.
- Measuring Tape and Marking Tools: To maintain precision throughout the construction process, use a measuring tape and marking tools to accurately measure and mark the steel beam for cutting and welding.
Now that you've gathered all your materials and tools, it's time to roll up your sleeves and dive into the step-by-step construction process of your DIY manual log splitter.
Step-by-Step Construction Guide
Step 1: Crafting Your Log Splitter Design
Before you start cutting steel or firing up the welding machine, it's imperative to create a detailed design for your log splitter. Take into consideration the following factors:
- The length and thickness of the steel I-beam frame.
- Placement of the hydraulic cylinder and pump for optimal functionality.
- Location of the control valve for easy accessibility and control.
- Selection of wheels and axles, if you desire portability.
- The height and angle at which the wooden beam will support logs during splitting.
You can either sketch out your design on paper or utilize computer-aided design (CAD) software to visualize your log splitter's layout accurately. This careful planning will serve as your roadmap throughout the construction process.
Step 2: Frame Preparation
With your design in hand, it's time to proceed to the actual construction. Begin by cutting the steel I-beam components according to your design specifications, employing either an angle grinder or a specialized metal-cutting saw. Always adhere to safety guidelines and wear the appropriate safety gear when cutting and welding. Once all frame components are cut, weld them together meticulously to form the primary structure of your log splitter.
Step 3: Incorporating Portability
If you aspire to have a portable log splitter, it's time to attach the wheels and axles to your frame. Ensure that the wheels are securely fastened and capable of supporting the combined weight of the log splitter and the logs to be split. Portability will greatly enhance the versatility and convenience of your DIY manual log splitter.
Step 4: Mounting the Hydraulic Cylinder
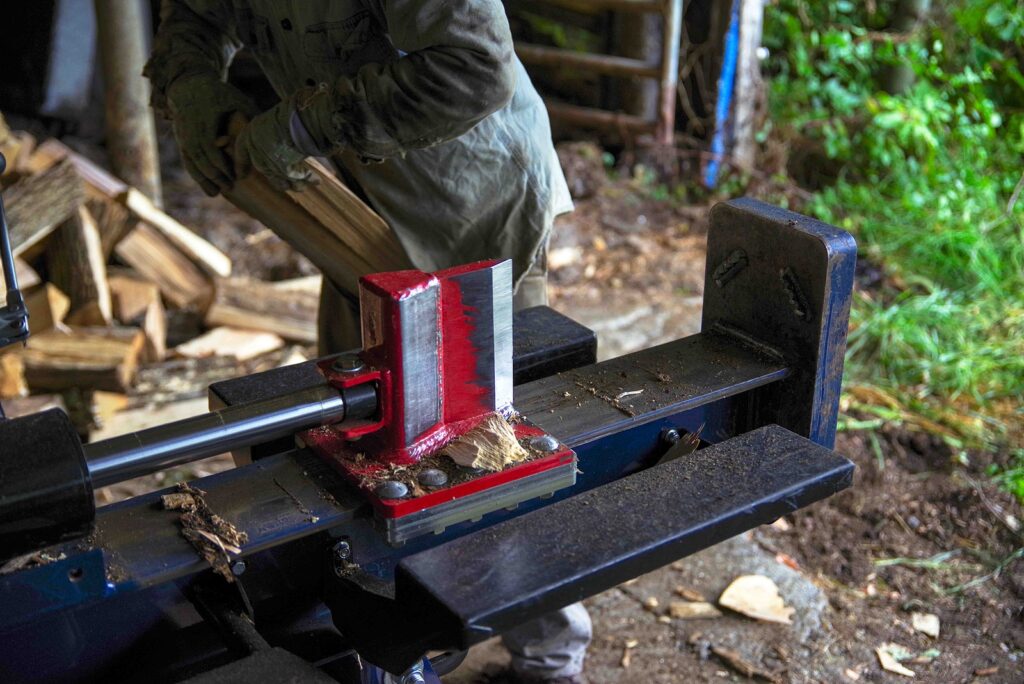
The hydraulic cylinder is the central component of your log splitter, responsible for generating the necessary force to split logs efficiently. Securely position the hydraulic cylinder on the frame, and weld brackets or plates to hold it firmly in place. Ensure that the rod end of the hydraulic cylinder faces the wooden beam; this is where the splitting force will be applied effectively.
Step 5: Hydraulic Pump and Control Valve Installation
Mount the hydraulic pump and control valve onto the frame, taking care to position them strategically for ease of access and operation. Use hydraulic hoses and fittings to create the necessary connections between the pump, valve, and cylinder. It's paramount that all connections are tightened securely to prevent leaks and ensure efficient hydraulic operation.
Step 6: Installing the Wooden Beam
The wooden beam, which will serve as the platform for supporting the logs during splitting, should be positioned on the frame so that it aligns perfectly with the rod end of the hydraulic cylinder. Secure the wooden beam firmly to the frame, ensuring it can withstand the substantial pressure it will endure during log splitting.
Step 7: Conducting a Test Run
Before you put your log splitter into full operation, it's wise to perform a test run to ensure that all components function as expected. Pump hydraulic fluid into the cylinder and closely observe how it moves the wooden beam. Look for any anomalies or issues and address them promptly through troubleshooting and necessary adjustments.
Step 8: Painting and Finishing Touches
To safeguard your log splitter from rust and corrosion, consider applying a protective coat of outdoor paint to the steel frame. This not only provides an extra layer of defense but also enhances the overall aesthetics of your log splitter, giving it a polished and professional appearance.

Safety Precautions: Protecting Yourself and Others
When embarking on the construction and operation of your DIY manual log splitter, prioritizing safety is paramount. To ensure the well-being of yourself and others involved, consider the following detailed safety precautions:
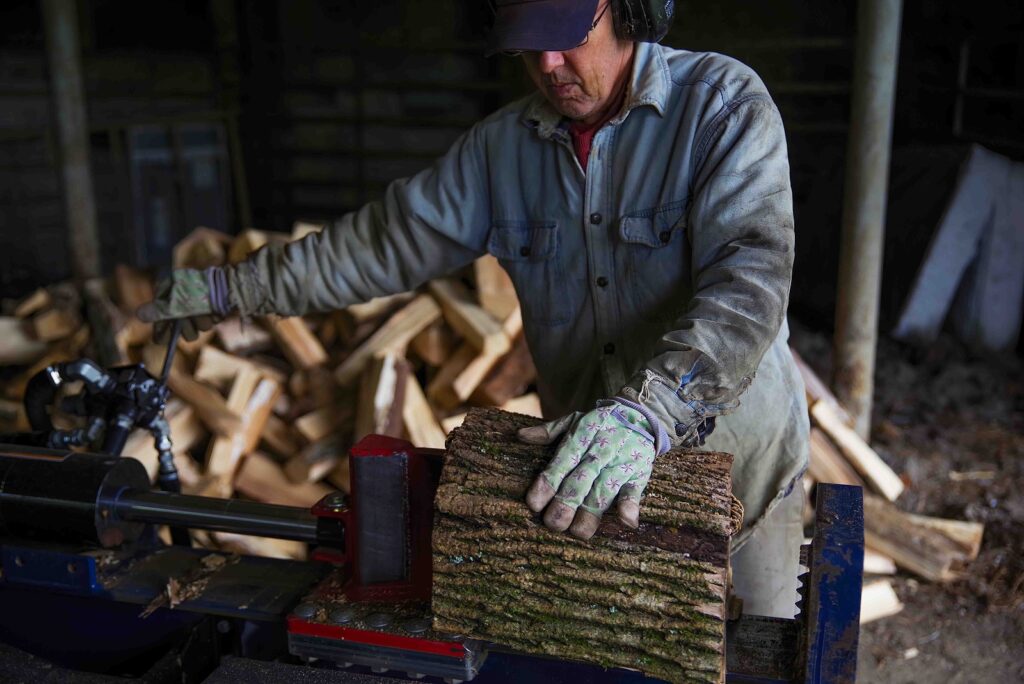
- Appropriate Safety Gear: Prior to operating or working on the log splitter, always equip yourself with the necessary safety gear. This should include welding gloves to protect your hands from heat and splinters, safety glasses to shield your eyes from debris, and ear protection to minimize the impact of loud noise generated during the splitting process.
- Maintaining Safe Distances: Maintain a safe distance from all moving parts, with particular attention to the hydraulic cylinder and the log being split. Keeping a safe distance will greatly reduce the risk of accidents or injuries caused by unexpected movements or malfunctions of the machinery.
- Adhering to Manufacturer's Instructions: Follow the manufacturer's instructions diligently, especially when dealing with hydraulic components. Regularly inspect these components for signs of wear or damage, such as leaks or weakened hydraulic hoses. Promptly address any issues to ensure the log splitter operates safely and efficiently.
- Proper Placement: Ensure that the log splitter is positioned on stable and level ground. This is crucial to prevent tipping or instability during operation, which could result in serious accidents or damage to the machine.
- Bystander Safety: When operating the log splitter, be mindful of bystanders and their safety. Maintain a designated safety zone around the equipment and keep all non-essential personnel at a safe distance. This precautionary measure will significantly reduce the risk of accidents or injuries to anyone not directly involved in the operation.
FAQs: DIY Manual Log Splitter
1. How much money can I save by building a DIY manual log splitter?
The amount of money you can save by building a DIY manual log splitter depends on various factors, including the size and complexity of your project, the cost of materials and tools, and the availability of free or salvaged components. On average, DIY manual log splitters can save you hundreds to even thousands of dollars compared to purchasing a commercial one.
2. Do I need welding skills to build a DIY log splitter?
Welding skills are beneficial when constructing a log splitter, especially if you plan to create a steel frame. While it's possible to build a log splitter without welding by using alternative methods such as bolting or clamping, welding provides a strong and durable frame. If you lack welding experience, consider learning the basics or seeking assistance from a professional welder.
3. What type of hydraulic cylinder should I choose for my log splitter?
The choice of hydraulic cylinder depends on your log-splitting requirements. A common choice for DIY manual log splitters is a 20-ton hydraulic cylinder, but the appropriate force rating may vary based on the size and density of the logs you plan to split. Ensure that the hydraulic cylinder you select is compatible with the hydraulic pump and control valve you intend to use.

4. Is it possible to make my DIY manual log splitter portable?
Yes, you can make your DIY manual log splitter portable by incorporating wheels and axles into the design. This allows for easy movement around your property or transportation to remote log-splitting locations. Select sturdy wheels capable of bearing the combined weight of the log splitter and the logs.
5. How can I ensure the safety of my DIY log splitter?
Safety is paramount when building and using a log splitter. To ensure safety:
- Always wear the appropriate safety gear, including welding gloves, safety glasses, and ear protection.
- Keep your hands and body away from moving parts, especially the hydraulic cylinder and the log being split.
- Follow the manufacturer's instructions for the hydraulic components and conduct regular inspections.
- Place the log splitter on stable and level ground to prevent tipping during operation.
- Maintain a safe distance from bystanders when operating the log splitter.
6. What types of logs can my DIY manual log splitter handle?
The capability of your DIY manual log splitter depends on its design, the force generated by the hydraulic cylinder, and the strength of the wooden beam. Most DIY Manual Log Splitter can handle a wide range of logs, including hardwoods and softwoods. However, it's essential to consider the maximum log diameter and length that your log splitter can accommodate based on its design and specifications.
7. Can I use my DIY log splitter for commercial purposes?
While DIY manual log splitters can be effective for personal use, it's important to note that they may not meet the safety and durability standards required for commercial or industrial applications. If you intend to use your log splitter for commercial purposes, it's advisable to consult local regulations and consider investing in a commercial-grade log splitter that complies with industry standards.
8. How can I maintain my DIY log splitter for optimal performance?
Regular maintenance is key to ensuring the longevity and optimal performance of your DIY manual log splitter. This includes checking and tightening hydraulic connections, lubricating moving parts, inspecting the hydraulic fluid level, and replacing worn or damaged components. Refer to the manufacturer's instructions for specific maintenance guidelines and intervals.
9. Where can I find additional resources and plans for building a DIY log splitter?
Additional resources and plans for building a DIY manual log splitter can be found online, in woodworking or DIY books, and through community forums or woodworking clubs. You can also seek inspiration and guidance from experienced DIY enthusiasts and craftsmen. Always ensure that the plans and resources you consult are reliable and safe to follow.
10. Can I modify or upgrade my DIY log splitter in the future?
Yes, you can modify or upgrade your DIY manual log splitter to enhance its performance or add new features. Common upgrades include increasing the hydraulic cylinder's force rating, improving the control system, or adding safety features. Just ensure that any modifications or upgrades are carried out carefully and that they comply with safety standards.
DIY Manual Log Splitter Conclusion
Building your own DIY manual log splitter offers a multitude of benefits, from cost savings and customization to personal satisfaction and portability. By following the detailed step-by-step instructions provided in this guide and always prioritizing safety, you can embark on a fulfilling DIY journey that not only saves you money but also equips you with a valuable tool for splitting logs.
So, why spend a small fortune on a commercial log splitter when you can channel your creativity and craftsmanship into creating your very own log splitter that perfectly suits your needs? Get started on this exciting project today and look forward to many seasons of efficient log splitting.


