DIY Tiles
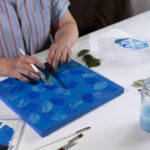
When it comes to giving my home a fresh and captivating makeover, I've always found that working with DIY tiles is a game-changer. Whether you're a seasoned DIY enthusiast like me or just starting out, I want to share a comprehensive guide that will take you through the entire journey.
From selecting the perfect tiles that match your vision to those final, satisfying touches of grout, I've got you covered. In this post, I'll share everything I've learned about DIY tiles, including the different types of tiles available, the tools and materials you'll need, step-by-step installation instructions for both floors and walls and some handy tips for keeping your newly tiled surfaces looking impeccable.
By the time you finish reading, you'll be armed with the knowledge and confidence to embark on your own tile project and experience the incredible transformation it can bring to your living space.
Types of DIY Tiles
When it comes to DIY home improvement projects, selecting the right type of tiles is crucial to achieving the desired aesthetic and functionality. Here are various types of DIY-friendly tiles to consider:
Ceramic Tiles
Ceramic tiles are a go-to choice for DIY enthusiasts due to their affordability and versatility. These tiles are available in an extensive array of colors, sizes, and patterns, making them suitable for a wide range of applications. Whether you're looking to revamp your bathroom, kitchen, or any other space, ceramic tiles offer ample design options.
Porcelain Tiles
Renowned for their durability and moisture resistance, porcelain tiles are an excellent option for areas prone to high humidity, such as bathrooms and kitchens. They come in a variety of designs, including wood and stone textures, allowing you to achieve a natural aesthetic without the upkeep associated with real wood or stone.
Natural Stone Tiles
For those aiming to infuse elegance into their spaces, natural stone tiles like marble, granite, and travertine are a top choice. These tiles add a timeless and luxurious touch to any room. However, it's important to note that natural stone tiles require special care during installation and maintenance due to their inherent variations, making them a project best suited for experienced DIYers.
Glass Tiles
Glass tiles are a contemporary and chic option for modernizing your living spaces. They are frequently employed for creating stunning kitchen backsplashes and accent walls, as they add a unique shimmer and depth to the overall decor. Incorporating glass tiles into your DIY project can instantly elevate the aesthetics of your home.
Vinyl Tiles
If you're on a budget or looking for a straightforward DIY installation, vinyl tiles are an excellent choice, especially for flooring projects. They are available in both peel-and-stick and click-and-lock varieties, making them incredibly user-friendly. Vinyl tiles come in a wide range of styles and patterns, allowing you to mimic the appearance of more expensive flooring materials without breaking the bank.
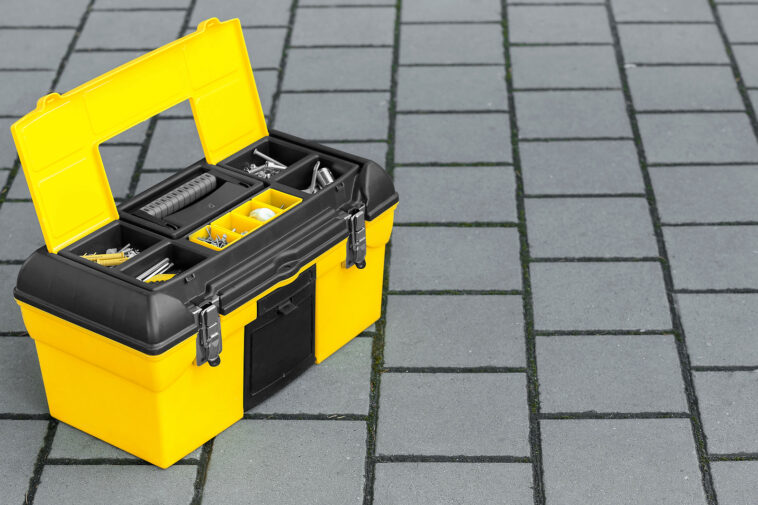
Tools and Materials You'll Need
Undertaking a DIY tile project can be a rewarding endeavor, but it's vital to be well-prepared with the right tools and materials. Here's an expanded list of items you'll need to ensure a successful tile installation:
Tile Cutter
A tile cutter is an essential tool for achieving precise cuts on diy hand painted tiles, ensuring they fit perfectly within your space. Depending on the tile type, you may choose between a manual tile cutter or a powered wet saw for larger and more intricate cuts.
Tile Adhesive
The adhesive is the glue that secures the tiles to the surface. Make sure to select the appropriate adhesive for your tile type and the substrate you're working on. Thin-set mortar is a common choice, but there are specialized adhesives for different materials, like mastic for ceramic tiles.
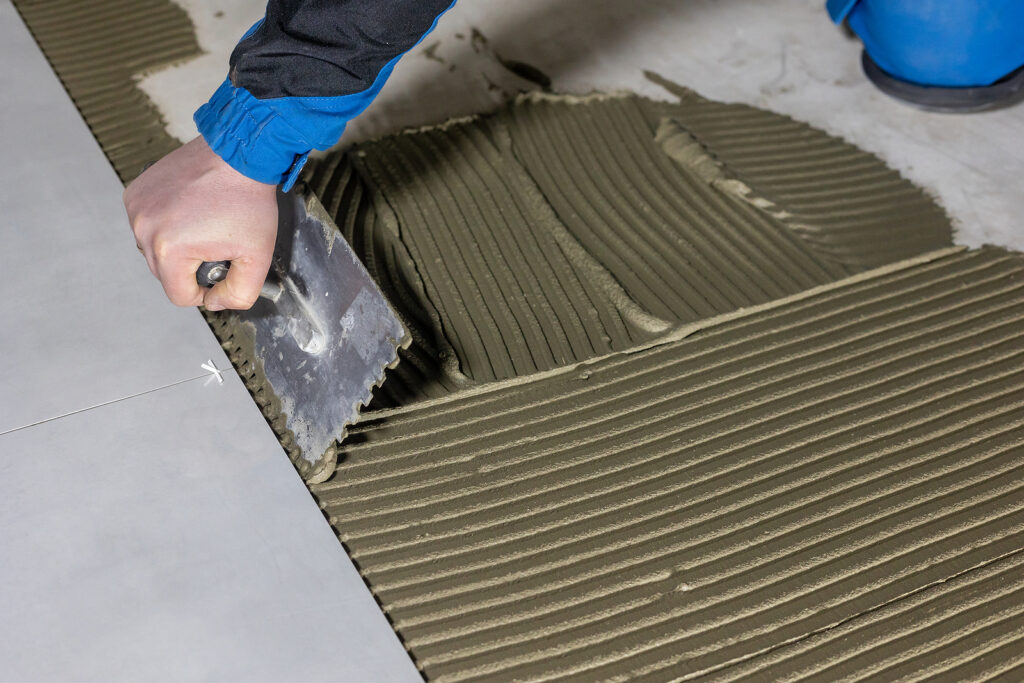
Trowel
A trowel is used to spread the adhesive evenly across the substrate. The notched side of the trowel helps create consistent ridges, ensuring proper tile adhesion. The size of the trowel notch should match the size of the tile being installed.
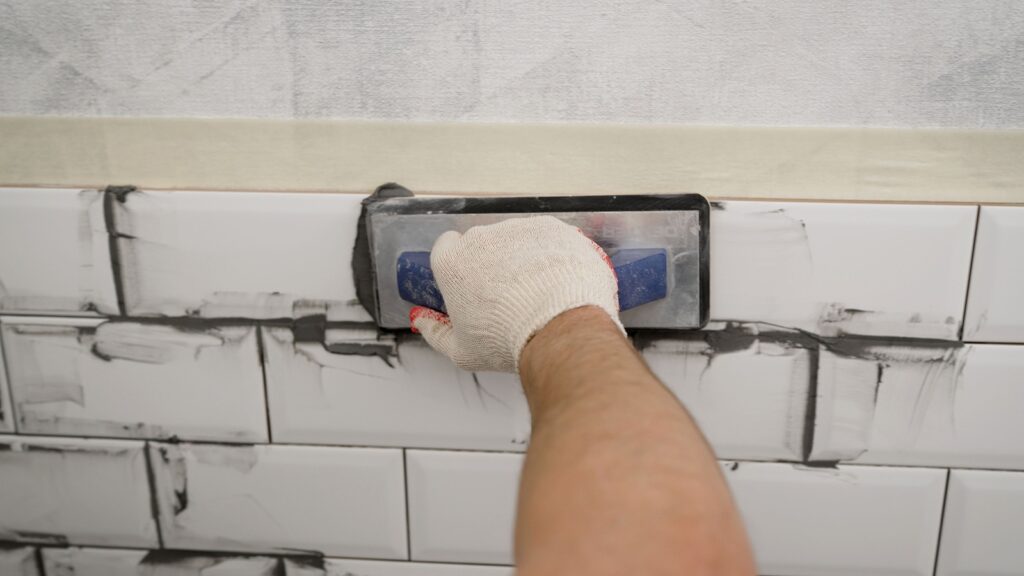
Grout and Grout Float
Grout serves two essential functions—it fills the gaps between tiles and provides a finished, cohesive appearance. Choose the appropriate grout type and color to complement your tiles. A grout float is used to press and smooth grout into the spaces between tiles during the grouting process.
Tile Spacers
Tile spacers are crucial for maintaining consistent and even spacing between tiles. They come in various sizes to accommodate different tile layouts and grout line widths. Using spacers ensures a professional-looking finish.
Level
A level is indispensable for ensuring that your tiles are installed straight and level. It helps prevent crooked or uneven tile lines, resulting in a polished final look. You may also use a laser level for larger and more complex projects.
Measuring Tape
Accurate measurements and layout planning are essential for a successful tile installation. Use a measuring tape to measure and mark your layout, ensuring that tiles fit precisely and align as intended.
Safety Gear
Prioritize safety during your DIY tile project by wearing appropriate safety gear. This includes gloves to protect your hands, safety glasses to shield your eyes from debris, and knee pads to provide comfort and protection while working close to the garage floor tiles.
Preparing Your Surface
Before you start laying tiles in your DIY project, it's essential to prepare the underlying surface properly. The level of preparation required varies depending on whether you're working on floors or walls. Here are the steps to ensure your surface is ready for tile installation:
Subfloor Preparation (for Floors)
Proper subfloor preparation is critical when tiling floors. This process ensures that your tiles adhere securely and prevents future issues. Follow these steps:
- Remove Existing Flooring: Begin by removing any existing flooring material, such as carpet, vinyl, or old tiles. This step provides a clean slate for your new tile installation.
- Repair Damaged Subfloor: Inspect the subfloor for any damage, such as rot or uneven surfaces. Address any issues by replacing damaged sections and leveling uneven areas.
- Clean the Subfloor: Thoroughly clean the subfloor to remove any dust, debris, or adhesive residue from previous flooring. A clean and dust-free surface promotes proper adhesion.
- Ensure Dryness: Ensure the subfloor is completely dry before laying tiles. Moisture can compromise the adhesive and lead to tile displacement over time.
- Check for Levelness: Use a level to confirm that the install tile flooring is level and flat. If necessary, use a self-leveling compound to correct any imperfections.
Wall Preparation (for Walls)
When preparing surfaces for wall tile projects, different considerations apply. Follow these steps to ensure your wall is ready for tiling:
- Remove Existing Wall Coverings: If there are existing wall coverings, such as wallpaper or old tiles, remove them carefully. Ensure that the wall is free of any loose or peeling material.
- Patch Holes and Cracks: Inspect the wall for holes, cracks, or imperfections. Patch and repair these areas with an appropriate filler or patching compound. Sand the patched areas smooth once they are dry.
- Clean and Degrease: Thoroughly clean the wall surface to remove dirt, grease, and any residues. A clean, smooth surface is essential for proper tile adhesion.
- Consider Waterproofing (for Wet Areas): If you're tiling in a wet area like a bathroom or kitchen, consider adding a waterproofing membrane before applying the tiles. This extra layer of protection helps prevent moisture from penetrating behind the tiles and causing damage over time.
Tile Installation Process
When embarking on a tile installation project, a step-by-step approach is essential to achieve a polished and professional result. Here's an in-depth breakdown of the tile installation process:
Layout Planning
Begin by meticulously planning the layout of your tiles. Measure the area, mark reference lines using your measuring tape and level, and establish chalk lines to serve as guidelines for your installation. This step ensures that your tiles fit the space evenly and align precisely.
Applying Tile Adhesive
To secure the tiles to the surface, you'll need to apply tile adhesive. Use your trowel to spread the adhesive, working in small sections at a time. The notched side of the trowel is essential here, as it creates ridges in the adhesive, enhancing tile adhesion and ensuring a solid bond with the substrate.
Setting the Tiles
Press each tile firmly into the adhesive, following the layout guidelines you've established. Utilize tile spacers to maintain consistent and even gaps between tiles. Periodically check the tiles with a level to confirm they are both flat and level. This attention to detail ensures a flawless and visually pleasing installation.
Cutting Tiles
In many cases, you'll need to cut tiles to fit around edges, corners, or obstacles. Employ a tile cutter or tile saw for this purpose. Take your time when cutting tiles, wear the necessary safety gear, and ensure accurate measurements to achieve a snug and precise fit.
Tile Alignment and Leveling
As you progress, it's crucial to continually assess tile alignment and leveling. Adjust tiles as needed while the adhesive is still wet to maintain the desired layout and ensure that adjacent tiles align correctly with one another. This step contributes to the overall aesthetics and functionality of your tiled surface.
Grouting
Once the adhesive has fully dried and the tiles are securely in place, it's time to move on to the grouting phase. Follow the manufacturer's instructions to prepare the grout mixture. Using a grout float, apply the grout at a 45-degree angle, ensuring that it fills the gaps between the tiles completely. Press the grout firmly into the spaces to create a strong bond.
Finishing Touches
Completing your tile project doesn't end with the grout and adhesive drying. There are several important finishing touches to consider for a polished and lasting outcome:
Sealing Grout
After allowing the grout to cure for the recommended time, it's crucial to apply a grout sealer. This protective layer helps safeguard the grout from stains and moisture infiltration, enhancing its durability and prolonging the life of your installation. Follow the manufacturer's instructions for the sealer application process, ensuring thorough coverage.
Caulking (for Walls)
In wall tile installations, gaps often exist between the tiles and adjacent surfaces, such as countertops, bathtubs, or shower edges. To prevent water intrusion and maintain a tidy appearance, use caulk to seal these gaps. Select a high-quality, waterproof caulk that matches the color of your grout or tiles for a seamless finish. Proper caulking helps preserve the integrity of your tiled surface.
Cleaning and Polishing
To showcase the beauty of your newly installed tiles, thorough cleaning is essential. Begin by using a tile cleaner to remove any adhesive or grout residue from the tile surfaces. Ensure that you follow the cleaner's instructions and use non-abrasive tools to avoid scratching the tiles.
Once your tiles are clean and residue-free, consider polishing them to enhance their shine and overall appearance. Depending on the type of tiles you've chosen, polishing may involve using a specialized tile polish or simply buffing them with a clean, soft cloth. This step can make a significant difference in the aesthetic appeal of your tiled space.
Tips for Maintenance
Maintaining your tiled surfaces is essential to preserve their beauty and functionality over time. Here are some valuable maintenance tips to keep your tiles looking their best:
Regular Cleaning
To prevent the accumulation of dirt and grime, establish a routine for cleaning your tiled surfaces. Use a mild tile cleaner and a soft cloth or mop to gently clean the tiles. Avoid abrasive cleaners or scrub brushes that could scratch the surface. Regular cleaning not only keeps your tiles looking fresh but also prevents staining and discoloration.
Repairing Damaged Tiles
Tiles can become cracked or chipped, particularly in high-traffic areas or if subjected to impact. It's crucial to address damaged tiles promptly to prevent further deterioration. To repair them, carefully remove the damaged tile and replace it with a new one. Make sure to use the appropriate adhesive and grout to ensure a seamless and secure fit.
Regular Inspection
Periodically inspect your tiled areas, paying special attention to high-traffic zones and areas prone to moisture exposure. Look for loose tiles, cracked grout lines, or any signs of damage. Address any issues you identify promptly to prevent them from escalating into larger problems. Regular inspections can help you catch and resolve maintenance issues early, prolonging the life of your tile installation.
Sealing Grout (as needed)
Over time, grout can wear down and become susceptible to moisture infiltration and staining. Depending on the type of grout used, consider resealing it periodically to maintain its protective qualities. Follow the manufacturer's recommendations for the frequency of resealing, which can vary based on grout type and usage.
Protective Measures
Take precautions to protect your tiles from potential damage. Use rugs or mats in high-traffic areas to reduce wear and tear. Place coasters or trivets under hot objects to prevent thermal shock to the tiles. Additionally, use felt pads or furniture gliders under heavy furniture to prevent scratching or gouging of the tile surface.
Avoid Harsh Chemicals
When cleaning your tiles, avoid using harsh or acidic cleaners that can erode grout and damage tile finishes. Opt for pH-balanced tile cleaners or consult the manufacturer's recommendations for suitable cleaning products.
Grout Maintenance
Grout is a critical part of your tile installation, and maintaining its integrity is essential. Periodically inspect grout lines for cracks or deterioration. If you notice issues, consider regrouting the affected areas to reinforce the structural integrity of your tiled surface.
DIY Tile Projects and Design Ideas
If you're looking to embark on engaging DIY tile projects, there's a world of creative possibilities to consider. Here are some inspiring ideas to help you transform various areas of your home:
Bathroom Makeover
Elevate the ambiance of your bathroom by incorporating tiles for both the installing tile flooring and walls. Tiles offer not only visual appeal but also practicality in wet areas. To infuse uniqueness, contemplate mosaic tiles as an accent, creating intricate patterns or focal points. You can play with colors, textures, and shapes to achieve a personalized and stylish bathroom retreat.
Kitchen Backsplash
The kitchen is a prime canvas for showcasing your design flair with tiles. Consider installing a captivating kitchen backsplash using an array of colorful glass tiles or classic subway tiles. This small but impactful addition can dramatically enhance your kitchen's aesthetics, making it a focal point of your culinary space. Experiment with various tile layouts and patterns to achieve the desired effect.
Outdoor Patio Enhancement
Extend your living space to the outdoors by rejuvenating your patio with tiles. Opt for outdoor-rated porcelain or natural stone tiles to ensure durability and elegance. These tiles can withstand the elements while adding a touch of sophistication to your outdoor area. Arrange them in visually appealing patterns or incorporate natural stone's inherent beauty to create a cozy and inviting outdoor haven.
Entryway Elegance
Impress guests right from the moment they step into your home by giving your entryway a tile makeover. Tiles provide a durable and attractive solution for high-traffic areas. Consider using porcelain or ceramic tiles in captivating designs or patterns to set the tone for your interior decor.
Fireplace Surround
Give your living room or den a warm and inviting atmosphere by enhancing the fireplace surround with tiles. Select tiles that complement your decor style, whether it's rustic, modern, or traditional. A well-tiled fireplace can become a captivating focal point and a cozy gathering spot in your home.
Accent Walls
Add drama and texture to any room by creating an accent wall with tiles. Whether it's your living room, bedroom, or dining area, a tiled accent wall can instantly transform the space. Experiment with various tile types, colors, and layouts to achieve the desired visual impact.
Outdoor Pathways and Garden Features
Extend your creative tile projects to your garden by incorporating tiles into pathways, garden borders, or even unique garden features like mosaic-tiled tables or sculptures. Outdoor-rated tiles can withstand exposure to the elements while adding a touch of artistry to your outdoor oasis.
Conclusion
In my personal DIY tile journey, I've come to appreciate tiles as not just functional elements but as the creative heartbeats of my home's transformation. These projects have allowed me to reimagine and revitalize different spaces, from the serene allure of my bathroom to the vibrant charm of my kitchen. Tiles have become my canvas, offering the means to infuse personality and style into my living spaces.
The satisfaction of planning, selecting, and witnessing the gradual transformation of each room through tile projects has been incredibly fulfilling. It's not just about the end result; it's the journey of self-expression and creativity that makes every tile project special.
And, I've learned that the key to preserving their beauty lies in diligent maintenance. By embracing the world of DIY tiles, you too can unlock the potential to rejuvenate your living spaces, one tile at a time, and experience a transformation that is both visual and deeply personal. Happy tiling!
Sources