DIY Hardware
When it comes to sprucing up my home and infusing it with personality, I've discovered that it's often the little details that make the biggest impact. I've found that customizing hardware is a fantastic way to add a unique touch to my living space, turning it into a reflection of my style and taste.
In this all-encompassing guide, I'll take you on a journey through the world of DIY hardware, sharing step-by-step instructions and some of the creative ideas I've personally used to transform everyday hardware into extraordinary accents for my home.
Whether you're a seasoned DIY enthusiast like me or just dipping your toes into the DIY world, I've got you covered.
Why Customize Your Hardware
Customizing your hardware offers a multitude of advantages that go beyond mere aesthetic appeal. By tailoring your hardware to your specific needs and preferences, you can elevate the overall look and functionality of your living space. Here are some compelling reasons why you should consider customizing your hardware:
- Personalized Aesthetic: When you customize your hardware, you have the opportunity to create a cohesive and harmonious look that perfectly matches your home's decor theme. Whether you prefer a rustic, modern, or eclectic style, custom hardware allows you to achieve a unique and personalized aesthetic that reflects your individual taste.
- Creative Expression: Custom hardware serves as a canvas for your creativity. It allows you to experiment with various designs, colors, and materials to achieve a one-of-a-kind look that cannot be replicated with mass-produced options. Expressing your creativity through hardware customization adds a personal touch to your home that sets it apart from others.
- Cost-Effective Solution: One of the most significant advantages of customizing your hardware is the potential for cost savings. Custom pieces are often more affordable than purchasing high-end designer hardware. Additionally, you can choose cost-effective materials and finishes that align with your budget, making home improvement projects more accessible and budget-friendly.
- Tailored Functionality: Beyond aesthetics, custom hardware enables you to tailor the functionality to meet your specific needs. You can design hardware that provides efficient storage solutions, enhances accessibility, or maximizes space utilization. This level of customization ensures that your hardware not only looks great but also serves a practical purpose in your home.
- Satisfaction and Ownership: DIY hardware projects offer a sense of satisfaction and ownership that store-bought items cannot match. When you create custom hardware, you have complete control over the design process, from concept to completion. This hands-on involvement can be incredibly fulfilling and rewarding.
Choosing the Right Hardware
Customizing your hardware is a fantastic way to infuse personality and uniqueness into your home, but the success of your project hinges on selecting the right hardware components. To help you make the best choices, it's crucial to consider the following factors when choosing hardware for your customization project:
Functionality
The first and foremost consideration should always be the functionality of the hardware. Assess the specific purpose of the hardware component you are customizing, whether it's a cabinet pull, door knob, or hook. Ensure that your selection is not only visually appealing but also practical and suitable for its intended use. For instance, a cabinet pull should offer a comfortable grip, while a door knob should be easy to turn and operate.
Style
Hardware plays a pivotal role in shaping the overall aesthetics of your living space. Therefore, it's essential to choose hardware that aligns with your preferred decor style. Your options are diverse, ranging from sleek and modern designs to rustic and vintage-inspired pieces. Take the time to explore various styles and find the one that complements your existing decor or sets the tone for a new design theme.
Material
Hardware components are available in an array of materials, each with its own unique charm and characteristics. Consider the material that best suits your design vision. Metal hardware offers durability and a contemporary feel, while wood imparts warmth and a natural look. Glass and plastic options provide versatility and can be customized with various finishes. Choosing the right material can significantly impact the overall look and feel of your customized hardware.
Size and Proportions
To ensure that your hardware fits seamlessly into your design, pay close attention to size and proportions. Oversized hardware can overpower a small space, while undersized hardware may not serve its intended purpose effectively. Measure the dimensions of the area where you plan to install the hardware and select components that are proportionate to the space. This careful consideration will ensure that your customized hardware not only looks great but also functions optimally.
Finish
The finish of your hardware can add the perfect finishing touch to your customization project. Hardware finishes can range from brushed nickel and polished chrome to antique brass and oil-rubbed bronze. The finish you choose should harmonize with the overall color palette and design theme of your space. Additionally, consider the durability and maintenance requirements of the finish to ensure it stands the test of time.
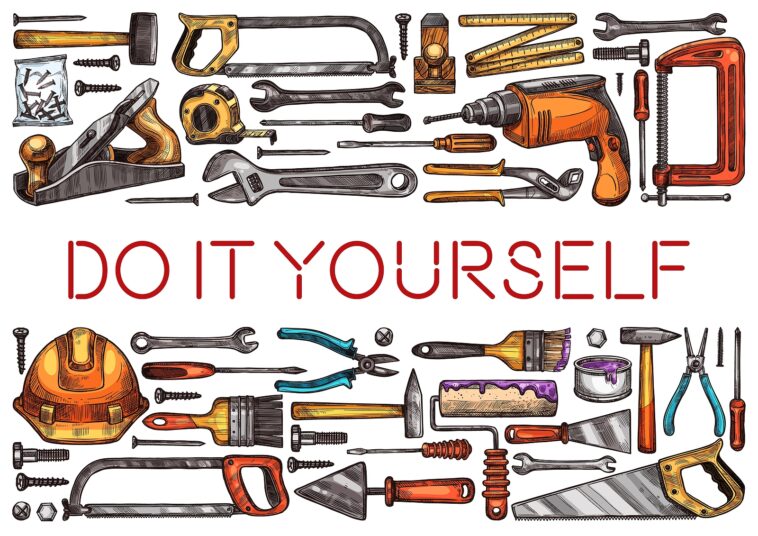
Essential Tools and Materials
Embarking on a DIY hardware customization project is an exciting endeavor, but it's crucial to have the right tools and materials at your disposal to ensure a successful and satisfying outcome. Here's a comprehensive list of the essential tools and materials you'll need to bring your project to life:
Tools:
- Screwdrivers: A set of screwdrivers with various head types (Phillips, flathead, etc.) will be indispensable for removing and attaching hardware components securely.
- Drill: A power drill equipped with appropriate drill bits will enable you to create holes for hardware installation or modify existing holes as needed.
- Sandpaper: Different grits of sandpaper (coarse to fine) are essential for smoothing surfaces, removing imperfections, and preparing materials for painting or finishing.
- Paintbrushes: A selection of high-quality paintbrushes in various sizes and shapes will ensure precise and even application of paints, stains, or sealants.
- Clamps: Clamps come in handy for securing materials together while adhesive or epoxy sets, ensuring a strong and lasting bond.
- Pliers: Various types of pliers, such as needle-nose and cutting pliers, are invaluable for bending, cutting, and manipulating hardware or materials.
- Safety goggles and gloves: Protect your eyes and hands from potential hazards by wearing safety goggles and gloves throughout your project.
Materials:
- Hardware pieces: The centerpiece of your customization project, select the hardware components you wish to transform or embellish to suit your design vision.
- Paints and brushes: Acquire paints in your chosen colors and the appropriate brushes for painting or detailing your hardware. Consider using specialized finishes like metallic or enamel paints for a unique look.
- Sandpaper: Ensure you have an assortment of sandpaper grits to accommodate various surface preparation needs.
- Base material: Depending on your project, you'll require a base material such as wood, leather, or resin as the canvas for your customization. Choose a material that complements your design and can be easily modified to accommodate the hardware.
- Epoxy or adhesive: High-quality epoxy or adhesive is essential for securely attaching hardware to the base material and ensuring a durable bond.
- Decorative elements: To add a personal touch to your customized hardware, consider incorporating decorative elements such as beads, crystals, or other embellishments that align with your design theme.
- Sealer or varnish (if applicable): If your project involves wood or other porous materials, a sealer or varnish can protect and enhance the finish, providing a polished and long-lasting result.
DIY Hardware Ideas and Projects
Exploring the world of DIY hardware customization offers an array of exciting and imaginative possibilities. Here are some innovative DIY hardware project ideas to spark your creativity and elevate the aesthetics of your living spaces:
Custom Door Knobs and Handles
Give your doors a touch of individuality by transforming plain door knobs and handles into eye-catching statement pieces.
You can achieve this by applying a fresh coat of paint in a color that complements your decor theme. Alternatively, experiment with decoupage techniques, incorporating patterns or using fabric to add texture and personality to these often-overlooked hardware elements.
The result? Door hardware that blends seamlessly with your home's style or serves as a striking focal point.
Decorative Cabinet Pulls
Elevate the charm of your kitchen or bathroom with customized cabinet pulls. There are numerous creative avenues to explore, from painting cabinet pulls in vibrant hues to adding decorative trims, such as metallic accents or delicate beadwork. For those seeking a truly unique touch, consider crafting your cabinet pulls from clay or resin, enabling you to design and mold distinctive shapes that perfectly suit your interior theme.
Personalized Drawer Pulls
Reinvent your furniture with personalized drawer pulls that reflect your taste and personality. Engraving, stamping, or incorporating leather accents can breathe new life into tired dressers, nightstands, or cabinets. By swapping out standard drawer pulls for custom ones, you can infuse your furniture with character and enhance its visual appeal.
Handcrafted Hooks and Hangers
Say goodbye to mundane wall hooks and hangers and welcome handcrafted alternatives that bring style and functionality to your home. Utilize reclaimed wood, metal, or even vintage doorknobs to create unique hooks and hangers for coats, bags, keys, or other essentials. Consider incorporating decorative elements like decorative trims, painted motifs, or reclaimed materials that resonate with your home's design aesthetics. These handcrafted pieces not only serve a practical purpose but also contribute to the overall decor of your space.
Step-by-Step DIY Hardware Tutorials
If you're ready to embark on some hands-on DIY hardware projects, here are detailed step-by-step tutorials for two exciting endeavors:
Creating Resin-Infused Knobs
Materials Needed:
- Resin and hardener: Select a high-quality resin and compatible hardener for your project.
- Molds: Choose molds in your preferred shapes and sizes to create your knobs.
- Additives (glitter, dried flowers, etc.): Gather any desired decorative elements to enhance your resin knobs.
Step 1: Gathering Materials
Before embarking on your resin-infused knob project, ensure you have all the necessary materials ready. You'll need to have your resin, hardener, molds, and any desired additives, such as glitter or dried flowers, within easy reach.
Step 2: Mold Preparation
To ensure a successful casting process, take the time to prepare your molds properly. Clean them thoroughly, removing any dust or residue, and make sure they are completely dry. If your molds have a tendency to stick, consider applying a mold release agent to ease the removal of the finished resin knobs later on.
Step 3: Mixing the Resin
Refer to the instructions on the packaging of your chosen resin and hardener. Typically, these instructions involve mixing equal parts of resin and hardener. Take care to follow the guidelines precisely, as an accurate mixture is crucial for a successful outcome. Stir the resin and hardener mixture thoroughly to eliminate any air bubbles, ensuring a smooth consistency.
Step 4: Adding Additives
If you want to add a personal touch to your knobs with glitter, dried flowers, or other decorative elements, incorporate these into the resin mixture. Gently stir to evenly distribute the additives throughout the resin mixture, creating a visually appealing design.
Step 5: Pouring the Resin
With your resin mixture prepared, carefully pour it into the molds. Pay close attention to ensure even distribution while avoiding any overflow. Take your time to ensure the knobs are shaped to your liking.
Step 6: Eliminating Air Bubbles
To achieve a polished finish, it's essential to eliminate any trapped air bubbles in the resin. Pass a heat gun or torch lightly over the surface of the resin-filled molds. This process will help the bubbles rise to the surface and pop, leaving you with a smooth and bubble-free result.
Step 7: Curing the Resin
Allow the resin to cure for the recommended time, typically ranging from 24 to 48 hours. Ensure that the curing environment is free from dust and other contaminants to maintain the quality of your knobs during this crucial stage.
Step 8: Removing from Molds
Once the resin has fully cured, gently remove the resin knobs from the molds. Exercise care and patience during this step to prevent any damage to the finished pieces. Your uniquely customized hardware pieces are now ready for use and will add a touch of personal flair to your projects.
Painted Cabinet Pulls
Materials Needed:
- Screwdriver: For removing cabinet pulls.
- Mild detergent and warm water: To clean the hardware.
- Sandpaper: To create a suitable surface for paint adhesion.
- Primer: To prepare the hardware for painting.
- Acrylic or spray paint: Choose your preferred paint color for customization.
- Clear sealant or varnish: To protect and enhance the finish.
Step 1: Removing the Hardware
Begin by using a screwdriver to carefully remove the cabinet pulls from the cabinets or drawers. This step ensures easy access for the customization process and prevents any paint from getting on the furniture.
Step 2: Cleaning the Hardware
To ensure a clean and grease-free surface, thoroughly clean the hardware. Mix mild detergent with warm water and scrub the hardware, followed by rinsing and drying. A clean surface is essential for paint adhesion and a flawless finish.
Step 3: Sanding the Surface
Use sandpaper to lightly sand the hardware. This step creates a roughened surface that improves the paint's ability to adhere. Proper surface preparation is critical for achieving a durable and long-lasting finish.
Step 4: Applying Primer
Apply a coat of primer to the hardware. Primer ensures that the paint adheres evenly and provides full coverage. It also helps in achieving a professional finish. Allow the primer to dry completely before proceeding.
Step 5: Painting
Select your desired acrylic or spray paint color and apply it to the hardware. Use multiple thin coats rather than one thick coat for an even and vibrant finish. Ensure that each coat dries completely before applying the next. This step allows you to customize the cabinet pulls to match your decor perfectly.
Step 6: Sealing the Finish
Once the paint has fully dried, protect your newly painted hardware by applying a clear sealant or varnish. This not only enhances the durability of the finish but also adds a polished appearance, making your cabinet pulls look professionally done.
Step 7: Reattaching the Hardware
After ensuring that everything is thoroughly dry, reattach your beautifully customized cabinet pulls to your cabinets or drawers. With the transformation complete, you can now enjoy the personalized and refreshed look of your furniture, all achieved through this comprehensive painting process.

Tips for Success
- Thoroughly Plan Your Project: Before diving into your creative endeavor, invest ample time in meticulous planning. This includes meticulously sketching out your design and selecting an appropriate color scheme. Comprehensive planning helps streamline your work and ensures you have a clear vision of the final result.
- Practice on Spare Hardware or Scrap Materials: A crucial step in perfecting your craft is practice. Consider dedicating time to experiment and refine your skills on spare hardware or scrap materials. This practice phase will help you iron out any kinks in your technique, making you more confident when you work on the final piece.
- Patience Is Key: Rushing through a project often leads to errors and subpar results. Take your time to work meticulously and with precision. Patiently tackling each step of the process will yield a more polished and professional outcome.
- Prioritize Safety: Safety should be a non-negotiable aspect of any creative endeavor. When working with tools and chemicals, always prioritize safety equipment. This includes wearing protective gear such as gloves, goggles, and masks to safeguard yourself from potential hazards.
- Embrace Experimentation and Mistakes: Don't shy away from experimenting with different techniques and approaches. Innovation often arises from the willingness to try new things. Moreover, don't fear making mistakes. They can be valuable learning experiences and may even lead to the development of unique and unexpected designs.
Maintaining Your Custom Hardware
Creating custom hardware through DIY projects is a rewarding endeavor, but to ensure its longevity and optimal performance, regular maintenance is crucial. Here's a more detailed guide on how to maintain your custom hardware, with consideration for various materials and finishes used:
Inspection and Cleaning
Periodically inspect your custom hardware for signs of wear, damage, or loose components. Depending on the type of hardware, this could involve checking for loose screws, bent parts, or any other issues. Regularly cleaning your hardware is also essential to prevent dust and grime buildup. Use a soft, damp cloth or a gentle cleaning solution to wipe down surfaces. Avoid abrasive materials that could scratch or damage the hardware.
Protective Coatings
Depending on the materials and finishes you've used, consider applying protective coatings to prolong the life of your hardware. For metal hardware, applying a clear protective coating or a rust inhibitor can help prevent corrosion. Wooden hardware can benefit from a coat of varnish or wood preservative to protect against moisture and wear. When using paints or finishes, opt for high-quality, durable products that can withstand environmental factors.
Lubrication
Hardware components such as hinges, locks, and moving parts may require occasional lubrication to ensure smooth operation. Use appropriate lubricants like silicone-based or graphite lubricants to maintain functionality and reduce friction. Be sure to follow manufacturer recommendations for lubrication intervals.
Addressing Wear and Tear
Over time, your custom hardware may show signs of wear and tear. Address any issues promptly to prevent further damage. Replace damaged or worn-out components, such as hinges, knobs, or fasteners, with suitable replacements. Proper maintenance ensures that your hardware continues to function as intended.
Environmental Considerations
Take into account the environmental conditions where your hardware is installed. Extreme temperatures, humidity, or exposure to sunlight can affect its longevity. Consider using materials and finishes that are suitable for the specific environment in which your hardware will be used.
Seasonal Maintenance
In regions with distinct seasons, hardware exposed to outdoor elements may require seasonal maintenance. For instance, outdoor furniture hardware might need additional protection during winter to withstand snow and moisture.
Documentation
Keep records of the materials, finishes, and maintenance procedures you've used for your DIY hardware. This information will be valuable for future reference and ensure that you can continue to care for your hardware effectively.
Conclusion
As I reflect on my journey through the realm of DIY hardware customization, I'm struck by the transformative power that even the smallest details can have on a living space. It's been a deeply fulfilling adventure, allowing me to inject my personal style into every nook and cranny of my home. The sense of accomplishment and ownership that comes with crafting unique knobs, pulls, and hooks is truly special.
Customizing hardware isn't just about aesthetics; it's about creating a home that resonates with your personality and preferences. This guide has highlighted the many benefits, from cost-effectiveness to tailored functionality, and provided the tools and ideas to get started. So, whether you're a seasoned DIY enthusiast or a novice, I encourage you to embark on this creative journey. With the right tools, materials, and a touch of imagination, you can transform the ordinary into something extraordinary, making your home a reflection of your unique identity.