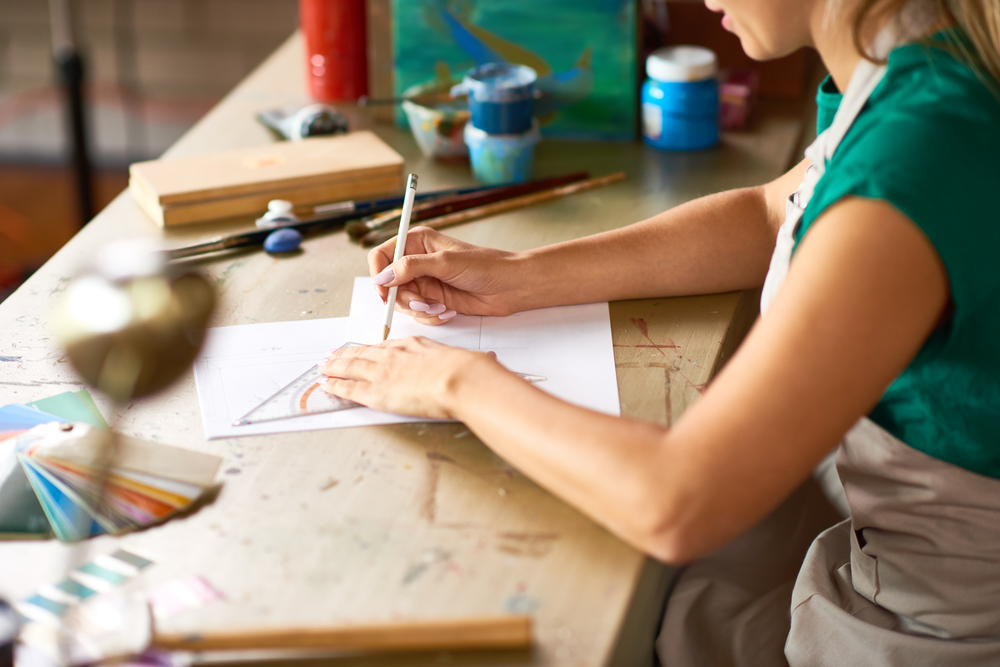
Are you ready to unleash your creativity without breaking the bank? DIY projects are a fantastic way to add a personal touch to your home while saving money. In this comprehensive blog post, we will explore a variety of DIY projects that you can make for under $200. From furniture makeovers and home decor to practical storage solutions and unique crafts, there are endless possibilities to express your creativity on a budget. Get ready to roll up your sleeves and embark on an affordable and fulfilling DIY adventure.
Introduction
Engaging in DIY projects not only allows you to flex your creative muscles but also enables you to transform your space into a reflection of your unique style. The best part? You can embark on these projects without breaking the bank. With a budget of $200 or less, you can breathe new life into old furniture, create stunning home decor, find practical storage solutions, and craft one-of-a-kind items that will impress your friends and family. Let's dive into the world of DIY projects on a budget and explore the numerous possibilities to ignite your creativity.
Benefits of DIY Projects
Before we delve into the exciting world of DIY projects, let's take a moment to understand the benefits of embracing a do-it-yourself approach:
- Cost Savings: DIY projects offer a cost-effective alternative to purchasing pre-made items. By sourcing materials and doing the work yourself, you can save a significant amount of money while still achieving impressive results.
- Creativity and Personalization: DIY projects allow you to infuse your own creativity, personality, and style into your creations. You have the freedom to customize every detail, ensuring that the final product is unique and tailored to your preferences.
- Sense of Accomplishment: Completing a DIY project can be incredibly rewarding. The satisfaction of seeing your vision come to life and being able to say, “I made that,” is a powerful motivator.
- Quality and Durability: When you embark on a DIY project, you have control over the quality of materials and craftsmanship. This often results in a more durable and long-lasting finished product compared to mass-produced alternatives.
Now, let's dive into various categories of DIY projects that you can tackle with a budget of $200 or less.
DIY Furniture Makeovers
1. Repurposed Dresser into a TV Console
- Step 1: Preparation: Remove drawers, hardware, and any unnecessary components. Clean and sand the dresser to create a smooth surface for painting or staining.
- Step 2: Paint or Stain: Apply a fresh coat of paint or stain to transform the dresser's appearance. Choose a color that matches your desired style and complements your existing decor.
- Step 3: Add Hardware: Replace or update the hardware to give the dresser a modern or vintage touch. Consider using unique knobs or pulls that enhance the overall look.
- Step 4: Cable Management: Drill holes at the back of the dresser to allow for cable management. This will help keep your TV console tidy and organized.
- Step 5: Finishing Touches: Once the paint or stain is dry, reassemble the dresser and add any final touches, such as decorative molding or trim. Place your TV on top and enjoy your stylish and budget-friendly TV console.
2. Thrifted Chair Makeover
- Step 1: Find a Chair: Visit thrift stores, flea markets, or online platforms to find an old chair with good bones and a sturdy frame. Look for chairs with interesting shapes or unique details.
- Step 2: Repair and Clean: Assess the chair for any repairs it may need, such as tightening loose screws or regluing joints. Clean the chair thoroughly to remove any dirt or grime.
- Step 3: Upholstery Makeover: Remove the old fabric or cushioning from the chair. Depending on your skill level, you can reupholster the chair yourself or take it to a professional. Choose a fabric that suits your style and complements your decor.
- Step 4: Paint or Refinish: If the chair has a wooden frame, consider giving it a fresh coat of paint or refinishing it to match your desired aesthetic. Sand the surface, apply primer if necessary, and then paint or stain it.
- Step 5: Finishing Details: Add any final touches such as decorative trim, nailhead trim, or a new cushion. Place the transformed chair in your desired space and enjoy your stylish and affordable seating.
3. Bookshelf Transformation
- Step 1: Assess and Clean: Examine your existing bookshelf to identify any repairs or cleaning it may require. Remove any dust or grime using a damp cloth or appropriate cleaning products.
- Step 2: Paint or Stain: Decide on the new look for your bookshelf. Paint it in a fresh, vibrant color or apply a stain to enhance the natural beauty of the wood.
- Step 3: Rearrange Shelves: Experiment with different shelf arrangements to create visual interest. Consider removing a few shelves to create larger spaces for displaying decorative items or books.
- Step 4: Add Backing or Wallpaper: To add a touch of personality, attach a decorative backing or wallpaper to the back panel of the bookshelf. This will make your books and displayed items pop.
- Step 5: Decorate and Style: Fill the shelves with books, decorative objects, and personal mementos. Play with different arrangements and heights to create an aesthetically pleasing display.
4. Coffee Table Upcycling
- Step 1: Find a Base: Look for a sturdy base for your coffee table, such as an old wooden crate, a large trunk, or a set of sturdy wooden legs. Upcycling existing furniture pieces can save you money and add unique character to your coffee table.
- Step 2: Tabletop Material: Choose a material for the tabletop that fits your style and budget. Options include reclaimed wood, repurposed doors, or even a mosaic design using broken tiles or stained glass.
- Step 3: Assembly: Attach the tabletop material securely to the base using screws, brackets, or adhesive, depending on the materials used. Ensure the table is stable and level.
- Step 4: Finishing Touches: Sand the edges and surfaces to smooth out any rough spots. Apply a protective finish to the wood or paint the coffee table to match your decor. Consider adding a glass top for added durability and easy cleaning.
- Step 5: Style and Enjoy: Decorate your coffee table with books, candles, or decorative trays. Personalize it with unique items that reflect your personality and make it a focal point in your living room.
5. Bed Frame Revamp
- Step 1: Assess and Clean: Examine your bed frame for any repairs it may need, such as loose screws or damaged slats. Clean the frame thoroughly to remove any dirt or dust.
- Step 2: Paint or Stain: Decide on the new look for your bed frame. Paint it in a color that complements your bedroom decor or apply a stain to highlight the natural beauty of the wood.
- Step 3: Upholstered Headboard: If your bed frame has a headboard, consider upholstering it for a luxurious and customized look. Choose a fabric that matches your style and complements your bedding.
- Step 4: Add Decorative Accents: Enhance the bed frame's visual appeal by adding decorative accents such as decorative trim, carved details, or finials. These small touches can elevate the overall aesthetic.
- Step 5: Finishing Touches: Once the paint or stain is dry and any upholstery is complete, reassemble the bed frame. Dress your bed with beautiful bedding and pillows to complete the transformation.
Home Decor on a Budget
1. DIY Wall Art
- Canvas Painting: Create your own artwork on canvas using acrylic paints. Experiment with different colors, techniques, and brush strokes to create a piece that reflects your style.
- Printable Art: Download and print high-quality artwork from online platforms. Frame the prints using affordable frames or create a gallery wall for a visually stunning display.
- Macrame Wall Hanging: Learn basic macrame knots and create a beautiful wall hanging using macrame cord or rope. Customize the design and size to fit your space.
- Fabric Wall Hangings: Use fabric remnants or scarves to create unique and textured wall hangings. Attach them to wooden dowels or embroidery hoops for an inexpensive and trendy decor piece.
- Mixed Media Collage: Gather magazines, scrapbook paper, fabric, and other materials to create a mixed media collage. Cut out shapes, words, and images, and arrange them on a canvas or wooden board. Apply a layer of decoupage glue to secure the elements in place.
2. Customized Photo Frames
- Upcycled Frames: Find old frames at thrift stores or in your own home. Clean and repaint them in your desired color. Add embellishments like buttons, beads, or shells for a unique and personalized touch.
- Washi Tape Frames: Use colorful washi tape to decorate plain frames. Create patterns, stripes, or geometric designs for a fun and budget-friendly way to showcase your favorite photos.
- Mod Podge Photo Frames: Print out photos and cut them to fit the frames. Apply a layer of Mod Podge to the frame surface and carefully place the photos, smoothing out any air bubbles. Seal the photos with another layer of Mod Podge for a glossy finish.
- Rustic Wood Frames: Cut reclaimed or scrap wood into desired sizes and assemble them into frames. Sand the edges for a distressed look or stain the wood to enhance its natural beauty. Insert your photos and hang them on the wall for a rustic and personalized display.
- Clipboard Photo Display: Attach clipboards to the wall and insert photos or art prints. Easily swap out the images whenever you want to change up the display.
3. Handmade Throw Pillows
- Envelope-Style Pillow Covers: Create simple envelope-style pillow covers using fabric of your choice. No sewing machine is required, as these covers can be easily hand-stitched or secured with fabric glue.
- No-Sew Applique Pillows: Choose a fabric with a pattern or design you love. Cut out shapes or motifs from contrasting fabric and attach them to the pillow cover using fabric glue or iron-on adhesive.
- Painted Pillow Covers: Use fabric paint or stencils to create unique designs directly on plain pillow covers. Experiment with different colors, patterns, and textures to match your decor.
- Tassel Trim Pillows: Sew or glue tassel trim to the edges of plain pillow covers to add a bohemian touch. Mix and match colors and sizes for a playful and stylish look.
- Patchwork Pillows: Use fabric scraps or old clothing to create patchwork pillow covers. Cut the fabric into squares or other shapes and sew them together to form a patchwork pattern. Customize the size and design to suit your style.
4. Decorative Shelving Units
- Hanging Rope Shelves: Cut and stain wooden boards for the shelves. Attach ropes to each corner of the boards and hang them from hooks or brackets on the wall. These shelves provide a rustic and unique display space.
- Floating Wooden Shelves: Install floating shelf brackets on the wall and attach stained or painted wooden boards to create a minimalist and sleek shelving unit. Arrange decorative items, books, or plants on the shelves for an organized and visually appealing display.
- Repurposed Ladder Shelf: Find an old ladder and give it a fresh coat of paint. Place wooden boards or reclaimed planks on the ladder rungs to create shelves. Use this repurposed ladder as a stylish and functional storage solution in any room.
- Crate Shelves: Arrange wooden crates in various configurations on the wall to create an eclectic shelving unit. Paint or stain the crates to match your decor, and use them to display books, plants, or decorative items.
- Pegboard Organizer: Install a pegboard on the wall and attach pegboard hooks or baskets. Use this versatile storage system to hang and display items such as tools, craft supplies, or kitchen utensils. Customize the organization layout by moving the hooks as needed.
5. Painted Accent Walls
- Stripes: Use painter's tape to create stripes on a selected wall. Choose colors that complement your existing decor and create a visually striking focal point in the room.
- Geometric Patterns: Create geometric patterns on the wall using stencils or painter's tape. Experiment with different shapes and sizes to achieve a modern and artistic look.
- Ombre Effect: Paint the wall with a gradient effect, transitioning from one color to another. This technique adds depth and dimension to the space.
- Stencil Designs: Use stencils to paint intricate patterns or designs on the wall. Select stencils that match your style, whether it's floral, Moroccan, or contemporary.
- Chalkboard Wall: Apply chalkboard paint to a wall and turn it into a functional and interactive surface. Use it to write daily reminders, create artwork, or leave messages for family members.

Practical and Stylish Storage Solutions
1. DIY Floating Shelves
- Materials Needed: Floating shelf brackets, wooden boards, screws, wall anchors (if necessary), level, drill, and screwdriver.
- Measure and Mark: Determine the desired height and spacing for the shelves. Use a level and pencil to mark the positions on the wall.
- Attach Brackets: Install the floating shelf brackets according to the manufacturer's instructions. Use wall anchors if necessary for added stability.
- Cut and Sand Boards: Cut the wooden boards to the desired length and sand them to create a smooth surface.
- Attach Boards: Place the boards onto the brackets and secure them with screws from underneath.
- Finishing Touches: Fill any screw holes with wood filler and sand them smooth. Paint or stain the shelves to match your decor.
2. Creative Closet Organization
- Pegboard Organizer: Install a pegboard on the closet wall to hang accessories like belts, scarves, or hats. Attach hooks, baskets, and shelves to hold smaller items like jewelry or shoes.
- Tension Rod Shoe Rack: Place tension rods horizontally between the closet walls to create a shoe rack. Adjust the rods to accommodate different shoe heights.
- Cubbies and Baskets: Use modular cubbies or storage cubes to organize folded clothes, accessories, or shoes. Place baskets or fabric bins inside the cubbies to hide clutter and add style.
- Hanging Closet Organizer: Hang a fabric closet organizer with multiple compartments to store folded clothes, socks, or undergarments. This maximizes vertical space and keeps items easily accessible.
- Drawer Dividers: Use DIY drawer dividers to keep socks, underwear, or accessories neatly separated. Repurpose small cardboard boxes or create custom dividers using foam board or wood.
3. Customized Storage Bins
- Fabric-Covered Bins: Select plain storage bins and cover them with fabric of your choice. Use fabric glue or double-sided tape to secure the fabric to the bins. This adds a personal touch and enhances the overall aesthetic.
- Labelled Storage Bins: Create labels for your storage bins using adhesive labels or printable labels attached to tags or stickers. This makes it easy to identify the contents and keeps your storage organized.
- Upcycled Bins: Repurpose items like cardboard boxes, crates, or baskets as storage bins. Paint or decorate them to match your decor and use them for storing various items throughout your home.
- Stackable Storage Boxes: Purchase or repurpose stackable plastic or wooden boxes to optimize vertical storage. Label each box to easily identify the contents and maintain an organized space.
- Underbed Storage: Utilize the space under your bed by using storage containers specifically designed to fit under the bed. Store seasonal clothing, bedding, or other items you don't need immediate access to.
4. Repurposed Pegboards
- Kitchen Organizer: Mount a pegboard on the kitchen wall to hang pots, pans, and utensils. Use hooks, shelves, and baskets to maximize storage space and keep your kitchen essentials within reach.
- Craft Room Storage: Install a pegboard in your craft room to organize tools, scissors, ribbons, and other supplies. Use different types of hooks and accessories to create a custom storage solution.
- Garage Organization: Hang a pegboard in your garage to store frequently used tools, gardening equipment, or sports gear. Customize the pegboard with specific hooks and holders to accommodate your needs.
- Home Office Organizer: Create an efficient and organized workspace by mounting a pegboard above your desk. Use it to hang files, office supplies, and other essentials. Add shelves or containers for additional storage options.
- Children's Room Organizer: Install a pegboard in your child's room to keep their toys, art supplies, and accessories organized. Use colorful hooks and baskets for a playful and functional storage solution.
5. Space-Saving Under Bed Storage
- Rolling Storage Bins: Purchase or repurpose rolling bins or drawers that fit under your bed. Use them to store clothing, shoes, or bedding. Opt for clear bins or label them for easy identification.
- DIY Under Bed Drawers: Build your own under bed drawers using plywood and drawer slides. Measure the height of your bed frame and design drawers that slide smoothly in and out, providing additional storage space.
- Vacuum-Sealed Bags: Utilize vacuum-sealed storage bags to compress and store seasonal clothing or bedding. These bags reduce the bulkiness and protect items from dust and moisture.
- Bed Risers with Built-in Storage: Elevate your bed using bed risers that have built-in storage compartments. These risers provide extra height for under bed storage and offer convenient access to your belongings.
- Fabric Under Bed Storage Containers: Sew or repurpose fabric bins that fit under your bed. Add handles for easy access and utilize them to store shoes, accessories, or out-of-season clothing.

Unique and Budget-Friendly Crafts
1. Handmade Jewelry
- Beaded Bracelets: Use colorful beads and elastic cord to create custom bracelets. Experiment with different bead patterns, sizes, and colors to make unique accessories.
- Wire-Wrapped Rings: Wrap thin wire around various stones, beads, or crystals to create one-of-a-kind rings. Use pliers to shape the wire and secure the stones in place.
- Personalized Initial Necklaces: Attach letter charms or pendants to a delicate chain to create personalized initial necklaces. Layer multiple necklaces for a trendy and meaningful look.
- Friendship Bracelets: Make traditional or modern friendship bracelets using colorful embroidery floss. Experiment with different knotting techniques and patterns to create vibrant and stylish bracelets.
- Beaded Earrings: Design your own earrings using beads, wire, and earring hooks. Combine different bead shapes and colors to make eye-catching and unique earrings.
2. DIY Planters and Terrariums
- Upcycled Planters: Repurpose items like tin cans, mason jars, or wine bottles as planters. Paint or decorate them to match your decor and use them to house your favorite plants or herbs.
- Hanging Planters: Create macrame plant hangers using ropes or cords. Hang them from the ceiling or wall-mounted hooks to add a touch of greenery to your space.
- Terrariums: Fill glass containers with layers of sand, pebbles, activated charcoal, and potting soil to create miniature ecosystems. Plant succulents, air plants, or moss to bring a bit of nature indoors.
- Vertical Wall Planters: Construct a vertical wall planter using wooden pallets, hanging pockets, or repurposed shoe organizers. Fill them with herbs, small flowers, or trailing vines for a living wall display.
- Concrete Planters: Mold and shape your own planters using concrete mix and molds of various shapes and sizes. Decorate them with paint, mosaic tiles, or imprints for a personalized touch.
3. Personalized Photo Albums
- Handmade Scrapbook: Create a personalized scrapbook using blank pages, decorative paper, and adhesive. Arrange your photos, add captions, and decorate with stickers, washi tape, or embellishments.
- Accordion Photo Album: Make an accordion-style photo album using cardstock or heavy-duty paper. Attach your photos to each panel and fold it up like an accordion for a unique and compact photo display.
- Digital Photo Books: Design and print custom photo books using online services or software. Choose layouts, backgrounds, and captions to create a professional-looking album to cherish for years to come.
- Shadow Box Frame: Use a shadow box frame to create a three-dimensional photo display. Arrange photos, keepsakes, and mementos in the box, and hang it on the wall or display it on a shelf.
- Memory Jar: Decorate a glass jar and fill it with small photos, notes, or mementos. Each time you have a special moment or memory, add it to the jar. Over time, it becomes a cherished keepsake of meaningful experiences.
4. Homemade Candles
- Soy Candles: Melt soy wax flakes and add fragrance oil or essential oils to create scented candles. Pour the melted wax into heat-resistant containers, such as mason jars or teacups, and insert wicks.
- Beeswax Candles: Roll sheets of beeswax into taper candles or shape them into votives. Decorate the candles with pressed flowers, ribbons, or twine for a natural and rustic look.
- Layered Candles: Melt different colors of wax and pour them in layers to create beautiful, multi-colored candles. Use a variety of containers or mold shapes to add visual interest.
- Floating Candles: Melt wax and pour it into small, heat-resistant containers. Insert wicks and let the candles solidify. Float them in a bowl of water and light them for a stunning and serene centerpiece.
- Upcycled Teacup Candles: Repurpose old teacups or vintage containers as candle holders. Melt wax, add fragrance or essential oils, and pour it into the teacups. Insert wicks and let the candles set.
5. Customized Tote Bags
- Fabric Painted Totes: Use fabric paint or markers to create custom designs or patterns on plain canvas tote bags. Paint flowers, quotes, or abstract designs to reflect your personal style.
- Stencil Tote Bags: Use stencils and fabric paint to create clean and precise designs on tote bags. Mix and match different stencil patterns and colors for a unique look.
- Iron-On Transfers: Create custom iron-on transfers using printable iron-on transfer paper. Print your desired design, cut it out, and iron it onto the tote bag. Follow the manufacturer's instructions for best results.
- Patchwork Totes: Sew together fabric scraps or old clothing to create a patchwork design on a plain tote bag. Arrange the fabric pieces in a visually appealing pattern and stitch them onto the bag.
- Embroidered Tote Bags: Embroider a design, monogram, or personalized message onto a plain tote bag. Use embroidery floss and different stitch techniques to create a charming and customized look.

Tips for Successful DIY Projects on a Budget
- Plan and Research: Before starting any DIY project, plan out the details and research techniques, materials, and costs. This will help you make informed decisions and avoid unnecessary expenses.
- Utilize What You Have: Look around your home for items or materials that can be repurposed or upcycled for your projects. This will save money and add a unique touch to your creations.
- Shop Secondhand: Visit thrift stores, yard sales, or online marketplaces to find affordable materials, furniture, or accessories. You may discover hidden gems that can be transformed into stunning pieces.
- Comparison Shop: When purchasing new materials or tools, compare prices at different stores or online retailers. Take advantage of sales, discounts, or bulk deals to stretch your budget further.
- DIY with Others: Collaborate with friends, family members, or neighbors on DIY projects. Pooling resources, tools, and expertise can reduce costs and create a fun and social experience.
- Learn New Skills: Invest time in learning new techniques or skills through online tutorials, workshops, or DIY communities. This will empower you to tackle more complex projects and reduce the need for professional services.
- Repurpose and Upcycle: Look for opportunities to repurpose or upcycle existing items instead of purchasing new ones. With a bit of creativity, you can transform old furniture, fabric, or accessories into something fresh and stylish.
- Focus on High-Impact Areas: Prioritize projects that have the most significant impact on your space. By focusing on key areas, you can allocate your budget effectively and create dramatic transformations.
- Take Care of Tools and Equipment: Properly maintain and store your tools and equipment to extend their lifespan. Regular cleaning, sharpening, and maintenance will save you money in the long run.
- Embrace Imperfections: DIY projects may not always turn out exactly as planned, and that's okay! Embrace the imperfections and view them as part of the charm and uniqueness of your handmade creations.
Conclusion
Embarking on DIY projects doesn't have to be expensive. With a budget of $200 or less, you can transform your home with creative and personalized touches. From furniture makeovers and home decor to practical storage solutions and unique crafts, there are endless possibilities to explore. By planning, researching, and utilizing affordable materials, you can unleash your creativity and make a significant impact without breaking the bank. So gather your tools, gather your materials, and get ready to embark on an affordable and fulfilling DIY journey.