Are you ready to embark on a creative journey with me? Together, we'll discover the enchanting world of DIY abstract art, a realm where we can express our inner artists and adorn our living spaces with one-of-a-kind masterpieces. In this comprehensive guide, I'll lead us through the captivating techniques of abstract art, offering step-by-step instructions that will empower us to create our very own unique artworks. So, let's grab our canvases, brushes, and paints, and unleash our inner artists as we explore the exciting world of DIY abstract art!
Understanding Abstract Art
Prior to embarking on a journey through the realm of artistic creation, it is imperative to gain a comprehensive understanding of abstract art. Abstract art stands as a captivating and profound genre within the visual arts, characterized by its deliberate deviation from the objective representation of reality.
Rather than striving for a precise replication of the visual world, abstract art harnesses the power of shapes, colors, forms, and expressive gestures to convey its intended impact. This unique approach grants viewers the privilege of engaging with the artwork on a deeply personal and subjective level, fostering a diverse spectrum of emotional reactions and interpretations.
Delving deeper into the nuances of abstract art reveals its ability to transcend traditional artistic boundaries and invite individuals into a realm of limitless creativity and boundless imagination.
Gathering Your Supplies
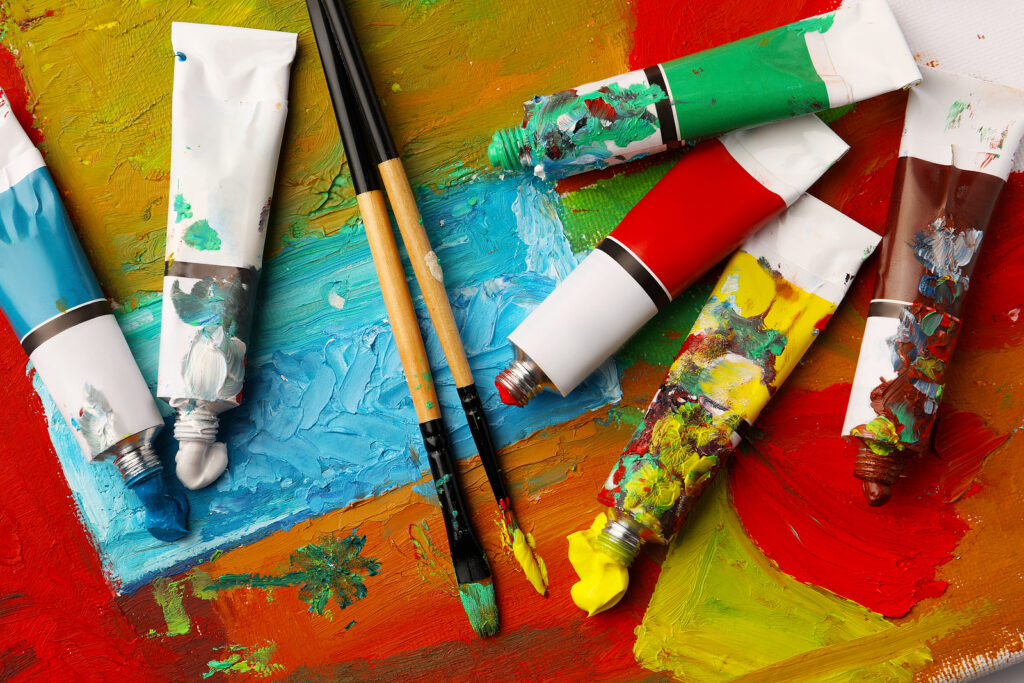
Before embarking on your easy DIY abstract art journey, it's crucial to gather the necessary supplies to ensure a smooth and enjoyable creative process. Here's an extensive list of the essentials you'll need:
Canvas
Select a canvas size that aligns with your artistic vision and the space you have available. Common sizes include 16×20 inches, 24×36 inches, and larger options for those seeking a more impactful display.
Paints
Acrylic paints are a favored choice for DIY abstract art due to their versatility and relatively quick drying time. Ensure you have a wide spectrum of colors at your disposal, including primary hues and some neutral shades. This palette diversity will empower you to create intricate color schemes and harmonious compositions.
Brushes
Invest in a set of high-quality brushes with varying shapes and sizes. This assortment allows you to experiment with different techniques, from broad strokes to intricate detailing, ensuring that your creative possibilities remain boundless.
Palette
A palette is an indispensable tool for mixing and blending your paint colors to achieve the precise shades you envision. You can opt for a traditional palette or disposable palette paper, depending on your preference.
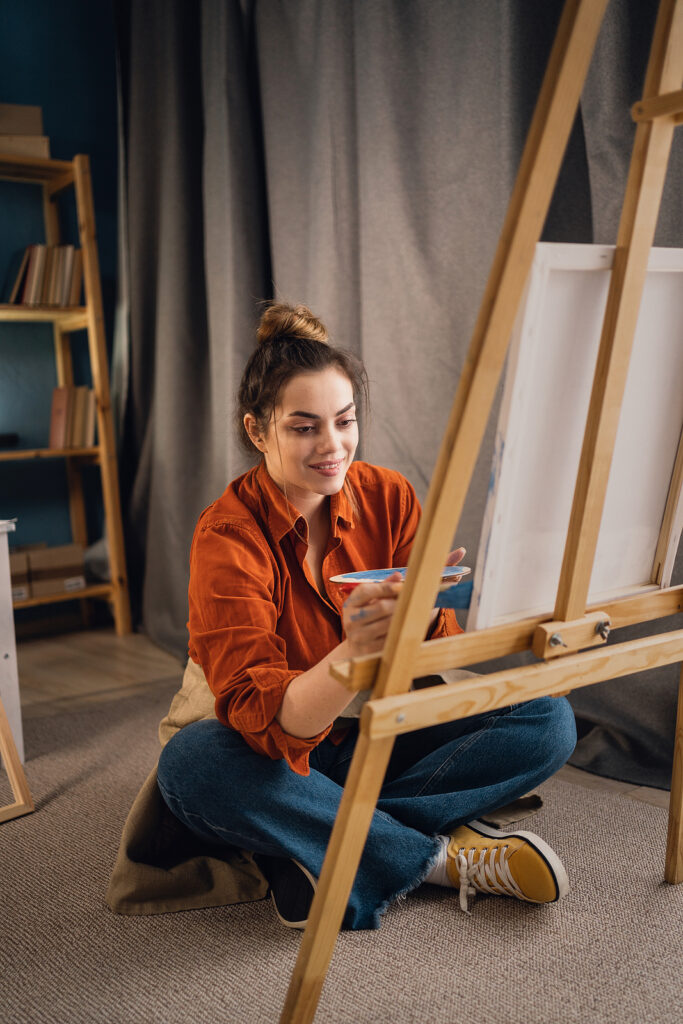
Easel
An easel provides a stable and ergonomic working surface, particularly beneficial when working on larger canvases. It allows you to maintain better control over your brushstrokes and view your artwork from various angles.
Other Supplies:
- Water and Containers: You'll need these for cleaning your brushes and adjusting the consistency of your paints as required.
- Palette Knives: These versatile tools are excellent for creating texture, applying paint in unconventional ways, and adding a unique flair to your abstract creations.
- Masking Tape: Use masking tape to create clean, defined lines or to section off specific areas of your canvas for distinct visual effects.
- Drop Cloth or Newspaper: Protect your workspace from paint splatters and spills by laying down a drop cloth or a layer of newspaper. This not only keeps your working area tidy but also gives you the freedom to explore your creative impulses without worry.
Choosing Your Color Palette
One of the pivotal aspects of crafting impactful abstract art lies in the meticulous selection of your color palette. Your chosen colors wield the power to express the very essence, mood, and emotion of your artistic creation. Below, we delve into a deeper exploration of color selection techniques to help you make informed decisions:
Analogous Colors
Delve into the realm of color harmony by selecting analogous colors—those that sit adjacent to each other on the color wheel. This choice imbues your artwork with a sense of tranquility and cohesion. Imagine the soothing effect of blending shades of blue and green, or the serene beauty of combining various purples.
Complementary Colors
Inject vitality and dynamism into your abstract piece by embracing the play of complementary colors. These are hues positioned directly opposite each other on the color wheel. The interaction between these opposites ignites a visual contrast that captures attention and energizes the viewer. Think about the striking interplay between red and green or blue and orange.
Monochromatic Palett
Opt for a monochromatic palette when aiming for an air of sophistication and unity within your artwork. By adhering to a single color while varying its tones, you achieve a refined and harmonious look. A monochromatic approach allows you to explore the depth and subtleties of a particular hue, whether it's the gentle transition from light to dark blues or the gradient from pale to deep greens.
Warm and Cool Colors
Harness the emotional resonance of color temperature to convey specific feelings and sensations. Warm colors—such as reds, yellows, and oranges—vibrate with energy and passion, imbuing your artwork with dynamism and intensity. Conversely, cool colors—like blues, greens, and purples—usher in a sense of serenity, calm, and contemplation. Consider how a fiery red might evoke fiery emotions, while a serene blue offers a soothing visual experience.
Techniques for Creating DIY Abstract Art
Now that you've gathered your supplies and selected your color palette, let's explore some popular techniques for creating easy diy abstract wall art.
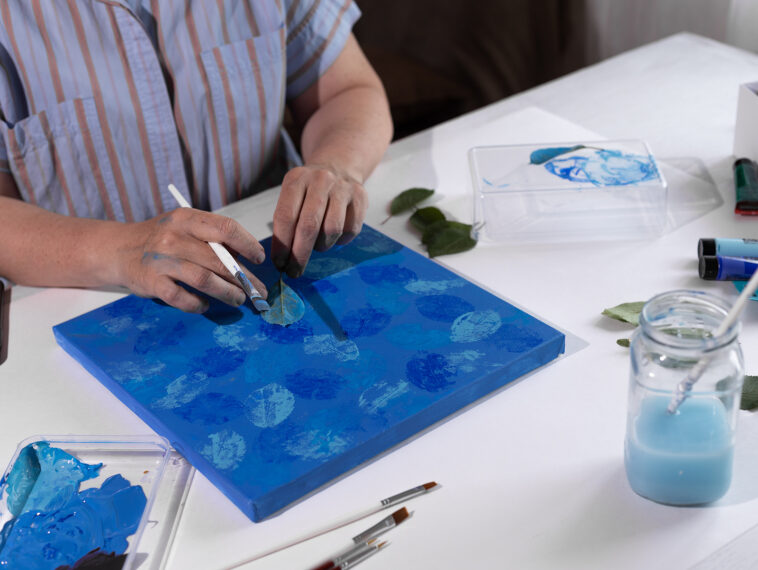
Acrylic Pouring
Acrylic pouring stands as a captivating and visually stunning technique within the realm of abstract art. It involves the meticulous blending of acrylic paint with a pouring medium to produce mesmerizing, fluid patterns on a canvas. Below, we provide a comprehensive guide to help you explore this enchanting process in detail:
Materials Needed:
- Acrylic Paints: As the core of your artwork, a diverse selection of acrylic paints in an array of colors is essential to bring your pouring vision to life. These paints will interact harmoniously with the pouring medium to create captivating patterns.
- Pouring Medium: The pouring medium acts as a crucial catalyst, ensuring that the acrylic paints flow gracefully and smoothly across the canvas. It plays a pivotal role in achieving the desired fluidity and texture in your artwork.
- Canvas: Select a canvas of your preferred size, considering the dimensions that align with your artistic intentions. The canvas serves as your creative canvas, ready to capture the unique pouring effects you create.
- Plastic Cups or Squeeze Bottles: These vessels are indispensable for mixing and containing your paint-pouring concoctions. Their convenience lies in their ability to precisely control the flow of paint onto the canvas.
- Stir Sticks: These handy tools are essential for ensuring thorough mixing of your acrylic paints and pouring medium, achieving the perfect consistency for your artwork.
- Drop Cloth: To safeguard your workspace against paint spills and splatters, lay down a reliable drop cloth, creating a dedicated area for your acrylic pouring endeavors.
Steps:
- Prepare Your Workspace: Before commencing your acrylic pouring adventure, ensure that your workspace is adequately protected. Cover your designated area with a drop cloth and place your canvas on top, ready to capture the fluid artistry.
- Mix Your Paint: In your chosen plastic cups or squeeze bottles, blend your acrylic paints with the pouring medium. The pouring medium's role is pivotal here, as it facilitates the smooth and controlled flow of paint. Experiment with various color combinations and ratios to achieve the desired effect.
- Layer Your Paint: Embrace your artistic intuition and pour different colors of paint onto the canvas in a manner that resonates with your vision. You can opt for a deliberate, planned approach or explore the spontaneity of random pouring, allowing the paints to interact and merge organically.
- Tilt the Canvas: With gentle precision, tilt the canvas in various directions, encouraging the paint to flow and intermingle. This dynamic manipulation of the canvas triggers the creation of intricate and captivating patterns, as the colors meld and blend.
- Let It Dry: After completing your acrylic pouring masterpiece, exercise patience by allowing it to dry flat for a minimum of 24 hours. This drying period is crucial to ensure that your artwork solidifies in its intended form, preserving the exquisite patterns and textures you've crafted.
Acrylic pouring offers endless possibilities for experimentation, and each piece you create will be one-of-a-kind.
Palette Knife Painting
Palette knife painting stands as a captivating and tactile technique within the realm of visual arts. It offers a distinct departure from traditional brushwork, embracing bold, textured, and expressive strokes to convey the artist's unique vision. Here's a comprehensive guide to embark on your journey into this dynamic form of artistic expression:
Materials Needed:
- Acrylic Paints: As the vibrant core of your creation, acrylic paints of various hues play a pivotal role in palette knife painting. Choose a palette that resonates with your artistic intent and vision.
- Canvas: Select a canvas that aligns with your artistic aspirations in terms of size and dimensions. The canvas becomes the blank canvas that awaits your palette knife's transformative touch.
- Palette Knives: The palette knife itself is your primary tool in this technique. These knives come in various shapes and sizes, each enabling distinct effects on the canvas. The choice of palette knives allows you to achieve a range of expressive strokes and textures.
- Palette: A palette is indispensable for mixing your chosen acrylic paint colors. It serves as the laboratory where you experiment with various color combinations and textures to realize your artistic vision.
Steps:
- Select Your Colors: The creative journey commences with the selection of colors that resonate with your artistic inspiration. Choose a palette that conveys the mood, emotion, or concept you wish to express through your palette knife painting.
- Mix Your Paint: On the palette, blend your chosen colors to achieve the precise shades and textures that align with your artistic vision. The palette becomes your laboratory for experimentation, enabling you to discover unique color harmonies and expressive combinations.
- Apply the Paint: Dip the palette knife into your meticulously mixed paint and apply it directly onto the canvas. Here, artistic freedom reigns supreme. Experiment with an array of strokes, varying thicknesses, and the layering of colors to create the desired visual impact. Palette knives allow you to create a rich tapestry of textures and expressive marks.
- Blend and Texture: One of the distinguishing features of palette knife painting is the ability to blend colors and craft texture directly on the canvas. Utilize the palette knife to blend adjacent colors seamlessly or build up layers of paint to evoke depth and dimension within your artwork.
- Let It Dry: As the final step in your creative process, exercise patience and allow your palette knife painting to dry thoroughly. This period of drying ensures that your artwork solidifies in its intended form, preserving the bold and textured strokes that convey your artistic expression.
Palette knife painting is all about spontaneity and creating bold, expressive marks on the canvas.
Splatter Painting
Splatter painting, renowned for its spontaneous and dynamic nature, is a vibrant technique that unlocks a realm of artistic freedom and unpredictability. It involves the rhythmic flicking or splattering of paint onto the canvas, resulting in energetic and captivating patterns. Dive deeper into this exhilarating creative process with our comprehensive guide:
Materials Needed:
- Acrylic Paints: The heart of your splatter painting adventure lies in the selection of acrylic paints. Opt for a diverse palette of colors that resonate with your artistic vision, offering a rich tapestry of hues to choose from.
- Canvas: Choose a canvas that aligns with your creative aspirations in terms of size and dimensions. The canvas becomes your playground for the vivid splatter patterns that will emerge.
- Brushes or Old Toothbrushes: For splattering the paint, you can employ traditional brushes or repurpose old toothbrushes. Each tool offers unique effects, allowing you to experiment and diversify your splatter patterns.
- Water: Water plays a vital role in achieving the desired consistency of your acrylic paint, allowing it to flow freely and create captivating splatters.
Steps:
- Prepare Your Paint: Begin by thinning your acrylic paints with a touch of water. This process helps you achieve a more fluid consistency, ideal for creating mesmerizing splatters. Experiment with the water-to-paint ratio to find the perfect balance that suits your artistic intention.
- Load Your Brush: Dip your chosen tool—a brush or an old toothbrush—into the thinned paint. Ensure that the bristles are saturated with paint, ready to release an explosion of color onto the canvas.
- Splatter the Paint: Hold the brush or toothbrush above the canvas and prepare to unleash your creativity. Flick your wrist with varying degrees of force to create splatters of paint. Explore different angles, heights, and motions to craft an array of splatter patterns. Embrace the interplay of colors, allowing them to blend and interact spontaneously.
- Layer and Repeat: Allow each layer of splatter to dry before adding more. Building up layers of splatter not only intensifies the visual impact but also introduces depth and complexity to your artwork. Experiment with layering different colors, creating intriguing contrasts and harmonies within your composition.
- Let It Dry: As the final step in your splatter painting journey, exercise patience and grant your artwork ample time to dry completely. This ensures that the vibrant splatter patterns solidify in their intended form, ready to captivate and inspire.
Splatter painting is a fantastic way to infuse energy and movement into your abstract art.
Watercolor Blooms
Watercolor blooms, often referred to as the “wet-on-wet” technique, constitute a captivating and nuanced approach to creating abstract art. This method embraces the fluid and unpredictable nature of watercolor paints, resulting in delicate and evocative artworks. Dive deeper into the world of watercolor blooms with this comprehensive guide:
Materials Needed:
- Watercolor Paints: The heart of watercolor blooms lies in the selection of watercolor paints. Opt for a diverse palette of colors that allows you to craft a wide spectrum of hues and effects.
- Watercolor Paper: Choose high-quality watercolor paper designed to withstand the absorption and distribution of watercolor pigments. The paper serves as the canvas for your delicate watercolor creations.
- Brushes: A selection of brushes, including various shapes and sizes, is essential for applying watercolor paint and manipulating the flow of colors on your paper.
- Water: Water plays a pivotal role in this technique, serving as both a medium and a catalyst for the watercolor blooms. It's essential for wetting the paper and facilitating the fluidity of the paint.
Steps:
- Wet the Paper: Begin by preparing your canvas, the watercolor paper. Use a clean brush to evenly wet the paper's surface. The goal is to make the paper damp but not excessively wet. This evenly moistened surface creates the ideal environment for the watercolor blooms to flourish.
- Apply the Paint: With your damp paper prepared, it's time to apply the watercolor paint. You can approach this in various ways. For instance, you can drop paint directly onto the wet paper, letting it spread organically. Alternatively, you can use a brush to gently introduce the paint, allowing it to mingle with the damp surface. Experiment with both methods to observe how they influence the resulting blooms.
- Watch the Magic: As the watercolor paint comes into contact with the wet surface, it will respond by spreading, blending, and diffusing across the paper. This captivating dance of pigments interacting with water creates beautiful and organic patterns known as “blooms.” Observe the mesmerizing interplay of colors and shapes as they unfold.
- Experiment: The beauty of watercolor blooms lies in their unpredictability, but you can also exercise a degree of control. Experiment with different colors, layering techniques, and brushwork to influence the blooms' direction and intensity. You can guide the process or allow it to evolve naturally, yielding unique and evocative results.
- Let It Dry: Once you've achieved the desired effect and your artwork has fully blossomed, allow it to dry completely. This ensures that the watercolor blooms set in their final form, preserving the delicate and ethereal qualities of your creation.
Step-by-Step Guide: Creating Your First Abstract Art Piece
Now that you've explored different abstract art techniques, let's walk through a step-by-step guide to creating your very own abstract masterpiece using acrylic pouring, one of the most popular and mesmerizing techniques.
Step 1: Gather Your Materials
For this project, you will need:
- A canvas
- Acrylic paints
- Pouring medium
- Plastic cups or squeeze bottles
- Stir sticks
- Drop cloth
Step 2: Prepare Your Workspace
Cover your workspace with a drop cloth to protect it from paint splatters. Place your canvas on top of the drop cloth.
Step 3: Mix Your Paints
In plastic cups or squeeze bottles, mix your acrylic paints with the pouring medium. Aim for a consistency that allows the paint to flow smoothly.
Step 4: Layer Your Paints
Pour different colors of paint onto the canvas in a random or planned fashion. You can create patterns or simply let the colors flow freely.
Step 5: Tilt the Canvas
Gently tilt the canvas in different directions to allow the paint to flow and mix. This will create unique patterns and interactions between the colors.
Step 6: Let It Dry
After you're satisfied with the composition, leave your artwork to dry flat for at least 24 hours. Avoid touching it during this time.
Congratulations! You've just created your first abstract art piece using the acrylic pouring technique. Now, it's time to explore more techniques and let your creativity soar.
Tips for Success
As you dive into the world of diy abstract art canvas, keep these tips in mind:
- Experiment: Don't be afraid to try new techniques and combinations of colors.
- Embrace Mistakes: Abstract art often involves unexpected outcomes, which can lead to beautiful results.
- Find Inspiration: Explore the work of famous abstract artists and gather inspiration from their styles.
- Practice Patience: Allow your artwork to dry completely before making any judgments or modifications.
- Stay Open-Minded: Abstract art is all about self-expression, so let your intuition guide you.
Displaying Your DIY Abstract Art
The way you display your abstract art can significantly affect its impact. Here are some ideas for showcasing your artwork:
- Gallery Wall: Create a gallery wall by grouping multiple abstract pieces together for a visually striking display.
- Statement Piece: Make your abstract art the centerpiece of a room by hanging it on a prominent wall.
- Rotate Art: Don't be afraid to switch out your artwork periodically to keep your space fresh and inspiring.
Conclusion
As we wrap up our artistic journey, I want to emphasize the beauty and freedom found in DIY abstract art. It's not just about creating stunning pieces; it's a deeply personal and transformative experience. Through techniques like acrylic pouring and palette knife painting, I've discovered the joy of embracing spontaneity and self-expression. Each stroke of paint has allowed me to explore my inner artist, and the unpredictability of the process has become part of the charm.
Displaying these abstract artworks in my living space has been a rewarding experience. They're not just decorations; they're windows into my emotions and creativity. Whether I choose to make them the centerpiece or part of a carefully curated gallery wall, they have the power to transform my home and inspire those who visit. So, I encourage you to embark on your own journey into the world of DIY abstract art. Let your imagination run wild, embrace the unexpected, and enjoy the unique beauty that comes from creating art that's truly your own.