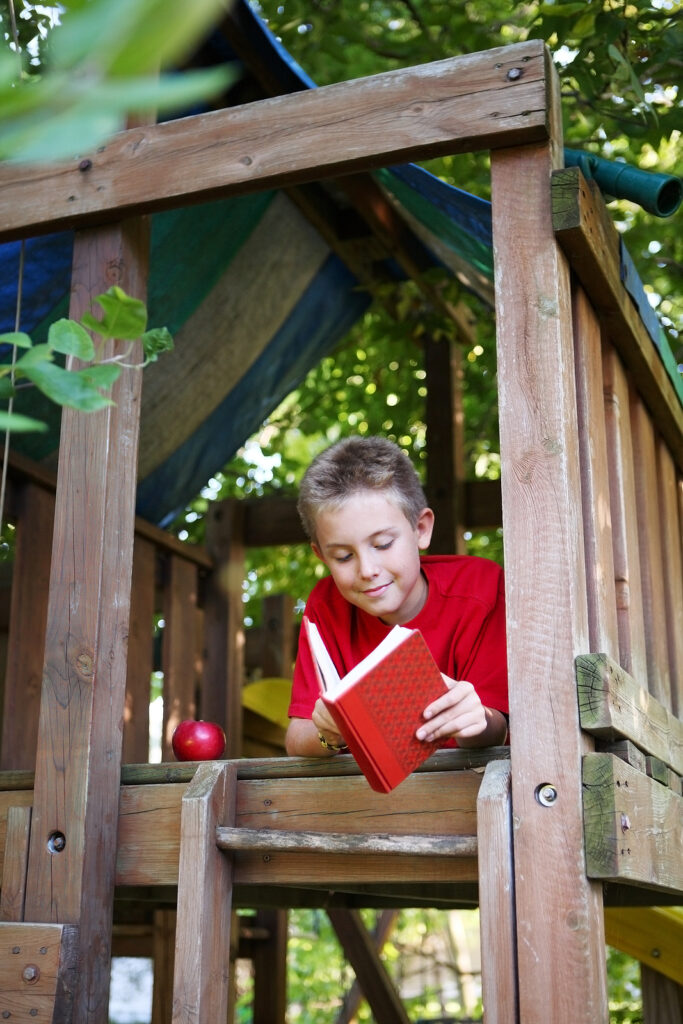
How to Make Forts for Storytime: A Magical Reading Nook
Building a fort holds a special place in my heart as it's an activity that resonates with both the young and the young at heart. Whether you want to craft a magical hideaway for your kids, a cozy reading nook just for yourself, or simply yearn to relive the pure joy of childhood, fort-building is an incredible outlet for creativity and fun.
Let me take you on a journey through various DIY fort ideas, the materials you'll need, and easy-to-follow steps. Together, we'll delve deep into the process, allowing you to channel your inner architect and embark on an exciting adventure to construct your very own fort!
Planning How to Make Your Fort
Define Your Purpose
Before you start the construction of your fort, it's essential to define its intended purpose. Clarify whether it's primarily for play, relaxation, or even as a decorative addition to your living space. This initial step will guide your design choices and help you create a fort that meets your specific needs.
For instance, if your fort is primarily for children's play, you may want to consider vibrant and playful design elements, while a relaxation fort for adults might lean towards a more serene and comfortable atmosphere.
Choose a Location
Selecting the perfect location for your fort is a pivotal decision that can significantly impact your overall experience. Your choice will largely depend on whether you're constructing an indoor or outdoor fort, each offering unique advantages and considerations.
Indoor Forts
When creating an indoor fort, it's essential to carefully assess your available spaces. The indoor environment provides a level of control and convenience that can enhance your fort-building adventure.
Areas like your living room, bedroom, or playroom can serve as ideal settings for your indoor fort. These spaces come equipped with readily available furniture that can be repurposed for fort construction and offer shelter from outdoor elements.
Outdoor Forts
For those embarking on the journey of building an outdoor fort, your location options expand to include your yard, garden, or even a nearby park. Outdoor forts can provide a more immersive and adventurous experience, but several factors need to be taken into account.
First and foremost, consider the prevailing weather conditions in your area and the season in which you plan to build your fort. Safety is paramount, so select a location that minimizes potential hazards and obstacles. Additionally, accessibility is key; choose a spot that's easily reachable for fort builders and their intended audience.
Gather Inspiration
Creating a successful fort project often starts with inspiration. Take the time to browse online platforms, such as Pinterest, Instagram, or even YouTube, to discover a wide range of fort-building ideas and design inspirations. By collecting and saving images and concepts that resonate with your vision, you'll be better equipped to create a blueprint for your fort.

Materials and Tools for Building Your Ultimate Fort
Basic Fort Materials
- Blankets or Sheets: Blankets and sheets are the primary materials for constructing the walls and roof of your fort. Choose a variety of colors and textures to add personality to your creation.
- Pillows and Cushions: Comfort is paramount in any fort. Gather an assortment of pillows and cushions for seating, lounging, and relaxation inside your fort.
- Furniture: Utilize tables, chairs, and couches as the foundational structure for your fort. These pieces of furniture will provide stability and support for your fort's structure.
- Clips or Clothespins: These simple tools are essential for securing blankets together, ensuring that your fort remains stable and sturdy throughout your playtime.
- Flashlights or String Lights: Create a magical ambiance inside your fort by adding illumination. Flashlights and string lights can be strategically placed to enhance the cozy atmosphere.
Optional Fort Materials
- Cardboard Boxes: Get creative with cardboard boxes to build tunnels, secret passages, or unique architectural elements within your fort. They can add an exciting twist to your fort's design.
- PVC Pipes: For those looking to build a more structured and robust fort, consider using PVC pipes to create a frame. This frame will provide extra stability and help maintain the desired shape.
- Ropes and Twine: These materials have both functional and decorative uses. Use them to secure blankets or add artistic touches to your fort's interior. They can also serve as makeshift curtain ties.
- Decorations: Elevate your fort's ambiance with decorative elements such as fairy lights, posters, or thematic decorations that align with your vision. Personalize your fort to make it uniquely yours.
- Safety Supplies: Don't overlook safety. Ensure you have basic tools like scissors, tape, and a first aid kit on hand. Accidents can happen, so it's essential to be prepared.
Tools
- Scissors: Essential for cutting fabric, cardboard, and other materials to the desired size and shape.
- Tape Measure: Use it to ensure accurate measurements when planning and constructing your fort. Precision is key to a well-built fort.
- Sewing Kit: If you plan to create custom-sized blankets or curtains, a sewing kit will be invaluable for stitching and hemming.
- Staple Gun: For those working with wooden frames or more substantial materials, a staple gun can securely fasten blankets and fabric in place.
- Drill and Screws: When building fort frames or more complex structures, having a drill and screws at your disposal will make assembly much more manageable and secure.
- Paint and Brushes: If your fort project includes painting or decorating elements, ensure you have paint and brushes ready to bring your creative vision to life.
See also our post on DIY Manual Treadmill
Building Indoor Forts
Indoor forts are a fantastic way to spark creativity, ignite the imagination, and create a cozy retreat for playtime or relaxation. Whether you're opting for a classic blanket fort or aiming to elevate your indoor fort-building game with a cardboard box fort, here's a detailed guide to help you get started.
Blanket Fort
A blanket fort is the epitome of comfort and simplicity, making it an excellent choice for a cozy hideaway. Follow these steps for a memorable blanket fort experience:
- Clear the Space: Begin by clearing an open area in the room where you plan to build your fort. Move furniture aside to create a blank canvas.
- Drape Blankets: Select your favorite blankets and lay them strategically over furniture and other supports to create the walls and roof of your fort. Let your creativity shine as you arrange them to achieve your desired design.
- Secure with Clips: Use clips or clothespins to firmly fasten the edges of the blankets together. This step ensures that your fort stays in place, even during enthusiastic play.
- Add Pillows and Cushions: Transform your fort into a haven of comfort by placing an assortment of pillows and cushions inside. This not only provides cozy seating but also adds to the inviting atmosphere.
- Decorate: Elevate the ambiance of your fort by incorporating string lights, posters, or other decorations that align with your chosen theme. Personal touches make your fort feel uniquely yours.
- Create an Entrance: Take the excitement up a notch by designing a unique entrance or “secret passage” into your fort. Whether it's a curtain, a tunnel of blankets, or another creative idea, this feature makes entering your fort an adventure in itself.
Cardboard Box Fort
For those seeking an adventure and a more elaborate indoor fort, a cardboard box fort is an exciting project that offers endless possibilities. Here's how to create one:
- Collect Cardboard Boxes: Gather a variety of cardboard boxes in different sizes. These boxes will serve as the building blocks for your fort. The more diverse the sizes, the more versatile your fort can be.
- Cut Openings: Using scissors or a utility knife, carefully cut doors, windows, and secret passages into the cardboard boxes. Get imaginative with your designs to make the fort truly unique and interactive.
- Assemble the Boxes: Begin stacking and arranging the cardboard boxes to create the structure of your fort. You can incorporate multiple levels or chambers for added excitement and exploration.
- Secure with Tape: Use sturdy packing tape to secure the boxes together, ensuring stability and durability. A well-constructed frame is essential for a long-lasting fort.
- Add Blankets: Drape blankets or sheets over the cardboard structure to create walls and a roof. This not only adds comfort but also conceals the cardboard, giving your fort a polished appearance and a comfortable interior.
- Decorate: Let your creativity run wild by customizing your fort with paint, markers, or other decorations. This step can transform a simple cardboard fort into a magnificent castle, a futuristic spaceship, or any other theme you desire.

Building Outdoor Forts
Constructing outdoor forts can be a thrilling and memorable experience that connects you with nature and sparks the imagination. Whether you're embarking on a treehouse fort project or opting for the simplicity of an outdoor tent fort, here's an in-depth guide to help you create your outdoor haven.
Treehouse Fort
Building a treehouse fort in your backyard is an extraordinary undertaking that allows you to harness the magic of the great outdoors. Follow these comprehensive steps:
- Select a Sturdy Tree: Begin by carefully choosing a healthy, mature tree with robust branches that can safely support the weight of the treehouse and its occupants. Prioritize safety above all else.
- Design Your Treehouse: Create a detailed blueprint or plan for your treehouse. Consider its size, shape, and any unique features you wish to incorporate. Ensure that your design harmonizes with your chosen tree's structure and capabilities.
- Gather Materials: Collect all the necessary materials, which may include wood, nails, screws, and any other construction materials specified in your design. Quality materials are essential for durability.
- Build the Frame: Construct the base and walls of the treehouse, meticulously following your design plan. Pay close attention to stability and ensure a secure attachment to the tree. Safety is paramount.
- Roof and Flooring: Add a roof to protect against the elements and provide shade. Install a sturdy flooring system to create a safe and comfortable space within the treehouse. Weatherproofing is crucial for longevity.
- Decorate: Customize your treehouse with paint, decorations, and thematic elements that bring your vision to life. Consider adding windows, curtains, and even a small seating area to make it a cozy and inviting retreat.
- Safety First: Throughout the construction process, prioritize safety. Install safety rails, confirm that all fastenings are secure, and conduct regular safety checks to ensure the treehouse remains safe for use.
Outdoor Tent Fort
For a more accessible outdoor fort experience with a camping-like twist, consider the following steps for an outdoor tent fort:
- Choose a Tent: Select a camping tent that suits your desired fort size and style, or opt for a pop-up tent for convenience.
- Set Up the Tent: Follow the manufacturer's instructions to set up the tent in your chosen outdoor location. Ensure the tent is stable, properly anchored, and securely pitched.
- Add Comfort: Transform the interior of the tent into a cozy haven by placing an array of pillows, blankets, and cushions inside. This ensures comfort during your outdoor adventures.
- Lighting: Enhance the ambiance by hanging string lights or lanterns inside the tent. LED string lights, in particular, can create a magical and inviting atmosphere.
- Campfire: For a touch of camping authenticity, create a pretend campfire using LED lights and logs or rocks. This imaginative addition adds a playful element to your outdoor fort experience.

Maintaining and Enhancing Your Fort
Your fort is a special space where creativity flourishes, imagination runs wild, and cherished memories are made. To ensure your fort remains a beloved haven, it's essential to take care of it properly and keep the excitement alive with creative enhancements. Here's a comprehensive guide to fort maintenance and upgrading:
Fort Care
- Regularly Wash Blankets and Cushions: Maintaining cleanliness is crucial for a comfortable fort experience. Periodically wash blankets, pillowcases, and cushions to keep your fort clean and fresh.
- Repair Any Tears or Damage: Keep an eye out for tears, rips, or damage to blankets, cushions, or structural components. Address any issues promptly to extend your fort's lifespan and ensure it remains safe and enjoyable.
- Store Materials Properly: When your fort is not in use, store materials like blankets, pillows, and decorations in a clean and dry space. Proper storage prevents damage and ensures your fort is ready for your next adventure.
Fort Upgrades
- Change the Fort's Theme Seasonally: Keep your fort exciting and in tune with the seasons by changing its theme. For example, transform it into a winter wonderland during colder months with faux snow and sparkling lights, and switch to a tropical paradise in the summer with beach-themed decorations.
- Add New Decorations: Periodically refresh the look of your fort by introducing new decorations, posters, or artwork. This simple step can reflect your evolving tastes and interests, breathing new life into your creative space.
- Host Fort-Themed Activities: Make the most of your fort by hosting fort-themed activities. Invite friends and family for movie nights, storytimes, or even sleepovers inside your fort. Sharing the fun with loved ones enhances the fort experience and creates lasting memories.
- Incorporate DIY Projects: Dive into DIY projects to enhance your fort's appeal. Create custom-made curtains, pillow covers, or decorative elements that align with your fort's theme. DIY projects add a personal touch and elevate the fort's aesthetic.
- Introduce Interactive Features: Take your fort to the next level by introducing interactive features. Incorporate games, puzzles, or a small library of books to keep yourself and your guests entertained for hours.
- Experiment with Lighting: Explore different lighting options to create unique atmospheres inside your fort. String lights, lanterns, or color-changing LED lights can add a magical and immersive dimension to your fort experience.
- Create Thematic Playlists: Enhance the ambiance with thematic playlists of music or soundscapes. For example, play calming nature sounds for a forest-themed fort or upbeat tunes for a dance party fort.
- Collaborate with Friends: Collaborate with friends on fort projects. Building, decorating, and coming up with creative ideas together can make the experience even more enjoyable and strengthen bonds.
See also our post on Grow and Play
How to Make Forts: Conclusion
In conclusion, building forts holds a special place in my heart, as it's an activity that transcends age and taps into the boundless realms of imagination. Whether you're crafting a fort for your kids, seeking solace in a cozy reading nook, or reliving the magic of youth, fort-building offers an avenue for self-expression and pure enjoyment. Throughout this journey, I've shared insights into planning, location selection, gathering inspiration, and materials, whether you're creating an indoor comfort haven or an outdoor nature-inspired retreat.
The key takeaway is that fort-building is about more than just structures; it's a means of crafting memories, nurturing creativity, and embracing the wonder of imagination. Your fort is a testament to the enduring joy of simplicity and the timeless enchantment of childhood. So, I encourage you to let your inner architect run wild and embark on this captivating journey to create something truly magical, regardless of your age.
How to Make Forts: Sources
https://www.cityofsanrafael.org/build-a-blanket-fort
https://www.wikihow.com/Make-a-Blanket-Fort
https://www.realsimple.com/work-life/family/kids-parenting/blanket-fort


