Cheap DIY Pizza Oven
I've always had a deep love for pizza, and there's just something magical about crafting your own homemade pies, especially when they're cooked in a DIY pizza oven that you've built yourself.
Many people believe that constructing a pizza oven can be a pricey endeavor, but I'm here to share my journey of creating one on a budget, all without sacrificing the delicious quality of my pizzas.
In this detailed guide, I'll walk you through every step of the process, so you can experience the joy of savoring gourmet pizzas right from your very own homemade oven.
The Joy of Homemade Pizza
The act of crafting your very own pizza from the ground up is nothing short of magical. From the tactile satisfaction of kneading the dough to the careful selection of the freshest toppings, and the anticipation of watching the cheese melt to perfection, each step in the process offers a unique and delightful culinary adventure.
However, to take your homemade pizza experience to the next level, it's essential to have a pizza oven that can provide that unmistakable, authentic wood-fired flavor and create a crispy, golden crust that's impossible to resist.
This is where a DIY pizza oven becomes an invaluable addition to your kitchen arsenal, allowing you to unlock the full potential of your pizza-making prowess.
Why Build a Cheap DIY Pizza Oven?
Opting to construct a cost-effective DIY pizza oven brings forth a multitude of advantages that extend beyond just saving money:
- Cost-Effective: Building your pizza oven can prove to be an incredibly cost-effective alternative compared to purchasing a ready-made one. The savings can be substantial, making it a practical choice for those on a budget.
- Customization: The allure of a DIY pizza oven lies in the complete control it affords you over its design and style. This enables you to tailor the oven precisely to your preferences, ensuring it complements your to build an outdoor pizza oven space or kitchen aesthetic seamlessly.
- Quality: When executed with care and precision, a DIY pizza oven can match, and in some cases, even surpass the performance of professional-grade pizza ovens. The end result is pizza with exceptional taste and texture that can rival those from your favorite pizzerias.
- Pride of Ownership: Crafting your pizza oven from scratch is a gratifying experience that instills a profound sense of pride. The ability to create and serve delicious pizzas to your friends and family, all from an oven you designed and built, is a unique and rewarding accomplishment that adds a special touch to your culinary endeavors. It's a source of pride and a conversation starter during gatherings.
Now that you're convinced that a cheap DIY pizza oven is the way to go, let's dive into the planning process.
Planning Your DIY Pizza Oven
Choosing the Right Location
Before embarking on the construction of your pizza oven, it's crucial to meticulously assess and choose the right location. Here are several key factors to take into account:
- Space: Start by evaluating the available space where you plan to install your pizza oven. It's essential to have ample room not only for the oven itself but also for a dedicated workspace for preparing your pizzas. This workspace should be both functional and comfortable to streamline the cooking process.
- Ventilation: Opt for a location that offers excellent ventilation. Adequate airflow is essential to prevent the accumulation of smoke, which can adversely affect the cooking process and potentially make the area uncomfortable for those around. Proper ventilation helps ensure a pleasant and safe cooking experience.
- Accessibility: Consider the ease of access to your chosen location. You'll need to transport various materials and firewood to the site during the construction and operation of the pizza oven. Ensure that the location allows for convenient ingress and egress, reducing the effort and time required for these tasks.
- Safety: Prioritize safety by keeping your pizza oven away from flammable materials and structures. Placing it in close proximity to anything combustible can pose significant risks. Maintain a safe distance to prevent accidental fires and ensure peace of mind while enjoying your homemade pizzas.
Designing Your Pizza Oven
Designing your pizza oven is a pivotal step in creating a culinary masterpiece tailored to your exact preferences. While personal taste plays a significant role, there are essential components to consider for a successful design:
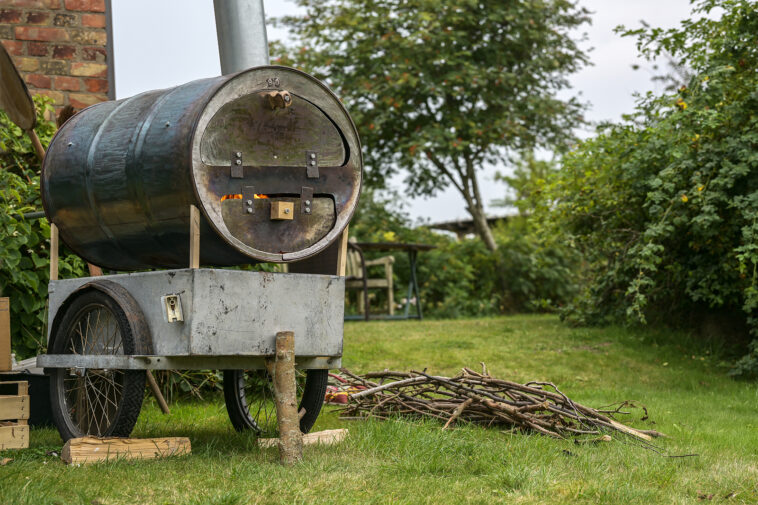
- Oven Dome Shape: The shape of your pizza oven's dome is a fundamental aspect of its design. Two common options are the hemispherical and barrel-vaulted shapes, each offering its unique blend of aesthetics and functionality. The choice ultimately depends on your vision and culinary objectives. A hemispherical dome, for instance, exudes a classic appeal, while a barrel-vaulted one may suit a more contemporary aesthetic.
- Size: Determining the size of your pizza oven is crucial and should align with your intended usage and available space. Consider how many pizzas you plan to make in one session and the dimensions of the area you've allocated for the oven. Your chosen size should ensure both practicality and efficient heat retention, enabling consistent and delightful pizza preparation.
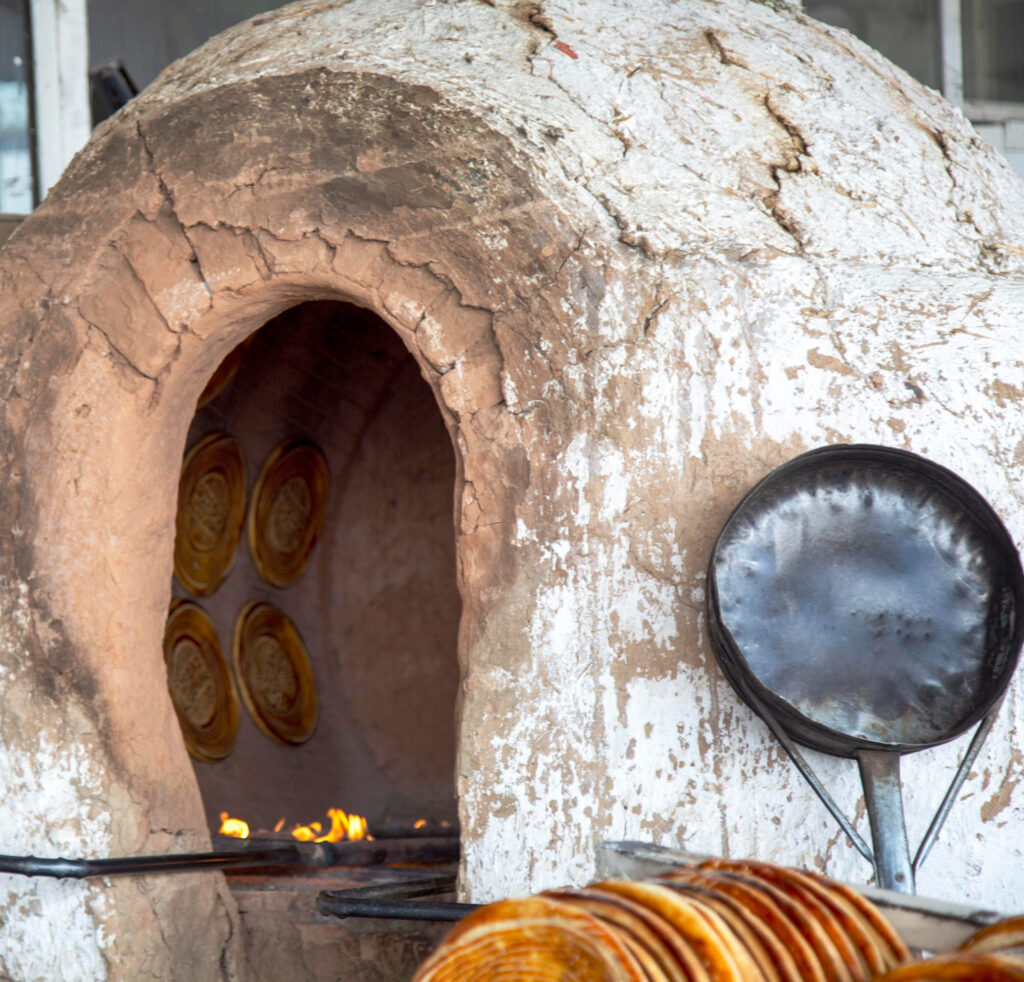
- Materials: The choice of materials is a significant design decision. Traditional clay ovens have their charm, but modern alternatives like firebricks and refractory mortar have gained popularity for their durability and heat-retaining properties. Assess your priorities, considering factors such as longevity, heat retention, and maintenance when selecting materials for your oven.
- Chimney or Vent: A well-planned chimney or vent is indispensable for directing smoke away from your cooking area. It enhances the safety and comfort of your pizza-making experience. Carefully consider the placement and design of the chimney to ensure optimal ventilation and smoke dispersal, thereby creating an enjoyable and hazard-free cooking environment.
Gathering Materials and Tools
Building your cost-effective DIY pizza oven necessitates gathering a specific set of materials and tools to ensure a smooth construction process. Here's a comprehensive list to guide you:
Materials
- Firebricks or Refractory Bricks: These specialized bricks are designed to withstand high temperatures and are the foundation for the oven's inner lining.
- Refractory Mortar: Essential for bonding the firebricks together and creating a heat-resistant structure.
- Sand: Used in various stages, including mixing with cement for the base and as a leveling material.
- Concrete Blocks or Bricks for the Base: Provide a stable foundation for your pizza oven.
- Oven Door (Optional): If desired, an oven door can help regulate heat and improve cooking control.
- Insulating Material like Ceramic Fiber Blanket: This material helps retain heat within the oven, improving its efficiency.
- Metal Sheet for the Oven's Roof (Optional): For added protection against the elements, you can opt for a metal roof over your pizza oven.
- A Chimney or Vent Pipe: Essential for proper smoke ventilation and ensuring a safe cooking environment.
Tools
- Shovel: Used for digging the foundation and mixing materials.
- Level: Ensures that surfaces are flat and even, crucial for the stability and performance of your oven.
- Trowel: Required for applying mortar and smoothing surfaces.
- Measuring Tape: Helps in precise measurement and layout.
- Spirit Level: Ensures accurate horizontal and vertical alignments during construction.
- Angle Grinder (with Diamond Blade): Useful for cutting bricks or blocks to the desired size and shape.
- Wheelbarrow (for Mixing Mortar): Simplifies the process of mixing sand, cement, and water for mortar.
- Safety Gear (Gloves, Safety Glasses, Dust Mask): Protects you from potential hazards during construction, such as dust and sharp materials.
Now that you've gathered your materials and tools, let's get started with the construction process.
Constructing the Base
The construction of a stable and resilient base is the cornerstone of a successful pizza oven project. Here's a detailed guide on how to create a dependable foundation:
Site Preparation
Begin by meticulously preparing the site where your pizza oven will stand. Remove any debris, grass, or vegetation from the chosen area. Utilize a level to ensure the ground is entirely flat and even.
Digging the Foundation
Next, dig a trench for the foundation, aiming for a depth of approximately 8 inches. The dimensions of this trench should align precisely with the size of your pizza oven to provide adequate support.
Foundation Material
Fill the trench with concrete to establish a sturdy and reliable foundation. Utilize a level and wooden forms to shape the concrete, ensuring it conforms to the dimensions required for your pizza oven's base.
Curing
Allow the concrete to cure for at least a week before advancing to the subsequent construction phases. Adequate curing time is essential to ensure the foundation's strength and durability.
Laying the Base Flooring
With the foundation in place, proceed to construct the base for your pizza oven:
- Building the Base: Begin by arranging concrete blocks or bricks on top of the cured foundation. These will form the solid base on which your pizza oven will rest. Employ a spirit level to confirm that the base is both level and stable.
- Insulation Layer: Apply a layer of insulating material, such as a ceramic fiber blanket, onto the base. This insulation layer plays a pivotal role in retaining heat within the oven, enhancing its efficiency and performance.
- Sand Layer: To create a level surface for your pizza oven, evenly distribute a layer of sand over the insulation material. This layer ensures a stable foundation for the oven's dome and cooking surface.
With the base in place, it's time to start pizza oven how to building the actual pizza oven.
Building the Pizza Oven
Designing the Oven Dome Template
Before diving into the construction, create a wooden template in the exact shape of your desired oven dome. This template will serve as a precise guide for placing the bricks or firebricks.
Laying the Dome Foundation
Start by placing a layer of sand upon which your oven will rest. Now, meticulously arrange firebricks or refractory bricks, using refractory mortar to secure them in position. Gradually build the dome structure while ensuring there's an opening for the oven's entrance.
Curing and Solidifying
It's crucial to allow the refractory mortar to cure thoroughly. This process may take several days, depending on the specific mortar used. Once cured, remove the wooden template, leaving behind the solid oven dome.
Ensuring Efficient Insulation
Enhance the oven's performance by adding an insulating layer over the dome. You can choose from materials like ceramic fiber blanket or a mix of perlite and cement. This insulation layer is essential for maintaining high temperatures inside the oven, making your pizzas cook to perfection.
Weather Protection
If you plan to keep your pizza oven outdoors, consider adding a metal sheet roof over the insulation layer. This extra layer will safeguard your oven from the elements, ensuring its longevity.
Installing the Ventilation
To keep your cooking area free of smoke, install a chimney or vent pipe at the back of the oven. Proper ventilation will help in directing smoke away from your workspace.
Adding an Oven Door
For improved heat retention and consistent cooking temperatures, you can opt to install a door on your pizza oven. This can be made from metal or wood, and it effectively traps heat inside, allowing you to master the art of pizza-making.
With the construction complete, it's time to move on to the exciting part: firing up your DIY pizza oven.

Firing Up Your Pizza Oven
Curing Your Pizza Oven
To ensure the longevity and performance of your pizza oven, a proper curing process is essential:
- Initial Low Heat: Begin by igniting a small fire in the oven and maintaining it at a low temperature, roughly around 200°F (93°C). This initial step is crucial for driving out any residual moisture and strengthening the oven's structure.
- Gradual Temperature Increase: Over the course of several hours, incrementally increase the heat by adding more wood to the fire. Aim for temperatures in the range of 350-450°F (177-232°C). This process further drives out moisture, allowing the oven to become more heat-efficient.
- Complete Cooling: After reaching the desired temperature range, allow the oven to cool down completely. This cooling phase may take several hours but is crucial for preparing the oven for cooking.
Cooking Your Inaugural Pizza
With your pizza oven properly cured, it's time to dive into the joy of pizza-making:
- Thorough Preheating: Initiate a fire in the oven and let it roar until the temperature rises to a scorching 700-900°F (371-482°C). It's advisable to employ an infrared thermometer to precisely gauge the temperature of the oven floor.
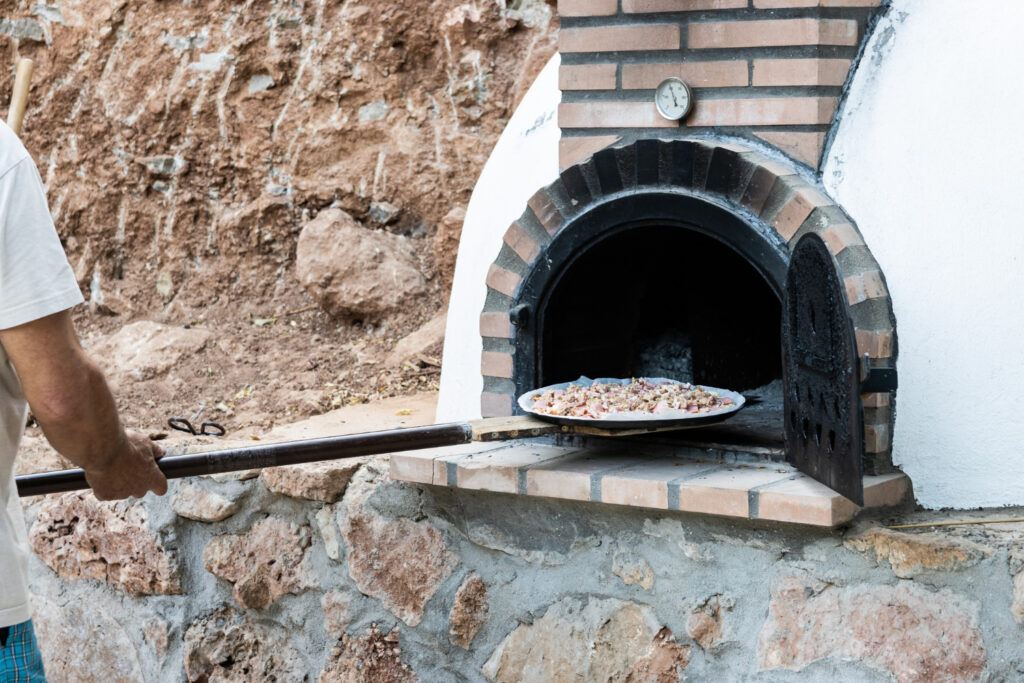
- Pizza Preparation: While the oven preheats, stretch out your pizza dough and artfully arrange your favorite toppings. To ensure easy transfer to the oven, use a pizza peel dusted with flour or cornmeal.
- Cooking Time: Carefully slide your pizza onto the blazing hot oven floor, and be prepared to work quickly. Use a turning peel to rotate the pizza, ensuring even cooking. Pizzas typically reach perfection in just a matter of minutes, so keep a vigilant eye on their progress.
- Indulge in Deliciousness: As soon as your pizza boasts a beautifully blistered crust with cheese that has melted to perfection, remove it from the oven. Slice it up and savor every bite of your homemade, wood-fired masterpiece.
Keeping Your Pizza Oven in Top Shape
Maintaining your DIY pizza oven not only extends its lifespan but also ensures consistent, delectable results. Here's a comprehensive guide to keeping your oven in top-notch condition:
Frequent Cleaning
After every use, diligently remove ash and debris from the oven floor. This simple practice prevents the buildup of excess residue and keeps your oven ready for the next culinary adventure.
Regular Inspections
Periodically examine the oven dome for any signs of cracks or wear. Cracks can compromise the oven's structural integrity and heating efficiency. If you spot any, promptly address them by applying refractory mortar or conducting necessary repairs.
Insulation Maintenance
Over time, the insulation layer that helps maintain high temperatures inside the oven may degrade. Monitor its condition and reapply insulating materials as needed. Ensuring this layer remains effective is crucial for achieving consistent and efficient heat retention.
Chimney Care
Your oven's chimney or vent plays a vital role in directing smoke away from the cooking area. Keep it clean and free of obstructions to maintain proper airflow. Periodically inspect and remove any buildup that might hinder the chimney's functionality.
Weather Protection
If your pizza oven is exposed to the elements, consider covering it with a weatherproof cover when not in use. This shields the oven from rain, snow, and other environmental factors, further enhancing its durability.
Wood Selection
If you're using wood as a fuel source, choose hardwoods like oak, maple, or cherry, which burn cleanly and generate minimal ash. Avoid softwoods like pine, as they tend to produce more creosote and can lead to chimney buildup.
Temperature Control
Practice temperature control during cooking. Extreme temperature fluctuations can stress the oven's structure. Utilize dampers and airflow adjustments to maintain a consistent and manageable cooking environment.
Tips for Perfect Pizzas
Elevate your pizza-making game in your homemade pizza oven with these invaluable tips and techniques:
Select the Right Wood
The type of wood you use can significantly impact the flavor and heat output of your pizzas. Hardwoods such as oak, maple, or cherry are excellent choices as they burn cleanly and impart a delightful smoky flavor. Avoid softwoods like pine, which can produce excessive creosote and negatively affect taste.
Temperature Control
Achieving the ideal temperature for your pizza oven is an art. Experiment with different fire sizes and temperatures to find the sweet spot for your specific oven. Invest in a quality infrared thermometer to accurately gauge the oven's temperature, especially the floor, which directly affects your pizza's cooking time and crust quality.
Master the Turn
Use a turning peel to rotate your pizzas during cooking. This technique ensures even cooking and imparts that sought-after wood-fired flavor. As the pizza rotates, every inch of the crust crisps to perfection, creating a delightful contrast of textures.
Less is More
When it comes to pizza toppings, less is often more. Opt for high-quality ingredients, and don't overload your pizzas with too many toppings. Simplicity allows the flavors to shine, and it's easier to manage the cooking process without overwhelming the crust.
Practice and Refine
Making exceptional pizzas is a skill that improves with practice. Don't be discouraged if your first few attempts aren't perfect. Experiment with different dough recipes, sauce variations, and topping combinations. As you gain experience, you'll develop a better understanding of your oven's nuances and how to achieve the perfect pie.
Timing is Crucial
Keep a close eye on your pizzas as they cook. Wood-fired ovens can deliver pizzas in a matter of minutes, so it's essential to monitor their progress. Rotate the pizza as needed to ensure even browning and bubbling of the cheese.
Experiment and Innovate
Don't be afraid to push the boundaries of pizza-making. Try unique toppings, explore regional pizza styles, and experiment with flavor combinations. The beauty of a DIY pizza oven is the creative freedom it offers, so let your culinary imagination run wild.
Conclusion
Building a cheap DIY pizza oven is a rewarding project that not only saves you money but also brings the joy of gourmet pizza making to your backyard. With careful planning, the right materials, and some patience, you can create an authentic wood-fired pizza oven build that rivals those in your favorite pizzerias.
So, roll up your sleeves, gather your materials and tools, and embark on this culinary adventure. Once your DIY diy cheap exercise ball pizza oven is up and running, you'll be treating your family and friends to the most delicious homemade pizzas they've ever tasted.
Sources
https://rtaoutdoorliving.com/diy-pizza-oven-outdoor-how-to-build/
https://www.thegardener.co.za/lets-braai/braai-diy/build-your-own-pizza-oven/