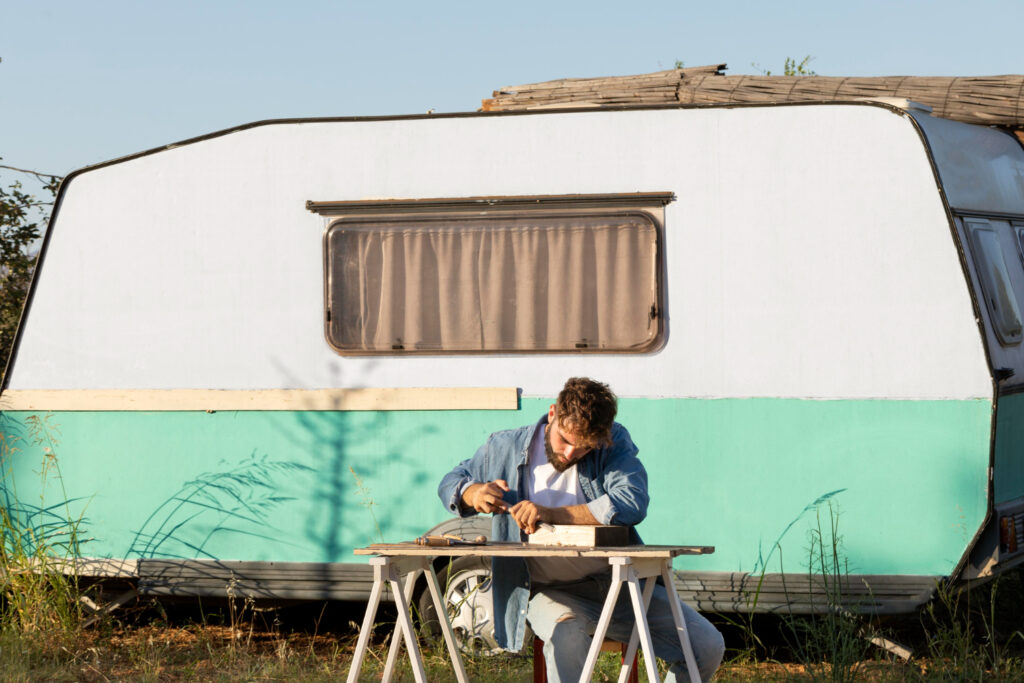
DIY Overland Camper
As someone who thrives on the thrill of outdoor escapades and dreams of embarking on epic adventures far from the comforts of city life, building my very own DIY overland camper has become an irresistible passion project. With each step, I'm crafting a rugged, adventure-ready vehicle that's poised to carry me to the wildest corners of the world.
This comprehensive guide is my trusted companion, leading me through the intricate process of creating a mobile haven packed with all the essentials to explore uncharted territories and savor the untamed beauty of our planet.
What Is an Overland Camper?
An overland camper, also known as an expedition vehicle or off-road camper, is a rugged and versatile vehicle designed for self-sustained, long-distance travel over rough terrain. These vehicles are equipped with sleeping quarters, kitchen facilities, and all the gear needed for extended adventures in remote locations. Overland campers are the ultimate choice for those who crave the freedom to explore off-grid destinations while enjoying the comfort and convenience of a mobile base camp.
Why Build a DIY Overland Camper?
Building your own DIY overland camper offers numerous advantages:
- Cost Savings: DIY projects often cost less than purchasing a pre-made overland trailer camper. You can choose cost-effective materials and components while putting in your own labor.
- Customization: Design and customize your camper to suit your specific needs and preferences. Every detail can be tailored to your liking.
- Skill Development: Learn valuable skills in carpentry, electrical work, and automotive mechanics during the build process.
- Pride of Ownership: There's a sense of accomplishment and pride that comes with creating something with your own hands.
- Unique Experience: No two DIY overland campers are alike. Yours will be a unique reflection of your personality and requirements.
Now that we've covered the basics, let's dive deeper into the process of planning and building your own DIY overland diy off road camper trailer.
Planning Your DIY Overland Camper
Defining Your Needs and Budget
Before you start your diy overland camper build project, it's crucial to define your needs and set a budget. Consider factors such as the number of occupants, the type of terrain you'll be traversing, and the duration of your trips. This will help you determine the size and features your camper should have.
Establishing a budget is equally important. It's easy for costs to escalate during a build, so create a realistic budget and try to stick to it. Don't forget to account for tools, materials, and potential unexpected expenses.
Selecting the Right Base Vehicle
The choice of base vehicle is the foundation of your DIY overland camper. When selecting a vehicle, consider the following:
- Size and Payload: Ensure the vehicle can support the weight of your camper and gear without compromising safety or performance.
- Fuel Efficiency: Overland travel often involves long distances. Choose a vehicle with decent fuel efficiency to save on costs.
- Off-Road Capability: If you plan to venture off-road, opt for a vehicle with four-wheel drive and good ground clearance.
- Reliability: Choose a vehicle known for its reliability and durability to minimize breakdowns during your adventures.
- Maintenance Costs: Consider the long-term maintenance costs and availability of spare parts.
Designing Your Camper Layout
The layout of your DIY overland camper should optimize space and functionality. Sketch out a floor plan that includes sleeping arrangements, a kitchen area, storage, and any additional features you desire. Keep in mind that every inch of space is valuable, so prioritize efficiency.
Consider the following design elements:
- Sleeping Quarters: Decide on the number and type of beds, whether it's bunk beds, a convertible sofa bed, or a rooftop tent.
- Kitchen Setup: Plan for a compact kitchen with a stove, sink, and storage for cookware and utensils.
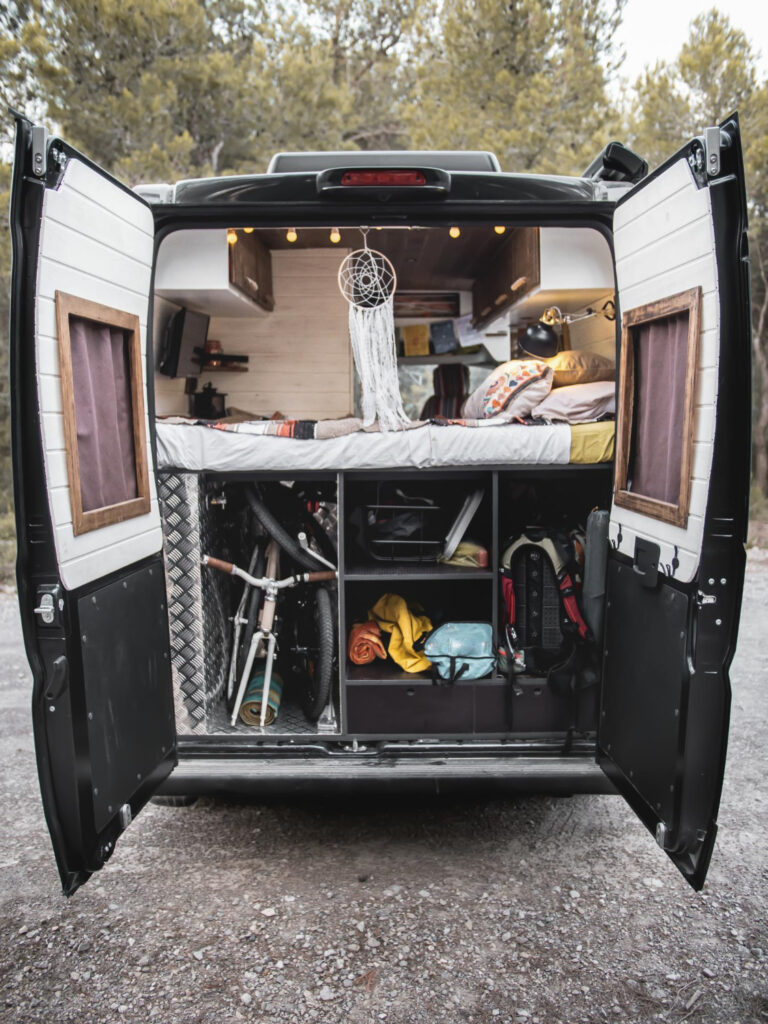
- Storage Solutions: Maximize storage space with drawers, cabinets, and built-in compartments for gear and supplies.
- Water and Sanitation: Include a freshwater tank, a greywater tank, and a portable toilet or shower, if necessary.
- Electrical System: Design your electrical system to power lights, appliances, and electronic devices. Consider solar panels for off-grid charging.
- Off-Road Modifications: If you plan to go off-road, make necessary modifications like reinforced suspension, all-terrain tires, and skid plates for undercarriage protection.
With a well-thought-out plan in place, you can proceed to gather the tools and materials needed for your DIY overland camper project.
Essential Components and Features
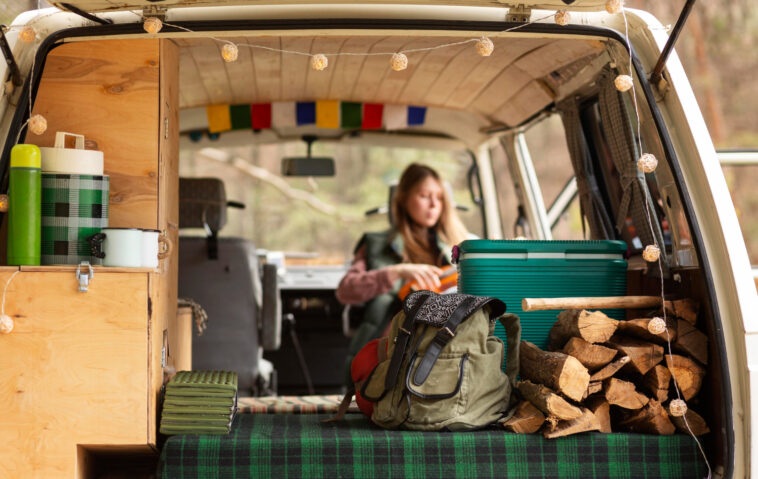
Sleeping Quarters
Your overland camper should provide comfortable sleeping arrangements for your adventures. Depending on your needs and the available space, you can opt for:
- Rear-Fold Bed: A fold-down bed at the rear of the camper is a space-saving option that allows you to convert the seating area into a bed when needed.
- Roof-Top Tent: Roof-top tents are popular for overland campers, offering a cozy sleeping area that can be set up in minutes.
- Bunk Beds: If you have multiple occupants, consider installing bunk beds to maximize sleeping capacity.
- Convertible Sofa Bed: A sofa bed is a versatile choice that can serve as both seating and a sleeping area.
Ensure you use comfortable and durable mattresses or sleeping pads, and provide adequate insulation to stay warm in colder climates.
Kitchen Setup
A well-equipped kitchen is essential for preparing meals on the road. Your kitchen should include:
- Stove: A compact propane or induction cooktop is ideal for cooking meals.
- Sink: A small sink with a freshwater supply is crucial for washing dishes and hands.
- Refrigerator: Consider installing a 12V or 24V DC refrigerator to keep food fresh.
- Storage: Cabinets and drawers should house cookware, utensils, and food supplies securely during travel.
- Counter Space: Include a fold-out countertop or workspace for meal preparation.
Storage Solutions
Effective storage is key to keeping your overland camper organized and clutter-free. Utilize space-saving solutions like:
- Cabinets and Shelves: Install cabinets and shelves to store clothing, gear, and food items.
- Drawers: Drawers are ideal for organizing smaller items and utensils.
- Cargo Nets and Bungee Cords: Use nets and cords to secure gear and prevent items from shifting during travel.
- Overhead Storage: Make use of overhead compartments for additional storage space.
Water and Sanitation
For extended trips, you'll need a reliable water and sanitation setup:
- Freshwater System: Install a freshwater tank with a pump for cooking and cleaning.
- Greywater System: Create a separate greywater tank to collect wastewater from the sink and shower.
- Toilet and Shower: Consider a portable camping toilet and a compact outdoor shower for hygiene.
- Water Filtration: Use a water filtration system to ensure clean drinking water.
Electrical System
Your overland camper should have a robust electrical system to power appliances and charge devices:
- Battery Setup: Install deep-cycle batteries to store electricity. Consider a dual battery system to separate the starter battery from the auxiliary battery.
- Solar Panels: Solar panels are an eco-friendly way to recharge your batteries when off-grid.
- Inverter: Use an inverter to convert DC power to AC for running standard household appliances.
- LED Lighting: LED lights are energy-efficient and provide ample illumination inside the camper.
Off-Road Modifications
If you plan to tackle challenging terrain, consider these off-road modifications:
- Suspension Upgrades: Beef up the suspension to handle rough roads and maintain vehicle stability.
- All-Terrain Tires: Equip your vehicle with high-quality all-terrain tires for traction on various surfaces.
- Skid Plates: Protect the undercarriage with skid plates to prevent damage from rocks and debris.
- Recovery Gear: Carry recovery gear like a winch, recovery straps, and a high-lift jack for emergencies.
Now that you have a clear picture of the essential components and features, let's move on to the tools and materials required for your DIY overland camper project.

Tools and Materials
Tools You'll Need
Building your own overland camper requires a variety of tools, including:
- Power Tools: A drill, circular saw, jigsaw, and orbital sander are essential for cutting and shaping materials.
- Hand Tools: Screwdrivers, wrenches, pliers, and a hammer will be used throughout the project.
- Measuring Tools: A tape measure, level, and square are vital for precise construction.
- Safety Gear: Don't forget safety equipment like safety glasses, ear protection, and dust masks.
- Welding Equipment: If you plan to make structural modifications, welding equipment may be necessary.
- Electrical Tools: Wire strippers, crimpers, and a multimeter are needed for the electrical system.
Choosing the Right Materials
Selecting the right materials is crucial for building a sturdy and reliable overland camper:
- Frame: Steel or aluminum is commonly used for the camper frame. Ensure it's strong enough to support the camper's weight.
- Insulation: Use high-quality insulation to regulate temperature and reduce energy consumption.
- Exterior Cladding: Choose durable and weather-resistant materials like fiberglass, aluminum, or composite panels.
- Interior Surfaces: Opt for easy-to-clean materials for the interior, such as marine-grade plywood or laminated plywood.
- Windows and Ventilation: Install windows with double glazing for insulation and ventilation options for airflow.
- Flooring: Consider durable and moisture-resistant flooring materials like vinyl or laminate.
- Electrical Components: Use marine-grade electrical components for durability and safety.
Remember that the materials you choose should align with your budget and design preferences. Quality materials will ensure the longevity of your DIY overland camper.
Safety Precautions
Safety should always be a top priority when building your overland camper. Follow these safety precautions:
- Wear Appropriate Safety Gear: Use safety glasses, gloves, and ear protection when working with power tools.
- Work in a Well-Ventilated Area: Adequate ventilation is essential when using adhesives, paints, or other chemicals.
- Secure Heavy Items: Secure heavy materials and equipment to prevent accidents.
- Follow Manufacturer's Instructions: Always follow the manufacturer's guidelines when using tools and materials.
- Seek Professional Help When Needed: If you're not experienced with certain tasks like welding or electrical work, consult with professionals.
With the tools and materials ready, it's time to start building your DIY overland camper. In the next section, we'll guide you through the construction process.
Building Your DIY Overland Camper
Constructing the Frame
- Measure and Cut: Begin by measuring and cutting the frame material to the desired dimensions. Ensure the frame is square and level.
- Welding or Bolting: Depending on your skills and materials, weld or bolt the frame together securely. Reinforce the corners and joints for added strength.
- Mounting Points: Attach the frame to the base vehicle's chassis, ensuring it's properly aligned and securely fastened.
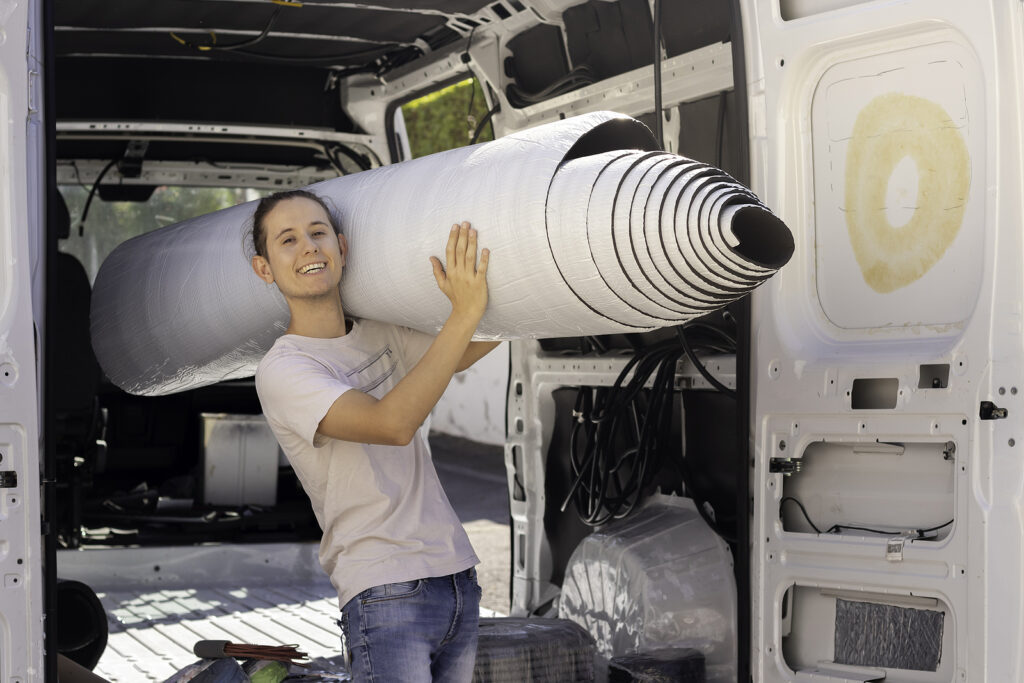
Insulating and Weatherproofing
- Insulation Installation: Apply insulation material to the frame, including the walls, floor, and roof. Ensure a snug fit and seal any gaps.
- Weatherproofing: Cover the insulated frame with weatherproof cladding, such as fiberglass or aluminum. Seal all seams and edges to prevent water intrusion.
Installing Windows and Ventilation
- Window Cutouts: Cut openings for windows and install them using appropriate sealants and fasteners.
- Ventilation Installation: Place roof vents or side vents to promote airflow inside the camper. Use weatherproof seals and proper ventilation mechanisms.
Building Interior Fixtures
- Furniture Installation: Install the sleeping quarters, kitchen area, and storage solutions according to your design plan. Secure all fixtures to the frame.
- Plumbing and Electrical: Connect the plumbing system, including sinks and freshwater tanks. Wire the electrical components, connecting them to the battery system.
Wiring the Electrical System
- Battery Placement: Secure the deep-cycle batteries in a designated area, ensuring proper ventilation and wiring access.
- Solar Panel Installation: Mount solar panels on the roof and connect them to the battery system.
- Interior Wiring: Run wiring for lights, outlets, and appliances, connecting them to the battery and inverter.
- Testing: Test all electrical components to ensure they function correctly.
As you progress through the construction process, refer to your design plan to ensure everything aligns with your vision. Once the build is complete, it's time to add personal touches to make your overland camper feel like home.
Adding Personal Touches
Decor and Comfort
Enhance the interior of your DIY overland camper with cozy decor and comfort features:
- Cushions and Bedding: Invest in comfortable cushions and bedding for a good night's sleep.
- Curtains or Blinds: Add curtains or blinds to ensure privacy and control light levels.
- Floor Rugs: Rugs can make the interior feel warm and inviting.
- Custom Upholstery: Consider custom upholstery for seating and cushions to match your style.
Customizing Your Overland Camper
Make your overland camper unique by adding personal touches:
- Decals and Paint: Apply decals or paint to the exterior to give it a personalized look.
- Exterior Lighting: Install exterior LED lighting for ambiance and safety.
- Mementos and Souvenirs: Decorate the interior with souvenirs from your adventures.
- Custom Storage Solutions: Modify storage areas to accommodate specific gear or equipment.
Security Measures
Protect your investment and belongings with security measures:
- Locking Systems: Ensure all entry points have secure locking systems.
- Security Cameras: Install security cameras for added protection when parked.
- GPS Tracking: Consider a GPS tracking system to locate your camper if it's ever stolen.
With personalization and security measures in place, your DIY overland camper will be ready for the road. However, the journey doesn't end there. Regular maintenance and upkeep are essential for keeping your camper in top shape.
Maintenance and Upkeep
Regular Maintenance
To ensure your DIY overland camper remains reliable, perform regular maintenance tasks such as:
- Inspect the Frame: Check for rust, damage, or wear and tear on the frame.
- Seal Insulation: Periodically inspect and reseal insulation and weatherproofing to prevent leaks.
- Electrical System Check: Test the electrical system, including the battery, solar panels, and all components.
- Tire Maintenance: Monitor tire pressure and tread wear regularly.
- Plumbing Inspection: Check plumbing connections and tanks for leaks.
Troubleshooting Common Issues
Be prepared to address common issues that may arise:
- Leaks: Leaks are a common problem. Identify and seal leaks promptly to prevent water damage.
- Electrical Problems: Troubleshoot electrical issues by checking connections, fuses, and batteries.
- Mechanical Repairs: Address any mechanical issues with the base vehicle promptly to ensure safe travel.
Modifications and Upgrades
Over time, you may want to make modifications or upgrades to your overland camper. These can include:
- Interior Layout Changes: Modify the interior layout to better suit your needs or preferences.
- Upgraded Appliances: Replace or upgrade appliances for improved efficiency and convenience.
- Exterior Accessories: Add accessories like roof racks, awnings, or bike mounts.
- Advanced Technology: Incorporate advanced technology like a mobile Wi-Fi hotspot or a navigation system.
By staying proactive with maintenance and considering upgrades, you can extend the life of your DIY overland camper and keep it in peak condition for years of adventures diy trailer build an overland.
Safety and Regulations
Vehicle Inspection and Compliance
Before hitting the road, ensure your DIY overland camper complies with local vehicle regulations and safety standards. This may involve:
- Inspections: Arrange for a safety inspection to ensure your camper meets legal requirements.
- License and Registration: Ensure your camper is properly registered and licensed as an RV or motorhome.
- Insurance: Obtain appropriate insurance coverage for your overland camper to protect yourself and your investment.
Insurance and Legal Requirements
Understanding legal requirements and securing insurance is essential for a worry-free overland adventure:
- Liability Insurance: Liability insurance covers damage to third parties and is often required by law.
- Comprehensive Insurance: Comprehensive insurance covers damage to your camper and may include coverage for theft and vandalism.
- Roadside Assistance: Consider a roadside assistance plan to provide support in case of breakdowns or emergencies.
- Travel Documentation: Ensure you have all necessary travel documents, including identification, permits, and visas for international travel.
Conclusion
Building your DIY overland camper is a rewarding journey that combines craftsmanship with adventure. By carefully planning, selecting the right materials, and following best practices, you can create a reliable and customized adventure-ready vehicle that will take you to breathtaking destinations off the beaten path. Whether you're exploring remote wilderness areas, embarking on cross-country road trips, or simply seeking the freedom of the open road, your DIY overland camper will be your trusted companion on your epic adventures.
Start your project with enthusiasm, stay committed to safety and legal compliance, and don't forget to document your adventures along the way. Your DIY overland camper will not only provide you with unforgettable experiences but also serve as a testament to your creativity and resourcefulness.
Sources
https://www.oregon.gov/osp/Docs/Vehicle_Codes.pdf