DIY Insulation
I've realized that insulating my home isn't just a smart idea; it's become a necessity. With rising energy costs and a desire for a more comfortable living space, I'm taking matters into my own hands. DIY insulation projects are not only cost-effective but also offer a valuable opportunity to learn new skills.
From the basics to advanced techniques, I'm diving into the world of DIY home insulation to make my home more energy-efficient, lower those utility bills, and create a cozier living environment – all while saving money in the process.
Understanding the Importance of Insulation
To embark on your DIY insulation journey, it is essential to gain a thorough understanding of why insulation plays a pivotal role in maintaining your home's comfort and efficiency. Insulation functions as a formidable barrier, curbing the transfer of heat and ensuring that your home remains cozy during winters and pleasantly cool during summers. This multifaceted component offers a range of advantages, including:
- Enhanced Energy Efficiency: By insulating your home effectively, you can significantly reduce the need for excessive heating or cooling. This leads to substantial savings on your energy bills over time.
- Elevated Comfort Levels: Proper insulation fosters a consistent and comfortable indoor temperature throughout the year, ensuring that you and your family enjoy a pleasant living environment, regardless of external weather conditions.
- Positive Environmental Impact: A well-insulated home contributes to sustainability by curbing energy consumption. This translates to a smaller carbon footprint and less strain on natural resources, aligning your household with environmentally conscious practices.
- Noise Abatement: Beyond temperature control, insulation also serves as a barrier to external noise. This results in a quieter indoor space, shielding you from the disturbances of the outside world and enhancing your overall quality of life.
- Increased Home Value: An energy-efficient home is an attractive prospect for potential buyers. Adequate insulation not only reduces operating costs but also adds intrinsic value to your property, making it more appealing in the real estate market.
Types of Insulation Materials
When embarking on a DIY insulation project, it's vital to acquaint yourself with the diverse range of insulation materials available, each boasting its unique set of advantages and drawbacks. The selection of the most suitable material hinges on factors such as your budget, specific insulation requirements, and the area you intend to insulate.
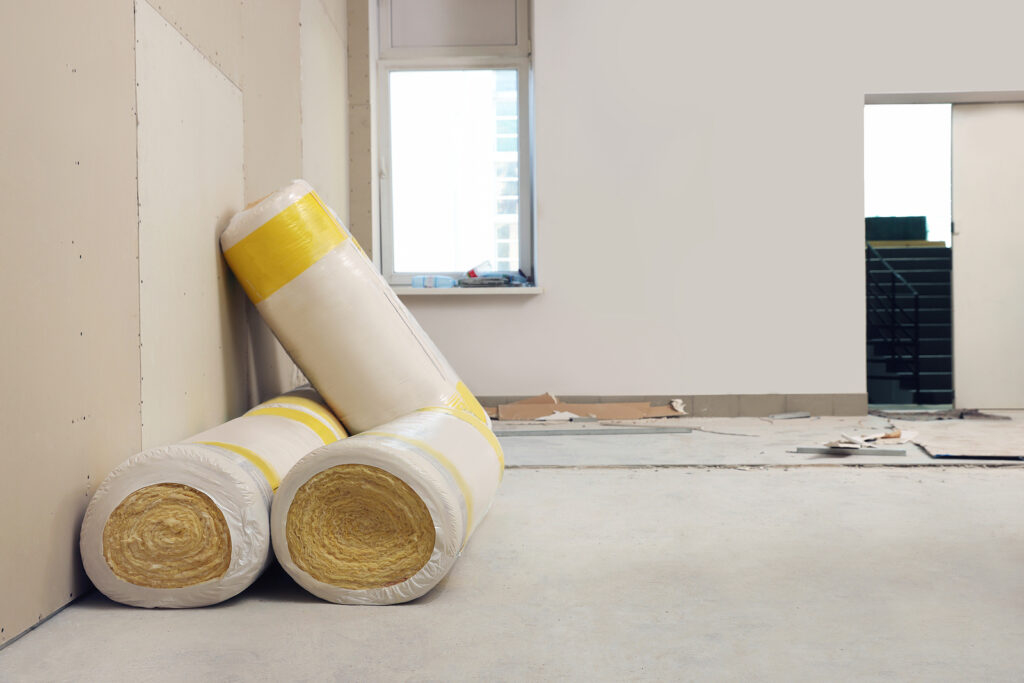
Fiberglass Insulation:
Fiberglass insulation stands as one of the most prevalent and cost-effective options. Comprising minuscule glass fibers, it can be found in batts, rolls, or loose-fill form. Consider the following:
- Pros: Demonstrates commendable thermal performance, is fire-resistant, non-combustible, and widely accessible in the market.
- Cons: During installation, it can be abrasive to the skin, eyes, and respiratory system, necessitating the use of appropriate protective gear.
Cellulose Insulation:
Derived from recycled paper products, often treated with fire retardants, cellulose insulation offers an environmentally friendly choice with respectable insulation properties. Key points include:
- Pros: Crafted from recycled materials, exhibits sound thermal performance, and is adept at reducing air infiltration.
- Cons: Tends to settle over time, potentially requiring periodic replenishment.
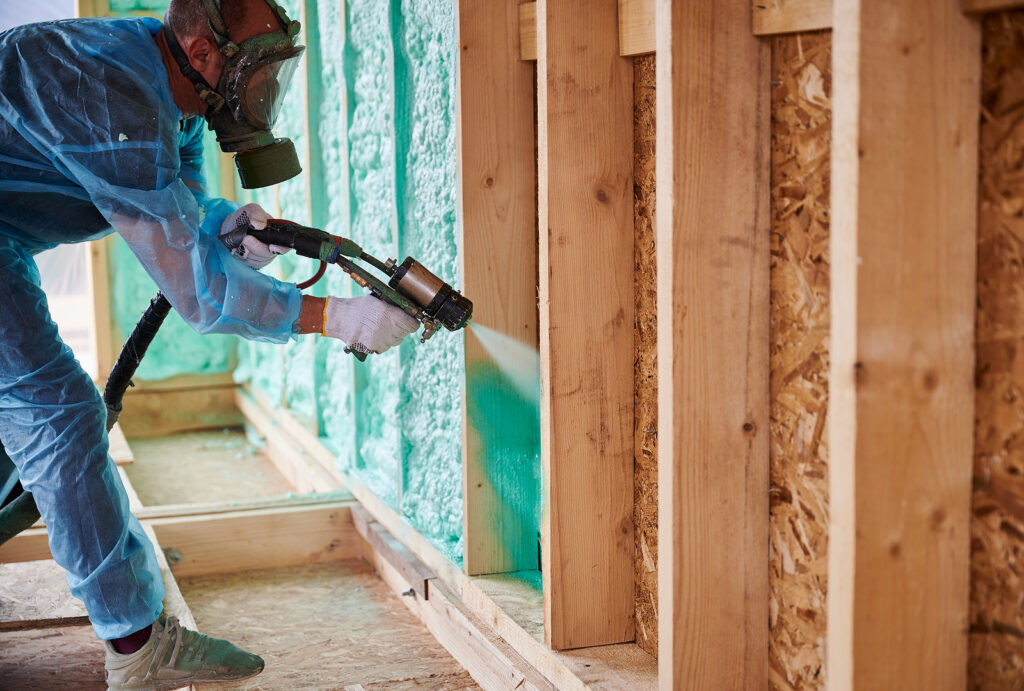
Spray Foam Insulation:
Known for its high R-value, which quantifies thermal resistance, spray foam insulation is available in two variations: open-cell and closed-cell. Delve into these considerations:
- Pros: Delivers outstanding thermal performance, establishes an effective air and moisture barrier, and finds versatility across various applications.
- Cons: Relatively more expensive than other alternatives, demands professional equipment for application, and improper installation may lead to off-gassing issues.
Reflective Insulation:
Often used in tandem with other insulation materials, reflective insulation operates by deflecting radiant heat away from your home. Bear in mind the following aspects:
- Pros: Proven effectiveness in blocking radiant heat, lends itself to installation in confined spaces, and offers ease of handling.
- Cons: Functions optimally when used in conjunction with other insulation types and might not suffice as a standalone solution for comprehensive insulation needs.
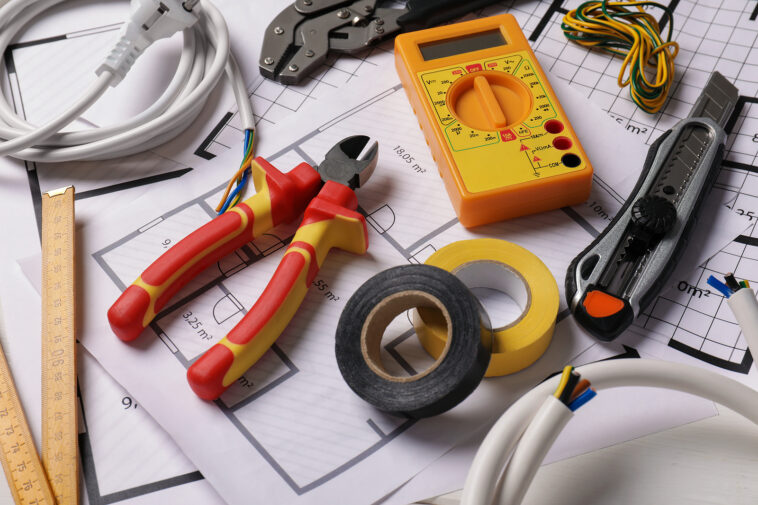
Tools and Equipment You'll Need
Undertaking a DIY insulation project requires careful preparation and access to the right tools and equipment. Equipping yourself with the necessary gear not only streamlines the insulation process but also ensures your safety. Below is an extensive list of items you'll need for a successful insulation project:
- Protective Gear: Ensure your safety with the following protective equipment:
- Safety goggles: To shield your eyes from debris and insulation particles.
- Gloves: Protect your hands from skin irritation and insulation fibers.
- Dust mask or respirator: Guards against inhalation of insulation particles.
- Appropriate clothing: Wear long sleeves and pants to minimize skin exposure.
- Utility Knife: A sharp utility knife is essential for precision cutting of insulation materials to fit your specific installation requirements.
- Tape Measure: Accurate measurements are crucial for ensuring insulation fits snugly into spaces, maximizing its effectiveness.
- Staple Gun: This tool is invaluable for securely fastening insulation in place, ensuring it remains in position.
- Caulking Gun and Sealant: Use these to seal gaps and cracks in walls and ceilings, preventing air leaks and enhancing insulation's performance.
- Insulation Supports (for overhead installations): Particularly important for attic insulation, these supports prevent insulation from sagging over time, maintaining its efficacy.
- Blower (for loose-fill insulation): If you opt for loose-fill insulation, you'll need a blower machine to evenly distribute insulation material within your chosen spaces.
- Ladder or Scaffolding (for high or hard-to-reach areas): Ensure that your ladder or scaffolding is both stable and in good working condition to access elevated portions of your home safely.
- Safety Harness (for attic work): When working in elevated spaces like attics, a safety harness is vital to prevent falls and ensure your safety throughout the project.
Preparing Your Home for Insulation
Proper preparation is crucial for the success and efficiency of your DIY insulation project. To ensure that your home is ready for insulation installation, follow these detailed steps:
Conduct a Thorough Air Leak Inspection
Start by identifying and sealing any air leaks in your home's envelope. Air leaks can significantly reduce the effectiveness of insulation. Common areas to check for leaks include windows, doors, electrical outlets, plumbing penetrations, and any gaps or cracks in the building structure. Use weatherstripping, caulk, or foam sealant to seal these openings.
Clear Obstacles and Debris
In the specific area you intend to insulate, remove any obstacles or debris that could hinder the installation process. This includes stored items, old insulation, and any other clutter. A clean workspace will make the insulation job easier and more efficient.
Evaluate Existing Insulation
If your home already has insulation, assess its condition and effectiveness. If it's old, damaged, or insufficient, consider removing or replacing it before adding new insulation. Properly dispose of any old insulation materials following local regulations.
Safety First
Prioritize safety when working in confined or elevated spaces like attics or crawl spaces. Ensure proper ventilation to minimize exposure to dust and fumes. Adequate lighting is essential to work safely in dimly lit areas. Additionally, always use appropriate safety gear, including a safety harness when working at heights. Inform a family member or friend about your insulation project so someone knows your whereabouts and can assist in case of an emergency.
Measure and Cut Insulation Precisely
Measure the spaces you plan to insulate accurately. Follow the manufacturer's guidelines for the desired R-value and thickness, which will depend on your climate and the insulation material you're using. Use a utility knife or specialized insulation cutting tools to cut the insulation materials to the appropriate size. Ensure that the cuts are precise to minimize gaps and voids in the insulation layer.
Select the Right Insulation Material
Choose the insulation material that best suits your needs and budget. Common options include fiberglass, cellulose, spray foam, and foam board insulation. Each material has its unique properties and installation requirements, so make an informed choice based on your project's goals.
Plan for Proper Installation
Depending on the insulation material, you may need to follow specific installation guidelines. For example, installing fiberglass batts requires proper stapling and sealing of seams, while spray foam insulation may require professional equipment. Refer to the manufacturer's instructions and consider seeking expert advice if you're unsure about the installation process.
Now that your home is prepared, let's explore how to insulate different areas effectively.
Installing Insulation in Different Areas
Attic Insulation
The attic space plays a crucial role in your home's energy efficiency, often serving as a significant source of heat loss. Properly insulating your attic can lead to substantial savings on your energy bills. To ensure you get the most out of your attic insulation project, consider the following steps:
- Select the Right Insulation Material: Begin by choosing the insulation material that best suits your budget and needs. Common options include fiberglass batts, blown-in cellulose, or spray foam insulation. Each material offers unique benefits, such as R-value (insulating effectiveness) and installation ease, so make your selection carefully.
- Seal Air Leaks: Prior to installing insulation, it's vital to address any air leaks or gaps in the attic space. These leaks can be found around chimneys, along the attic floor, and within ductwork. Sealing these areas effectively prevents warm air from escaping, making your insulation more efficient.
- Proper Installation: When installing insulation, pay attention to proper placement and coverage. If you're using fiberglass or cellulose insulation, ensure it's laid evenly between the attic joists or rafters. To prevent sagging over time, consider using insulation supports or baffles, especially in sloped or cathedral-style attics.
- Safety First: Always prioritize safety when working in the attic. Protective gear, such as a dust mask, safety goggles, gloves, and long sleeves, is crucial due to potential exposure to insulation fibers and dust. Adequate ventilation is also essential to maintain good air quality during installation.
- Consider Professional Help: While insulating your attic can be a DIY project, it's often wise to consult with professionals, especially if you have complex attic structures or if you're unsure about the insulation process. Professionals can provide expert advice, ensuring your attic is insulated correctly for optimal energy efficiency.
- Check for Local Codes and Regulations: Before beginning your attic insulation project, check with local building codes and regulations. These guidelines may specify the recommended R-values for your region, ensuring your insulation meets or exceeds the necessary standards.
- Regular Maintenance: Keep in mind that attic insulation can deteriorate over time. Periodically inspect your insulation for damage or compression and replace or reinforce it as needed to maintain its effectiveness.
Wall Insulation
Wall insulation plays a pivotal role in improving the overall energy efficiency of your home. While it's true that wall insulation can pose challenges for DIYers, the rewards in terms of energy savings and comfort make it a worthwhile endeavor. Here's a detailed guide on how to insulate your walls effectively:
- Assess Your Wall Structure: Before you begin, assess your wall structure and determine whether it's feasible to add insulation. Most homes have either exterior or interior walls that can be insulated. Insulating exterior walls is more common, as it offers better thermal performance.
- Choose the Right Insulation Material: Select the appropriate insulation material based on your needs and budget. Common choices include fiberglass, cellulose, foam board, or foam-in-place insulation. The R-value of the insulation material should align with your climate and energy efficiency goals.
- Locate Wall Cavities: Identify the wall cavities where you plan to add insulation. In the case of existing walls without insulation, you'll need to drill holes to access the cavities. Begin at the top of the wall and work your way down, maintaining even spacing between holes.
- Safety Precautions: Prioritize safety during the drilling process. Wear appropriate safety gear, including safety goggles and a dust mask, to protect yourself from potential hazards such as dust and debris.
- Insulation Installation: Utilize a blower machine to introduce insulation material into the wall cavities. Depending on the material and the size of the cavities, you may require a helper to ensure even distribution. Follow the manufacturer's guidelines for the specific insulation material you're using.
- Plug and Patch Holes: After the insulation is in place, seal the holes you drilled. Use suitable materials to plug the holes, ensuring they match your wall's finish. This step is essential for maintaining the aesthetic integrity of your home.
Crawl Space and Basement Insulation
Crawl spaces and basements, often relegated to the realms of dampness and cold, can be transformed into valuable contributors to your home's comfort and energy efficiency through proper insulation. Here's a comprehensive guide on how to tackle this critical home improvement project:
- Assess Moisture and Air Infiltration: Start by evaluating the moisture levels and potential air infiltration issues in your crawl space or basement. Address any existing moisture problems, as excessive moisture can compromise the effectiveness of insulation.
- Seal Gaps and Cracks: Before insulating, seal all gaps and cracks in the walls, foundation, and floor. This step is crucial to prevent drafts, moisture infiltration, and the intrusion of pests. Use appropriate sealants or caulking materials for a thorough job.
- Rim Joist Insulation: Insulate the rim joists around the perimeter of your crawl space or basement. This area is a common entry point for cold air, so using rigid foam board or spray foam insulation to seal these gaps effectively can make a significant difference in energy efficiency.
- Ground Coverage and Vapor Barrier: In the case of a crawl space, consider covering the ground with a vapor barrier. This barrier, typically made of heavy-duty plastic, prevents moisture from rising into your home through the soil. Securely anchor it to the walls and ensure proper overlap between sheets to create an airtight seal.
- Insulate Walls or Ceiling: Depending on your specific needs and the configuration of your space, you can insulate either the walls or the ceiling of the crawl space or basement. Insulating the walls is typically more effective in controlling temperature and moisture levels. Choose insulation materials with the appropriate R-value for your climate.
- Choose Insulation Material: Select insulation materials that are suitable for the conditions in your crawl space or basement. Common options include fiberglass batts, rigid foam boards, spray foam, or mineral wool. Ensure the chosen insulation is appropriate for the desired application.
Floor Insulation
Floor insulation plays a pivotal role in ensuring a comfortable indoor environment, especially when there's an unheated or poorly insulated space beneath your home. Here's an in-depth guide to help you tackle floor insulation effectively:
- Assess Your Space: Begin by assessing the space beneath your home. Identify whether it's unheated, poorly insulated, or exposed to moisture. Understanding your space's specific conditions will inform your insulation choices.
- Choose the Right Insulation Material: Select insulation materials tailored for floor applications. Common choices include fiberglass, foam board, rigid foam, or spray foam insulation. The material you choose should align with your budget, energy efficiency goals, and the unique conditions of your floor.
- Insulation Installation: Install insulation between the floor joists, which are the horizontal beams that support the floor above. Ensure a snug fit to minimize air gaps that can compromise insulation effectiveness. If the space allows, consider installing insulation with a higher R-value for better thermal resistance.
- Seal Gaps and Seams: To maintain a tight thermal envelope, seal any gaps or seams in the insulation. Foil tape is an excellent choice for this purpose, as it provides an airtight seal. Pay careful attention to areas where insulation meets the floor, walls, or other structural elements.
- Vapor Barrier Considerations: Evaluate whether a vapor barrier is necessary. In spaces with high moisture levels, such as basements or crawl spaces, a vapor barrier can prevent moisture from migrating into the insulation and causing damage. Secure the vapor barrier to the floor joists or subfloor, ensuring it's properly sealed and overlapped.
- Protection from the Elements: If the space beneath your home is exposed to the elements, such as strong winds or extreme temperatures, consider adding additional protection. This might involve installing insulation boards on the underside of the floor joists or using insulated panels that provide both insulation and structural support.
Safety Considerations
When embarking on a do-it-yourself (DIY) insulation project, prioritizing safety is of paramount importance. To ensure a secure and injury-free experience, consider the following comprehensive safety precautions:
Protective Gear
Equip yourself with a range of protective gear to safeguard against potential hazards. This should include sturdy gloves to shield your hands, goggles to protect your eyes from airborne particles, a dust mask or respirator to prevent inhalation of harmful substances, and appropriate clothing that covers your skin to prevent direct contact with insulation materials.
Ventilation
Adequate ventilation is crucial to minimize exposure to airborne particles, especially when handling insulation materials. Make sure to work in well-ventilated areas or consider using exhaust fans and windows to dissipate any airborne contaminants.
Ladder Safety
When working in elevated spaces such as attics or ceilings, employ a stable ladder or scaffolding. Adhere to proper ladder safety guidelines, ensuring it is positioned on a flat, even surface and that it is at the appropriate angle to prevent accidents.
Electricity Awareness
Exercise caution when working around electrical wiring and fixtures during insulation installation. Prioritize turning off electrical circuits in the areas you're working on and use non-conductive tools. Avoid any contact with live electrical components to reduce the risk of electrocution.
Safety Harness
In situations where you need to access elevated spaces, such as attics or high ceilings, wearing a safety harness is essential. A safety harness, when properly secured, can prevent falls and provide an extra layer of protection against accidents.
Common DIY Insulation Mistakes to Avoid
While DIY insulation can be cost-effective and rewarding, it's essential to avoid common mistakes that could lead to poor insulation performance or safety hazards. Here are some pitfalls to watch out for:
- Inadequate Sealing: Failing to seal gaps, cracks, and air leaks before insulating can reduce the effectiveness of your insulation.
- Incorrect R-Value: Choosing insulation with an incorrect R-value for your climate can result in inefficient insulation.
- Compression: Over-compressing insulation material can reduce its insulating properties, so be careful when fitting it into tight spaces.
- Neglecting Safety Gear: Skipping protective gear can lead to skin irritation, respiratory issues, and eye injuries.
- Ignoring Building Codes: Ensure your insulation project complies with local building codes and regulations to avoid potential issues during inspections or future home sales.
Conclusion
DIY insulation is a practical and rewarding home improvement project that can enhance your home's energy efficiency, comfort, and value. By understanding the importance of insulation, choosing the right materials, and following proper installation techniques, you can achieve significant cost savings and reduce your environmental impact.
Remember to prioritize safety throughout your DIY insulation project and to maintain your insulation over time to reap the full benefits. With the right knowledge and tools, you can take control of your home's insulation needs and create a more comfortable and sustainable living space.
Sources:

