When I think about hosting a truly unforgettable party or event, I've found that it's the little details that make all the difference. And one detail that often gets overlooked but can have a huge impact is the treat table. I've learned that a well-designed DIY treat table can not only satisfy your guests' taste buds but also add a touch of elegance and personality to your event.
So, let's dive into this comprehensive guide where I'll share my passion for creating a stunning DIY treat table that will leave a lasting impression on your guests. We'll explore the art of designing, decorating, and presenting your very own custom treat table, as we embark on a journey into the world of crafting delicious and delightful experiences.
Planning Your DIY Treat Table
Before you dive into creating your DIY treat table, it's crucial to plan meticulously to ensure a seamless and visually appealing setup.
Define Your Theme and Color Palette
Every successful DIY treat table begins with a well-defined theme and color palette. Your theme can be based on the occasion (e.g., birthday, wedding, baby shower) or your personal preferences. To make your treat table truly stand out, take the time to brainstorm unique and creative themes that align with the event's purpose.
For instance, if you're hosting a children's birthday party, consider themes like “Under the Sea,” “Enchanted Forest,” or “Superhero Extravaganza.” Once you've settled on a theme, select a color palette that complements it. If you're going with an underwater theme, shades of blue and green would work beautifully.
Create a Budget
Establishing a budget for your DIY treat table is essential to prevent overspending and ensure that you allocate funds appropriately. Start by determining how much you're willing to invest in your treat table, taking into account all related expenses, such as decorations, serving platters, treats, and any additional accessories.
For instance, if your total party budget is $500, consider allocating around 20% (or $100) for your treat table. This will guide your purchasing decisions and help you make informed choices when shopping for supplies.
Make a Shopping List
Based on your chosen theme, color palette, and budget, it's time to create a comprehensive shopping list. A well-organized list will save you time and help you stay on track while shopping for supplies. Ensure that your list includes every item necessary to bring your DIY treat table vision to life.
For example, if you've chosen a garden-themed baby shower, your shopping list might include items such as:
- Pastel tablecloths or runners
- Floral centerpieces
- Vintage teacups and saucers for serving
- Miniature potted plants as table accents
- Ingredients for floral cupcakes and tea sandwiches
- Decorative paper butterflies or birds
- Chalkboard signs for labeling treats
By breaking down your shopping list by category (e.g., decorations, serving ware, treats), you can ensure that you cover all aspects of your DIY treat table.
Explore our latest post on How to Make Delicious DIY Fruit Snacks
DIY Treat Table Design
Now that you've got your plan in place, let's dive into the design of your DIY treat table. This is where your creativity can shine.
Select a Table or Surface
Choosing the right table or surface for your treat table is pivotal to achieving the desired aesthetic. Depending on your event's space and theme, you can explore various options, from traditional rectangular tables to rustic wooden crates, vintage dressers, or even custom-made stands.
For instance, if you're planning a rustic outdoor wedding, a weathered barnwood table might be the perfect choice. Alternatively, if you're hosting a modern-themed cocktail party, sleek acrylic tables can lend a contemporary touch to your treat display.
Tablecloth and Backdrop
The tablecloth and backdrop are fundamental elements that set the stage for your DIY treat table. They should not only complement your theme but also provide a cohesive canvas for the rest of your design elements.
Let's say you've decided on a vintage-inspired tea party theme for your baby shower. Opt for a lace or floral-patterned tablecloth in soft pastels or muted tones. To enhance the ambiance, consider adding a delicate fabric backdrop with a lace or tulle curtain. Hang vintage teacups and saucers on the backdrop for an extra touch of charm.
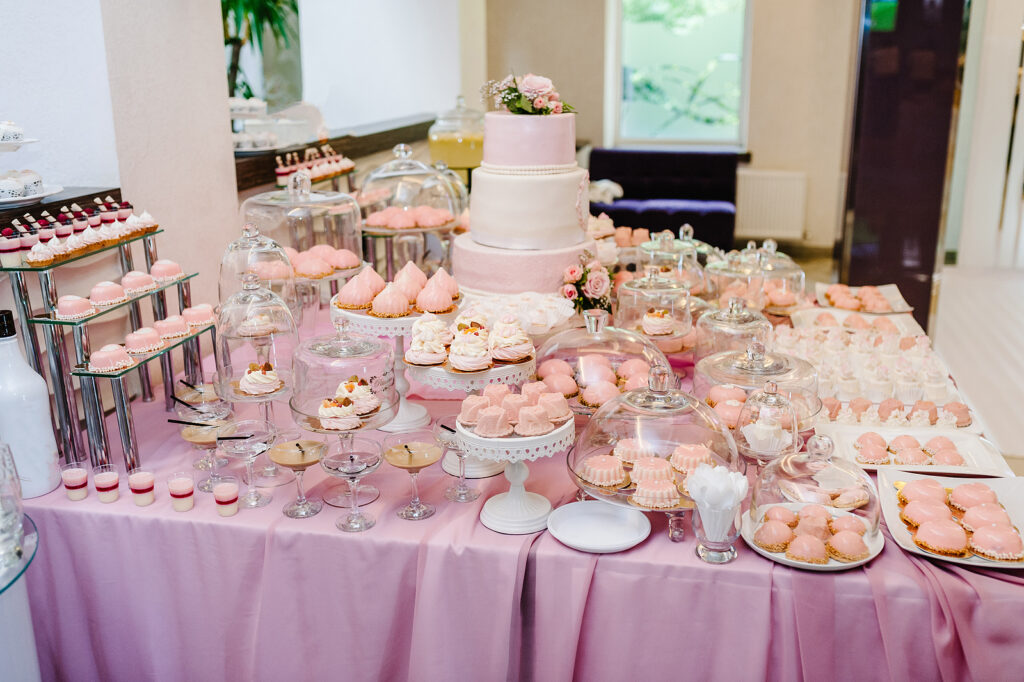
Tiered Display
Tiered display stands or platforms are fantastic additions to your treat table design, as they add height, depth, and visual interest to your presentation. They not only help maximize your table's space but also allow you to showcase a diverse array of treats without overcrowding.
For example, if you're hosting a whimsical Alice in Wonderland-themed birthday party, use tiered cake stands to display an assortment of sweets. Place oversized teacups and teapots filled with colorful candies on the lower tiers and arrange themed cupcakes, cookies, and pastries on the upper levels. This arrangement not only captures the essence of the theme but also makes it easier for guests to access their favorite treats.
Decorative Elements
Decorative elements play a crucial role in bringing your chosen theme to life and infusing your DIY treat table with personality and style. The key is to strike a balance between visual impact and cohesiveness with your theme.
Suppose you're planning a Hawaiian luau-themed birthday bash for your child. Incorporate thematic elements like tiki torches, tropical flowers, and grass skirts into your treat table decor. You can also add mini surfboards, leis, or seashells as charming accents. Place a hula dancer figurine or two to complete the look.
For more formal events like a wedding reception or bridal shower, consider elegant decorative elements such as crystal candle holders, draped string lights, or floral arrangements. These elements can provide a touch of sophistication and romance to your treat table.
DIY Treat Selection and Preparation
The heart of any treat table is, of course, the treats themselves. Here's how to choose, prepare, and present your delicious offerings.
Treat Selection
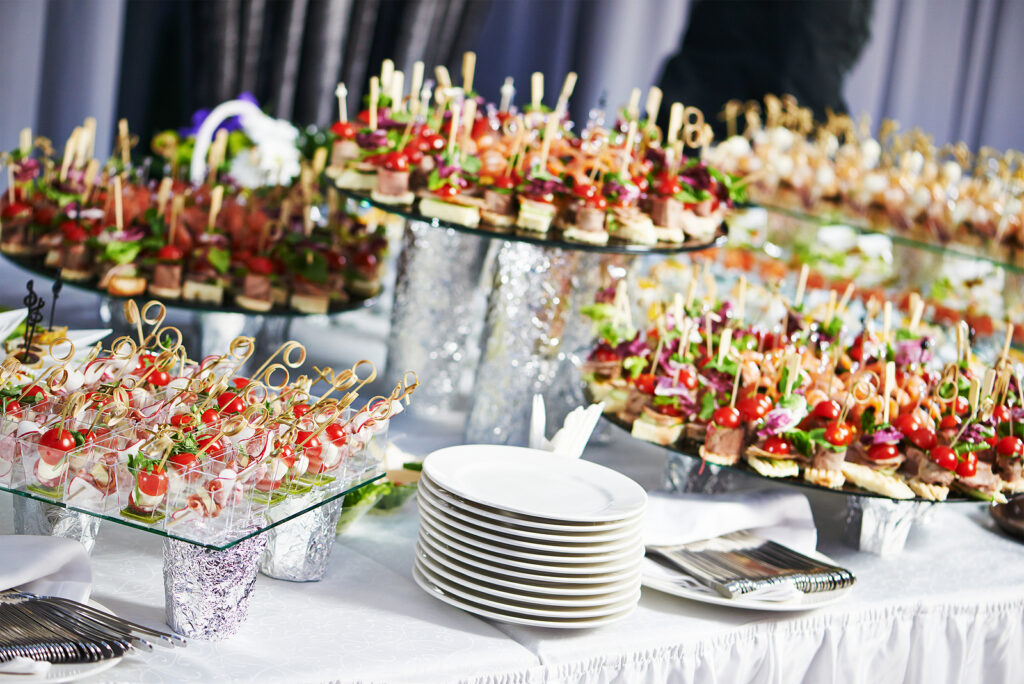
The selection of treats is where you can truly showcase your creativity and cater to your guests' taste preferences. Consider offering a diverse assortment of treats that cater to different palates, including sweet and savory options.
Imagine you're organizing a retirement party with a Hollywood glamour theme. In this case, you might include an array of glamorous treats like gold-dusted chocolate truffles, mini champagne cupcakes, and caviar-topped blinis. Don't forget to offer some non-alcoholic alternatives like sparkling cider for designated drivers and guests who prefer not to drink alcohol.
DIY Treat Recipes
While store-bought treats are convenient and perfectly acceptable, adding some homemade creations to your treat table can make it even more special. Homemade treats allow you to tailor the flavors and presentation to align perfectly with your theme.
Suppose you're hosting a vintage-themed bridal shower. You could bake and decorate vintage-inspired sugar cookies in the shape of tea cups, dresses, and engagement rings. Share the joy of homemade goodies with your guests by offering beautifully packaged cookie favors for them to take home.
Presentation
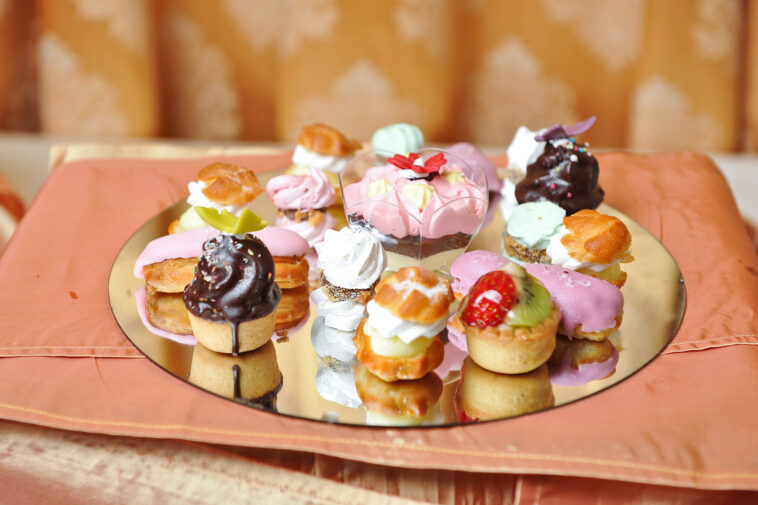
Presentation is key when it comes to making your treats irresistible and photogenic. Use a variety of serving platters, cake stands, and decorative dishes that complement your chosen theme and color palette.
Continuing with our vintage tea party theme, you can present your homemade floral cupcakes on elegant porcelain cake stands with delicate floral patterns. Use vintage-inspired teacup and saucer sets to serve bite-sized treats like mini quiches or petit fours. Ensure that the colors and patterns of your serveware enhance the overall aesthetics of the treat table.
For a final touch of elegance, consider garnishing your treats with edible flowers, edible glitter, or themed cake toppers that tie back to your chosen theme.
Explore our latest post on DIY Optavia Fuelings
DIY Treat Table Organization
A well-organized treat table not only looks great but also helps guests easily navigate their options.
Labeling
To assist your guests in making informed choices, label each treat with descriptive tags or cards. These labels should include the treat's name and, if necessary, any information regarding common allergens or dietary restrictions.
Suppose you're hosting a graduation party with a “College Destinations” theme where each treat represents a different university. Create small signs for each treat indicating the university it represents, along with a brief fun fact or trivia about the institution. This not only adds an educational element but also sparks conversations among your guests.
Flow and Accessibility
The arrangement of your treats plays a significant role in maintaining an organized and visually appealing treat table. Plan the layout to ensure a smooth flow of guests and easy access to each treat.
For example, if you're organizing a dessert table for a corporate event with a “Global Flavors” theme, organize the treats by continent. Place European desserts like French macarons and Italian cannoli at the front, followed by Asian delights such as mochi and matcha-flavored treats. American classics like apple pie and New York cheesecake can be displayed further down the table, and so on.
Additionally, make sure that utensils and napkins are readily available to avoid any inconvenience for your guests.
Serving Utensils
It's essential to provide the appropriate serving utensils for each treat to maintain hygiene and prevent cross-contamination. Choose utensils that match the style and theme of your treat table.
For instance, if you're hosting a garden-themed baby shower with an emphasis on organic and eco-friendly elements, opt for wooden or bamboo serving utensils. Alternatively, if your treat table is designed with a glamorous Hollywood theme, consider using elegant silver or gold-colored utensils for a touch of luxury.
By carefully considering the type and style of utensils, you can enhance the overall look and feel of your treat table while ensuring the convenience and safety of your guests.
DIY Treat Table Presentation
Now that everything is in place, it's time to put the finishing touches on your DIY treat table and make it shine.
Lighting
Adding lighting to your treat table can create a captivating and inviting atmosphere. Depending on your theme and event space, explore various lighting options to set the right mood.
For instance, if you're hosting a romantic outdoor wedding with a “Starry Night” theme, string fairy lights overhead and drape them along the backdrop to mimic a starlit sky. Use lanterns or glass hurricanes with pillar candles as centerpieces to add a warm, intimate glow to your treat table.
Signage
Signage is a powerful tool for drawing attention to your DIY treat table and conveying its theme. Create eye-catching signs or labels that feature a catchy title related to your theme.
Let's say you're organizing a tropical luau-themed party for your friends. Design a vibrant sign that reads “Tiki Treats Oasis” or “Aloha Dessert Paradise.” Incorporate tiki-style fonts and tiki mask illustrations to reinforce the theme. Place this sign at the entrance to your treat table to welcome guests and set the tone for the celebration.
Personal Touch
Adding a personal touch to your DIY treat table can leave a lasting impression on your guests and make your event even more memorable. Consider incorporating customized elements or party favors that guests can take home as keepsakes.
If you're hosting a baby shower, for instance, create personalized favor tags or labels that match your theme and attach them to mini jars filled with candies or homemade bath salts. These thoughtful gestures not only make your guests feel appreciated but also serve as delightful reminders of your event.
FAQs: DIY Treat Table
1. Can I use a small table for my DIY treat table, or does it have to be large?
You can absolutely use a small table for your DIY treat table, especially if you have limited space. The key is to make the most of the available surface by using tiered displays and carefully arranging your treats. Smaller tables can create an intimate and charming setup, perfect for smaller gatherings or cozy events.
2. How far in advance should I start planning my DIY treat table?
It's a good idea to start planning your DIY treat table at least a month before your event. This allows ample time to choose a theme, create a budget, and gather all the necessary supplies. For more elaborate themes or larger events, consider starting your planning process even earlier to ensure everything comes together seamlessly.
3. Can I rent or borrow decor items for my DIY treat table?
Yes, renting or borrowing decor items is a smart way to save money and reduce waste. Many party rental companies offer a wide range of decor items, including tables, tablecloths, and serving ware. Additionally, you can reach out to friends and family to see if they have any decorative pieces that match your theme and would be willing to lend or donate for your event.
4. How can I accommodate dietary restrictions or allergies on my treat table?
Accommodating dietary restrictions and allergies is important to ensure all your guests can enjoy your treats safely. When planning your DIY treat table, consider including a few options that cater to specific dietary needs, such as gluten-free, nut-free, or vegan treats. Make sure to label each treat with clear allergen information, and if possible, provide a separate section or platter for allergen-free treats to prevent cross-contamination.
5. What do I do with leftover treats from my DIY treat table?
If you have leftover treats from your DIY treat table, you have several options. You can offer them to your guests to take home in personalized favor bags or containers, reducing food waste. Alternatively, you can freeze some of the treats for later enjoyment or share them with neighbors, friends, or coworkers. Donating to local shelters or food banks is another thoughtful way to ensure that excess treats don't go to waste.
6. How can I ensure my treats stay fresh and delicious during the event?
To keep your treats fresh and delicious throughout your event, consider a few tips. Store any perishable treats in a cool, shaded area or use chafing dishes and warming trays for hot items. For baked goods like cupcakes or cookies, you can place small silica gel packets inside the display containers to absorb moisture and maintain freshness. It's also a good practice to replenish the treat table with fresh treats if the event lasts for an extended period.
7. Can I incorporate seasonal elements into my DIY treat table?
Absolutely! Seasonal elements can add a delightful touch to your DIY treat table. For example, during the winter holidays, you can include seasonal flavors like peppermint and gingerbread in your treats and decorate with festive ornaments and twinkling lights. In the spring, opt for pastel colors, fresh flowers, and Easter-themed treats. Adapting your treat table to the seasons adds a dynamic and ever-changing aspect to your events.
8. What are some creative ways to display themed treats on my DIY treat table?
There are countless creative ways to display themed treats on your DIY treat table. For a beach-themed party, consider serving treats in sandcastle-shaped containers or edible seashell bowls. For a garden party, use miniature terracotta pots as containers for mini flowerpot cupcakes. The key is to think outside the box and look for unique items that tie in with your theme while still being practical for serving.
9. Can I create a DIY treat table for a corporate event or business function?
Certainly! DIY treat tables can be a fantastic addition to corporate events and business functions. They can serve as a welcoming focal point for networking, provide a break area for employees, or add a touch of elegance to client meetings. Just ensure that your treat table aligns with your company's branding and the tone of the event.
10. How can I make my DIY treat table stand out and leave a lasting impression on my guests?
To make your DIY treat table stand out and leave a lasting impression, pay attention to the details. Focus on unique, eye-catching decor elements, incorporate personalized touches like custom signage or labels, and, most importantly, ensure that your treats are not only visually appealing but also delicious. The combination of creativity, presentation, and taste will make your treat table a memorable highlight of your event.
Conclusion
A DIY treat table is an excellent way to add a touch of elegance and personality to your party or event. By carefully planning, designing, and presenting your treats, you can create a memorable and visually stunning experience for your guests. Remember to customize your treat table to fit your theme and budget, and don't forget the little details that make a big difference.
With the right preparation and creativity, your DIY treat table will be the talk of the event, leaving a lasting impression on everyone who attends.
Sources
https://evanandkatelyn.com/2015/01/diy-dessert-table-practical-tips/