
Doghouse DIY: DIY a Dreamy Custom Doghouse to Spoil Your Furry Companion
Creating a comfortable living space for your favorite furry friend doesn't need to be a daunting task. This guide will walk you through a simple, yet effective, DIY project to build a custom doghouse.
Why Build A Custom Doghouse?
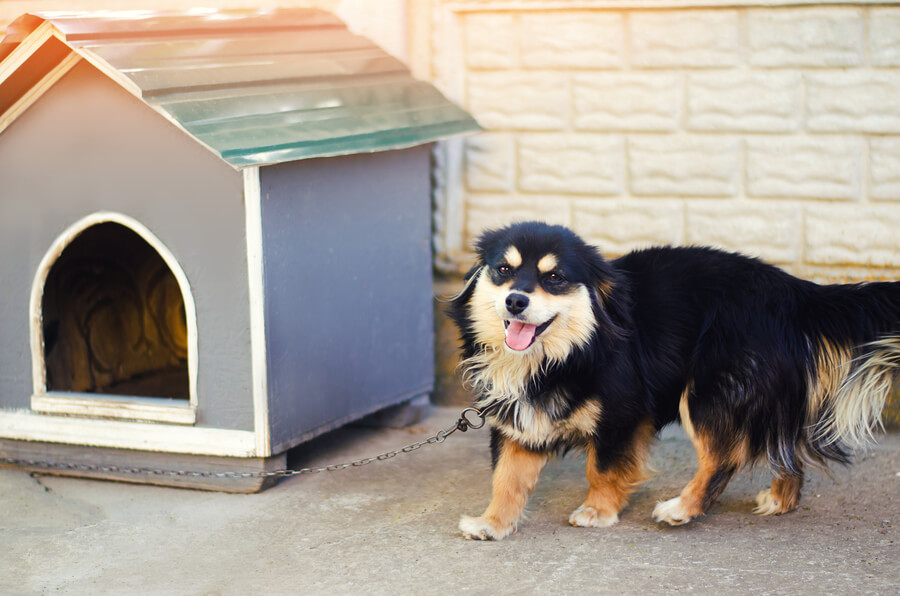
Before we dive into the steps, it's essential to understand why a custom doghouse can be beneficial for your pet. A doghouse provides a safe, cozy place for your dog to rest outside while being sheltered from the elements. By building it yourself, you can customize the doghouse to fit your pet's size and preferences, making it an ideal haven for your canine companion.
Understanding Your Dog's Needs
It's crucial to design a doghouse that will meet your dog's specific needs. Consider the following factors:
- Size: The doghouse should be large enough for your dog to comfortably turn around and lie down. However, avoid making it too large, as a smaller space can help retain your pet's body heat during colder months.
- Climate: If you live in a colder climate, consider insulation to keep your pet warm. For hotter climates, ensure good ventilation.
- Raised Floor: Raising the doghouse a few inches off the ground can protect your dog from cold and damp conditions.
- Door Placement: Rather than placing the door in the middle, offsetting it can provide a larger wall to protect your pet from wind and rain.
Materials Needed For Your DIY Doghouse
To embark on your DIY doghouse project, it's important to gather the necessary materials. Here's a detailed list of the essential items you'll need:
- Pressure-Treated Wood for the Frame: Choose high-quality, pressure-treated wood to ensure durability and resistance to rot and decay. Opt for pieces that are suitable for the size and design of your doghouse.
- Plywood for the Exterior Walls and Roof: Select sturdy plywood for the walls and roof of the doghouse. The thickness of the plywood will depend on the size and insulation needs of your doghouse.
- Roofing Material like Shingles or Metal Roofing: Decide on the roofing material that suits your doghouse design and climate. Asphalt shingles are a popular choice for their affordability and ease of installation, while metal roofing provides excellent durability and weather resistance.
- Wood Screws: Choose appropriate wood screws that are long enough to securely fasten the wooden components of your doghouse. Use corrosion-resistant screws to ensure long-lasting stability.
- Insulation Material (Optional): If you plan to insulate the doghouse, consider materials like foam boards or fiberglass insulation. Insulation can help regulate the temperature inside the doghouse, providing warmth during cold seasons and maintaining a comfortable environment.
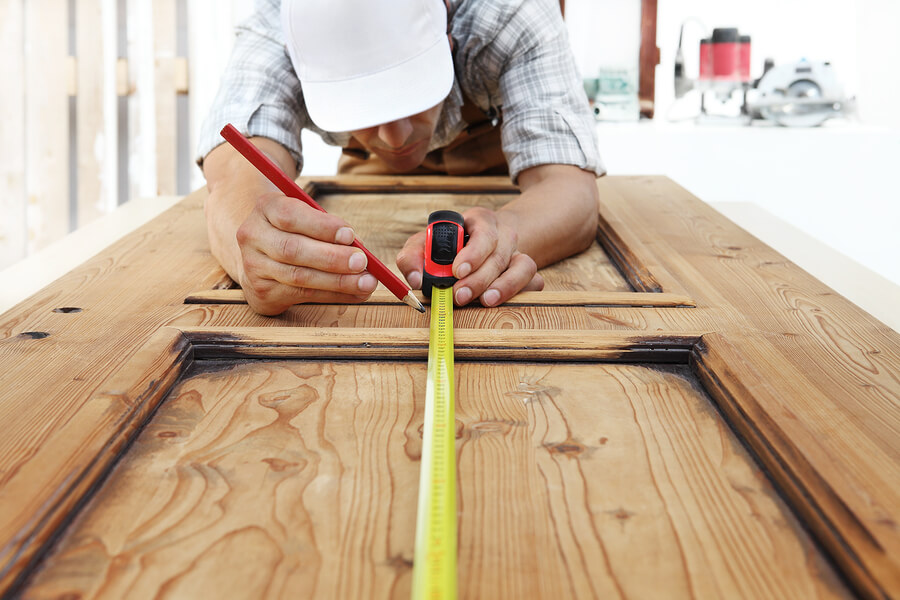
- Saw: Invest in a quality saw suitable for cutting wood. A circular saw or a handsaw with fine teeth can help you make precise and clean cuts.
- Screwdriver or Drill: Use a screwdriver or a drill with appropriate bits to drive the wood screws into place. This will make assembly faster and more efficient.
- Tape Measure: Accurate measurements are crucial for ensuring that the components of your doghouse fit together properly. Use a tape measure to measure and mark the dimensions accurately.
- Paint or Wood Stain (Optional): If you want to add a personal touch or protect the wood from the elements, consider using paint or wood stain. Choose pet-safe and weather-resistant options that complement your desired aesthetic.
Remember to wear appropriate safety gear, including gloves and safety glasses, while working on your DIY project.
Step-by-Step Guide to Building Your Custom Doghouse
With a firm understanding of your dog's needs and the necessary materials on hand, let's get building.
Step 1: Plan and Cut Your Pieces
Start by drawing out your plans. Once you've got your design, begin cutting the wood for your frame, walls, and roof.
Step 2: Assemble the Frame
Start by assembling the base of your doghouse, ensuring that it's strong and level. Then, attach the walls to the base, followed by the roof supports.
Step 3: Attach the Exterior Walls and Roof
Next, attach the plywood to the exterior of your frame, ensuring it's secure.
Step 4: Add Roofing Material
Attach your chosen roofing material to the roof of the doghouse, making sure it's secure and waterproof.
Step 5: Customize
Add any additional features such as insulation, a door flap, or even a custom paint job.
Step 6: Install and Introduce
Place the finished doghouse in a chosen spot in your yard. Introduce your pet to their new haven.

Expert Tips for a Successful DIY Doghouse
Building a DIY doghouse requires careful planning and attention to detail. To ensure that your project is a success, consider the following expert tips:
- Prioritize Safety: When working with tools and materials, always prioritize safety. Wear appropriate protective gear, such as gloves and safety glasses, and follow safety guidelines throughout the construction process.
- Choose High-Quality Materials: Opt for weather-resistant and durable materials to ensure the longevity of your doghouse. Consider using pressure-treated wood for the frame and plywood with good structural integrity for the walls and roof.
- Ensure Proper Ventilation: Proper ventilation is crucial to keep your dog comfortable inside the doghouse. Drill a few small holes near the roof to allow air to circulate, preventing stuffiness and ensuring fresh airflow.
- Create a Cozy Atmosphere: Make your doghouse inviting and cozy for your furry friend. Add familiar items like your pet's favorite blanket, toys, or a comfortable dog bed to make them feel at home and provide a sense of security.
- Consider Insulation: If you live in a region with colder climates, consider adding insulation to the doghouse. Insulation can help regulate the temperature inside, keeping your dog warm during chilly seasons.
- Provide Adequate Shelter: Ensure that the doghouse offers sufficient protection from the elements. The roof should have a slight slope to allow rainwater to drain easily. Additionally, position the entrance away from prevailing winds to shield your dog from drafts.
- Appropriate Size: Build a doghouse that is spacious enough for your dog to move comfortably. Consider their height, length, and weight when determining the dimensions of the doghouse. It should allow them to stand up, turn around, and lie down with ease.
- Add a Raised Floor: Elevating the floor of the doghouse a few inches from the ground helps prevent moisture buildup and keeps your dog dry. This is especially important if the doghouse is placed in an area prone to rain or snow.
- Personalize with Name or Sign: Add a personal touch by including your dog's name or a sign on the doghouse. This gives it a unique identity and adds a charming element to the overall design.
Weatherproofing Your DIY Doghouse
Protecting your doghouse from various weather conditions is crucial for your dog's comfort and the longevity of the structure. Here's how to weatherproof your DIY doghouse:
- Waterproofing: Apply a waterproof sealant to the exterior of the doghouse to protect it from rain and snow.
- Insulation: Adding insulation to the walls, floor, and roof can help keep your dog warm during cold weather.
- Sun Protection: If the doghouse will be in direct sunlight, consider adding a shade over it or using heat-reflective paint.
- Winterization: In particularly cold regions, adding a self-heating pad or a door flap can provide extra warmth.
Doghouse Maintenance Tips
A well-maintained doghouse will last longer and provide a healthier environment for your pet. Here are some maintenance tips:
- Regular Cleaning: Clean the doghouse regularly to prevent the buildup of dirt, germs, and pests.
- Check for Damage: Regularly inspect the doghouse for any signs of wear and tear, and make necessary repairs promptly.
- Refresh Bedding: Regularly wash or replace your dog's bedding to keep the space clean and comfortable.
- Repaint or Restain: Over time, the color of your doghouse may fade. Consider repainting or re-staining it to keep it looking fresh.
Decor and Personalization Ideas for Your Doghouse
Make your dog's house a home with these decor and personalization ideas:
- Name Plate: Add a custom name plate with your dog's name.
- Color: Paint the doghouse in your dog's favorite color or a color that matches your house or garden.
- Comfort: Add a comfortable dog bed and your dog's favorite toys.
- Landscaping: Add some dog-friendly plants around the doghouse for a bit of greenery.
Incorporating the Doghouse into Your Garden Design
If you're keen on maintaining the aesthetic of your garden, here are some tips on seamlessly integrating the doghouse into your garden design:
- Color Match: Paint the doghouse in a color that complements your garden design.
- Plant Selection: Surround the doghouse with plants that match the rest of your garden.
- Placement: Place the doghouse in an area where it blends in with the landscape, perhaps near a tree or a garden bench.
- Size and Design: Consider the size and design of the doghouse. It should be functional for your dog but also fit well within the overall garden aesthetic.
Conclusion
Embarking on the journey of building a custom doghouse for your beloved furry friend is a truly gratifying experience. Not only do you have the chance to craft a unique and dedicated space for your pet, but it also presents an exciting opportunity to immerse yourself in a fun and fulfilling DIY project that will leave both you and your dog with a sense of pride and satisfaction.
Throughout the construction process, it is crucial to keep in mind that the ultimate goal is to create a doghouse that prioritizes the safety, comfort, and durability of your furry companion. By meticulously planning each step and investing your efforts into careful execution, you can ensure that the end result is a cozy and secure haven tailored to your dog's specific needs and preferences.
Take the time to envision the ideal design, considering factors such as size, climate-appropriate features, and ergonomic layout. By thoughtfully considering these elements, you can guarantee that the final product will be a doghouse that provides optimal comfort, protection, and enjoyment for your pet.