How To Install A Light Dimmer Switch
Dimmer switches are a popular feature installed in many new or renovated homes. You may easily update an older light fixture with a dimmer switch without expensive renovations. You may even take on the project yourself to further reduce the cost.
Adjusting the brightness in a room can provide subtle ambiance and conserve energy. Dimmer switches give you control over the intensity of the light, but it’s not a one size fits all situation. The dimmer switch needs to be compatible with both the fixture and the choice of light bulbs. This can be a complicated decision now that there are so many options for light bulbs on the market, including LED bulbs.
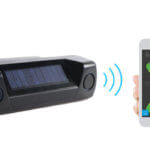
With the advancements made in technology, you may adjust the dimmer switches with an app on a smart device instead of manually. Dimmer switches reduce the amount of power that is used by the light bulb. This keeps your electric bill down and enhances the room.
Checking the lamp’s specification sheet or the dimmer’s compatibility sheet is the best way to ensure the dimmer switch and type of light bulb is compatible. Follow this DIY guide to installing the dimmer switch.
Understanding Light Dimmers: What They Are and How They Work
Before diving into the installation process, let's start with a brief explanation of what light dimmers are and how they function. A light dimmer switch is an electrical device that allows you to control the brightness of a light fixture. It works by altering the amount of electrical voltage supplied to the light, thus dimming or brightening the illumination.
Essential Tools and Materials for Installation
To successfully install a light dimmer switch, you'll need a few tools and materials. Here's a list of the essentials:
- Flathead screwdriver
- Phillips screwdriver
- Wire stripper
- Voltage tester
- Needle-nose pliers
- Dimmer switch (compatible with your light fixture)
- Electrical tape
- Wire nuts
- Electrical box extenders (if necessary)
- Circuit breaker identifier (optional but helpful)
Can I Install a Light Dimmer Switch on Any Light Fixture?
Dimmer switches can be installed with most light fixtures, even those that use halogen and incandescent lamps. However, dimmer switches won’t work on fluorescent fixtures. A special kind of low-voltage dimmer is necessary for low-voltage lighting. This is because line-voltage dimmers don’t work with low-voltage fixtures. LED fixtures may also require a special dimmer, though they often work with standard dimmers.
Low-voltage dimmers use either a magnetic system or an electronic system to dim the lights. Before you start the installation process, your first step is to check the voltage requirements of the dimmer. Then you can determine if your light fixtures use the magnetic or electronic dimmer switches. Some universal dimmers that are compatible with low voltage, LED and some fluorescent bulbs.
Dimmers installed in fixtures with standard sockets can often be lit with incandescent or halogen bulbs. The most popular type of dimmer switch is used in chandelier lighting. Dimmers can also be used to control ceiling and wall lights in various rooms in your home. LED track lighting can be used to keep halls dimly light at night or for enhancing the ambiance. If you have an outdoor patio or other outdoor area used for late-night entertainment, dimmer switches can be installed outside, too.
What Light Bulbs Can Be Used With a Light Dimmer Switch?
Thomas Edison is often credited with creating the first incandescent light bulb in the late 1880s. Almost 150 years later, they remain the most popular type of light bulb. Both incandescent and halogen bulbs are compatible with any dimmer switch available. However, the bulbs burn faster than LED lights.
Most countries are slowly phasing out incandescent bulbs for LED bulbs for energy efficiency. However, consumers are resisting this plan and continue to favor incandescent bulbs for their lower price. The price of LED bulbs has been steadily declining in recent years, making their use more widespread. To that end, LED bulbs can be used with dimmer switches. If the LED bulb is dimmable, the package will indicate that and offer information on compatible dimmer switches.
Incandescent light bulbs may be utilitarian, but they tend to burn out faster because only 10% of the bulb is converted to visible light when supplied with electric power. Comparing LED lights and incandescent lights, the cost comes out almost even in the end. Cheaper incandescent bulbs burn faster and use more energy for less light. LED bulbs are pricier, but save money on your electric bill in the long run.
Like LED lights, some Compact Fluorescent Light Bulbs (CFL) will work with some dimmers but not all of them. CFLs are more energy-efficient than incandescent bulbs, but radiate harmful mercury. The packaging of the CFL will indicate if it is dimmer switch compatible.
If you install a dimmer switch without checking its compatibility, there are signs you will notice that suggest incompatibility. These signs include:
- The dimming system not dimming as low as expected
- Light emitting humming or buzzing sounds
- Blinking or flickering at certain dimming thresholds
- Light cutting out when dimmer switch is adjusted to the lowest range
- Light brightening suddenly when dimmer switch is adjusted to a higher setting
- Lights don’t dim at all when the dimmer switch is adjusted
Installing a dimmer switch that isn’t compatible with the type of light bulb or with the light fixture is a serious fire hazard. It is essential to your well-being to ensure the dimmer is installed safely and correctly. Flickering lights in general can indicate a problem with the electrical conduit and should be checked by an electrician to prevent a fire.
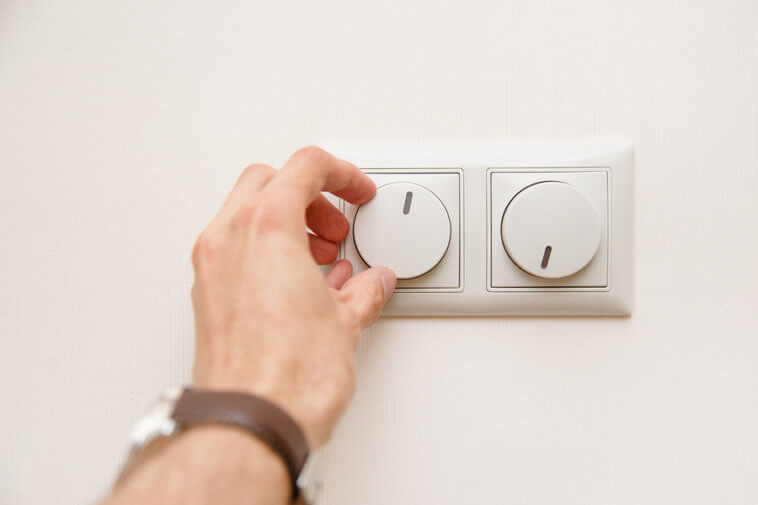
Preparing for the Installation: Safety Precautions and Switch Selection
Safety should always be a top priority when working with electricity. Before installing a light dimmer switch, follow these important safety precautions:
- Turn off the power: Locate the circuit breaker or fuse box and turn off the power to the circuit where you'll be working. Double-check the power is off using a voltage tester.
- Choose the right dimmer switch: Select a dimmer switch that is compatible with your light fixture and the type of bulbs you'll be using. Consider factors such as the maximum wattage capacity and whether it's a single-pole or three-way switch.
Getting Started
Once you’ve determined the type of bulb that is compatible with your switch, you can hire an electrician to install the dimmer or install it yourself if you are handy around the house. Before you start installing the dimmer switch, there are a few things you need to do for preparation.
Check the switch you’re replacing with a dimmer switch to see if it is a single pole (one switch) or a three-way (accessible from multiple locations) switch. That will help determine the type of dimmer that is best for that specific fixture.
The newer dimmer switch models will conserve more energy than the older models. This is because some of the older models use resistors that still use energy even if the bulb isn’t emitting full light.
Newer varieties of dimmer switches are your best chance of finding a switch compatible with CFL and LED light bulbs
When it comes time to start the electrical work, you will need the following tools and supplies:
- Screwdriver
- Wire strippers
- Flashlight
- Dimmer Switch
- Optional voltage detector
Step-by-Step Installation Guide
Now, let's dive into the step-by-step installation process for a light dimmer switch. Follow these instructions carefully to ensure a successful installation:
Step 1: Turn off the Power
Locate the circuit breaker or fuse controlling the circuit you'll be working on and switch it off. Confirm that the power is off by using a voltage tester to test the wires.
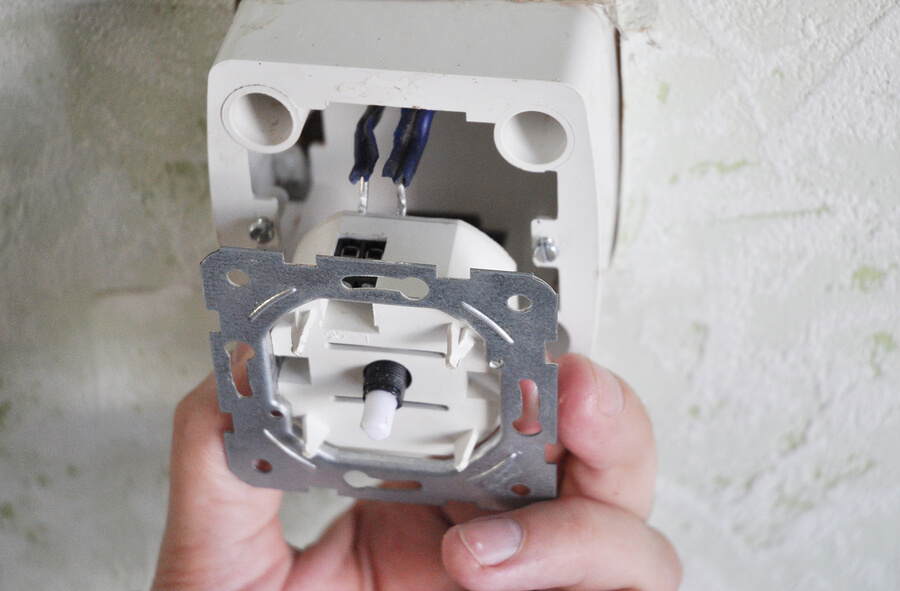
Step 2: Remove the Existing Switch
Remove the cover plate and unscrew the mounting screws holding the existing switch in place. Gently pull the switch out, exposing the wires.
Step 3: Verify the Wires
Using a voltage tester, double-check that there is no power running through the wires. Once confirmed, proceed to identify the different wires: the hot wire (usually black), the neutral wire (usually white), and the ground wire (usually green or bare copper).
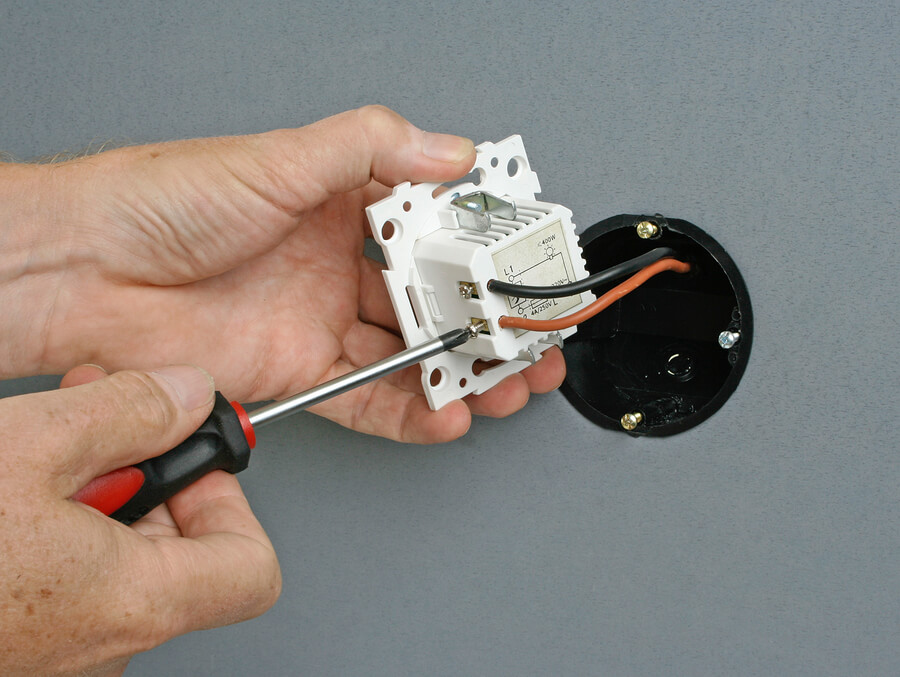
Step 4: Connect the Dimmer Switch
Following the manufacturer's instructions, connect the wires from the dimmer switch to the corresponding wires in the electrical box. Typically, this involves attaching the hot wire to the black wire on the dimmer switch, the neutral wire to the white wire, and the ground wire to the green or bare copper wire.
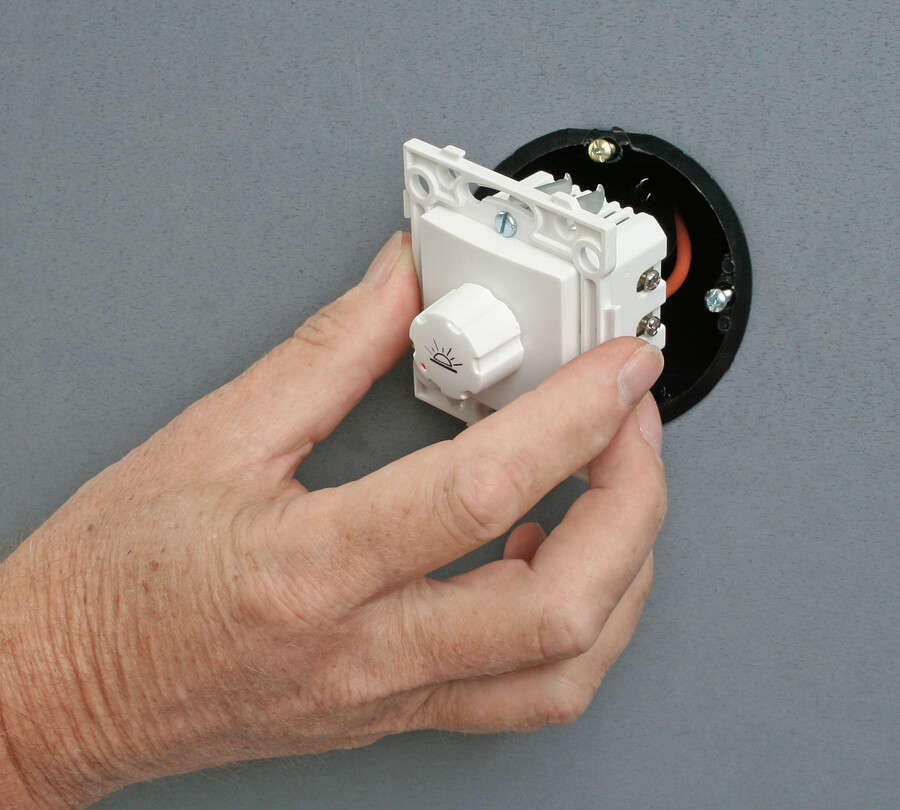
Step 5: Mount the Dimmer Switch
Carefully tuck the connected wires back into the electrical box, ensuring they are not strained or pinched. Secure the dimmer switch to the electrical box using the provided screws, and attach the cover plate.
Step 6: Restore Power and Test the Dimmer Switch
Turn the circuit breaker back on and test the dimmer switch by gradually adjusting the brightness level. Confirm that the switch operates smoothly and that the light dims or brightens accordingly.
Troubleshooting Common Issues
If you encounter any issues during or after the installation, here are some common troubleshooting tips:
- Ensure all connections are secure and properly tightened.
- Verify that you have chosen the correct type of dimmer switch for your specific light fixture.
- Check for any loose or exposed wires and fix them using wire nuts and electrical tape.
If the issues persist or you are uncertain about resolving them, it is recommended to consult a qualified electrician for assistance.
Safety Tips and Best Practices
To ensure a safe and successful installation, consider the following safety tips and best practices:
- Always work with the power turned off.
- Use appropriate tools and materials for electrical work.
- Double-check wire connections to ensure they are secure and properly insulated.
- Follow the manufacturer's instructions for your specific dimmer switch model.
Conclusion
Installing a light dimmer switch can greatly enhance the atmosphere and functionality of your home's lighting. With this step-by-step guide and the necessary tools, you can confidently complete the installation process and enjoy the benefits of adjustable lighting in your living spaces.
Remember, if you are unsure about any aspect of the installation or encounter electrical issues beyond your expertise, it is best to consult a licensed electrician for professional assistance.
Now that you have the knowledge and instructions, it's time to embark on this DIY project and create a well-lit environment perfectly suited to your preferences and needs.