DIY Wonder Woman Headband
As a huge fan of Wonder Woman and all things superhero, I've always admired her iconic tiara and the powerful symbolism it carries. To channel my inner superhero and bring a touch of Wonder Woman into my life, I decided to embark on a fun and creative DIY project – making my very own Wonder Woman headband.
Whether it's for a cosplay event, a thrilling Halloween costume, or just to add a bit of heroic flair to my everyday life, I'm excited to take you through the step-by-step process of crafting this emblematic accessory. Let's jump into the world of DIY superhero gear and unleash our inner Wonder Woman!
Why Make Your Own Wonder Woman Headband
There are several compelling reasons why you should consider making your own Wonder Woman headband instead of buying a pre-made one. This DIY project not only grants you the freedom to tailor the design to your exact preferences but also enables you to create a headband that fits comfortably, ensuring it's perfectly suited for your head size and shape.
Crafting your Wonder Woman headband can be an enjoyable and fulfilling experience, suitable for individuals of all crafting skill levels. Whether you're a seasoned DIY enthusiast or a beginner looking to embark on a creative journey, this project offers the opportunity to express your creativity and unleash your inner superhero.
Furthermore, opting to make your headband is a cost-effective choice compared to purchasing a pre-assembled one. Not only will you save money, but you'll also have the satisfaction of knowing that you put your time and effort into crafting a unique accessory that reflects your personal style. So, if you're ready to channel your inner Wonder Woman and embark on a creative adventure, making your own headband is the way to go.
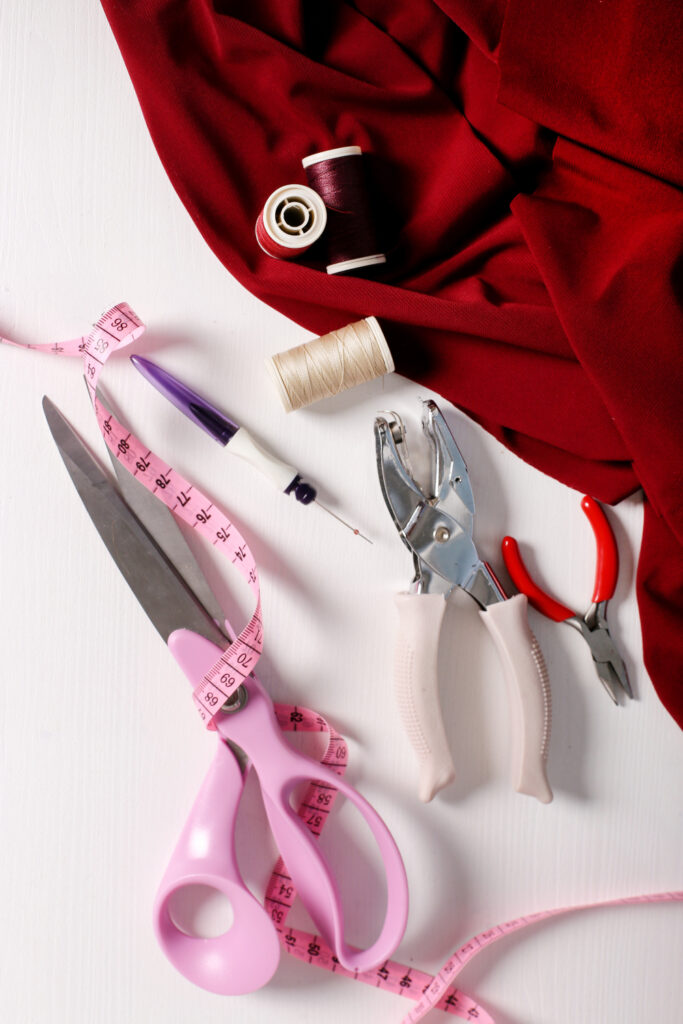
Materials Needed
To ensure a smooth and successful crafting experience, it's essential to gather all the required materials before we begin creating your Wonder Woman headband. Here's a comprehensive list of what you'll need:
- Red Fabric: You'll want a piece of red fabric to serve as the base of your headband. The fabric should be of a quality that is comfortable to wear and durable enough to hold its shape.
- Gold Foil or Gold Fabric: To capture the iconic Wonder Woman emblem, you'll need either gold foil or gold fabric. This will be used to create the distinctive “W” symbol that adorns the front of the headband.
- Elastic Band: An elastic band will be used to secure the headband around your head. Ensure it's comfortable and fits snugly without being too tight.
- Glue: Depending on your preference and the materials you choose, you'll need either fabric glue or hot glue. Fabric glue is suitable for attaching fabric to fabric, while hot glue is more versatile and can be used for various materials.
- Scissors: A good pair of scissors is essential for cutting the fabric and elastic band with precision. Make sure they are sharp to avoid frayed edges.
- Optional: Rhinestones or Gems for Embellishments: If you want to add extra flair and sparkle to your Wonder Woman headband, consider including rhinestones or gems as embellishments. These can be strategically placed to enhance the overall look.
Now that you know why creating your DIY Wonder Woman headband is a fantastic idea and have your materials ready, let's move on to the design phase.
Designing Your Wonder Woman Headband
When it comes to crafting your very own Wonder Woman headband, the design phase is where you can truly infuse your creativity. Here's a detailed guide to help you design a headband that embodies the essence of Wonder Woman:
Sketching the Design
To kickstart the creative process, begin by sketching the design of your headband on a piece of paper. To capture the iconic and recognizable essence of Wonder Woman's headband, draw a curving ‘W' shape in the center. This design should closely resemble the emblem closely associated with the character. Pay attention to the proportions and curves to ensure an accurate representation.
Choosing the Right Colors
Wonder Woman's headband is known for its distinctive color combination. It typically features a red base with a gold emblem. To stay true to the character's iconic look, it's essential to select the right colors for your project. Opt for vibrant red fabric for the base, ensuring it matches the character's signature hue. For the emblem, you can choose either gold foil or gold fabric, depending on your preference and the overall texture you desire for your headband.
Sizing Considerations
Achieving a comfortable and secure fit is crucial for your Wonder Woman headband. To do this, measure your head circumference accurately. Ensure that the headband fits comfortably but snugly around your head. Take into account any specific hairstyles or wigs you plan to wear with it, as this can affect the sizing. If necessary, seek assistance from someone else to ensure precise measurements, especially if you have long hair or other factors that might affect the fit.
With your design in mind and materials gathered, it's time to start the crafting process.
Gathering Materials
When it comes to gathering the materials for your Wonder Woman headband, careful selection is key to achieving the desired result. Here's a comprehensive guide to help you choose the right materials for your project:
Red Fabric Selection
Start by selecting a red fabric that aligns with your preferences and budget. The fabric should possess certain qualities to ensure both durability and comfort. Consider fabrics like cotton or satin, as they are not only visually appealing but also provide the necessary flexibility for comfortable wear. Make sure the fabric is sturdy enough to hold its shape and withstand wear and tear.
Gold Foil or Fabric Options
For the emblem and golden bands that are quintessential to the Wonder Woman headband, you have a choice between two materials: gold foil or gold fabric. Each option offers a distinct texture and appearance. Gold foil provides a stunning metallic shine, while gold fabric adds a textured finish to your headband. Your choice here will depend on your desired look and the overall aesthetic you wish to achieve.
Elastic Band for Secure Fit
To ensure your Wonder Woman headband stays securely in place, you'll need an elastic band. Opt for a wide elastic band that matches the color of your hair, as this will help it blend seamlessly and discreetly with your overall appearance.
Glue and Scissors
Invest in the right adhesive and cutting tools to make your crafting process smooth and precise. Fabric glue or hot glue are excellent choices for attaching fabric pieces together securely. Keep a pair of sharp scissors handy for cutting the fabric and other materials with precision.
Optional: Rhinestones or Gems for Extra Glam
For those who want to take their Wonder Woman headband to the next level of glamour, consider using rhinestones or gems as embellishments. These add an extra layer of flair and sparkle to your headband and can be incorporated during the crafting process to enhance its overall aesthetic.
With your materials ready, let's move on to creating the base of your Wonder Woman headband.
Creating the Base of Your Headband
Creating the base of your Wonder Woman headband is a crucial step that sets the foundation for the rest of the project. Here's a detailed guide on how to craft the base of your headband:
Measuring and Cutting the Fabric
Start by laying the red fabric flat on your work surface. To ensure a perfect fit, use your head circumference measurement as a reference. Measure the fabric to determine the length of your headband, then cut a strip of fabric that's approximately 2 inches wide. This width is ideal as it provides ample space for comfortably attaching the elastic band later on.
Adding Elastic for a Comfortable Fit
To ensure your headband stays comfortably and securely in place, you'll need to incorporate an elastic band. Begin by attaching one end of the elastic band to one end of the fabric strip. You can use fabric glue or hot glue for this step. As you attach the elastic, gently stretch it slightly to ensure a snug fit. Allow the glue to dry completely before moving on to the next phase of your project. This step is crucial to ensure that the headband fits securely but comfortably around your head.
Securing the Ends for Comfort
With the elastic band securely attached, fold the fabric strip in half lengthwise, effectively covering the elastic band. Then, use your chosen adhesive (fabric glue or hot glue) to secure the folded edge down. This encases the elastic entirely within the fabric, creating a smooth and comfortable interior for your headband. This not only ensures a comfortable fit but also conceals the elastic for a neat and polished appearance.
Adding the Iconic W Logo
Cutting the Logo
To get started, you have two options for creating the Wonder Woman logo. You can either print a template or showcase your artistic skills by freehand drawing it on a piece of gold foil or gold fabric. Regardless of your method, it's crucial to ensure that the logo size fits perfectly on the front of your headband. Carefully cut out the “W” shape with precision, paying close attention to its curves and angles.
Attaching the Logo to the Headband
Once you have your perfectly cut logo, it's time to attach it to the front of your red headband base. To do this, apply fabric glue or hot glue to the back of the gold logo. Ensure even distribution of adhesive for a secure attachment. Carefully place the logo on the center front of your red headband base, aligning it accurately. Press it down firmly to ensure it adheres securely. Allow the glue to dry completely before moving on to the next step.
Tips for Precision
Achieving precision when attaching the logo is key to capturing the authentic Wonder Woman look. To ensure perfect placement, consider using a ruler or measuring tape to measure and mark the exact center of the headband. This step guarantees that the emblem is centered and symmetrical on the headband, maintaining the iconic appearance associated with the character.
Finishing Touches
Painting the Golden Bands
To complete the iconic look of Wonder Woman's headband, consider adding golden bands along the edges. This step adds a touch of authenticity to your creation. You have two options for achieving this effect:
- Gold Fabric Paint: One method is to use gold fabric paint. Carefully paint the edges of the red fabric with the gold fabric paint, ensuring an even application for a polished finish. Take your time with this step to achieve clean and precise lines.
- Gold Fabric Tape: Alternatively, you can opt for gold fabric tape. This tape can be applied neatly along the edges of the headband to create the golden bands. It offers a convenient and visually appealing solution.
Whichever method you choose, the goal is to create a striking contrast between the red base and the golden bands, capturing the Wonder Woman aesthetic.
Optional Rhinestone Embellishments
For those seeking to add an extra level of sparkle and glamour to their Wonder Woman headband, consider incorporating rhinestones or gems as optional embellishments. Here's how to do it:
- Be creative with your design and decide where you'd like to place the rhinestones. You can add them to the logo, around the golden bands, or both, depending on your preference.
- Use fabric glue to secure the rhinestones or gems in their designated spots. Ensure that the glue is applied sparingly to avoid any excess seeping out around the embellishments.
- Allow the glue to dry thoroughly before wearing your headband. This will ensure that the rhinestones stay securely in place and withstand the test of time.
FAQs about DIY Wonder Woman Headband
What materials do I need to make a Wonder Woman headband?
You'll need red fabric for the base, gold foil or gold fabric for the emblem, an elastic band, glue (fabric or hot glue), scissors, and optional rhinestones or gems for embellishments.
Why should I make my own Wonder Woman headband instead of buying one?
Making your own headband allows you to customize the design to your preferences, ensures a comfortable fit, and can be a more cost-effective option. Plus, it's a fun and creative DIY project.
Do I need to be experienced in crafting to make a Wonder Woman headband?
No, this project is suitable for individuals of all crafting skill levels. The instructions provided are detailed and easy to follow.
How do I determine the right size for my Wonder Woman headband?
Measure your head circumference accurately and consider any hairstyles or wigs you plan to wear with it. A snug, yet comfortable fit is essential.
Can I wash the Wonder Woman headband once it's made?
It depends on the materials you use. Check the care instructions for the fabric and adhesive you chose. Some may be machine washable, while others may require more delicate care.
What's the best way to attach the gold emblem to the headband?
You can use fabric glue or hot glue to attach the emblem. Ensure even distribution of adhesive for a secure attachment.
Can I create the Wonder Woman logo without a template?
Yes, you can freehand draw the “W” logo on gold foil or gold fabric if you have artistic skills. However, using a template can help ensure accuracy.
Are there any specific safety precautions I should take when using hot glue?
Yes, be cautious when using hot glue to avoid burns. Work on a protected surface, and consider using a low-temperature glue gun if you're new to crafting with hot glue.
How long does it take to complete the DIY Wonder Woman headband?
The time it takes depends on your crafting experience and the level of detail you add. On average, it can take a few hours to complete.
Can I personalize my Wonder Woman headband with my own design variations?
Absolutely! The design is flexible, and you can add your unique touches or embellishments to make it your own while staying true to the Wonder Woman theme.
Conclusion
In conclusion, embarking on this diy wonder woman costume headband project has been an incredible journey that allowed me to fuse my love for superheroes with my creative spirit. Crafting this emblematic accessory not only gave me the freedom to design it to my exact preferences but also ensured a comfortable fit that perfectly suited my head.
The process, from sketching the iconic “W” logo to carefully selecting materials, was both enjoyable and fulfilling, regardless of my crafting experience. Moreover, the cost-effectiveness of making my headband added an extra layer of satisfaction, knowing that I had created something unique that reflected my personal style.
As I wear my Wonder Woman headband, I'm reminded of the strength, courage, and justice that this iconic symbol represents. It's not just an accessory; it's a statement of empowerment and a reminder that we all have a superhero within us.
Whether I'm donning it for a cosplay event, a thrilling Halloween costume, or just to add a bit of heroic flair to my everyday life, it's a constant source of inspiration and a testament to the power of creativity. So, if you're ready to channel your inner Wonder Woman and embark on a creative adventure, I highly recommend making your own headband – it's a DIY project that's both empowering and fun.
Sources
https://www.countryliving.com/diy-crafts/g28411859/diy-wonder-woman-costume/