DIY Scratch Board for Dogs
Dogs have an incredibly special place in my heart, as they've become cherished members of my family over the years. Their unwavering loyalty and boundless energy bring so much joy and love into our lives. To show my appreciation and reciprocate the love they give, I'm always looking for ways to keep them entertained and mentally stimulated training your dog.
One DIY project that has been both highly effective and cost-efficient for me is creating a Scratch Board for Dogs. Not only does it provide hours of entertainment for my beloved pets, but it also contributes to the health of their claws. I want to share this rewarding journey with you, so let's dive into the step-by-step process of constructing a DIY Scratch Board for Dogs together!
Why a Scratch Board for Dogs?
Before we delve into the exciting world of DIY scratch boards for dogs, it's essential to understand the compelling reasons why a scratch board can be a fantastic addition to your furry friend's life. Beyond being an enjoyable plaything, scratch boards offer a plethora of health and well-being benefits for your canine companion:
Promoting Healthy Claws
Scratching is an innate behavior in dogs, and it serves a vital purpose in maintaining their claw health. When they scratch, they naturally shed the outer layers of their claws, preventing them from becoming overgrown and uncomfortable. By providing a designated scratch board, you not only protect your furniture from potential damage but also ensure that your dog's claws remain in optimal condition.
Engaging Mental Stimulation
Dogs need more than just physical exercise; they also require mental stimulation to keep their minds sharp and content. A scratch board serves as an intellectual puzzle for your furry companion. It engages their cognitive faculties as they figure out how to scratch effectively, preventing boredom-related behaviors and promoting mental well-being fear of nail.
Stress Relief and Relaxation
Scratching isn't just about claw maintenance; it's also a stress-relief mechanism for dogs. When they scratch, it allows them to unwind and release tension. By offering a scratch board, you provide a soothing outlet for your pet, helping alleviate anxiety and promoting a calmer and happier state of mind dog scratch board.
DIY Scratch Board for Dogs: A Detailed Guide
Now that we comprehend the significance of a scratch board, let's delve into the meticulous process of crafting one that your dog will adore.
Materials You'll Need:
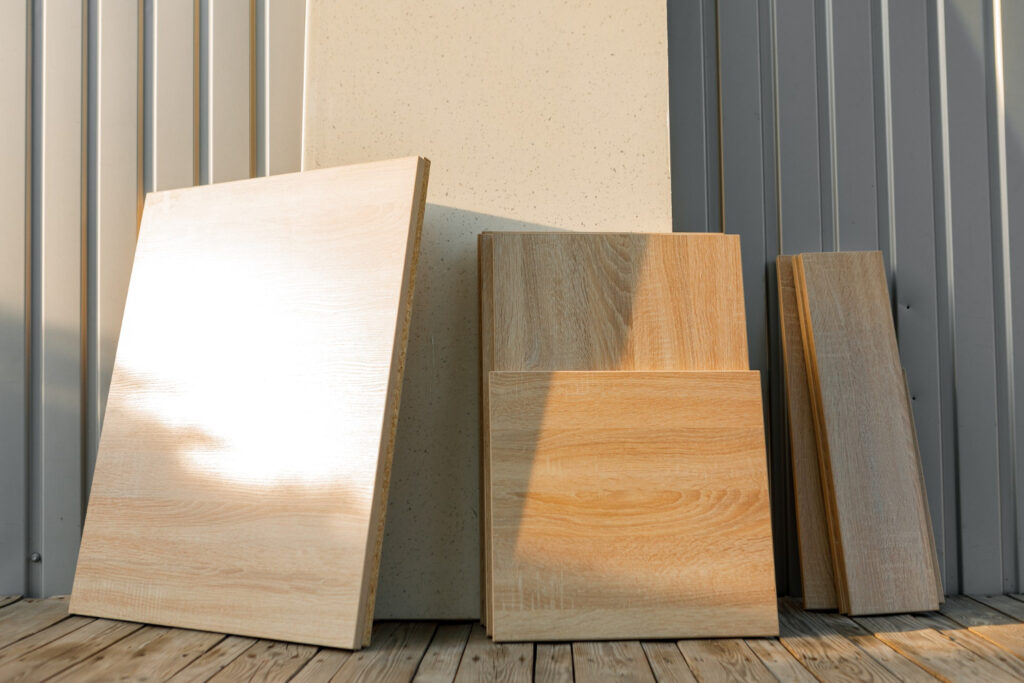
- Plywood Board (2'x2′): This will serve as the sturdy base for your scratch board, providing a stable surface for your dog to scratch on.
- Sandpaper (Medium Grit): Use sandpaper to smooth out any rough edges and surfaces on the plywood, ensuring it's safe for your furry friend.
- Jigsaw: An essential tool for cutting the plywood to the desired size and shaping it into custom designs if you prefer.
- Sanding Block: This tool helps ensure that the edges of the plywood are smooth and won't harm your dog while scratching.
- Non-Toxic Paint or Wood Stain: Apart from adding aesthetic appeal, a non-toxic paint or wood stain will protect the wood from wear and tear, making your scratch board more durable.
- Paintbrushes: You'll need these to apply the paint or wood stain evenly to the plywood.
- Hook and Loop Fasteners: These are necessary for securely attaching the scratch board to a wall or other surface, preventing it from moving around during use.
- Sisal Rope (1/2 inch thick): Sisal rope will provide the textured scratching surface that dogs love. It's a durable and natural material for this purpose.
- Hot Glue Gun and Glue Sticks: Use these to firmly attach the sisal rope to the plywood, ensuring it stays in place as your dog scratches.
- Measuring Tape and Pencil: These tools will help you take precise measurements and mark the plywood for cutting and rope placement, ensuring a neat and well-proportioned design.
- Safety Goggles and Gloves: Always prioritize safety. Safety goggles and gloves protect your eyes and hands during the woodworking process, especially when cutting and sanding the plywood. Your safety is as important as your dog's enjoyment of the scratch board.
Step by Step:
Step 1: Prioritize Safety for a Secure DIY Project
Ensuring a safe woodworking project is crucial. Always prioritize safety by taking appropriate precautions. To protect yourself, wear safety goggles and gloves consistently during the entire woodworking process. These safety measures are essential to prevent accidents and injuries, ensuring a smooth and secure construction experience.
Step 2: Precise Plywood Cutting
Begin by selecting a plywood board that suits your project's requirements; a standard 2'x2′ board is a great starting point. Measure and mark the board to your desired dimensions, ensuring accuracy. Employ a jigsaw to make precise cuts along the marked lines. After cutting, use a sanding block with medium-grit sandpaper to smooth the edges. This step not only enhances the aesthetic appeal but also ensures that the plywood is safe for your dog to use.
Step 3: Adding Visual Appeal with Paint or Stain
Now, it's time to add a personal touch to your project. Choose a non-toxic paint or wood stain in your preferred color. Apply a generous coat to one side of the plywood board and allow it to dry thoroughly. For a more vibrant finish, consider applying multiple coats. This not only enhances the visual appeal of the scratch board but also provides protection against wear and tear, ensuring its durability.
Step 4: Creating the Scratching Surface with Sisal Rope
To create the essential scratching surface for your dog, measure and cut the sisal rope into equal lengths, typically around 6-8 inches each. Using a hot glue gun, securely attach these rope pieces to the painted side of the plywood board. You have the creative freedom to design various patterns, grids, or designs with the sisal ropes. Ensure that they are firmly fastened to provide an effective scratching surface for your pet affordable effective diy scratch pad.
Step 5: Securing the Scratch Board with Hook and Loop Fasteners
Flip the board over to access the unpainted side. Here, attach hook and loop fasteners to the corners and edges of the board. These fasteners are essential for securing the scratch board to the floor or any flat surface. They prevent any unintended movement during your dog's enthusiastic scratching sessions, ensuring that the board remains in place and your pet can enjoy it safely.

Tips for Maximizing Your Dog's Enjoyment
Congratulations on nearing the completion of your DIY Scratch Board for Dogs! To ensure your furry companion derives the utmost enjoyment from their new toy, here are some additional tips and insights to consider:
- Strategic Placement for Engagement: Select a strategic location for the scratch board within your home. Place it in an area where your dog frequently spends time, such as near their bed, favorite resting spot, or in a high-traffic area. This strategic placement encourages your dog to use the scratch board regularly, making it an integral part of their daily routine.
- Positive Reinforcement for Encouragement: Encourage your dog to use the scratch board by providing praise and rewards when they engage with it. Offer verbal praise, treats, or toys as positive reinforcement to create a positive association with the scratch board. This reinforcement reinforces the idea that using the board is a rewarding and enjoyable activity, encouraging your dog to return to it.
- Regular Maintenance for Longevity: To ensure the scratch board remains safe and effective, conduct routine inspections. Check the sisal ropes to make sure they are securely attached. Over time, if any sections become loose, use your hot glue gun to reattach them firmly. Additionally, inspect the ropes for any signs of wear and tear. Replace damaged or frayed ropes promptly to maintain the board's scratching effectiveness and your dog's safety.
- Variety to Keep Things Exciting: Keep your dog engaged and intrigued by periodically changing the scratch board's location. This simple adjustment can maintain your dog's interest and prevent boredom. Additionally, consider introducing different textures to the board, such as sections with carpet or fabric. Providing these novel scratching experiences can add variety and excitement to your dog's playtime.
See also our post on Doghouse DIY
Customizing Your Scratch Board
Customization is the key to tailoring your DIY Scratch Board for Dogs to meet your pet's unique preferences. While the foundational construction has been discussed, this section will delve into the myriad ways you can personalize the scratch board to make it even more engaging for your furry friend.
Adding Interactive Elements
Consider incorporating interactive elements that your dog can engage with while scratching. Small bells, for instance, can be securely attached to the board's frame. As your dog scratches, the gentle jingling of bells can capture their attention, making the activity even more stimulating. The sound of bells adds an auditory dimension to their experience, which can be particularly appealing.
Hanging Toys and Danglers
Another delightful addition to your scratch board is hanging toys or danglers. These can be suspended from the top of the board and dangle enticingly within your dog's reach. Opt for toys with various textures, shapes, and colors to pique your dog's curiosity. These dangling toys will encourage your pet to stretch and jump, promoting physical activity alongside mental engagement.
Treat Dispenser Integration
For a more advanced customization, consider integrating a treat dispenser into your scratch board. This feature can provide an extra layer of motivation for your dog to scratch. A simple treat dispenser can be fashioned by attaching a small container to the board and cutting a hole just large enough for treats to dispense when your dog interacts with it. This not only rewards their scratching behavior but also adds an element of surprise and satisfaction.
Texture Variety
To cater to your dog's tactile preferences, experiment with different textures on your scratch board at. In addition to the sisal rope, you can attach sections of carpet, faux fur, or even fabric. These variations in texture offer your dog a multisensory experience, appealing to their sense of touch and further stimulating their curiosity.
Adjustable Components
Consider making some of the interactive elements adjustable. For instance, you can attach toys with removable clips or Velcro. This allows you to change the toys periodically, preventing your dog from becoming bored with the same setup. Adjustable components also enable you to adapt the scratch board as your dog's preferences evolve.
Personalized Paintwork
While decorating the board with non-toxic paint or wood stain, take the opportunity to personalize it further. Paint your dog's name or a fun design that resonates with their personality. This personal touch can make the scratch board feel like a unique and special gift just for your pet.
Safety Considerations
Throughout the customization process, remember to prioritize your dog's safety. Ensure that any added elements are securely attached and won't pose a choking hazard. Regularly inspect the scratch board to check for loose components or signs of wear and tear. Safety should always be paramount in any customization effort.

Maintenance Tips for Longevity
Creating a DIY Scratch Board for Dogs is a labor of love, and to ensure that your dog continues to enjoy it for years to come, proper maintenance is essential. This section will provide comprehensive guidance on maintaining your scratch board to maximize its longevity and your dog's satisfaction.
Cleaning the Sisal Ropes
Over time, the sisal ropes on your scratch board may accumulate dirt and debris. To keep them clean and in good condition, you can use a brush or vacuum cleaner to remove loose particles. If the ropes become heavily soiled, you can gently scrub them with a mixture of mild soap and water. Ensure they are completely dry before allowing your dog to use the board again.
Checking for Wear and Tear
Regularly inspect the scratch board for signs of wear and tear. Pay close attention to the attachment points of the sisal ropes and any added components like bells or toys. If you notice any loose or frayed sections, address them promptly. Secure any loose ropes with a hot glue gun and replace frayed ropes to maintain a safe scratching surface.
Repainting or Refinishing
The paint or wood stain applied to the scratch board can wear down over time due to scratching and general use. To keep the board looking fresh and vibrant, consider repainting or refinishing it as needed. This not only maintains its aesthetic appeal but also provides continued protection to the wood surface.
Replacing Hanging Toys
If you've added hanging toys or danglers to the scratch board, periodically assess their condition. Toys that show signs of excessive wear, such as loose parts or damage, should be replaced promptly. Safety should always be a top priority, and ensuring that your dog's toys are in good condition is crucial.
Ongoing Safety Checks
Perform regular safety checks on the entire scratch board. Ensure that all components are securely attached and that there are no sharp edges or hazards that could harm your dog. By maintaining a safe environment, you can provide peace of mind while your pet enjoys their scratch board.
See also our post on 6 DIY Puppy Projects
Monitoring Your Dog's Usage
To truly understand the impact of the scratch board on your dog's well-being, it's essential to monitor their usage and behavior. This section will guide you on how to observe and interpret your dog's interactions with their new toy.
Frequency and Duration
Keep track of how often your dog engages with the scratch board and the duration of each session. An increase in frequency and longer scratching sessions can indicate that your dog is finding the activity enjoyable and stimulating. Conversely, a sudden decrease in interest may warrant investigation.
Body Language
Observe your dog's body language while they use the scratch board. A relaxed and content posture, such as a wagging tail and soft eyes, indicates that they are enjoying the experience. However, if you notice signs of stress, anxiety, or discomfort, such as raised hackles or avoidance behavior, it's essential to address these issues promptly.
Changes in Behavior
Monitor your dog for any behavioral changes that may be linked to their use of the scratch board. Positive changes, such as reduced destructive behavior or increased mental alertness, can be indicators of the board's effectiveness. Conversely, any signs of distress or aggression may suggest that adjustments are needed.
Gradual Introduction
For some dogs, adapting to a new toy or activity may take time. If your dog initially shows hesitation or indifference towards the scratch board, be patient. Gradually introduce them to it, offering positive reinforcement and rewards when they interact with it. Over time, many dogs come to appreciate the benefits of scratching.
Consultation with a Veterinarian
If you notice significant changes in your dog's behavior or health that you suspect may be related to their use of the scratch board, it's advisable to consult with a veterinarian. They can help rule out any underlying medical issues and provide guidance on how to address specific behavioral concerns.
DIY Enrichment Toys
While the scratch board is a fantastic addition to your dog's life, expanding their range of enrichment activities can provide even more mental and physical stimulation. This section will introduce you to various DIY enrichment toys that can complement the scratch board and keep your dog engaged.
Homemade Treat-Dispensing Toys
Crafting homemade treat-dispensing toys is an excellent way to challenge your dog's problem-solving skills and keep them mentally engaged. You can create these toys from materials like PVC pipes, cardboard boxes, or old containers. Fill them with your dog's favorite treats or kibble, and watch as your pet figures out how to access the hidden rewards.
Puzzle Feeders
Puzzle feeders are designed to make mealtime an interactive and mentally stimulating experience for your dog. You can create your own puzzle feeders using materials like muffin tins, tennis balls, or plastic bottles. The idea is to make your dog work for their food by solving puzzles or manipulating objects to access their meals.
Snuffle Mats
A snuffle mat is a DIY project that combines mental stimulation with scent work. It's essentially a mat with fleece strips tied to it, creating pockets where you can hide treats or kibble. Your dog uses their nose to search for the hidden goodies, providing a fun and engaging activity that taps into their natural instincts.
Frozen Treats
During hot weather, frozen treats can provide a refreshing and entertaining experience for your dog. You can make frozen treats by mixing dog-safe ingredients like yogurt, peanut butter, and fruit, and freezing them in molds or ice cube trays. These icy delights serve as both a tasty snack and a cooling activity.
DIY Tug Toys
Tug-of-war is a classic game that dogs love, and you can create your own tug toys from materials like old t-shirts or jeans. By braiding or knotting these fabrics, you can fashion durable and interactive toys that provide both physical exercise and bonding time with your pet.
Alternatives to the Scratch Board
While the scratch board is an excellent source of entertainment and mental stimulation for your dog, it's essential to diversify their activities to keep them engaged and happy. This section will explore alternative activities and toys that can contribute to your dog's overall well-being.
Hide-and-Seek
Playing hide-and-seek with your dog is a fantastic way to engage their natural hunting instincts and provide mental stimulation. Start by hiding behind furniture or doors and encourage your dog to find you. As they become more skilled, you can hide treats or toys around the house for them to discover.
Agility Training
Agility training is an enjoyable and physically stimulating activity for guide to dogs. You can set up an agility course in your backyard or a nearby park using basic equipment like tunnels, jumps, and weave poles. Agility training not only provides exercise but also strengthens your bond with your dog through training and teamwork.
Interactive Puzzle Toys
Interactive puzzle toys are designed to challenge your dog's problem-solving abilities. These toys often involve hiding treats or kibble inside compartments that your dog must manipulate to access. Investing in a variety of puzzle toys can keep your dog mentally engaged and prevent boredom.
Nature Walks and Hikes
Exploring the great outdoors with your dog is an enriching experience for both you and your furry companion. Regular nature walks or hikes allow your dog to engage with different scents, sights, and sounds. It's an excellent way to provide mental stimulation while keeping your dog physically active.
Obedience Training and Tricks
Engaging in obedience training or teaching your dog new tricks is not only mentally stimulating but also strengthens the bond between you and your pet. Training sessions provide opportunities for learning, positive reinforcement, and mental exercise, all of which contribute to your dog's overall well-being.
Conclusion
Creating a DIY Scratch Board for dogs nails is not only a fun and fulfilling project for pet owners but also a valuable means of offering mental stimulation, promoting claw health, and reducing stress for our beloved four-legged companions. Although every dog is unique and may take varying amounts of time to embrace their new scratch board fully, your patience and dedication will undoubtedly pay off.
As you put your DIY skills to the test and embark on this creative journey, remember to enjoy the process and relish the joy it brings to your dog. May your furry friend find endless entertainment and contentment in their newly crafted scratch board!
Sources
https://www.agoodfeelingdogtraining.com/blog/diyscratchboard