I've recently discovered the amazing world of DIY lash extensions, and I couldn't be more excited about it! These innovative products have taken the beauty and cosmetics industry by storm, allowing me to achieve those dreamy, long lashes I've always desired without having to make frequent trips to a professional salon. But here's the real secret to making sure my DIY lash extensions look their absolute best and last as long as possible: proper maintenance and regular cleaning.
In this comprehensive guide, I'm going to share all the knowledge and skills I've acquired on how to clean DIY lash extensions effectively, right from the comfort of my own home. I'll provide you with detailed insights, step-by-step instructions, and some valuable maintenance tips that I've learned along the way. By the end of this article, you'll be equipped with everything you need to know to maintain your lash extensions like a pro. So, let's dive in and make those lashes shine!
Understanding the Importance of Cleaning DIY Lash Extensions: Why It Matters
The realm of DIY lash extensions, delving into the intricacies of cleaning them is a crucial endeavor. To truly appreciate its significance, it's vital to grasp why maintaining their cleanliness is imperative. Lash extensions, like any other beauty accessory, are not immune to the accumulation of natural oils, remnants of makeup, dust, and the pervasive presence of environmental pollutants. Neglecting their regular cleaning can give rise to a host of issues, which encompass:
- Diminished Lifespan: Lash extensions, when not cleaned regularly, suffer a reduced lifespan. The accumulation of debris and impurities can weaken the adhesive bond, causing the extensions to fall off prematurely. Proper cleaning routines can extend their durability, ensuring a longer-lasting and cost-effective beauty investment.
- Potential Bacterial Growth: The neglect of cleaning DIY lash extensions creates an environment ripe for bacterial growth. These microorganisms thrive in the presence of oil and debris, which can lead to eye infections. Such infections can be not only uncomfortable but also pose risks to overall eye health. Maintaining a clean environment around your lashes is essential to prevent these issues.
- Loss of Natural Luster: Clean lash extensions exude a natural, lustrous appearance that enhances your overall look. However, when laden with residue and pollutants, they can appear dull and lackluster. Regular cleaning restores their radiant allure, ensuring you always look your best.
- Eye Health and Comfort: Beyond aesthetics, maintaining clean-lash extensions is fundamental to preserving eye health and comfort. Unclean extensions can cause discomfort, irritation, and even allergies. A clean lash line promotes eye comfort and reduces the likelihood of adverse reactions to clean eyelash extensions how to clean.
Materials and Tools You Will Need: Gathering Your Arsenal
Before embarking on your DIY lash extension cleaning journey, it's essential to gather all the necessary materials and tools to ensure a seamless and effective process. Here's a comprehensive list of what you'll need:
- A Clean, Well-Lit Workspace: Create a comfortable and well-lit environment where you can perform the task with precision and ease. Adequate lighting is crucial to ensure you don't miss any dirt or residue during the cleaning process.
- Mirror or Magnifying Mirror: Enhance your visibility by using a mirror or magnifying mirror. This will help you closely inspect your lash extensions and ensure that every nook and cranny is thoroughly cleaned.
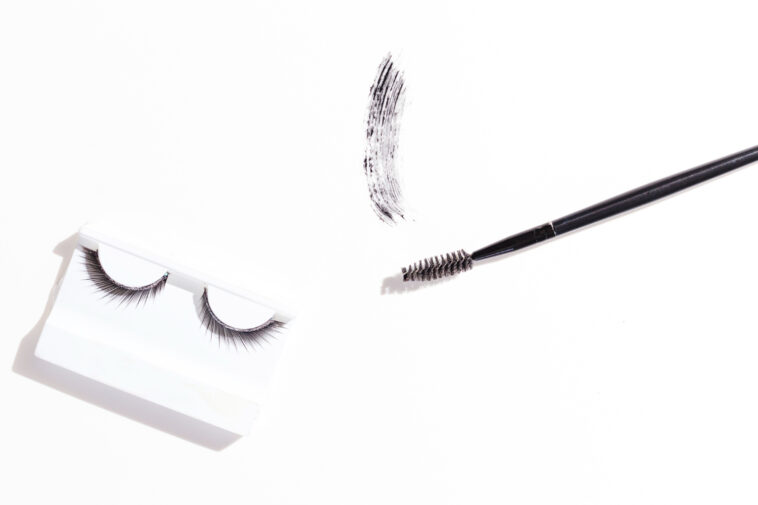
- Lash Extension Brush or Spoolie: A lash extension brush or spoolie is a fundamental tool for keeping your lash extensions untangled and in their desired shape. It's essential to prevent any clumping or tangling of the lashes during and after the cleaning process.
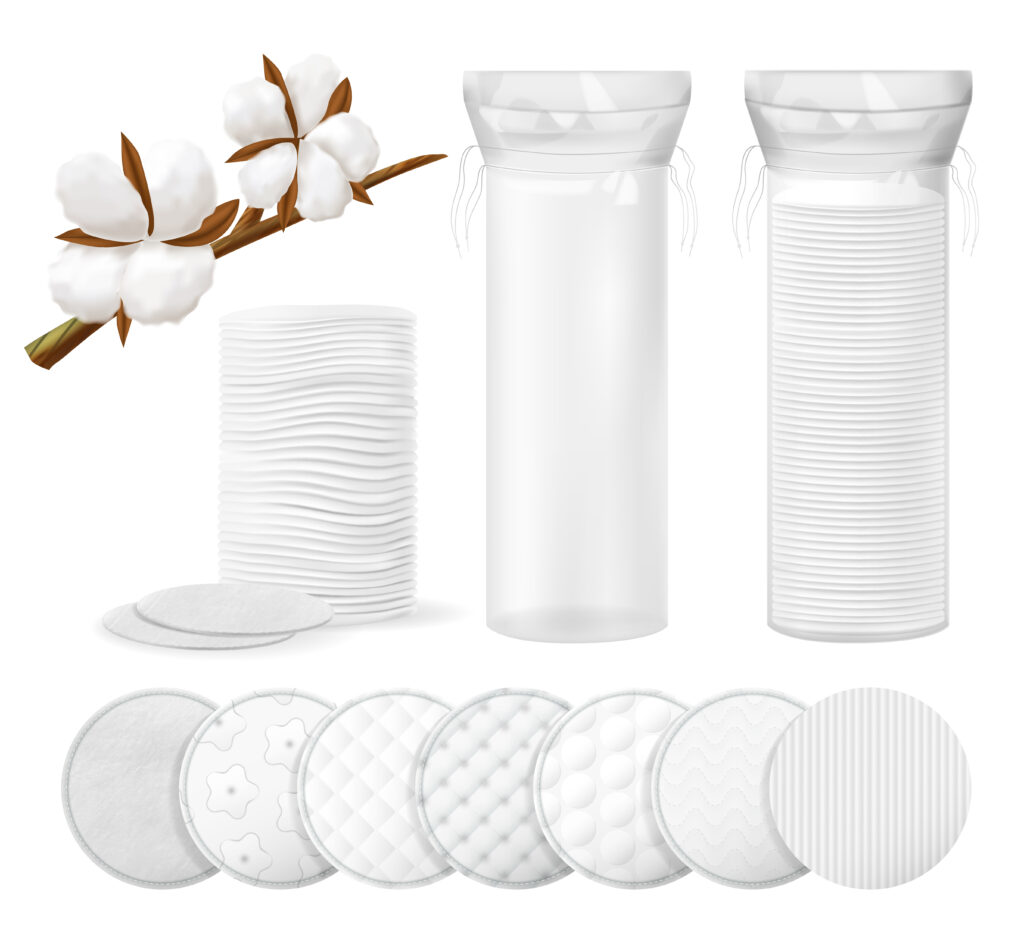
- Soft, Clean Microfiber Cloth or Cotton Pads: These gentle materials will be your allies in the cleansing process. They are responsible for delicately wiping away impurities and cleansing solution without causing damage to your lash extensions.
- High-Quality Lash Cleansing Solution: Invest in a reputable lash cleansing solution specifically designed for lash extensions. These solutions are formulated to effectively clean extensions while preserving their adhesive bond and overall integrity.
- Small Dish or Container: You'll need a small dish or container to mix and hold the lash cleansing solution. This container should be clean and easy to work with during the cleaning process.
- Lukewarm Distilled Water: Lukewarm distilled water plays a crucial role in rinsing your lash extensions. It should be used sparingly to ensure that any residue from the cleansing solution is thoroughly removed without over-saturating your lashes.
Check out our post on Do It Yourself Quotes
Step-by-Step Guide: How to Clean DIY Lash Extensions – Nurturing Your Lashes to Perfection
Step 1: Set Up Your Ideal Lash Extension Maintenance Workspace
Creating an ideal work environment is the crucial first step in ensuring the proper cleaning of your DIY lash extensions. Choose a clean, well-ventilated area with ample natural or artificial lighting to work comfortably and with precision. Ensure the workspace is free from distractions, and have all your materials and tools within easy reach.
Moreover, it's essential to maintain good hygiene during this process. Wash your hands thoroughly with a mild, oil-free soap and ensure they are completely dry before touching your lash extensions. Any oils or residues on your hands can transfer to your lashes and affect their adhesive bond.
Step 2: The Art of Gentle Lash Extension Brushing
Before you begin the cleansing process, it's essential to address any loose dirt or debris on your lashes. Gently comb through your lashes using a lash extension brush or spoolie to eliminate any particles that may have settled on them. This not only ensures a cleaner starting point but also prevents tangles during the cleaning process.
Be patient and gentle during this step, as aggressive brushing can cause damage to the lash extensions. Start at the tips of your lashes and work your way up to the base, ensuring you remove any debris along the way.
Step 3: Crafting the Perfect Lash Cleansing Solution
In a small, clean dish or container, prepare your lash cleansing solution. The choice of cleansing solution is pivotal in this process. Opt for a lash extension-friendly formula, specifically designed to be gentle on your extensions and prevent any potential damage. Look for solutions that are oil-free and gentle on sensitive eyes. Ensure it is a product that you trust and follow the manufacturer's instructions for dilution if necessary.
When preparing the solution, remember that less is often more. It's better to start with a slightly more diluted solution and adjust as needed. The goal is to have a cleansing solution that effectively removes dirt and makeup residues while maintaining the integrity of your lash extensions.
Step 4: Soaking a Microfiber Cloth or Cotton Pads: The Soothing Bath for Your Lashes
Dip a clean microfiber cloth or cotton pad into the lash cleansing solution. You'll want the cloth or pad to be damp but not dripping wet. The right amount of moisture is essential to avoid over-saturating your lash extensions, which could compromise their adhesive bond.
Allow the cloth or pad to absorb the solution thoroughly. This will ensure even distribution of the cleansing solution across your lashes and eyelids during the cleaning process.
Step 5: The Meticulous Lash Extension Cleaning Process
With your eyes gently closed, begin the cleansing process by using soft, downward strokes. Carefully wipe the damp cloth or cotton pad across your closed eyelids and lash extensions. Take your time during this step to ensure the thorough removal of makeup residue, oils, and accumulated dirt. Pay special attention to the lash base, where oils tend to accumulate more significantly.
If you wear eye makeup, such as mascara or eyeliner, ensure that you clean the lash line thoroughly to remove any residue. Stubborn makeup can sometimes require a bit more gentle pressure, but always prioritize the health of your lash extensions.
Step 6: Rinse and Pat Dry: The Final Touch
Once you've meticulously cleaned your lash extensions, rinse your face with lukewarm distilled water to remove any lingering cleansing solution. Proper rinsing is essential to prevent any residue from the cleansing solution from lingering on your lashes, which could affect their adhesive bond or cause irritation.
When drying your face, be sure to pat it gently with a clean, soft towel, avoiding any rubbing or pulling on the lashes. Patting helps maintain the integrity of the extensions and minimizes the risk of damage.
Tips for Maintaining Clean DIY Lash Extensions: A Maintenance Regimen That Works
Achieving and preserving the cleanliness and longevity of your DIY lash extensions involves more than just a one-time cleaning routine. Embrace the following comprehensive tips to ensure your lash extensions remain in impeccable condition:
Tip 1: Establish a Consistent Cleaning Routine
The foundation of maintaining clean DIY lash extensions lies in establishing a regular cleaning routine. Incorporate lash extension cleaning as a non-negotiable part of your daily or weekly beauty regimen. Consistency is paramount, as it prevents the gradual buildup of dirt, oils, and debris that can compromise the extensions' appearance and adhesive bond.
Tip 2: Beware of Oil-Based Products: Why They Spell Trouble
Exercise caution when selecting makeup removers and cleansers. Steer clear of oil-based products, as they have the potential to break down the lash adhesive, leading to premature lash loss. Opt instead for oil-free alternatives that are specifically formulated to be safe for lash extensions. These products effectively remove makeup and impurities without jeopardizing the integrity of your extensions.
Tip 3: Gentle Handling: The Key to Extension Longevity
Handle your lash extensions with the utmost care. Avoid any form of tugging, pulling, or excessive manipulation. When cleaning or applying makeup, always use a soft touch to preserve the integrity of your extensions. Delicate handling ensures that your lashes stay firmly bonded and free from damage.
Tip 4: The Shielding Power of a Lash Sealant
Consider enhancing your lash extension maintenance regimen by incorporating a lash extension sealant. This sealant forms a protective barrier over your extensions, acting as a shield against oil, dust, and debris. By doing so, it extends the lifespan of your lash extensions and keeps them looking fresh and flawless for longer periods.
Tip 5: Choosing the Right Mascara: A Guide to Lash Extension-Safe Products
If you have a preference for mascara alongside your extensions, make an informed choice by opting for mascara products specifically formulated for use with lash extensions. These specialized products are designed to be gentle on extensions, ensuring they won't clump or cause damage. Select from a range of extension-safe mascaras that enhance your lash look without compromising their health.
Check out our post on DIY Lash Lift
Common Mistakes to Avoid When Cleaning DIY Lash Extensions: Navigating the Pitfalls
Ensuring the pristine condition and durability of your DIY lash extensions involves not only knowing how to clean them effectively but also being aware of common mistakes that can undermine their integrity. Here, we delve into the pitfalls you should steer clear of:
Using Oil-Based Products – The Adhesive Breakdown Risk
One of the most critical mistakes to avoid is the use of oil-based makeup removers or cleansers. These products can be detrimental to your lash extensions as they have the potential to break down the adhesive that holds the extensions in place. This breakdown can result in premature lash loss and the need for frequent touch-ups. Always opt for oil-free alternatives that are specifically designed to be safe for lash extensions.
Vigorous Rubbing or Pulling – A Recipe for Damage
Another common pitfall is applying excessive force when cleaning or handling your lash extensions. Vigorous rubbing or pulling on the lashes can cause damage by loosening the extensions from your natural lashes or even causing them to fall off prematurely. Always exercise gentle care when cleaning and handling your extensions to maintain their integrity and longevity.
Overusing Lash Extension Cleansers – Weakening the Adhesive
While proper cleaning is essential, overdoing it can lead to another mistake. Excessive use of lash extension cleansers can weaken the adhesive bond holding the extensions in place. It's essential to strike a balance between keeping your lashes clean and preserving their adhesive strength. Follow a regular cleaning routine but avoid over-cleansing to ensure your extensions stay securely attached.
Neglecting a Regular Cleaning Routine – Allowing Accumulation of Oils and Debris
Lastly, neglecting to establish a consistent cleaning routine is a mistake that should not be underestimated. When you skip regular cleaning sessions, you allow oils, makeup residues, and environmental debris to accumulate on your lash extensions over time. This accumulation can lead to clumping, discomfort, and a shorter lifespan for your extensions. Make it a habit to clean your lash extensions as part of your daily or weekly beauty regimen to maintain their cleanliness and overall condition.
FAQs: Cleaning DIY Lash Extensions
1. How often should I clean my DIY lash extensions?
Ideally, you should clean your DIY lash extensions daily or at least every other day. Regular cleaning helps prevent the buildup of oils, makeup residue, and debris, keeping your lashes looking fresh and maintaining eye health.
2. Can I use regular makeup removers to clean my lash extensions?
It's best to avoid regular makeup removers, especially those that are oil-based, as they can break down the lash adhesive and lead to premature lash loss. Instead, opt for a lash extension-friendly cleansing solution specifically designed for this purpose.
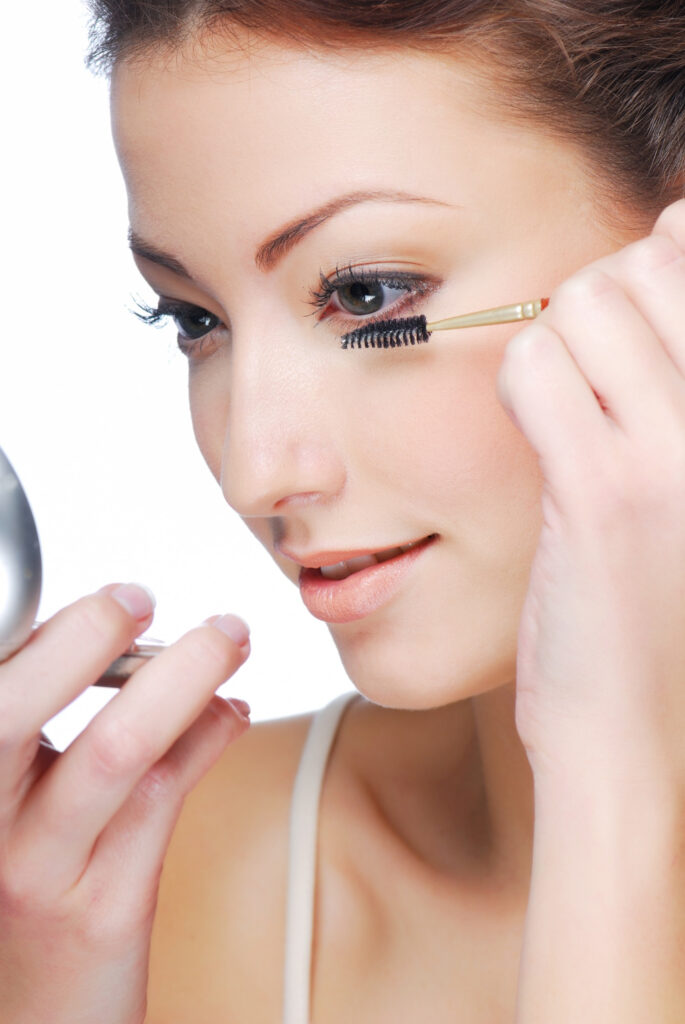
3. Can I wear mascara with my DIY lash extensions?
Yes, you can wear mascara with your lash extensions, but it's essential to use a mascara formulated for use with lash extensions. These products are designed to be gentle and won't clump or damage your extensions. Always apply mascara sparingly to avoid excessive buildup.
4. How should I handle my lash extensions to prevent damage?
Handle your lash extensions with care. Avoid tugging, pulling, or rubbing your eyes. When cleaning or applying makeup, use a soft touch and be gentle around the lash area to preserve the integrity of your extensions.
5. What should I do if my DIY lash extensions become tangled or twisted?
If your lash extensions become tangled or twisted, use a lash extension brush or spoolie to carefully separate and untangle them. Start at the base and gently comb through the lashes to separate any crossed strands.
6. Is it necessary to use a lash sealant?
Using a lash extension sealant is not mandatory, but it can be beneficial. A lash sealant forms a protective barrier over your extensions, helping to shield them from oil, dust, and debris, thus extending their lifespan. Consider using one if you want to maximize the longevity of your lash extensions.
7. Can I swim or get my lashes wet after cleaning them?
After cleaning your lash extensions, it's best to avoid getting them wet for at least 24 hours. This allows the adhesive to fully cure and ensures the longevity of your lash extensions. If you plan to swim or be in a humid environment, consider using a waterproof lash sealant to protect your lashes.
8. Can I curl my DIY lash extensions?
It is generally not recommended to use an eyelash curler on your DIY lash extensions, as it can damage the extensions and the adhesive. Lash extensions are designed to maintain their curl, so additional curling is usually unnecessary.
9. What should I do if my DIY lash extensions start falling out?
Lash extensions do have a natural shedding process, where individual extensions may fall out as your natural lashes shed. If you notice excessive lash loss or gaps, it's essential to consult with a professional lash technician for a touch-up or assessment to ensure proper maintenance.
10. Can I remove my DIY lash extensions at home?
Removing DIY lash extensions at home can be challenging and may risk damaging your natural lashes. It's best to consult a professional lash technician for safe and proper lash extension removal. Attempting to remove them yourself can lead to lash breakage or loss.
Conclusion: The Path to Beautiful, Healthy Lashes
My journey into the enchanting world of DIY lash extensions has taught me that maintaining these beautiful adornments is a personal ritual of self-care and self-expression. It's not just about aesthetics; it's about preserving the health of my natural lashes and the comfort of my eyes while enhancing my unique style and confidence. Through consistent cleaning routines, gentle handling, and avoiding common pitfalls, I've discovered the delicate balance between beauty and well-being.
Cleaning my lash extensions has become a meditative practice, a moment to focus on myself and embrace the allure of long, fluttery lashes. It's a testament to self-love and the rewarding feeling of vibrant, healthy lashes that frame my eyes with elegance. So, to anyone embarking on this journey, remember that maintaining clean DIY lash extensions is a personal journey of self-expression, beauty, and inner radiance – one that I've come to cherish with each flutter of my lashes.
Sources
https://www.rmlashandbeauty.com/how-to-clean-eyelash-extensions/
https://www.modelrocklashes.com/blog/lashes/how-to-maintain-diy-eyelash-extensions/
https://www.masterclass.com/articles/how-to-clean-lash-extensions