DIY Overnight Hair Mask
I know firsthand the struggle of dealing with dry, damaged, and lackluster hair, and I'm sure many of you can relate. Our hair goes through so much on a daily basis, and it can be disheartening to see it lose its luster.
But here's the exciting part – there's a simple and budget-friendly solution that can breathe new life into your locks: DIY overnight hair masks. I've personally experienced the benefits of these masks, and I'm thrilled to share this comprehensive guide with you.
We'll delve into the world of DIY overnight hair masks, exploring the incredible advantages they offer, the key ingredients to look for, and some fantastic recipes that have transformed my hair into a head full of radiant, healthy locks. Say goodbye to those frustrating bad hair days and hello to the joy of having gorgeous, revitalized hair!
The Benefits of DIY Overnight Hair Masks
Deep Conditioning
One of the primary benefits of using a DIY overnight hair mask is deep conditioning. These masks penetrate deep into the hair shaft, providing intense moisture and nourishment. This helps repair damage caused by heat styling, chemical treatments, and environmental factors.
Improved Hair Texture
Regular use of overnight hair masks can result in smoother and softer hair. The natural instructions ingredients in these masks can help improve the texture of your hair, making it more manageable and reducing frizz.
Strengthening
Overnight hair masks are also known for their strengthening properties. They can help fortify your hair, reducing breakage and split ends. This is especially beneficial for those with weak or brittle hair.
Enhanced Shine
Do you dream of having shiny, glossy locks? DIY overnight hair mask for dry can help you achieve that coveted shine. These masks seal the hair cuticles, which reflect light, making your hair look radiant.
Promotes Hair Growth
Certain ingredients in overnight hair masks, such as aloe vera and green tea, have been linked to promoting hair growth. Regular use may help stimulate hair follicles and encourage healthy hair growth.
Damage Repair
Overnight hair masks can work wonders in repairing damaged hair. They can help mend split ends, reduce hair breakage, and restore the health of your hair by providing essential nutrients and hydration.
Scalp Health
Many DIY hair masks contain ingredients that are beneficial for your scalp as well. A healthy scalp is essential for promoting hair growth and preventing issues like dandruff and itchiness. Ingredients like coconut oil and aloe vera can soothe and nourish the scalp.
Reduces Hair Loss
By strengthening the hair shaft and improving overall hair health, overnight masks can help reduce hair loss. They may also minimize hair fall caused by excessive styling or harsh environmental conditions.
Ingredients for DIY Overnight Hair Masks
Before we dive into the recipes for DIY overnight hair masks, it's crucial to familiarize ourselves with the key ingredients commonly utilized in these treatments. These ingredients offer a range of benefits for your hair, making them excellent choices for enhancing its health and appearance:
- Coconut Oil: Renowned for its deep moisturizing properties, coconut oil is a powerhouse ingredient that aids in repairing damaged hair while preventing protein loss. It leaves your locks feeling nourished and revitalized.
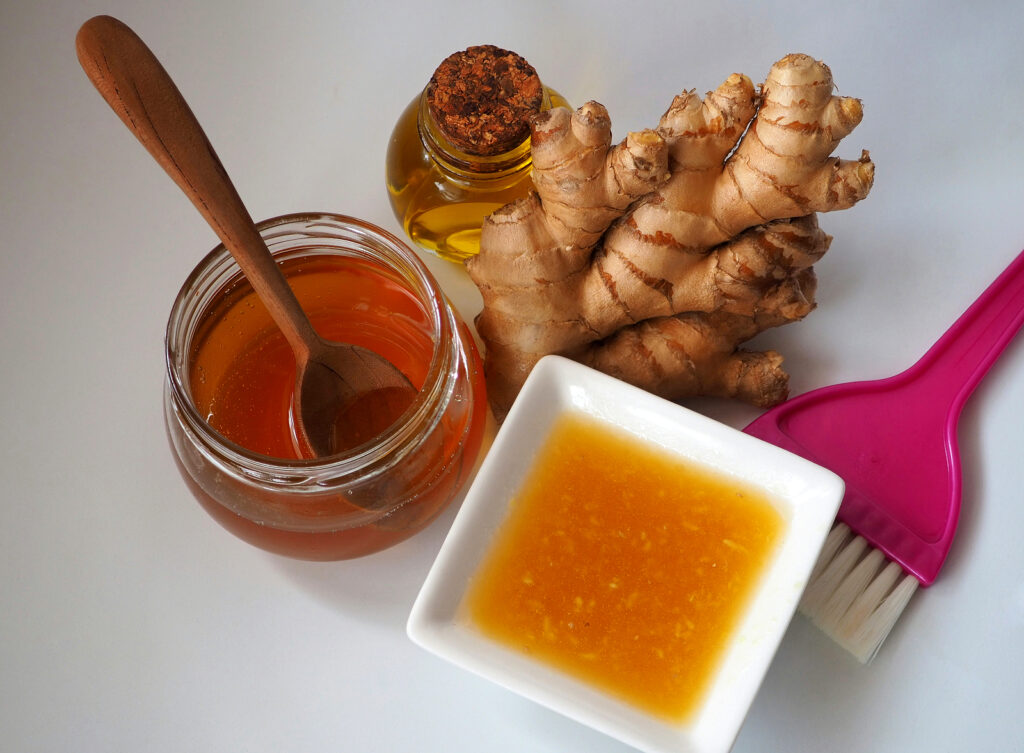
- Honey: As a natural humectant, honey is fantastic for attracting and retaining moisture. This quality makes it particularly effective for dry and thirsty hair, leaving it soft, supple, and well-hydrated.
- Avocado: Loaded with essential fatty acids and an array of vitamins, avocado provides your hair with essential nutrients that promote both strength and shine. It works wonders for rejuvenating tired and lackluster locks.
- Bananas: Bananas are a rich source of potassium and vitamins that can significantly enhance hair elasticity, reducing the likelihood of breakage. They leave your hair looking resilient and healthier.
- Yogurt: Containing protein and lactic acid, yogurt strengthens hair strands and infuses moisture. It's a valuable ingredient for those seeking to fortify their hair and maintain its hydration.
- Egg: Eggs are a wellspring of protein and biotin, both of which play vital roles in promoting hair growth and overall hair health. They are particularly beneficial for those experiencing hair thinning or looking to bolster their hair's strength.
- Aloe Vera: Aloe vera's soothing properties are not just for sunburns—it also benefits the scalp and encourages hair growth while reducing dandruff. It helps create a harmonious environment for hair to thrive.
- Olive Oil: Rich in antioxidants and healthy fats, olive oil serves as an exceptional moisturizer and conditioner for your hair. It leaves your locks looking glossy and well-cared for.
- Green Tea: With its abundant antioxidants, green tea is a potent ingredient for reducing hair loss and stimulating growth. It's a natural remedy for those looking to bolster their hair's volume and vitality.
- Lemon Juice: Lemon juice has a clarifying effect on the scalp, effectively removing excess oil and creating an optimal environment for hair growth. It promotes a healthy scalp, which is the foundation of vibrant hair.
Now that we've covered the benefits and essential ingredients, let's explore some DIY overnight hair mask recipes that you can easily prepare at home.
DIY Overnight Hair Mask Recipes
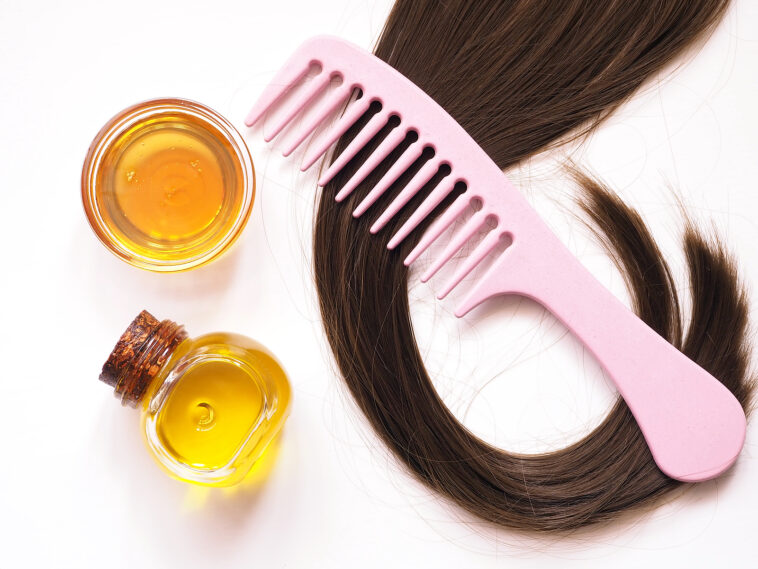
Recipe 1: Coconut Oil and Honey Mask
Ingredients
- 2 tablespoons of organic virgin coconut oil
- 1 tablespoon of pure, raw honey
Instructions
- Coconut Oil Melting: Begin by placing the coconut oil in a microwave-safe bowl. Heat the coconut oil in the microwave for about 20-30 seconds or until it transforms into a liquid form. Alternatively, you can gently warm it using a double boiler on the stovetop. This step ensures that the coconut oil is easy to work with and evenly distributed throughout your hair.
- Incorporate Honey: Once the coconut oil has liquefied, add the honey to the bowl. Ensure thorough mixing to create a well-blended and creamy consistency. The honey complements the coconut oil by adding its natural humectant properties, intensifying moisture retention.
- Application: Begin the application process by sectioning your hair. Start at the roots and work your way down to the tips. Use your fingertips to massage the mask into your scalp, promoting circulation and nourishing the hair follicles. Continue applying until all your hair is coated evenly.
- Protective Covering: To prevent any mess or oil transfer to your bed linens, cover your hair with a shower cap or wrap it securely in plastic wrap. This barrier also helps trap heat and enhances the absorption of the mask's nutrients.
- Overnight Treatment: Allow the mask to work its magic overnight. The extended exposure time allows the coconut oil and honey to deeply penetrate your hair, repairing damage and boosting moisture retention.
- Morning Ritual: In the morning, it's time to rinse out the mask. Begin by using lukewarm water to thoroughly wash the mask out of your hair. Be patient and ensure you remove all traces of the mask. Follow up with your regular shampoo and conditioner routine to leave your hair fresh and clean.
Recipe 2: Avocado and Banana Mask
Ingredients
- 1 ripe avocado
- 1 ripe banana
Instructions
- Preparing the Mask: Begin by selecting a ripe avocado and banana. These ingredients are not only delicious but also incredibly beneficial for your hair. Avocado is packed with essential fatty acids and vitamins, while bananas are rich in potassium and nourishing vitamins. To create the mask, peel the avocado and remove its pit. Cut it into small pieces for easier mashing. Similarly, peel the banana and break it into smaller chunks.
- Mash to Perfection: In a bowl, combine the avocado and banana pieces. Mash them together using a fork or a blender until you achieve a smooth and creamy paste. This step ensures that the nutrients from both fruits are thoroughly blended, creating an effective hair treatment.
- ingredients instructionsApplication Technique: With the paste ready, it's time to apply it to your hair. Start by sectioning your hair to ensure even coverage. Focus the application on the ends of your hair, as this is where it tends to be the most damaged and dry. Gently massage the mixture into your hair, ensuring that it is distributed evenly from root to tip.
- Protective Cover: To keep the mask in place and prevent any mess, cover your hair with a shower cap or wrap it securely with plastic wrap. This covering not only maintains the warmth but also prevents the mask from transferring to your bedding.
- Overnight Nourishment: Leave the mask in your hair overnight to allow the rich nutrients from the avocado and banana to penetrate deeply. This extended treatment time will help repair damage, boost hydration, and enhance the overall health of your hair.
- Morning Cleanse: In the morning, it's time to rinse out the mask. Begin by using lukewarm water to thoroughly wash the mask from your hair. Take your time to ensure you remove all remnants of the mixture. Follow up with your regular shampoo and conditioner routine to leave your hair feeling clean and revitalized.
Recipe 3: Yogurt and Egg Mask
Ingredients
- 1/2 cup of plain yogurt
- 1 egg
Instructions
- Understanding the Ingredients: Before we delve into the method, it's worth noting the benefits of the ingredients you're about to use. Plain yogurt is an excellent source of protein and lactic acid, which help to strengthen and moisturize your hair. On the other hand, eggs are rich in protein and biotin, promoting hair growth and overall hair health. Combining these two powerful elements in this mask will provide your hair with a revitalizing treatment.
- Creating the Mask: In a bowl, crack open an egg and whisk it thoroughly. Once the egg is well-beaten, add the 1/2 cup of plain yogurt to the bowl. Mix the two ingredients together until you achieve a smooth and consistent blend. This step ensures that the nutrients from both the yogurt and egg are thoroughly combined, offering your hair a holistic treatment.
- Application Technique: With the mask prepared, it's time to apply it to your hair. Begin by sectioning your hair to ensure an even distribution of the mixture. Using your fingers or a brush, apply the mask from root to tip, making sure that every strand is coated. This ensures that your hair reaps the full benefits of the nourishing mask.
- Protective Covering: To maximize the effectiveness of the mask and prevent any mess, cover your hair with a shower cap or securely wrap it with plastic wrap. This covering helps to trap heat, creating a warm environment that enhances the absorption of nutrients into your hair strands.
- Overnight Treatment: Allow the mask to work its magic overnight. This extended duration gives the yogurt and egg ample time to penetrate your hair, strengthening it, adding moisture, and supporting its overall health.
- Morning Cleansing: In the morning, rinse out the mask using lukewarm water. Take your time to ensure you remove all traces of the mixture. Follow up with your regular shampoo and conditioner routine, leaving your hair feeling fresh and invigorated.
Recipe 4: Aloe Vera and Olive Oil Mask
Ingredients
- 2 tablespoons of pure aloe vera gel
- 1 tablespoon of extra-virgin olive oil
Instructions
- Understanding the Ingredients: Before we dive into the method, let's explore the qualities of the ingredients you'll be using. Aloe vera gel is renowned for its soothing properties, making it excellent for the scalp. It also promotes hair growth and reduces dandruff. On the other hand, extra-virgin olive oil is a rich source of antioxidants and healthy fats, offering deep moisturization and conditioning to your hair.
- Creating the Hair Mask: In a bowl, combine the 2 tablespoons of pure aloe vera gel with the 1 tablespoon of extra-virgin olive oil. This fusion brings together the scalp-soothing and hair-nourishing properties of aloe vera and olive oil. Stir the mixture until it forms a consistent blend, ensuring the ingredients are thoroughly incorporated.
- Application Technique: With the mask ready, it's time to apply it to your hair. Start by sectioning your hair to ensure an even distribution. Begin at the roots, gently massaging the mixture into your scalp. This promotes blood circulation and encourages a healthy environment for hair growth. Continue applying the mask to the ends of your hair, ensuring every strand is coated with the nourishing blend.
- Protective Covering: To optimize the absorption of nutrients and prevent any mess, cover your hair with a shower cap or securely wrap it with plastic wrap. This covering also traps heat, allowing the mask to work its magic by deeply penetrating your hair and scalp.
- Overnight Revitalization: Leave the mask in your hair overnight, giving the aloe vera gel and olive oil ample time to nourish your scalp, moisturize your hair, and reduce any scalp irritation or dandruff.
- Morning Cleansing: In the morning, it's time to rinse out the mask. Begin by using lukewarm water to thoroughly wash the mask out of your hair. Ensure you remove all traces of the mixture. Follow up with your regular shampoo and conditioner routine to leave your hair feeling clean, refreshed, and deeply conditioned.
Recipe 5: Green Tea and Lemon Juice Mask
Ingredients
- 2 green tea bags (steeped and cooled)
- Juice of half a lemon
Instructions
- Unlocking the Potential: Before we get into the method, let's uncover the unique qualities of the ingredients at play. Green tea is a powerhouse of antioxidants, which can help reduce hair loss and promote growth. Additionally, it has anti-inflammatory properties that can soothe the scalp. Lemon juice, on the other hand, acts as a natural clarifier, removing excess oil and providing a clean slate for hair growth.
- Creating the Potion: Begin by steeping two green tea bags in hot water and allowing them to cool down. Green tea is celebrated for its health benefits, but in this case, it will serve as a key ingredient in your hair mask. Once the green tea is cooled, squeeze the juice from half a lemon into it. This infusion combines the antioxidant-rich green tea with the clarifying and scalp-cleansing power of lemon juice.
- Application Mastery: Now that your hair elixir is ready, it's time to apply it to your hair and scalp. Section your hair to ensure even coverage, then gently massage the mixture into your scalp. This stimulating massage not only promotes blood circulation but also ensures that the beneficial properties of the green tea and lemon juice are distributed evenly.
- Protective Shield: To avoid any mess and ensure the mixture remains in contact with your hair and scalp, cover your head with a shower cap or securely wrap it with plastic wrap. This covering also helps retain warmth, allowing the mask to work effectively overnight.
- Overnight Transformation: Leave the mask in your hair overnight. This extended duration allows the green tea and lemon juice to work their magic, promoting hair growth, clarifying the scalp, and reducing excess oil.
- Morning Cleanse: In the morning, it's time to bid farewell to the mask. Begin by rinsing your hair thoroughly with lukewarm water to remove any residue. Follow up with your regular shampoo routine to leave your hair feeling fresh, rejuvenated, and free from any lingering impurities.
How to Apply DIY Overnight Hair Masks
Applying a DIY overnight hair mask is a straightforward process, but understanding the nuances can maximize its effectiveness. Here's a detailed guide on how to do it right:
Prep Your Tresses
Begin by ensuring your hair is clean and free from any styling products. You have the option to apply the mask to either dry or slightly damp hair, depending on your preference. If your hair is dry, consider lightly dampening it with water to enhance mask absorption.
Sectional Strategy
Divide your hair into manageable sections. This step ensures even distribution and comprehensive coverage. Use hair clips or ties to keep these sections separate, making the application process more efficient.
Strategic Application
Apply your selected DIY hair mask with intention. Start at the roots and work your way down to the tips. Focus on areas that require the most attention, such as dry ends or a flaky scalp. Don't forget to massage the mask into your scalp as well, stimulating blood circulation and promoting a healthier scalp environment.
Barrier Protection
To avoid any unfortunate encounters between your mask and your pillow, cover your hair. A shower cap is a popular choice, but you can also use plastic wrap or even an old, soft T-shirt to wrap your head. This protective covering serves two purposes: it traps heat, enhancing the absorption of the mask's nourishing ingredients, and it prevents any messy transfers during your slumber.
Overnight Soak
Leave the mask in your hair overnight to grant the ingredients ample time to work their magic. The extended duration allows for deeper penetration and more profound benefits.
Morning Ritual
Rise and shine—it's time to rinse. Begin by thoroughly rinsing your hair with lukewarm water. Ensure that you remove all traces of the mask. Follow up with your regular shampoo and conditioner routine, using products tailored to your hair type and needs.
Tips for Maximizing the Effectiveness of Overnight Hair Masks
If you want to make the most of your DIY overnight hair masks and achieve exceptional results, here are some valuable tips to keep in mind:
Consistency is Key
To truly transform your hair, consistency is vital. Incorporate these masks into your routine on a regular basis, aiming for at least once a week. Over time, the cumulative effects will become more noticeable, and your hair will benefit from continuous nourishment.
Customize Your Blend
Don't be afraid to tailor your hair mask to address your specific hair needs. Experiment with different ingredients based on your concerns—whether it's dryness, frizz, or damage. Each ingredient offers unique benefits, so you can craft a mask that's perfectly suited to your hair type and goals.
Protect Your Linens
Overnight masks can sometimes be messy, and you certainly don't want to stain your beloved pillowcases. Place an old pillowcase or a towel on your pillow before you sleep to safeguard your bedding from any potential mask residue. This simple precaution ensures a clean and comfortable night's rest.
Patience Pays Off
While these DIY masks are effective, remember that hair transformations often take time. Don't be discouraged if you don't see immediate results. Give it a few weeks of consistent use, and you'll likely notice significant improvements in the health and appearance of your hair.
Conclusion
DIY overnight hair masks are a fantastic way to rejuvenate and revitalize your hair from the comfort of your own home. These masks offer numerous benefits, including deep conditioning, improved texture, strengthening, enhanced shine, and promotion of hair growth. With a variety of ingredients and recipes to choose from, you can tailor your mask to address your specific hair concerns.
Say goodbye to dull, lifeless locks and hello to luscious, healthy hair by incorporating DIY overnight hair masks into your hair care routine. Experiment with different recipes and ingredients to discover what works best for your hair type and enjoy the transformative results.
Remember, consistency is key, and with patience and dedication, you can achieve the luscious locks you've always dreamed of!
Sources
https://www.ncbi.nlm.nih.gov/pmc/articles/PMC5499037/
https://www.mindbodygreen.com/articles/coconut-oil-hair-mask