DIY Electric Skateboard
I've always had a strong desire to own an electric skateboard, but the idea of simply buying one didn't quite ignite my excitement. I quickly realized I wasn't alone in this sentiment, as many fellow enthusiasts were also drawn to the idea of crafting their own personalized electric ride.
So, I embarked on a journey to create my very own DIY electric skateboard, one that would be ideal for leisurely town cruises or even as my daily commuting companion. What makes this project truly special is the immense satisfaction that comes with building something from scratch, tailoring it to my exact preferences. So, let's dive right into this thrilling adventure!
Understanding the DIY Electric Skateboard
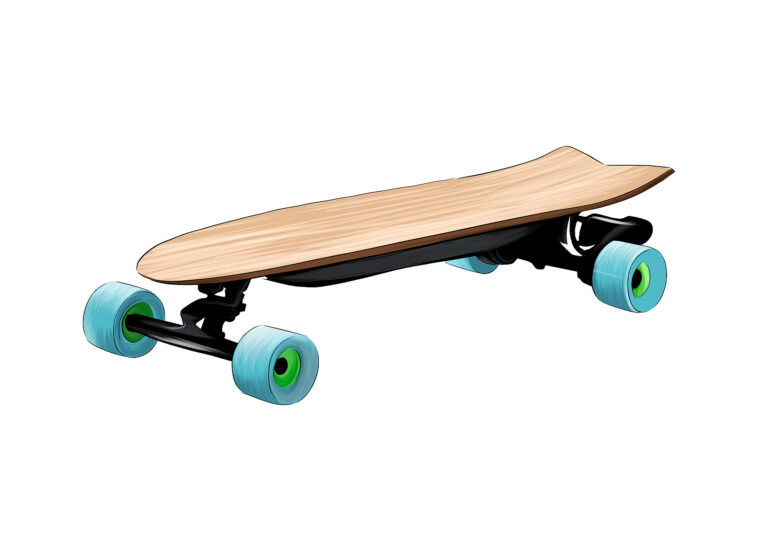
The DIY electric skateboard represents an exciting fusion of conventional skateboarding with advanced electric propulsion. This ingenious contraption integrates an electric motor, offering riders a thrilling powered experience that eliminates the need for manual pushing. Beyond its sheer excitement, this innovative project offers a plethora of opportunities for customization, cost savings, and hands-on learning. Embarking on the journey of building your own electric skateboard unveils a world of possibilities, making it an exhilarating and educational adventure.
Materials and Components Needed
Creating your very own DIY electric skateboard requires a careful selection of components and materials. Here's a detailed breakdown of what you'll need:
- Deck: The deck forms the structural foundation of your skateboard. Choose one that not only aligns with your stylistic preferences but is also robust enough to handle the rigors of electric propulsion.
- Trucks and Wheels: Opt for high-quality trucks and wheels to ensure stability, balance, and a smooth riding experience. These components significantly affect the overall performance of your skateboard.
- Electric Motor: The heart of your electric skateboard, the motor, determines the power and speed of your ride. For casual riding and beginners, a 250W motor should suffice. However, if you crave more speed, consider a higher wattage motor.
- Battery: The lifeblood of your DIY electric skateboard, the battery choice is critical. Aim for a battery that can provide a reliable 10 to 20 miles of range on a single charge. This range ensures extended enjoyment between charges.
- Electronic Speed Controller (ESC): The ESC serves as the intermediary between your battery and motor. It regulates power delivery, ensuring smooth acceleration and deceleration. Additionally, it interfaces with your remote control, giving you control over your skateboard's speed and direction.
- Remote Control: This essential device empowers you to control your electric skateboard wirelessly. It allows you to adjust speed and direction effortlessly, enhancing the riding experience.
- Bearing and Belt System: The bearing and belt system facilitates power transfer from the motor to the wheels. A well-maintained system ensures efficient propulsion and reduces wear and tear on your components.
- Enclosure: Safeguard your electronic components from dirt, moisture, and potential damage with a sturdy enclosure. It's a crucial element for ensuring the longevity and reliability of your DIY electric skateboard.
- Wiring and Connectors: Proper wiring and connectors are fundamental for seamlessly connecting all the components. Ensuring secure connections not only enhances safety but also guarantees consistent performance.
Step-by-Step Building Guide
Step 1: Deck Setup
Begin the assembly process by placing the deck on a flat surface. Position your trucks on either end of the deck, ensuring they align with the pre-drilled holes. Then, attach the wheels securely to the trucks, ensuring that all bolts and nuts are tightened properly. This foundational step sets the stage for the rest of the assembly.
Step 2: Motor Mounting
Now, move on to mounting the electric motor. Attach the motor to the rear truck using a compatible mounting bracket. Ensure it is positioned close enough to the wheels to establish a proper connection with the belt system. The motor's placement is crucial for optimal performance and balance.
Step 3: Bearing and Belt System Setup
Create a smooth power transfer system by connecting the motor's pulley to the wheel's pulley using a durable belt. It's important to ensure the belt has a snug fit, providing sufficient tension for efficient operation without being overly tight, which can lead to unnecessary strain on components. A well-adjusted belt is essential for a smooth and safe ride.
Step 4: Battery and ESC Installation
Now, it's time to set up the electrical components. Choose a central position on the deck for mounting the battery and ESC to maintain balance and stability. Secure them in place using an appropriate enclosure, ensuring they are well-protected from external elements, such as moisture and debris. This safeguarding step prolongs the lifespan of your electric skateboard.
Step 5: Wiring the Components
Carefully connect the battery to the ESC using the provided connectors, ensuring a secure and reliable electrical connection. Next, link the ESC to the motor, which completes the electrical circuit. To enhance durability and safety, consider using heat shrink tubing to protect these connections from wear and tear.
Step 6: Remote Control Integration
Pair the remote control with the ESC following the manufacturer's instructions to establish a reliable wireless connection. This step is essential for controlling the speed and direction of your electric skateboard. Ensure that the remote control is functioning correctly before proceeding.
Step 7: Safety Test
Before taking your electric skateboard for a ride, it's imperative to perform a thorough safety test. Head to a safe area, such as an empty parking lot or quiet street. Test all components, including the motor, brakes, and remote control, to confirm that everything is functioning perfectly. Make any necessary adjustments to ensure a safe and enjoyable riding experience.
Essential Safety Gear
Ensuring your safety is paramount when riding an electric skateboard. Here's an in-depth look at the essential safety gear you should always have on hand:
- Helmets: The single most important piece of safety gear for any skateboarder is a helmet. It provides vital protection for your head, safeguarding against severe head injuries in case of falls or accidents. Look for helmets certified to meet safety standards and ensure it fits snugly on your head.
- Knee and Elbow Pads: Protecting your joints is crucial, especially when skateboarding. Knee and elbow pads offer cushioning and support during falls or impacts. They can prevent painful scrapes, bruises, and even more serious injuries like fractures or dislocations.
- Gloves: Your hands are often the first point of contact with the ground during a fall. Proper skateboarding gloves can save your palms from abrasions, cuts, and road rash. Look for gloves with reinforced padding in high-impact areas.
- Safety Lights: If you plan to ride during low-light conditions, safety lights are a must. They enhance your visibility to others on the road, reducing the risk of collisions. Attach lights to the front and rear of your skateboard, wear a headlamp, or invest in reflective clothing to ensure you're seen in the dark.
- Reflective Clothing: In addition to safety lights, wearing reflective clothing, such as vests, jackets, or bands, significantly increases your visibility to motorists and pedestrians. It's a simple yet effective way to stay safe when riding in dimly lit or high-traffic areas.
- Wrist Guards: To protect your wrists from sprains and fractures during falls, consider wearing wrist guards. They provide essential support and prevent hyperextension of your wrist joints.
- Mouthguard: If you're pushing the limits of speed and terrain, a mouthguard can safeguard your teeth and jaw in case of a hard fall. It's a lesser-known but important piece of safety equipment, especially for aggressive riders.
- Full-Face Helmet (Optional): For riders engaging in high-speed or downhill electric skateboarding, a full-face helmet offers extra protection for the face and jaw. While it may not be necessary for all riders, it's a wise choice for those who take on more extreme riding challenges.
- Body Armor (Optional): For advanced riders or those participating in electric skateboarding competitions, body armor can provide additional protection for the chest, back, and spine. It's an optional but valuable safety investment for those seeking the utmost protection.
Maintenance Tips
Building your own electric skateboard is a rewarding endeavor, but it's just the beginning of your journey. To ensure the longevity and safety of your custom ride, it's essential to follow a thorough maintenance routine:
Regularly Inspect the Belt System:
Periodically examine the belt system that drives your skateboard. Look for signs of wear and tear, such as fraying or damage to the belt itself. If you notice any issues, replace the belt promptly to maintain optimal performance. A well-maintained belt system ensures smooth acceleration and efficient power transfer.
Check the Battery:
Keep a close eye on your skateboard's battery. Check for any swelling or physical damage. A swollen battery can be dangerous and should be replaced immediately. Additionally, always store your battery in a cool, dry place when not in use to prolong its lifespan and prevent potential hazards.
Clean the Bearings:
Your skateboard's bearings play a critical role in ensuring a smooth and enjoyable ride. Regularly clean them to remove dirt, dust, and debris that can accumulate over time. Clean bearings reduce friction, enhance maneuverability, and prolong the life of your wheels. Consider using a bearing cleaning kit for thorough maintenance.
Update the ESC Firmware:
Your skateboard's Electronic Speed Controller (ESC) may receive firmware updates from the manufacturer. It's crucial to stay informed about these updates and apply them as needed. Updated firmware can improve performance, fix bugs, and enhance safety features. Check the manufacturer's website or contact customer support for information on the latest firmware releases.
Regularly Test the Brakes:
Safety should always be your top priority. Before each ride, thoroughly test your skateboard's braking system. Ensure that the brakes respond promptly and effectively to your commands. If you notice any issues with the braking performance, address them immediately to prevent accidents. Regular brake testing is a simple yet critical step in maintaining rider safety.
Choosing the Right Deck Material
The choice of deck material plays a pivotal role in the performance and feel of your electric skateboard. Let's explore the various options in greater detail:
Maple Wood
This is the classic and traditional choice for skateboard decks. Maple wood provides a combination of flexibility and strength, making it suitable for various riding styles. Its durability and resilience to wear and tear make it a dependable choice for riders who seek a balanced and reliable platform.
Bamboo
If you're looking for a lightweight deck with enhanced flex, bamboo is an excellent option. Bamboo decks offer a smoother, more comfortable ride, making them perfect for cruising and carving. The natural flexibility of bamboo absorbs shocks and vibrations from rough terrain, adding to the overall comfort of your ride.
Carbon Fiber
While carbon fiber decks tend to be on the expensive side, they are renowned for their exceptional strength-to-weight ratio. This material is often employed in professional-grade setups due to its durability and lightweight properties. Carbon fiber decks excel in providing precise control, stability, and responsiveness, making them ideal for riders who prioritize performance.
Fiberglass
Fiberglass decks are renowned for their combination of strength and flexibility. They often feature layers of fiberglass cloth encased in epoxy resin, creating a durable and lightweight deck. Fiberglass decks are known for their excellent energy transfer, translating to powerful rides. The flex in these decks can be customized by altering the number of fiberglass layers, allowing you to fine-tune your skateboard's performance to your liking.
Hybrid Composites
Some skateboard decks combine two or more materials, such as maple and fiberglass or bamboo and carbon fiber. These hybrid composites aim to provide the best of both worlds, offering riders a unique balance of strength, flexibility, and weight. They are often chosen by riders who seek a specific blend of characteristics tailored to their riding style.
Plastic and Composite Materials
Beyond traditional wood-based decks, you can explore options made from various plastics and composite materials. These materials are sometimes chosen for their affordability, durability, and resistance to moisture. While they may not offer the same level of flexibility as wood-based decks, they can be an excellent choice for riders in wet climates or those seeking an alternative aesthetic.
Upgrading Your Skateboard
Taking your skateboard to the next level involves a range of exciting possibilities beyond its initial build. Consider these upgrades to unlock new capabilities and personalize your ride to your liking:
Higher Capacity Batteries for Extended Rides:
If you're looking to explore longer distances on your electric skateboard, consider upgrading to higher-capacity batteries.
These power packs provide extended ride times, allowing you to cruise further without worrying about recharging. Be sure to choose batteries compatible with your skateboard's voltage and dimensions for a seamless upgrade.
Custom Grip Tapes for Improved Foot Grip and Aesthetic Appeal:
Elevate both the performance and style of your skateboard by investing in custom grip tapes. These specially designed tapes not only offer superior foot grip, enhancing control and stability but also provide an opportunity for personalization.
Express your unique style with grip tapes featuring various patterns, colors, and designs that reflect your personality.
All-Terrain Wheels for Versatility on Various Surfaces:
Expand your riding terrain with all-terrain wheels. These rugged wheels are designed to conquer different surfaces, from smooth pavements to rough trails.
With all-terrain wheels, you can explore a wider range of environments, making your skateboard suitable for urban streets, off-road adventures, and everything in between. Ensure compatibility with your trucks and deck when making this upgrade.
Upgraded Trucks and Bushings for Enhanced Maneuverability:
The trucks and bushings on your skateboard are critical components that affect how it turns and responds to your movements. Upgrading to high-quality trucks and bushings can provide smoother turns, better stability, and improved control.
Whether you prefer a responsive carving experience or a stable ride at high speeds, customized trucks, and bushings can fine-tune your skateboard's handling to match your riding style.
Shock Absorption Systems for a Smoother Ride:
Riding on rough or uneven surfaces can be jarring on your body. Installing shock absorption systems, such as shock pads or riser pads, can significantly improve your ride's comfort.
These additions help reduce vibrations and impact, making your skateboard more forgiving on less-than-ideal road conditions. They also prolong the lifespan of your deck by minimizing stress on the components.
LED Lights for Visibility and Style:
Enhance both the safety and aesthetic appeal of your skateboard by adding LED lights. These can be mounted on the underside of your deck, wheels, or trucks to improve visibility when riding at night or in low-light conditions.Beyond safety, LED lights also allow you to showcase your unique style with various color options and lighting patterns.
FAQs about DIY Electric Skateboards:
1. Is it difficult to build a DIY electric skateboard?
Building a DIY electric skateboard requires some technical knowledge and the ability to follow instructions. While it's not extremely difficult, it does involve working with electrical components, so it's essential to have a basic understanding of electronics and safety precautions.
2. How much does it cost to build a DIY electric skateboard?
The cost of building a DIY electric skateboard can vary widely depending on the quality of components you choose and whether you already have some of the tools required. A basic DIY electric skateboard can cost anywhere from $300 to $600, but high-end custom builds can exceed $1,000.
3. What's the typical range of a DIY electric skateboard on a single charge?
The range of a DIY electric skateboard depends on factors like the battery capacity and rider weight. A typical DIY electric skateboard can offer a range of 10 to 20 miles on a single charge. Upgrading to a higher-capacity battery can extend the range further.
4. Can I use any skateboard deck for a DIY electric skateboard?
You can use various types of skateboard decks for your DIY electric skateboard, but it's important to choose one that's sturdy enough to handle the added weight of the electrical components. Ensure that the deck has enough space to accommodate the battery and electronics without compromising stability.
5. How fast can a DIY electric skateboard go?
The top speed of a DIY electric skateboard depends on the motor's wattage and other factors like wheel size and terrain. Generally, a DIY electric skateboard can reach speeds between 15 to 30 miles per hour. Be sure to prioritize safety when riding at high speeds.
6. Are there any legal restrictions for riding DIY electric skateboards?
Laws and regulations regarding electric skateboards vary by location. Some areas may have restrictions on where you can ride, speed limits, and helmet requirements. Always check your local laws and regulations to ensure you're in compliance.
7. Can I upgrade or modify my DIY electric skateboard after building it?
Yes, you can upgrade and modify your DIY electric skateboard to enhance its performance or customize its features. Popular upgrades include changing the battery for a longer range, upgrading wheels and trucks, and adding LED lights for style and visibility.
8. How do I maintain my DIY electric skateboard for optimal performance?
Maintenance is crucial to keep your DIY electric skateboard in good condition. Regularly inspect and clean the belt system, check the battery, update the ESC firmware, and test the brakes before each ride. Refer to the maintenance tips provided in the guide for more details.
9. What safety gear is essential when riding a DIY electric skateboard?
Safety gear is paramount when riding an electric skateboard. Essential safety gear includes a helmet, knee and elbow pads, gloves, safety lights, and reflective clothing. Depending on your riding style and terrain, you may also consider wrist guards, a mouthguard, or body armor for added protection.
10. Can I build a DIY electric skateboard if I have no prior experience with electronics?
While prior experience with electronics can be helpful, it's not mandatory. There are many online resources and tutorials available to guide beginners through the process of building a DIY electric skateboard. However, it's essential to take your time, follow instructions carefully, and prioritize safety throughout the build.
Conclusion
Building a DIY electric skateboard is more than just a fun project—it's a journey of customization, learning, and above all, creating something unique to you. By following this guide, you're now equipped with the knowledge to start on this exciting venture. The open road awaits; all it needs is your newly built electric ride!
Sources: