DIY After Shower Spray
For me, a clean and fresh bathroom is like a personal sanctuary within my home. After I indulge in a refreshing shower, the last thing I desire is to step into a bathroom marred by unsightly mildew and stubborn soap scum.
Thankfully, I've discovered a straightforward remedy: crafting my very own after-shower spray. In this detailed guide, I'll take you on a journey through the process of creating this magical solution, delve into the science behind it, and reveal how I've effectively used it to ensure my bathroom always exudes a delightful scent and maintains its pristine appearance.
Understanding the Need for an After Shower Spray
To truly appreciate the significance of DIY after shower sprays, it's crucial to delve into the reasons behind their necessity in maintaining a fresh and hygienic bathroom environment. At the heart of this need are two key factors: moisture and heat.
When you indulge in a hot and steamy shower, the bathroom's atmosphere becomes saturated with moisture. This moisture, combined with the residual effects of soap, body oils, and shampoo remnants, creates a fertile breeding ground for unwelcome intruders such as mold, mildew, and bacteria. The consequences of this unholy alliance extend beyond mere inconvenience and aesthetic displeasure; they pose tangible threats to your bathroom's cleanliness and hygiene.
The Science Behind After Shower Sprays
To fully grasp the utility of after shower sprays in addressing the common issues that plague bathrooms post-shower, it's essential to delve into the scientific principles that underpin their effectiveness. These sprays are meticulously formulated to achieve three primary objectives:
Preventing Mold and Mildew Growth
One of the foremost functions of after shower sprays is to thwart the insidious growth of mold and mildew. These troublesome fungi thrive in the warm and damp environment left behind after a hot shower. After shower sprays deploy a scientific approach to combat this menace. Many of these sprays incorporate carefully selected ingredients that alter the pH level of bathroom surfaces, rendering them inhospitable to mold and mildew. By creating an environment less conducive to fungal growth, after shower sprays act as a proactive defense mechanism against these persistent intruders.
Breaking Down Soap Scum and Residue
Soap scum, body oils, and shampoo residues are notorious for accumulating on bathroom surfaces. These substances not only mar the appearance of your bathroom but can also become formidable to remove over time. The scientific prowess of after shower sprays comes into play here as well. These sprays contain a potent combination of detergents and surfactants. These compounds work in tandem to break down the complex molecular structures of soap scum and residue, essentially dissolving them. As a result, what was once stubborn and unsightly becomes easily wipeable, restoring the pristine cleanliness of your bathroom surfaces.
Neutralizing Odors
A fresh and pleasant-smelling bathroom is undoubtedly a desirable goal. After shower sprays take a multifaceted approach to achieve this by harnessing the power of chemistry. Many DIY after shower spray recipes incorporate natural deodorizing agents, often in the form of essential oils. These oils contain compounds with specific properties that neutralize odorous molecules, rather than merely masking them. This science-backed approach not only leaves your bathroom with an inviting fragrance but also effectively eradicates unpleasant odors at their source.
Surfactant Action for Stain Removal
Beyond the breakdown of soap scum and residues, after shower sprays often leverage the power of surfactants. Surfactants are molecules with both hydrophobic (water-repelling) and hydrophilic (water-attracting) regions. This unique molecular structure allows them to surround and encapsulate dirt, oils, and other stains, lifting them away from surfaces. As a result, the application of after shower sprays containing surfactants not only cleans the bathroom but also helps to maintain a spotless appearance by preventing the re-deposition of particles on cleaned surfaces.
Ion Exchange for Hard Water Stain Removal
In areas with hard water, mineral deposits like calcium and magnesium can accumulate on bathroom fixtures and tiles, creating unsightly stains. Many after shower sprays incorporate ion exchange technology. This process involves exchanging calcium and magnesium ions in the hard water with sodium or potassium ions in the spray solution. By effectively removing these minerals, after shower sprays mitigate the formation of hard water stains and contribute to the preservation of your bathroom's aesthetic appeal.
pH Control for Surface Protection
The pH level of bathroom surfaces plays a pivotal role in their longevity and appearance. After shower sprays often feature pH-balancing properties that help protect surfaces from damage. High or low pH levels can erode or etch surfaces over time. By maintaining a neutral pH or one that is suitable for specific materials (e.g., acidic for tiles and alkaline for glass), these sprays ensure that your bathroom surfaces remain not only clean but also structurally sound.
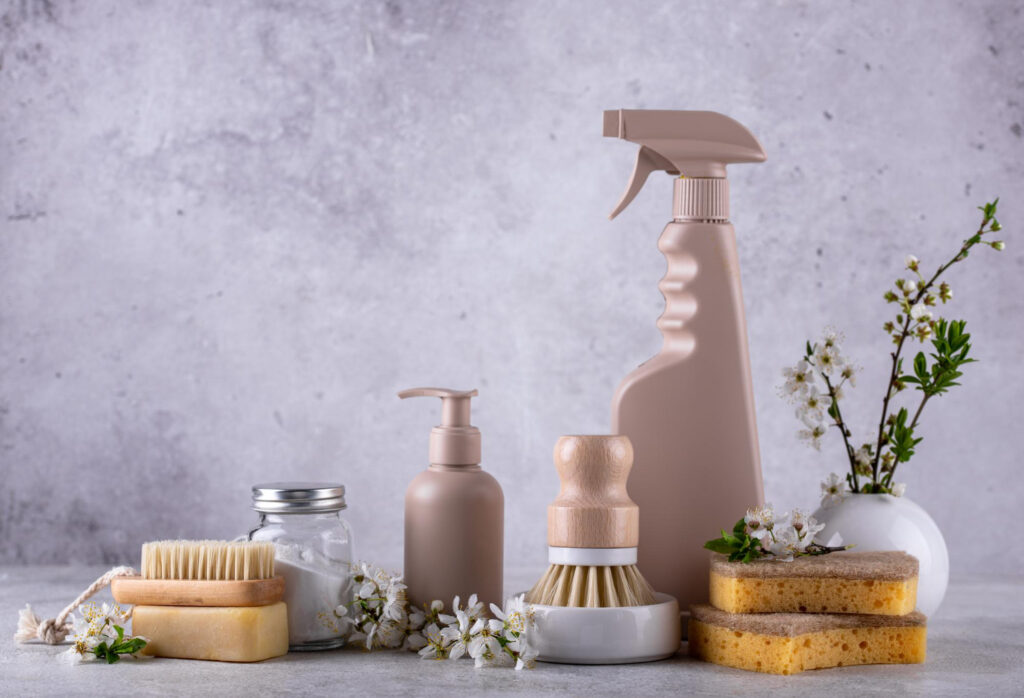
DIY After Shower Spray Ingredients
Creating your own after shower spray is not only cost-effective but also allows you to customize the formula to your preferences. Let's delve into the science and purpose behind each ingredient:
Distilled Water (Approximately 2 cups)
Distilled water is the foundation of your DIY after shower spray. Its purity is essential, as tap water may contain minerals and impurities that could leave behind residue on bathroom surfaces. Distilled water serves as a neutral solvent, helping to dilute and distribute the other ingredients evenly.
White Vinegar (1/2 cup)
White vinegar is a versatile cleaning agent with natural antimicrobial properties. It is a key ingredient due to its acidity, which helps to dissolve mineral deposits, soap scum, and residues. The acetic acid in white vinegar also aids in inhibiting the growth of bacteria and molds.
Hydrogen Peroxide (1/4 cup)
Hydrogen peroxide is a powerful oxidizing agent that not only helps to brighten and disinfect surfaces but also contributes to mold and mildew prevention. Its effervescence upon contact with surfaces helps to lift stains and grime.
Liquid Dish Soap (2 tablespoons)
Liquid dish soap contains surfactants that aid in the emulsification and removal of oils, body fats, and other residues. This essential component assists in breaking down stubborn substances and ensures a thorough cleaning action.
Essential Oils (10-15 drops, optional)
Essential oils serve both practical and aesthetic purposes. Beyond imparting a pleasant fragrance to your DIY after shower spray, certain essential oils, such as tea tree, lavender, or eucalyptus, offer additional antimicrobial properties. They can help neutralize odors and contribute to a fresh and inviting post-shower environment. Be mindful of your choice of essential oil, as they vary in scent and potential therapeutic benefits.
Spray Bottle (16-ounce capacity)
The spray bottle is the vessel that allows you to conveniently apply your DIY after shower spray to bathroom surfaces. Its capacity ensures you have enough solution to cover larger areas while being easy to handle. Opt for a high-quality spray bottle with a reliable nozzle for consistent distribution.
Step-by-Step Guide to Making Your After Shower Spray
Creating your very own DIY after shower spray is a straightforward and cost-effective process. Here's a comprehensive, step-by-step guide with additional insights into each stage:
Step 1: Gather Your Materials
Before you embark on your DIY journey, make sure you have all the essential materials and tools at hand. These include:
- A 16-ounce capacity spray bottle
- Distilled water (approximately 2 cups)
- White vinegar (1/2 cup)
- Hydrogen peroxide (1/4 cup)
- Liquid dish soap (2 tablespoons)
- Optional essential oils (10-15 drops)
- A funnel (for easier pouring)
Step 2: Mix the Ingredients
Now, let's dive into the scientific rationale behind the ingredient combination and the order of mixing:
- Distilled Water (Approximately 2 cups): Begin by pouring the distilled water into the spray bottle. Using distilled water ensures that there are no impurities or minerals that could interfere with the effectiveness of the solution. Water serves as the base solvent for the other ingredients, helping to dilute and distribute them evenly.
- White Vinegar (1/2 cup): White vinegar is introduced next due to its acidity, which plays a crucial role in dissolving soap scum, mineral deposits, and other residues found in the bathroom. The acetic acid in vinegar also exhibits natural antimicrobial properties, aiding in the prevention of bacterial and fungal growth.
- Hydrogen Peroxide (1/4 cup): Hydrogen peroxide is added to the mix, contributing its potent oxidizing abilities. This component not only helps brighten surfaces but also assists in disinfection and stain removal. Its effervescence upon contact with surfaces aids in the loosening and lifting of stubborn grime.
- Liquid Dish Soap (2 tablespoons): Liquid dish soap, containing surfactants, is incorporated to emulsify oils, body fats, and other residues. Surfactants are molecules with hydrophilic and hydrophobic regions, allowing them to surround and break down oily substances, ensuring a thorough cleaning action.
- Optional Essential Oils (10-15 drops): If you desire a pleasant fragrance and additional antimicrobial properties, this is the point to add essential oils. The choice of essential oil is entirely customizable. For instance, tea tree, lavender, or eucalyptus oils offer appealing scents along with antibacterial benefits. These oils contribute to neutralizing odors and creating a refreshing atmosphere in your bathroom.
Step 3: Shake Well
Once all the ingredients are in the spray bottle, securely seal the bottle's cap or nozzle. Shake the bottle vigorously to ensure that all the components are thoroughly mixed. This ensures an even distribution of cleaning agents and fragrances throughout the solution.
Step 4: Label Your Spray
Labeling your DIY after shower spray bottle is a prudent and safety-conscious step. Clearly indicate the bottle's purpose and its contents. This helps prevent any accidental misuse and ensures that the spray is easily identifiable among your household free weekly cleaning supplies.
How to Use Your DIY After Shower Spray
Now that you've created your own effective after shower spray, it's time to make the most of it. Here's a step-by-step guide on how to use your DIY after shower spray for a cleaner and more hygienic bathroom:
Step 1: Incorporate it into Your After Shower Routine
After completing your refreshing shower, take a moment to integrate your homemade after shower spray into your routine. Grab your spray bottle and generously apply the DIY mixture to various surfaces within your shower space. This includes shower walls, glass doors, faucets, and any other areas that come into contact with water.
Step 2: Let it Work its Magic
Allow the spray to work its magic for a few minutes. This dwell time is essential, as it enables the solution to break down soap scum and create a protective barrier against the growth of mold and mildew. During this waiting period, you can carry on with other post-shower tasks.
Step 3: Wipe Down the Surfaces
Once the DIY spray has had a chance to work, it's time to get to work yourself. Grab a microfiber cloth or a sponge, and use it to wipe down all the surfaces you previously sprayed. The combination of the spray and your chosen cleaning tool will effectively remove soap residue, water spots, and other unwanted buildup. For any particularly stubborn spots or stains, consider using a scrubbing brush to tackle them with a bit more vigor.
Step 4: Rinse for a Sparkling Finish
To ensure a sparkling and residue-free finish, it's important to rinse the treated surfaces with clean water. This step will help eliminate any remaining cleaning solution or debris. Simply use a detachable showerhead or a clean bucket of water to rinse thoroughly. Make sure all traces of the DIY spray are gone, leaving your shower and bathroom looking fresh and clean.
Additional Tips for a Fresh and Clean Bathroom
Creating and maintaining a fresh and clean bathroom goes beyond just using your DIY after shower spray. Here are some additional tips and insights to help you achieve a spotless and hygienic bathroom environment:
Regular Maintenance is Key
To keep your bathroom consistently clean, make it a habit to use your DIY after shower spray after every shower. This practice not only prevents soap scum buildup but also reduces the likelihood of mold and mildew growth, making your cleaning routine more manageable in the long run.
Prioritize Ventilation
Proper ventilation is essential in maintaining a dry and mold-free bathroom. Ensure your bathroom is well-ventilated by using exhaust fans or opening windows during and after showers. Reducing humidity levels in the bathroom can significantly inhibit the growth of mold and mildew, keeping your bathroom smelling fresh and looking clean.
Clean Towels and Bath Mats
Your bath towels and bath mats can become hotspots for bacteria and odors if not regularly cleaned. Wash your bath towels, hand towels, and bath mats on a regular basis, ideally once a week or as needed. Use hot water and a quality laundry detergent to eliminate bacteria and maintain freshness.
Address Grout and Caulk Issues
Over time, the grout and caulk in your shower can deteriorate, leading to water penetration and potential mold growth behind the tiles. Periodically inspect these areas for damage or signs of mold. Replace any damaged or moldy grout or caulk promptly to prevent water damage and maintain the integrity of your shower and bathroom walls.
Deep Cleaning
In addition to your regular cleaning routine, consider scheduling deep cleaning sessions for your bathroom. This can involve tasks like scrubbing tiles and grout, cleaning exhaust fan vents, and disinfecting commonly touched surfaces such as faucets and doorknobs. Deep cleaning should be performed on a monthly or quarterly basis, depending on your bathroom's usage.
Storage and Organization
Keep your bathroom clutter-free by organizing toiletries and personal items. Use storage solutions like shelves, cabinets, and baskets to keep things tidy and easily accessible. A clutter-free space is not only visually pleasing but also easier to clean.
Eco-Friendly Alternatives
Consider using eco-friendly cleaning products for your bathroom. Many commercial cleaning products contain harsh chemicals that can be harmful to both your health and the environment. Look for environmentally friendly cleaning solutions that are effective and safe for everyday use.
FAQs
Q1: Can I make my own daily shower spray?
A: Yes, you can make your own daily shower spray at home using simple ingredients. Creating your shower spray is an effective way to keep your shower clean and prevent the buildup of soap scum and mildew. There are various DIY recipes available that use common household items like vinegar, water, and essential oils. Homemade daily shower sprays are eco-friendly and budget-friendly.
Q2: What is the best DIY shower spray?
A: The best diy shower cleaner spray depends on your preferences and needs, but a common and effective recipe includes equal parts of white vinegar and water, with a few drops of essential oils like tea tree, lavender, or eucalyptus for added fragrance and cleaning power. Some people prefer to add a small amount of dish soap for extra cleaning power. Experiment with different formulas to find the one that works best for your shower and your senses.
Q3: How do you make natural shower spray?
A: To make a natural shower spray, you can follow these steps:
- Ingredients: Gather white vinegar, water, and essential oils. Common essential oils for natural cleaning include tea tree, eucalyptus, lavender, lemon, or orange.
- Recipe: Mix equal parts white vinegar and water in a spray bottle. For every cup of this mixture, add 10-20 drops of your chosen essential oil. Shake the bottle well to combine.
- Application: Spray the natural diy daily shower spray on your shower surfaces after each use. Let it sit for a few minutes to break down soap scum and prevent mold and mildew growth.
- Scrub and Rinse: If needed, scrub the surfaces lightly with a brush or sponge, then rinse thoroughly with water.
Remember that vinegar has a strong odor that dissipates as it dries, leaving your best homemade shower cleaner smelling fresh from the essential oils.
Q4: How do you make shower spray for mold?
A: To make a shower spray specifically for mold, you can follow this recipe:
Ingredients:
- 1 cup white vinegar
- 1 cup water
- 1 tablespoon baking soda
- 10-20 drops tea tree or eucalyptus essential oil (known for their antifungal properties)
Instructions:
- In a spray bottle, combine the white vinegar and water.
- Add the baking soda to the mixture. Be prepared for some fizzing when the baking soda reacts with the vinegar.
- Add the essential oil drops to enhance the spray's antifungal properties and provide a pleasant scent.
- Shake the bottle well to mix all the ingredients.
- Spray the solution on areas with mold or mildew in your shower and let it sit for at least 15 minutes.
- Scrub the affected areas with a brush or sponge to remove the mold.
- Rinse thoroughly with water.
Conclusion
Maintaining a clean and fresh bathroom is more than just a chore; it's about cultivating a personal sanctuary within my home. Crafting my own DIY after shower spray has not only simplified my cleaning routine but deepened my understanding of bathroom hygiene.
Understanding the importance of combating moisture and heat in the bathroom, the science behind these sprays, and the customization they offer has empowered me to take control of my bathroom's cleanliness.
Using my DIY after shower spray has become a meaningful ritual, transforming every post-shower experience into a soothing and refreshing one. With regular maintenance, proper ventilation, and attention to detail, I've turned my bathroom into a space that not only looks spotless but also radiates a welcoming freshness.
This commitment to a cleaner and more pleasant living space is a reflection of my dedication to creating a personal haven where every shower rejuvenates both my body and my spirit. Through the simple yet powerful DIY after shower spray, my bathroom has truly become my sanctuary.
Sources
https://www.ncbi.nlm.nih.gov/pmc/articles/PMC2874882/


