DIY Fix Scratch on Car
Your car is more than just a mode of transportation; it's a symbol of your hard work and personal style. However, no matter how careful you are, scratches and dings can appear on your car's flawless exterior. Whether it's a result of an unfortunate accident, a stray shopping cart, or the inevitable wear and tear of everyday driving, scratches on your car's paint can be a genuine eyesore.
But here's the good news: you don't always have to rush to the auto body shop and spend a small fortune to get them fixed. In this comprehensive guide, we will walk you through the step-by-step process of DIY fixing a scratch on your car. By the time you finish reading this, you'll have the knowledge and confidence to give your vehicle the care it deserves without breaking the bank.
Understanding Car Scratch Types
Scratches on your car's surface can vary in severity, and it's essential to know what you're dealing with before attempting any repair. Understanding the different types of car scratches will help you determine the most suitable repair method for your situation.
Clear Coat Scratches
These are the most common and least severe scratches. They only affect the clear coat, leaving the base coat and the car's metal body untouched. Clear coat scratches are typically easier to fix and often require minimal effort.
Base Coat Scratches
These scratches penetrate the clear coat and affect the base coat, which is the colored layer of paint beneath. Repairing base coat scratches can be a bit more challenging than dealing with clear coat scratches but is still manageable with the right techniques deep scratches from your car.
Deep Scratches
These are the most severe type of scratches and require more extensive repair work. Deep scratches go beyond the clear coat and base coat, reaching the primer or, in some cases, the bare metal of your car. Fixing deep remove scratches from a car is a more involved process, but it can still be done with patience and the right tools a car scratch.
Gathering the Necessary Tools and Materials
Before you begin your DIY car scratch repair project, it's essential to gather all the necessary tools and materials to ensure a successful outcome. Here's a comprehensive list of what you'll need:
- Microfiber cloths: These are crucial for cleaning and polishing the surface of your car, leaving it spotless.
- High-quality car wash soap: Use this soap to remove dirt and contaminants from the scratched area effectively.
- Water hose or bucket: You'll require these to wash and rinse your car thoroughly before starting the repair process.
- Sandpaper (various grits): Different grits of sandpaper will be used for sanding and smoothing the scratched area, ensuring a smooth finish.
- Paint matching your car's color code: Accurate paint matching is paramount to achieving a seamless repair that blends with your car's existing color.
- Automotive primer: Applying automotive primer creates a stable surface for the new paint and improves adhesion, ensuring a long-lasting repair.
- Clear coat: The clear coat is essential for sealing and protecting the new paint layer, providing a glossy finish.
- Paint thinner: You'll need paint thinner for cleaning your tools and brushes after each use, maintaining their effectiveness.
- Putty filler: Use putty filler to fill deep remove deep scratches from or dents in the car's surface, ensuring a smooth and level repair.
- Masking tape: Protect surrounding areas from accidental overspray by using masking tape to delineate the repair area.
- Sanding block: A sanding block provides stability and control during the sanding process, ensuring even and consistent results.
- Paintbrushes: Different brushes are required for applying primer, paint, and clear coat. Choose brushes that suit the specific task.
- Rubber gloves: Always wear gloves to protect your hands from chemicals and potential skin irritation.
- Respirator mask: Prioritize safety by wearing a respirator mask when working with paint and chemicals to prevent inhaling harmful fumes.
- Polishing compound: After the repair, a polishing compound is necessary for buffing and blending the new paint, achieving a seamless finish.
- Electric buffer: An electric buffer can save time and effort during the polishing stage, resulting in a professional-looking outcome.
- UV-protectant wax: Apply a UV-protectant wax to maintain your car's shine and protect it from future damage caused by UV rays and environmental factors.
Now that you have a comprehensive list of tools and materials, you'll be well-equipped to tackle the scratch repair process effectively.
Check out our post on Rev Up Your Ride
Step-by-Step DIY Scratch Repair Process
Repairing a scratch on your car involves several steps, each of which plays a crucial role in achieving a flawless result. Let's delve deeper into each stage of the process to ensure you have a thorough understanding.
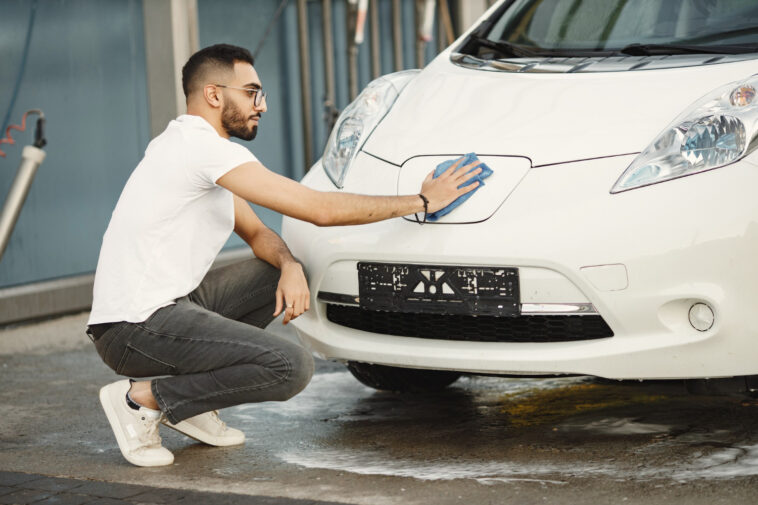
Cleaning the Affected Area
The initial step is to clean the scratched area thoroughly. Use a microfiber cloth, car wash soap, and clean water to-remove any dirt, grime, or contaminants from the surface. It's essential to start with a clean canvas to ensure a successful repair. Rinse the area thoroughly and allow it to dry completely before proceeding to the next step.
Assessing the Depth of the Scratch
After cleaning, take a close look at the scratch to determine its depth. You can use your fingernail as a tactile gauge. If the scratch is shallow and only affects the clear coat, you can proceed with confidence, knowing that the repair process will likely be straightforward. However, if the scratch is deeper and has penetrated the base coat or even reached the primer or metal, you'll need to invest more time and effort in the repair.
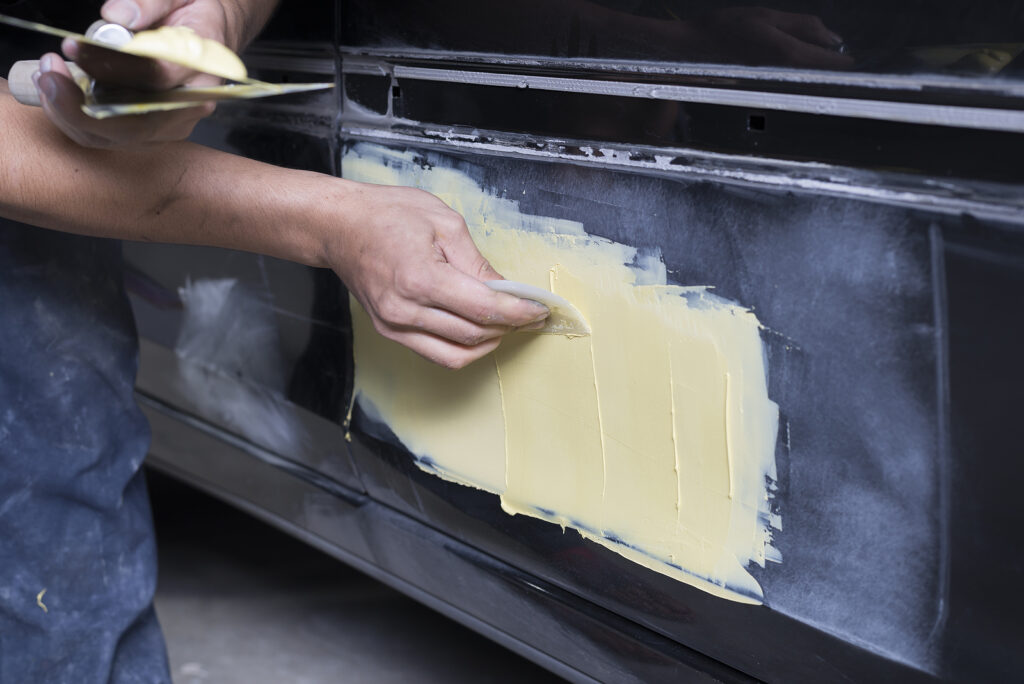
Filling the Scratch
For deep scratches, filling is essential to level the damaged area with the surrounding paint. Use an appropriate putty filler, following the manufacturer's instructions. Apply the filler evenly over the scratch and let it dry completely. Once dry, you'll need to use fine-grit sandpaper to smooth the surface, ensuring it's flush with the surrounding paint. This step may require some patience and precision to achieve a seamless finish.
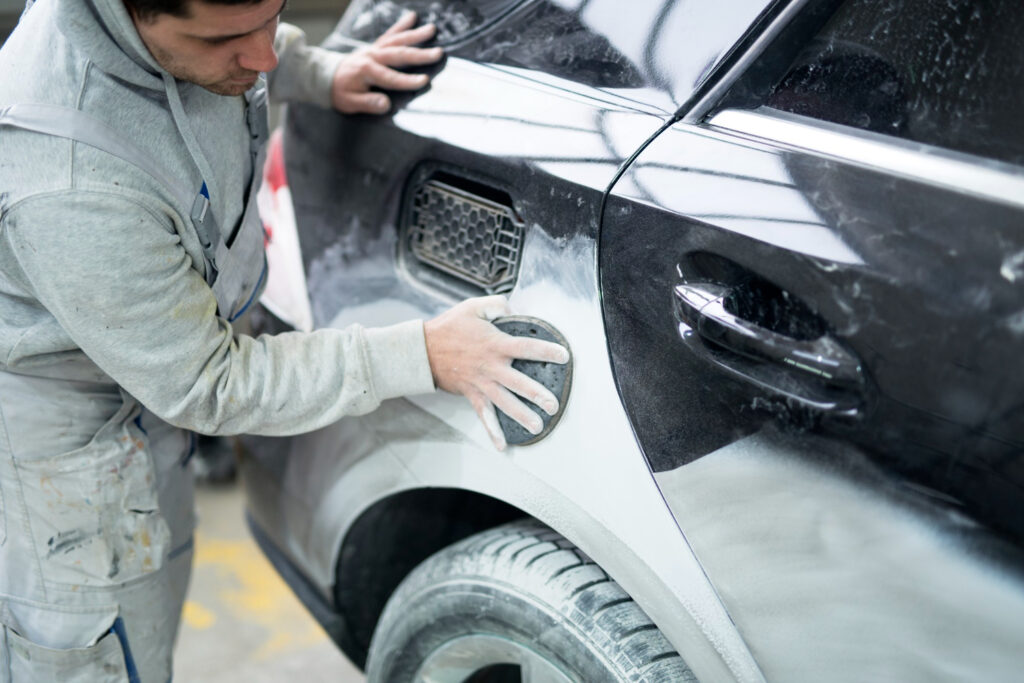
Sanding
Regardless of the scratch's depth, sanding is a critical step in the repair process. It helps create a smooth and even surface for the new paint to adhere to. Start with a low-grit sandpaper (around 320 grit) and gradually work your way up to a higher grit (around 2000 grit) for a polished finish. To prevent heat build-up and ensure a smooth result, it's essential to keep the sandpaper wet and use a circular motion while sanding.
Priming
After sanding, the next step is applying automotive primer. Primer serves as a foundation for the new paint, enhancing adhesion and ensuring a uniform finish. Follow the manufacturer's instructions for the primer you've chosen, and allow it to dry thoroughly. Proper drying time is crucial to prevent issues with the subsequent paint layers.
Painting
Now, it's time to apply the paint. Ensure you have the paint that matches your car's color code precisely. Applying paint that doesn't match can result in a noticeable difference in color. It's recommended to apply several thin coats of paint, allowing each coat to dry completely before applying the next. Using smooth and even strokes, maintain a consistent distance from the surface to achieve the best results. Blending the new paint with the surrounding area is crucial to achieving a seamless finish.
Buffing and Polishing
The final step in the DIY scratch repair process is buffing and polishing. This stage is essential for blending the new paint with the existing paint and achieving a glossy finish. Use a polishing compound and a clean, dry microfiber cloth to gently buff the repaired area.
You can also opt to use an electric buffer for more significant and time-efficient results. The goal is to achieve a uniform appearance, making it challenging for anyone to spot the repair apply touchup paint step sand the area step apply.
Tips and Tricks for a Flawless Repair
Achieving a flawless DIY car scratch repair requires careful attention to detail and a healthy dose of patience. Here are some valuable tips and tricks to help you achieve a repair job that looks as if it were done by a professional:
- Prioritize Safety: Always work in a well-ventilated area, or even better, wear a high-quality respirator mask when handling paints and chemicals. Safety should never be compromised, and protecting yourself from fumes and hazardous materials is paramount.
- Color Code Confidence: If you're uncertain about your car's exact color code, you can typically find it on the inside of the driver's door or in the owner's manual. Accurate paint matching is absolutely crucial for a seamless repair. If in doubt, consult a professional or use color-matching technology available at auto parts stores.
- Effective Masking: Use masking tape to meticulously protect the surrounding areas from accidental paint overspray. Proper masking ensures that only the scratched area receives the new paint, preventing additional damage and mess.
- Patient Perfection: Take your time during each step of the repair process to ensure a professional-looking result. Rushing through the job can lead to mistakes and ultimately result in a less-than-perfect repair. Be patient, and follow each step carefully, from cleaning and sanding to priming and painting.
- Consider Professional Help: If the scratch is too deep, extensive, or if you lack confidence in your DIY skills, it's wise to consider seeking professional assistance. Professional auto body shops have the expertise, specialized equipment, and access to high-quality materials necessary to handle more significant repairs. They can often provide a warranty for their work, ensuring long-lasting results.
Check out our post on Best DIY Ceramic Coating
Preventing Future Scratches
Knowing how to repair car scratches is undoubtedly valuable, but it's equally essential to take proactive measures to prevent them in the first place. Here's an in-depth guide with practical tips to safeguard your car's exterior and minimize the risk of future scratches:
- Choose Smart Parking Spots: Whenever possible, park your vehicle in a garage or shaded area. This not only shields your car from direct sunlight, which can cause paint damage over time, but it also reduces the risk of exposure to environmental elements that can lead to scratches. Falling branches, tree sap, and bird droppings can wreak havoc on your car's finish.
- Invest in Car Covers: Car covers are excellent protective tools. They provide an additional layer of defense against dust, debris, and potential scratches. Consider using a car cover when your vehicle is parked outdoors for extended periods, especially in areas with high tree sap or bird activity.
- Mindful Parking Practices: When parking in crowded areas or near shopping carts, exercise caution. Take your time to choose parking spots strategically, keeping a safe distance from potential sources of damage. Being mindful of your surroundings can help minimize the risk of accidents and subsequent scratches.
- Regular Car Washes: Establish a routine for washing your car to remove dirt and debris that can cause scratches. A clean vehicle is less likely to accumulate abrasive particles, reducing the chances of scratches during everyday activities. Use high-quality car wash products and techniques to avoid swirl marks.
- Protective Coatings: Consider applying a clear coat or protective film to vulnerable areas of your vehicle, such as the front bumper, hood, and side mirrors. These protective measures act as a shield against minor scratches and chips. Protective films, often referred to as clear bras or PPF (Paint Protection Film), offer excellent defense against road debris and environmental contaminants.
- Regular Waxing: Apply a quality car wax to your vehicle's paint regularly. Wax not only enhances your car's shine but also adds a protective layer that can help prevent scratches and other minor damage. It also makes it easier to remove dirt and contaminants during washing.
- Soft, Non-Abrasive Materials: When cleaning your car or removing debris, use soft, non-abrasive materials. Microfiber towels, soft brushes, and gentle cleaning solutions can help maintain your car's finish without causing scratches.
- Avoid Automatic Car Washes: Automatic car washes with stiff brushes can be harsh on your car's paint. Whenever possible, opt for hand washing or touchless car washes, which are gentler on the exterior.
Frequently Asked Questions (FAQs)
1. Can I fix scratches on my car myself, even if I have no prior experience with auto body repair?
Yes, you can absolutely fix scratches on your car yourself, even if you're a beginner. The key is to follow a systematic approach, gather the necessary tools and materials, and take your time with each step. The comprehensive guide provided in this article will walk you through the entire process, making it accessible to DIY enthusiasts of all skill levels.
2. How do I determine the color code for my car's paint?
You can typically find your car's color code on the inside of the driver's door or in your owner's manual. It's essential to locate the exact color code to ensure a seamless match when applying new paint to your car's surface.
3. Can I use touch-up paint pens instead of automotive paint for scratch repairs?
Touch-up paint pens can be suitable for small, shallow scratches, such as clear coat scratches. However, for more extensive or deeper scratches, it's advisable to use automotive paint that matches your car's color code precisely. Touch-up pens may not provide the same level of coverage and blending required for a flawless repair.
4. Is it necessary to use an electric buffer during the buffing and polishing stage?
While an electric buffer can save time and effort during the buffing and polishing stage, it is not a strict requirement. You can achieve satisfactory results with hand polishing using a microfiber cloth and polishing compound. If you're experienced with using an electric buffer, it can be a helpful tool to achieve a high-gloss finish more quickly.
5. How long does the entire DIY car scratch repair process typically take?
The duration of the repair process can vary depending on the severity of the scratch and your experience level. For minor clear coat scratches, the process may take a few hours, including drying times. Deeper scratches that require filling and more extensive sanding may take a day or longer. It's crucial to be patient and prioritize quality over speed to achieve the best results.
6. Can I repair multiple scratches on my car at the same time, or should I tackle them one by one?
While it's possible to repair multiple scratches simultaneously, it's generally recommended to address them one at a time. Focusing on one scratch allows you to give each repair the attention it deserves, ensuring a high-quality outcome. Trying to repair multiple scratches simultaneously may lead to rushed and less effective results.
7. Will the repaired area be an exact match to the rest of my car's paint?
When done correctly, a DIY car scratch repair should result in a near-perfect match to your car's existing paint. Accurate paint matching is crucial, and following the steps outlined in the guide, including proper blending and buffing, will help ensure a seamless finish. However, keep in mind that factors such as paint aging and environmental conditions can affect the overall appearance of the repair.
8. Can I prevent future scratches on my car's surface?
While it's impossible to prevent every potential scratch, there are steps you can take to minimize the risk of future damage. These include parking in a garage or shaded area whenever possible, using car covers, being cautious when parking near shopping carts or in crowded areas, regular car washing to remove contaminants, and applying protective measures like clear coat or protective film to vulnerable areas.
9. Are there any safety precautions I should take while repairing car scratches?
Safety is paramount when working on car scratch repairs. Always work in a well-ventilated area, or wear a high-quality respirator mask when dealing with paint and chemicals to protect your respiratory health. Additionally, wear rubber gloves to shield your hands from chemicals, and exercise caution when handling sharp tools and equipment. Finally, follow the manufacturer's safety recommendations for all products and materials used in the repair process.
10. When should I consider seeking professional help for car scratch repair?
If you encounter a scratch that is exceptionally deep, extensive, or if you lack confidence in your DIY skills, it may be best to consult a professional auto body shop. Professional technicians have the expertise, specialized equipment, and experience to handle complex and severe car scratch repairs. Seeking professional help ensures that your car receives the highest level of care and expertise.
Conclusion
In conclusion, DIY fixing a scratch on your car is a cost-effective way to maintain its appearance and value. By understanding the type of scratch, gathering the necessary tools and materials, and following a meticulous step-by-step process, you can achieve professional-looking results. Remember to take your time, be patient, and always prioritize safety.
With this comprehensive guide, you now have the knowledge and confidence to tackle car scratches on your own, saving you both time and money. So, roll up your sleeves and give your car the TLC it deserves. You have the power to keep your vehicle looking pristine and showcase your pride and style on the road.
Sources
https://www.wired.com/story/car-scratch-repair-kits/
https://www.scottrobinsonhonda.com/4-types-of-car-scratches-and-how-to-fix-them/