Unleashing your creativity on a humble pumpkin is one of the most cherished traditions of the Halloween season. The Jack-O-Lantern, an iconic symbol of the fall, has been igniting the Halloween spirit in hearts for centuries. This blog post will guide you through some unique DIY Jack-O-Lantern ideas and recommend the best kits available in 2023 to make your Halloween decoration process simpler, more fun, and more exciting.
The History of Jack-O-Lanterns
Before we dive into our DIY ideas and kit suggestions, let's explore the history of this fascinating tradition. Jack-O-Lanterns originated in Ireland, where people carved turnips and other root vegetables as a way to ward off evil spirits during Samhain, an ancient Celtic festival. The practice transitioned to pumpkins in America due to their availability and large, carve-friendly size.

Top 5 DIY Jack-O-Lantern Ideas
1. Classic Carved Jack-O-Lantern
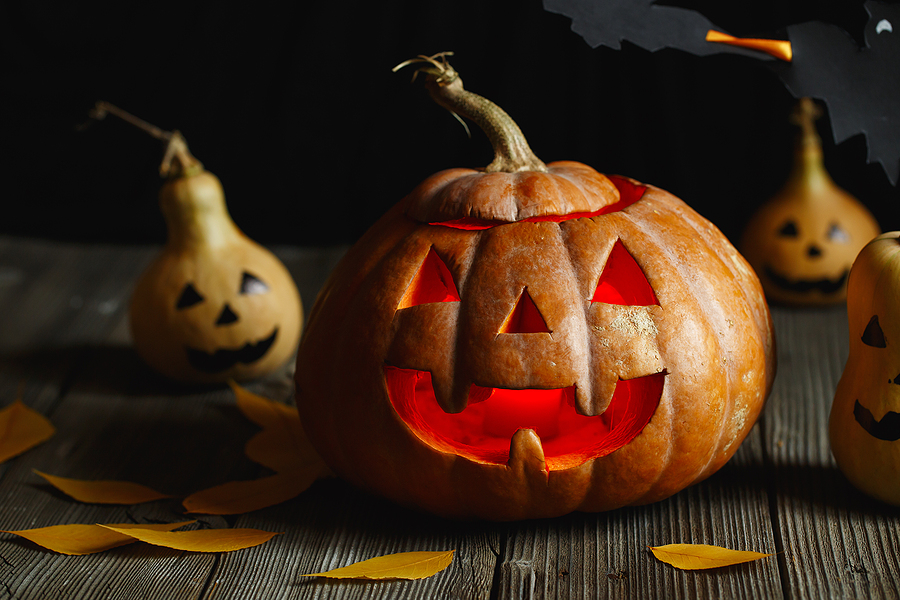
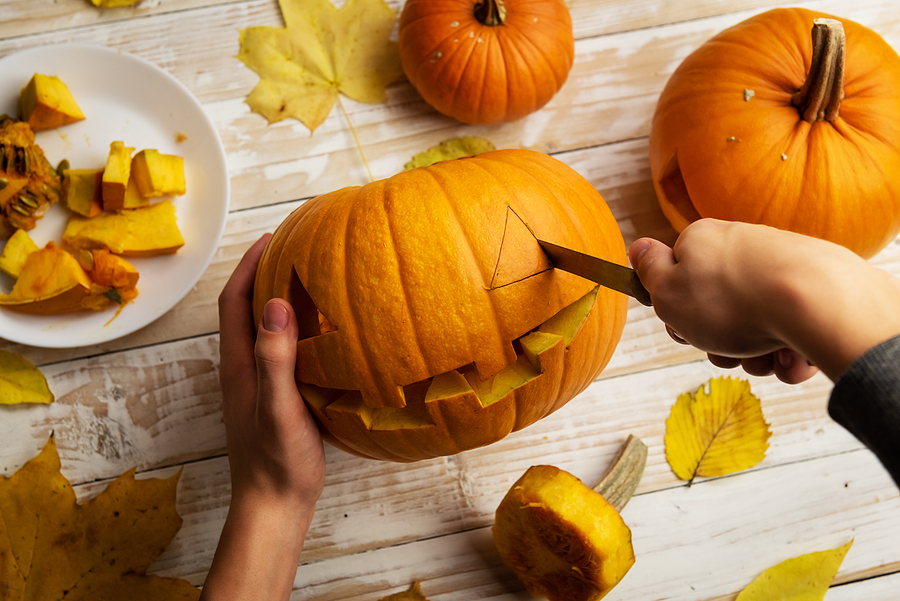
There's a certain timeless appeal to the traditional carved Jack-O-Lantern. For a classic design, you need a pumpkin, a sharp knife, a spoon, and your creativity. Cut the top off, scoop out the insides, then carve a spooky face or design into the front. Remember, your creation doesn't have to be a masterpiece; part of the charm of a carved Jack-O-Lantern is its homemade appeal.
2. Painted Pumpkin Jack-O-Lantern
If carving isn't your thing, or you're looking for a less messy alternative, painting your pumpkin is a fantastic option. Use acrylic paints to paint faces, patterns, or scenes onto your pumpkin. This option is also great if you have small children who want to participate but are too young for carving.
3. Stenciled Jack-O-Lantern
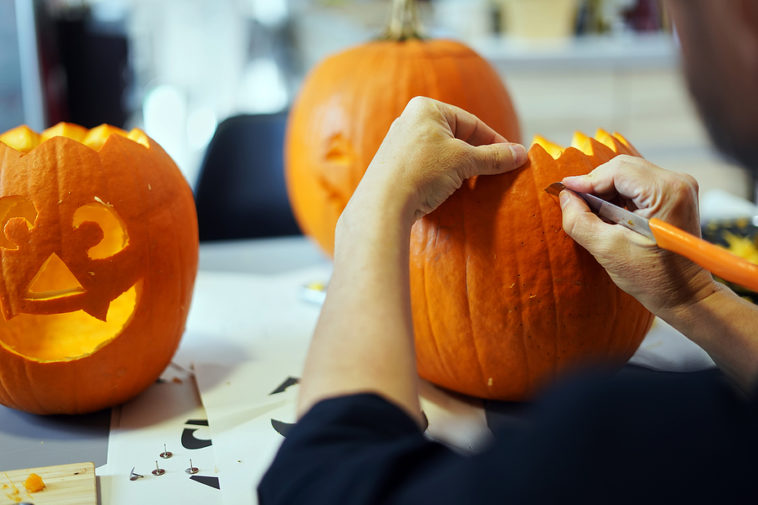
Stenciling is a great compromise between carving and painting. You can buy stencils or make your own, then simply tape them to your pumpkin and carve or paint around them. This method can result in some impressively intricate designs.
4. Drilled Jack-O-Lantern
For a different take on the carved Jack-O-Lantern, why not try drilling? Use a drill to make holes in your pumpkin, either randomly for a starry effect or in patterns or shapes. When you put a candle inside, the light will shine out through the holes in a beautiful way.
5. Mixed Media Jack-O-Lantern
Mix it up by using a combination of the above techniques or by adding other materials. Stick on googly eyes, use yarn for hair, or attach pipe cleaners for arms. The only limit is your imagination!

The Best Jack-O-Lantern Kits for 2023
Now that you have some design ideas in mind, let's discuss the tools you'll need to bring your vision to life. If you're looking for a convenient, all-in-one solution, consider purchasing a Jack-O-Lantern kit. Here are the top three kits for 2023:
1. Pumpkin Masters Deluxe Carving Kit
This comprehensive kit contains 21 pieces, including carving tools of various sizes, scoops, and a book of stencils to help you create the perfect Jack-O-Lantern. The tools are made of durable plastic and metal, ensuring they'll last for many Halloweens to come.
2. Grampa Bardeen’s Family Pumpkin Carving Set
This premium set includes 18 stainless-steel pieces and is meant to last a lifetime. It's perfect for families who make pumpkin carving a yearly tradition.
3. Halloween Haunters Ultimate 14-Piece Professional Pumpkin Carving Tool Kit
A set designed for those who want to get serious about their pumpkin carving. This kit features a wide range of tools, including saws, scoops, and drills, allowing for detailed and intricate designs.
How to Preserve Your Jack-O-Lantern
After dedicating hours to carefully carving your masterpiece, naturally, you'd want your Jack-O-Lantern to be on display as long as possible. Here are some detailed steps you can take to help extend its lifespan, ensuring it remains a festive centerpiece throughout the Halloween season:
1. Meticulously Clean the Inside
An integral part of the pumpkin preservation process begins with the thorough removal of its insides. The more of the pumpkin guts and seeds you manage to scoop out, the less likely it will rot prematurely. The inside should be as clean and dry as possible.
2. Apply Petroleum Jelly
Once your pumpkin is clean, the next step involves using a common household product – petroleum jelly. Applying petroleum jelly to the carved edges of your pumpkin helps to lock in the moisture. This effectively prevents the pumpkin from drying out and shriveling.
3. Use a Mold Prevention Product
Another important consideration for prolonging the life of your Jack-O-Lantern is to prevent mold. This can be achieved with the help of mold prevention sprays, which are available in most home improvement stores or online. These sprays are specifically designed to prevent mold and decay in pumpkins, thus extending their lifespan.
4. Keep Your Pumpkin Cool
The last crucial tip for maintaining your Jack-O-Lantern involves temperature control. Heat and light can cause a pumpkin to decay faster. Therefore, when your Jack-O-Lantern isn’t being displayed, store it in a cool, dark place. A basement or garage can often be a good choice, providing the temperatures aren’t freezing.

DIY Pumpkin Painting Ideas
Painting pumpkins can be a fun, creative, and lasting alternative to traditional pumpkin carving. Not only can paint introduce a vibrant array of colors to your pumpkin, but it also has the added benefit of extending the lifespan of your pumpkin masterpiece. While a carved pumpkin may wither and cave within a week or two, a skillfully painted pumpkin can remain vivid and striking for several months.
The type of paint you select can significantly influence the aesthetic of your painted pumpkin. Here's a closer examination of various paint types, along with their unique benefits and applications:
1. Acrylic Paint
Acrylic paint offers a fast-drying solution for your pumpkin painting needs. It's ideal for creating multi-layered designs since its quick-drying nature allows you to swiftly apply different colors without waiting for extensive dry times. Whether you're aiming for a rainbow motif or a more intricate pattern requiring several color applications, acrylic paint can provide you with the flexibility and speed you need.
2. Spray Paint
If you're looking to completely change the color of your pumpkin, spray paint is a top choice. It allows for an even coating and can quickly transform the entire pumpkin's surface. This medium is perfect if you're thinking about a metallic, neon, or even a monochromatic theme for your pumpkins.
3. Paint Markers
For those aiming for precision and intricate detail work, paint markers can be a game-changer. These allow for the same control and accuracy you'd get with a standard marker, but with the vibrant, lasting color of paint. If you want to illustrate a complex design, doodle, or even write on your pumpkin, paint markers are an ideal option.
4. Chalkboard Paint
Chalkboard paint offers an exciting twist for pumpkin decoration. Applying a coat of this paint provides a matte finish that you can decorate with chalk. This means you can continually change and update your pumpkin design throughout the season. Want to doodle one day, then write a spooky message the next? Chalkboard paint makes it possible.
5. Puffy Paint
For those seeking a 3-dimensional effect on their pumpkin design, puffy paint is the way to go. This paint raises up as it dries, adding an exciting textural element to your pumpkin. You can create raised patterns, words, or designs, adding an extra layer of depth and dimension to your pumpkin.
6. Washable Paint
Washable paint is a perfect option for younger artists or anyone looking to minimize cleanup. Although it's thinner and may require more coats to achieve a vibrant color, the convenience of being able to clean up any spills or messes easily can outweigh this minor inconvenience.
With so many varieties of paint, you’ve got plenty of DIY pumpkin painting options.
DIY Pumpkin Decorating Ideas
Enrich the beauty of your pumpkin this Halloween season by exploring various DIY decorating techniques. Carving and painting are traditional methods of pumpkin adornment, but there's an array of unique and exciting ways to personalize your gourd. Discover a new world of pumpkin decor with these detailed, easy-to-follow DIY pumpkin decorating ideas:
1. Glitter Glam
Sparkle up your pumpkin by harnessing the power of glitter. With a bit of craft glue or Mod Podge, you can apply glitter to your pumpkin in any design you desire. Create patterns, write words, or just go for an all-over shimmer. This technique adds a vibrant, festive touch to your decor and can make your pumpkin stand out even in the darkest of Halloween nights.
2. Tissue Paper Artistry
Transform your pumpkin into a vibrant mosaic with tissue paper. Start with a layer of Mod Podge or similar adhesive on your pumpkin's surface. Cut or tear your tissue paper into shapes and place them onto the sticky pumpkin. Finish by sealing your design with another layer of Mod Podge, which will give your pumpkin a glossy finish and protect your design.
3. Floral and Feathered Design
Aim for a natural, earthy look with pressed flowers, leaves, or feathers. Begin by applying a layer of Mod Podge on the area of the pumpkin where you wish to place your items. Arrange your chosen nature elements aesthetically on the adhesive, then seal them in place with another layer of Mod Podge. This method provides a rustic charm and pays homage to the beautiful fall season.
4. Elegant Lace Pumpkin
Create a sophisticated Halloween display by incorporating lace into your pumpkin decor. Depending on your chosen design, you may wrap your pumpkin in a lace fabric, cut out lace patterns to adhere to the pumpkin, or use lace as a stencil for painting. The delicate intricacy of lace adds a touch of elegance to your Halloween aesthetic.
5. Sticker Fun
Unleash your creativity by using stickers to decorate your pumpkin. Kids especially will enjoy this method as it's safe and allows them to express their imagination. Pick your favorite stickers—Halloween-themed, characters, or simply colorful dots and shapes—and stick them onto your gourd to create a unique design.
6. Ribbon Accents
Add a touch of sophistication to your pumpkin with ribbons. You can wrap your pumpkin with ribbon, create patterns with it, or make ribbon bows and glue them on. Choose from satin, burlap, or patterned ribbons and make your pumpkin look chic and festive.
7. Cheesecloth Mummies
Give your pumpkin a haunting look by transforming it into a mummy with cheesecloth. Wrap your pumpkin in strips of cheesecloth to mimic the look of ancient bandages. Add a pair of googly eyes peeking out from between the wraps to complete the eerie effect.
8. Foam Creations
For a fun, family-friendly pumpkin decorating idea, use foam sheets. Cut out your favorite Halloween shapes, such as bats, witches, or cats, and adhere them to your pumpkin. Alternatively, consider purchasing a foam sticker kit for an easy, mess-free decorating session. This method is particularly great for little ones who want to join in the Halloween crafting fun.
Think about what other craft materials you have that you can apply to your pumpkin. Your DIY pumpkin decorating options are limited only by your imagination!
Final Thoughts
After reading about these DIY Jack-O-Lantern ideas and kits, you know there are quite a few ways to make a creative Jack-O-Lantern. With a DIY pumpkin stencil, you can easily carve, paint, or otherwise decorate your gourd. You might even try combining decorating techniques!


