
DIY Lightsaber
Lightsabers have been a staple of the Star Wars franchise since its inception. These elegant weapons have fascinated fans for decades, and crafting your own lightsaber can be an incredibly rewarding experience.
Not only will you end up with a stunning replica, but you'll also gain a deeper appreciation for the craftsmanship behind these iconic weapons.
Before you embark on your DIY lightsaber journey, let's get the basics down.
Materials and Tools
Creating your own lightsaber is a thrilling DIY project that combines craftsmanship and technology. To embark on this journey, you'll need a variety of materials and tools to ensure your lightsaber is both visually stunning and fully functional. Here's a comprehensive list of what you'll require:
Materials Needed
- Hilt Material: The hilt serves as the handle and structural foundation of your lightsaber. You can choose from various materials such as metal, PVC pipe, or 3D-printed plastic. Each material offers distinct aesthetics and durability, so select one that suits your preferences.
- Blade Material: The blade is the centerpiece of your lightsaber and contributes to its appearance and resilience. Polycarbonate tubing is the favored choice due to its durability and ability to transmit light effectively, giving your lightsaber an authentic glow.
- LEDs: High-power LEDs are essential for illuminating the blade of your diy lightsaber. Opt for LEDs with the desired color and brightness to achieve the look you envision.
- Batteries: You'll need lithium-ion rechargeable batteries to power your lightsaber. Ensure they provide sufficient voltage and capacity to maintain consistent performance.
- Switches and Wiring: To control the illumination of your lightsaber, you'll require switches and wiring. These components enable you to activate and deactivate the lightsaber with ease.
- Sound Board: While optional, a sound board adds a layer of realism to your lightsaber by generating authentic sound effects during operation. Consider incorporating one for a more immersive experience.
- Grip Material: For a comfortable and secure hold on your diy lightsaber tutorial, choose grip materials like leather, rubber, or foam. Your choice of grip can significantly impact the ergonomics and aesthetics of your creation.
- Heat Sink: High-power LEDs can generate heat during operation, and a heat sink is essential to dissipate this heat efficiently. This helps prevent damage to your lightsaber's components and ensures longevity.
- Adhesives, Screws, and Connectors: Various adhesives, screws, and connectors are necessary for the assembly of your lightsaber. These materials hold components together securely, ensuring your diy lightsaber craft remains sturdy.
Tools Required
- Drill and Bits: To create holes in the hilt for switches, buttons, and other components, you'll need a drill and appropriate drill bits. Precise hole placement is crucial for both aesthetics and functionality.
- Soldering Iron: A soldering iron is essential for connecting wires, LEDs, and other electrical components. Proper soldering ensures reliable electrical connections.
- Wire Strippers and Cutters: Working with electrical components demands precision. Wire strippers and cutters enable you to prepare wires neatly and cut them to the required lengths.
- Screwdrivers: Various components in your lightsaber may need to be secured with screws. Having a selection of screwdrivers on hand ensures you can properly assemble and disassemble your lightsaber as needed.
- Sandpaper and Files: To smooth and shape the hilt and any other components that require modification, sandpaper and files are indispensable tools. They help you achieve the desired finish and appearance.
- Paints and Brushes: If you intend to customize your lightsaber with unique designs or colors, paints and brushes will be necessary. Personalizing your diy pool noodle lightsaber adds a distinctive touch to your creation.

Choosing Your Lightsaber Design
When it comes to crafting your very own lightsaber, the design you choose plays a pivotal role in defining the character and personality of your weapon. You have the creative freedom to craft a lightsaber that mirrors the iconic designs of revered Jedi and Sith, or you can embark on an imaginative journey and forge a hilt that's uniquely yours. Let's delve deeper into the essential design considerations:
Hilt Length
The length of your lightsaber's hilt is a fundamental choice. Will you go for the classic, standard-length lightsaber, reminiscent of legendary Jedi like Luke Skywalker? Or will you embrace the agility of a shorter hilt, known as a shoto, favored by some Jedi for close combat situations? Your choice here shapes the overall balance and handling of your lightsaber.
Hilt Color
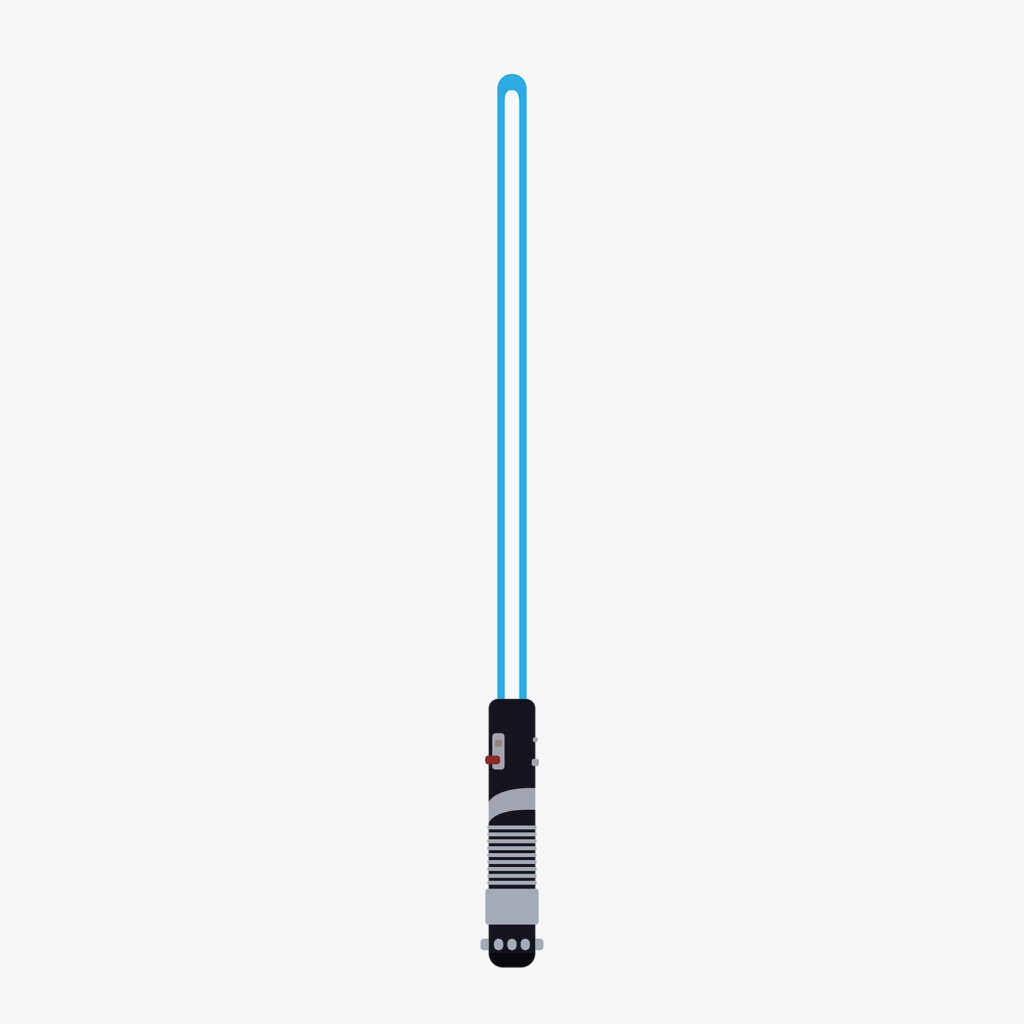
The color scheme of your lightsaber is an opportunity to convey your allegiance, emotions, or personal style. Traditional Jedi lightsabers typically feature blue or green blades, representing the Guardians and Consulars, respectively. In contrast, Sith lightsabers are known for their menacing red hue. The color you select reflects the nature of your character and the path you wish to follow.
Embellishments
Elevate your lightsaber's aesthetics by considering embellishments. Details like grips, buttons, and switches not only enhance the hilt's appearance but also impact its ergonomics and functionality. These elements provide an opportunity to infuse your lightsaber with unique elements that set it apart from others.
Weathering
If you yearn for an authentic, battle-worn appearance, weathering is an intriguing option. By applying weathering techniques, such as paint or abrasion, you can give your lightsaber the appearance of having endured countless clashes and battles. This weathered look adds depth and character to your weapon, telling a story of its own.
Personalization
Beyond the aforementioned considerations, you have the liberty to personalize your lightsaber further. Incorporate symbols, engravings, or even precious gemstones to imbue your lightsaber with a deeper significance or connection to your character's backstory.
Thematic Inspiration
Drawing inspiration from your favorite Star Wars characters or factions can guide your design choices. Whether it's the elegance of the Jedi Order or the sinister allure of the Sith, aligning your lightsaber with a specific theme can help you achieve a cohesive and compelling design.
Building the Hilt
Now that you've envisioned your unique lightsaber design, it's time to dive into the hands-on process of constructing the hilt. This integral component not only determines the look and feel of your lightsaber but also serves as the foundation for its functionality. Follow these detailed steps to master the art of hilt construction:
Step 1: Cutting and Shaping the Hilt
To kickstart your lightsaber project, you'll need to take your chosen hilt material and transform it into the desired form:
- Begin by cutting the hilt material to your preferred length. Consider the balance and ergonomics of your lightsaber when making this critical decision.
- Employ files and sandpaper to meticulously shape the hilt. Sculpt the grip to your liking, ensuring it provides comfort and control during combat. Add any other distinctive features you've envisioned, such as flares, ridges, or accents. This stage is where your creative flair truly shines.
Step 2: Creating Hilt Openings
For your lightsaber to function as intended, you'll need to create openings within the hilt to accommodate switches, buttons, and other vital components:
- Utilize a drill and appropriate drill bits to meticulously craft holes and openings in the hilt. Precision is key here, as these openings must align seamlessly for both functionality and aesthetics.
- Carefully plan the placement of these openings, considering the ergonomics of your grip and the accessibility of the controls. Ensure that your design maintains a cohesive and visually appealing appearance.
Step 3: Attaching Components
With your hilt prepared, it's time to secure the various components that bring your lightsaber to life:
- Methodically attach switches, buttons, and any decorative embellishments to the hilt. Depending on your chosen design, you may use screws, adhesives, or a combination of both to ensure these components remain firmly in place.
- Pay meticulous attention to detail during this phase, as the proper alignment and secure attachment of these elements are crucial for the functionality and overall aesthetics of your lightsaber.
Assembling the Electronics
The true essence of a lightsaber lies within its intricate electronics, the heart of your DIY creation. While this step demands a degree of familiarity with wiring and soldering, fear not if you're new to these skills. Assistance from someone with electronics expertise can provide invaluable guidance. Let's delve into the nuanced process:
Step 1: LED and Blade Assembly
The luminous core of your lightsaber is composed of high-power LEDs embedded within the blade's sturdy polycarbonate tubing. This is where the magic happens:
- Begin by carefully connecting the high-power LEDs to the polycarbonate tubing of the blade. Precise alignment ensures a uniform and dazzling illumination.
- Insert this LED-laden blade into the hilt with precision, ensuring that the LEDs align seamlessly with the blade. This step is pivotal in achieving the iconic, radiant glow of a lightsaber.
Step 2: Wiring
The complexity of your lightsaber's electronic components requires methodical wiring for seamless functionality:
- Establish connections from the LEDs to the power source, ensuring the voltage is correctly matched to your chosen LEDs. This precision ensures a consistent and vibrant blade illumination.
- Wire the switches and, if you opt for an enhanced experience, the sound board. The switches act as the gateway to control the lightsaber's luminosity, while the sound board adds immersive sound effects to your every swing and clash.
- During this stage, meticulous attention to detail is paramount. Insulate and secure all electrical connections to prevent any unintentional short circuits or interruptions in your lightsaber's operation.
Adding Special Effects
To truly make your DIY lightsaber a masterpiece, consider infusing it with captivating special effects, such as dynamic soundscapes and blade color transitions. Here's an in-depth guide on how to accomplish this:
Sound Effects (Optional)
If you're eager to immerse yourself further in the Star Wars universe, enhancing your lightsaber with sound effects is a brilliant choice:
- If your lightsaber boasts a sound board, you'll need to either upload pre-existing sound effects or program custom ones to achieve the desired auditory experience.
- Connect the sound board to a speaker, ensuring that the speaker is securely integrated within the hilt. Also, connect the sound board to the switches that enable you to control the sound effects.
- Thoroughly test the sound effects to guarantee they align perfectly with your vision. Adjust settings or programming as necessary to achieve the most authentic and captivating sounds.
Blade Color Changes (Optional)
For those seeking a lightsaber with a dynamic and color-changing blade, follow these steps:
- Select a color-changing LED, like an RGB LED, to serve as the heart of your blade's chromatic metamorphosis. Alternatively, you can use a color-changing blade attachment.
- Program the selected LED to cycle through an array of vibrant colors. This may require a microcontroller for precise control over color transitions. Customizing color sequences lets you express your individuality and style.
- Wire the LED to the microcontroller and battery, ensuring that all connections are secure and concealed within the blade. This meticulous wiring safeguards against disruptions in the mesmerizing color-changing display.
By incorporating these special effects into your lightsaber, you transform it into a work of art that captures the essence of the Jedi and Sith. Each swing and clash becomes an immersive experience, and the blade's dynamic transformation mirrors the shifting emotions and battles within the Star Wars universe.
As you embark on this final phase of your lightsaber journey, remember that it's the culmination of your creativity and dedication. May the Force be with you as you craft a lightsaber that is uniquely yours, ready to ignite the galaxy with its brilliance and character.
Fine-Tuning and Safety
When preparing to activate your lightsaber, it's crucial to devote some attention to fine-tuning your self-built weapon to ensure both functionality and safety. Here are detailed steps to consider:
Balance and Comfort
Before you engage the plasma blade, carefully assess the balance and ergonomics of the hilt. A well-balanced lightsaber ensures precise control and reduces strain during prolonged use. Experiment with grip placements and attachments to find the configuration that suits your style and comfort.
Thorough Wiring Check
Conduct a comprehensive inspection of the internal wiring and connections within your lightsaber. Look for loose wires, exposed components, or potential points of contact that could lead to shorts or malfunction. A meticulous examination can help prevent dangerous accidents and extend the lifespan of your weapon.
Battery Health
Ensure that the power source, typically a high-energy density cell, is in prime condition. Replace batteries regularly to maintain consistent energy output and prevent unexpected power failures during combat or practice.
Blade Crystal Alignment
If your lightsaber employs a crystal to produce its blade, verify that it is correctly aligned. An improperly aligned crystal can result in an unstable or erratic blade, posing a significant safety hazard. Consult your saber's construction manual for guidance on crystal alignment procedures.
Emitter Ventilation
Pay attention to the emitter section, where the plasma blade emerges. Adequate ventilation prevents the weapon from overheating and potentially causing damage to its components. Ensure there are no obstructions or blockages that hinder proper ventilation.
Safety Measures for Duels
If you plan to engage in lightsaber duels, prioritize safety above all else. Equip yourself with appropriate protective gear, including a helmet, gloves, and body armor. Furthermore, practice utmost caution and adhere to the following guidelines:
- Choose a suitable location: Perform duels in an open area, free from obstacles or bystanders.
- Establish rules: Agree upon rules and boundaries with your opponent to minimize the risk of injury.
- Communication: Maintain clear communication with your dueling partner to coordinate moves and ensure safety.
- Training: Regularly practice with a qualified instructor to hone your skills and enhance your combat awareness.
Conclusion
Congratulations, you've successfully crafted your very own DIY lightsaber! This epic journey has allowed you to tap into your inner Jedi or Sith and create a piece of Star Wars lore. Whether you're displaying it proudly on your shelf or engaging in epic duels, your lightsaber is a testament to your creativity and passion for the Star Wars universe.
Now, it's time to awaken the Force within you and let your lightsaber shine!

