DIY Blinds
When it comes to decorating my home, I've always believed that window treatments play a pivotal role. They don't just add a touch of style to the living space but also grant that essential sense of privacy and control over the natural light.
However, the cost of ready-made blinds can be quite daunting, and they often don't fit my unique window dimensions or match my personal style. That's where the magic of DIY blinds comes into play. In this comprehensive guide, I'll take you on a journey into the world of DIY blinds, sharing how I've learned to create custom window treatments.
Whether you're a seasoned DIY enthusiast like me or a complete novice ready to embark on your first project, I've got your back!
Why Choose DIY Blinds?
When considering the option of crafting your own blinds, it's important to explore the numerous compelling reasons why DIY blinds can be the perfect addition to your home:
Cost-Effective Solutions
One of the most compelling advantages of opting for diy blinds installation is the potential for substantial cost savings. When you take on the task of creating your own blinds, you often have the opportunity to attain the same or even superior quality compared to store-bought alternatives, all while significantly reducing your expenditure. Additionally, you have full control over the choice of materials, ensuring that you can adhere to your predetermined budget.
Unparalleled Customization
DIY blinds offer an unparalleled level of creative control. You are free to handpick the fabric, style, and size, ensuring a seamless integration with your existing decor and precise alignment with your window dimensions. Such a level of customization is rarely attainable when opting for ready-made blinds, making DIY an attractive choice for those with unique design preferences.
Manifest Unique Designs
If you harbor a specific design or pattern in mind that remains elusive in standard retail offerings, DIY blinds provide you with the ability to bring your imaginative vision to life. Crafting your blinds allows you to create bespoke window treatments that reflect your distinctive personality and style, enhancing the overall aesthetic of your living space.
A Valuable Learning Experience
Initiating a DIY blind project presents an invaluable opportunity to acquire new skills. Whether you are a novice or an experienced DIY enthusiast, you will gain valuable knowledge and hands-on experience in areas such as sewing, precise measuring, and working with a diverse range of materials. These newfound skills can not only save you money but also empower you to undertake more home improvement projects.
Embrace Sustainability
Crafting your own blinds grants you complete control over the materials you use, facilitating the selection of eco-friendly options. Additionally, you can repurpose existing materials, contributing to a more sustainable home environment and reducing waste. By embracing DIY blinds, you not only enhance the aesthetics of your space but also take a step towards a greener, more environmentally conscious lifestyle.
Materials and Tools You'll Need
Before we get started with the DIY blinds project, gather the following materials and tools:
Materials:
- Fabric Selection: Start by choosing a fabric that not only complements your interior decor but also meets your desired level of light control. Different fabrics offer varying degrees of opacity, so make your choice accordingly.
- Blind Mechanism: You have the option to purchase a ready-made blind mechanism or repurpose one from old blinds. It's essential to ensure that the mechanism's width matches that of your window for a snug fit.
- Lining Fabric (Optional): While this is optional, adding a lining can significantly enhance both light control and privacy. Select a lining fabric that complements your chosen fabric.
- Mounting Hardware: Gather all the necessary hardware required to securely install the blinds. This typically includes brackets, screws, and any other fixtures suitable for your window type.
- Cord or Chain: Acquire a cord or chain that is the appropriate length for your window size. This component is essential for operating the blinds effectively.
- Cord Condenser: A cord condenser will help you control the length of the cords or chains, ensuring they are neither too long nor too short.
- Cord Cleat: For added safety, especially if you have young children or pets, invest in a cord cleat to securely fasten the cords or chains out of reach when not in use.
- Stitch Witchery or Fabric Glue: If you prefer a no-sew approach, you'll need stitch witchery or fabric glue to hem the fabric edges neatly.
Tools:
- Measuring Tape: This indispensable tool is crucial for obtaining accurate measurements of your window, guaranteeing that your blinds will fit perfectly and look seamless.
- Scissors: A pair of sharp scissors is a must-have for cutting fabric and other materials with precision, giving your blinds a neat and professional finish.
- Sewing Machine (if applicable): If you plan to sew your blinds, having a sewing machine at your disposal will greatly expedite the process and enhance the durability of your finished product.
- Iron and Ironing Board: To achieve a polished and refined appearance, an iron and ironing board are essential. They help in pressing seams and eliminating wrinkles in your fabric, ensuring your blinds look their best.
- Drill: When it's time to securely install the mounting hardware onto your window frame or wall, a drill becomes an invaluable tool, making the installation process smoother and more reliable.
- Pencil or Chalk: Utilize a pencil or chalk to mark precise measurements on your fabric, reducing the chances of errors and ensuring your blinds fit precisely.
- Safety Gear: If your project involves power tools or unfamiliar materials, prioritize safety by wearing the appropriate gear. Safety glasses and gloves are crucial for safeguarding your eyes and hands during the installation process.
Now that you've gathered your materials and tools, it's time to start making your DIY blinds.
Step-by-Step Guide to Making DIY Blinds
Embarking on a DIY blinds project can be a rewarding endeavor, but it requires careful attention to detail. Below is an in-depth step-by-step guide to help you craft your own custom blinds:
Measure Your Window Accurately
The first and arguably most crucial step is obtaining precise measurements of your window. Use a measuring tape to determine both the width and height of your window. Take measurements for two scenarios: inside the window frame for an inside mount and outside the frame for an outside mount. These measurements will serve as the foundation for the entire project.
Thoughtfully Select Your Fabric
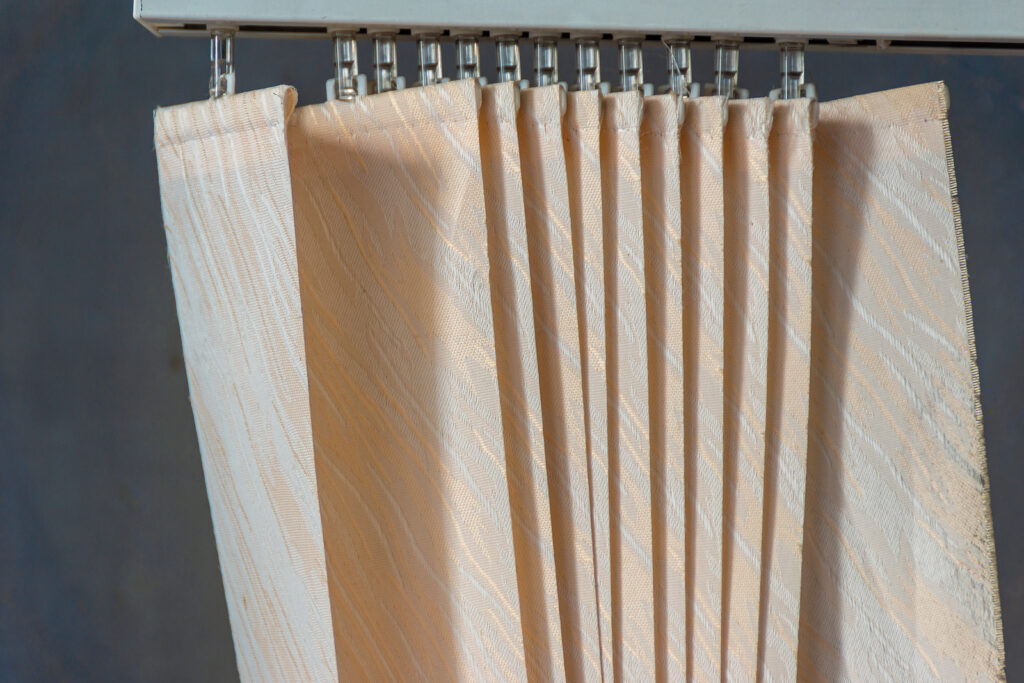
Choosing the right fabric is paramount. It should not only harmonize with your interior decor but also meet your specific light control requirements. Consider the weight and opacity of the fabric. For enhanced privacy and superior light control, opt for thicker or lined fabrics.
Carefully Cut the Fabric
With your measurements in hand, carefully cut the fabric to the desired width and length. Remember to add a few extra inches to account for hems and seam allowances. Precise cutting is essential to ensure the final blind hangs uniformly and looks professional.
Meticulously Hem the Fabric
Hemming the fabric can be done using two methods: sewing or fabric glue. If you choose to sew, fold the edges over and securely stitch them. Alternatively, if you opt for fabric glue, adhere to the manufacturer's instructions for a neat, no-sew finish.
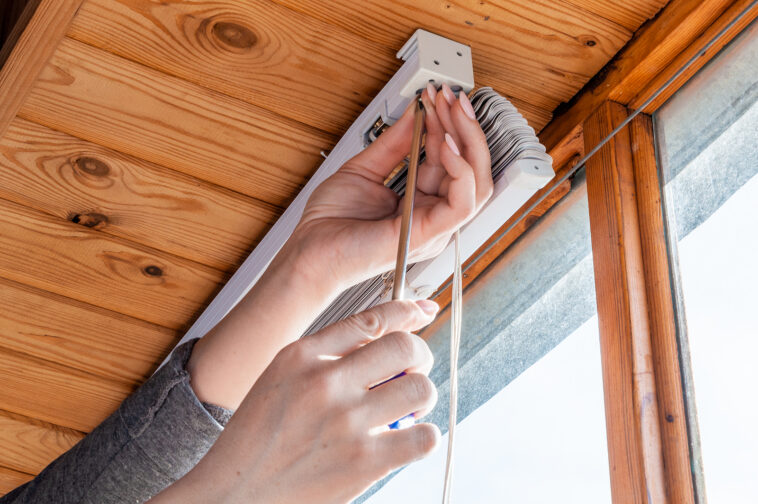
Attach the Blind Mechanism
Next, follow the manufacturer's guidelines to attach the blind mechanism securely to the top of your fabric. Ensure it's centered and level to facilitate smooth operation.
Thread the Cords or Chains with Precision
Thread the cords or chains through the blind mechanism and cord condenser. Adjust the length to your preferred height, leaving some extra length for easy maneuvering.
Secure the Mounting Hardware
Install the mounting brackets on the window frame or wall, depending on your chosen mounting style (inside or outside). Take care to ensure the brackets are level and securely fastened, as this is essential for the stability of your blinds.
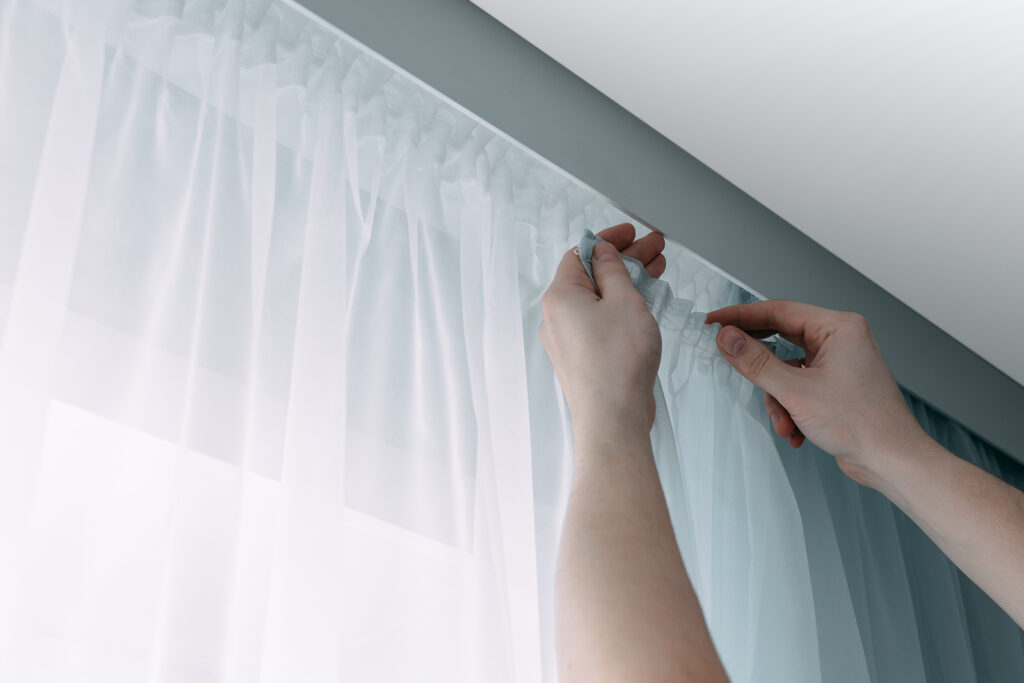
Hang Your DIY Blind with Care
Gently hang your DIY blind on the installed mounting brackets. Double-check to confirm that it is level and firmly secured in place.
Test the Operation Thoroughly
Before considering your project complete, it's essential to test the blind's operation. Raise and lower it several times to ensure smooth functionality. Adjust the cord condenser as needed to maintain the desired length.
Prioritize Safety: Secure the Cords or Chains
To enhance safety, especially in households with children or pets, install a cord cleat on the wall at an appropriate height. This will securely fasten the cords or chains when the blinds are not in use, preventing potential accidents.
Tips for Success
Double-Check Measurements: Precision Matters
“Measure twice, cut once” is a timeless adage that couldn't be more relevant in blind-making. Accurate measurements are the foundation of a well-fitted blind. Take the extra time to measure both the inside and outside of the window frame if you're considering different mounting options (inside or outside). This precision will save you from potential fit issues down the road.
Patience Is a Virtue: Take Your Time
Rushing through your DIY blind project can lead to costly mistakes. Each step in the process demands attention to detail. Take your time to carefully follow the instructions, from fabric selection and cutting to attaching the mechanisms. A patient approach will yield better results and a finished product you can be proud of.
3. Prioritize Safety: Use the Right Gear
Safety should be a top priority, especially when working with power tools or unfamiliar materials. Invest in the appropriate safety gear, such as safety glasses and gloves, to protect yourself during the project. Your well-being should always come first.
Embrace Creativity: Experiment and Customize
Don't hesitate to unleash your creativity and customize your blinds to achieve the desired aesthetic. Experiment with different fabrics, colors, and patterns until you find the perfect combination that complements your decor. Your DIY project allows you the freedom to create blinds that are not only functional but also a stylish addition to your space.
Consider Functionality and Longevity
Beyond aesthetics, think about the functionality and durability of your blinds. Choose fabrics and materials that can withstand daily use and exposure to sunlight. Consider the ease of cleaning and maintenance, as blinds will accumulate dust over time.
Seek Inspiration and Expertise
If you're unsure about design choices or techniques, seek inspiration from interior design magazines, online resources, or consult with experts. Sometimes, a fresh perspective can lead to innovative and appealing blind designs.
Document Your Process
Keeping a record of your process, including measurements, fabric choices, and any unique steps you take, can be invaluable for future reference or if you decide to replicate the project in another room. It also helps troubleshoot any issues that may arise during or after installation.
Test for Functionality and Safety
Once your blinds are in place, test them for functionality and safety. Ensure that they operate smoothly and that any cords or chains are safely secured to prevent accidents, especially in homes with children or pets.
FAQs About DIY Blinds
What Exactly Are DIY Blinds, and Why Should You Consider Crafting Them Yourself?
DIY blinds are bespoke window treatments that you fashion independently, offering a multitude of advantages such as substantial cost savings, tailor-made designs that perfectly complement your decor, and the freedom to create unique, personalized styles.
How Much Can You Save by Crafting Your Own Blinds?
The amount you can save when crafting DIY blinds hinges on several factors, notably the choice of materials. However, it's important to note that DIY blinds typically deliver substantial cost savings in comparison to off-the-shelf alternatives.
Do You Need Sewing Skills to Create DIY Blinds?
Although sewing skills can be beneficial, they are not always a prerequisite. If you prefer to avoid sewing altogether, you can utilize fabric glue or no-sew methods to fashion your blinds.
Can You Repurpose Old Blinds for Your DIY Project?
Absolutely, you can repurpose existing blind mechanisms, provided they are compatible with your window size. This environmentally conscious approach not only saves money but also reduces waste.
What Types of Fabric Are Suitable for DIY Blinds?
A wide spectrum of fabrics can be used for DIY blinds; however, it's crucial to consider factors such as fabric weight and opacity. Heavier or lined fabrics are excellent choices if you seek enhanced privacy and light control.
How Can You Ensure Your DIY Blinds Are Child and Pet-Safe?
To bolster safety, install cord cleats that secure cords or chains out of reach when not in use. This precautionary measure is especially vital for households with young children or pets to prevent accidents.
What Tools Do You Need for Crafting DIY Blinds?
Essential tools include a measuring tape, scissors, a sewing machine (if sewing is involved), an iron and ironing board, a drill, a pencil or chalk for marking, and appropriate safety gear if power tools are part of your project.
How Should You Maintain and Clean Your DIY Blinds?
Maintenance and cleaning requirements are contingent on the fabric you select. Regular dusting and occasional spot cleaning can help sustain the appearance and longevity of your blinds.
Can You Find Inspiration for DIY Blind Designs and Ideas Online?
Absolutely, the internet serves as a treasure trove of inspiration and design ideas for your DIY blinds. You can explore an array of fabric patterns, styles, and creative approaches to infuse your blinds with your unique personality.
What Should You Do if Mistakes Occur During the DIY Blind-Making Process?
Mistakes are part of the creative process, but many are rectifiable. Keeping extra fabric on hand can be a lifesaver when addressing errors. Additionally, documenting your process can prove invaluable for troubleshooting and future projects, ensuring a smoother DIY journey.
Conclusion
In conclusion, embarking on the journey of crafting my own DIY blinds has been an incredibly rewarding experience. It's transformed the way I view home decor, adding a personalized touch to my living space that store-bought blinds simply couldn't match.
The reasons to choose DIY blinds are compelling, from significant cost savings to unmatched customization and the ability to manifest unique designs that reflect my personality. Plus, it's been a valuable learning experience, helping me acquire new skills and empowering me to take on more home improvement projects.
The process itself, as outlined in this comprehensive guide, has taught me the importance of precision, patience, and safety. Double-checking measurements and taking my time at each step have been key to success. And the freedom to experiment with different fabrics and designs has allowed me to infuse my own creativity into my home.
As I enjoy the fruits of my labor with these custom blinds, I'm reminded of the practicality and aesthetics they bring to my space. But beyond that, they represent a sense of accomplishment and pride, knowing that I created something both functional and beautiful with my own two hands.
So, whether you're a seasoned DIY enthusiast or a novice eager to start your first project, I encourage you to dive into the world of DIY blinds. Not only will you enhance your home, but you'll also gain a newfound sense of creativity and craftsmanship that can be applied to many aspects of your life. Happy crafting!