How to Make a DIY Stylus
I can't believe how touchscreens have become such an essential part of our daily lives! Whether it's my trusty smartphone, my beloved tablet, or my reliable touchscreen laptop, having a stylus has truly revolutionized my digital experience.
Not only does it make drawing and note-taking a breeze, but it also helps keep my screens pristine and smudge-free. The only hitch? Buying a stylus can put a dent in your wallet, and sometimes, I just want to get creative and craft my own.
So, I embarked on a DIY journey to create a stylus that performs just as brilliantly as a store-bought one. By the end of this adventure, I had a functional stylus that I could proudly claim as my own creation!
Why Make Your Own Stylus?
Cost Savings
Making your own stylus offers significant cost savings compared to purchasing a commercial one. High-quality styluses often come with a hefty price tag, especially those equipped with advanced features. By opting for a DIY approach, you can reduce expenses considerably by using commonly available materials. This financial advantage makes it an appealing option for budget-conscious individuals.
Customization
Crafting your own stylus grants you the power of customization. You're in control of every aspect, from the stylus's size and shape to the color of its tip. This high level of personalization ensures that your stylus is tailored precisely to your unique preferences and requirements. Whether you need a stylus for drawing, note-taking, or other tasks, you can design it to meet your exact needs.
Fun and Satisfaction
Creating a DIY stylus is not just a practical endeavor; it's also a creative and satisfying project. You don't need advanced technical skills to embark on this endeavor, making it accessible to people of all ages. The process of designing and assembling your stylus allows you to tap into your creativity and problem-solving skills. When you successfully complete your stylus and see it function as intended, the sense of accomplishment and satisfaction you'll experience is truly rewarding. This DIY project offers an opportunity for hands-on learning and the joy of making something useful with your own two hands.
Sustainability
DIY stylus creation promotes sustainability by reducing the demand for mass-produced, often non-recyclable commercial styluses. By using materials you have on hand or repurposing items, you contribute to a more eco-friendly approach to technology accessories.
Learning Experience
Making your own stylus is an educational experience. It provides insight into the mechanics of touchscreen technology, electrical conductivity, and basic electronics. It's an excellent opportunity to learn about how everyday gadgets work and gain hands-on knowledge.
Bonding and Teaching
Crafting a stylus can be a great bonding activity with family and friends. It's a chance to involve children or beginners in a DIY project, teaching them valuable skills in problem-solving, creativity, and resourcefulness.
Materials You'll Need
Crafting your own stylus is a rewarding project, and to get started, you'll need to gather the following materials:
Conductive Foam
Conductive foam is the essential component that enables your stylus to interact with touchscreen devices. When sourcing conductive foam, it's crucial to ensure that it possesses the conductive properties necessary for touchscreen functionality. You can typically find this specialized foam online or at electronics supply stores. Regular foam will not suffice for this purpose due to its lack of conductivity.
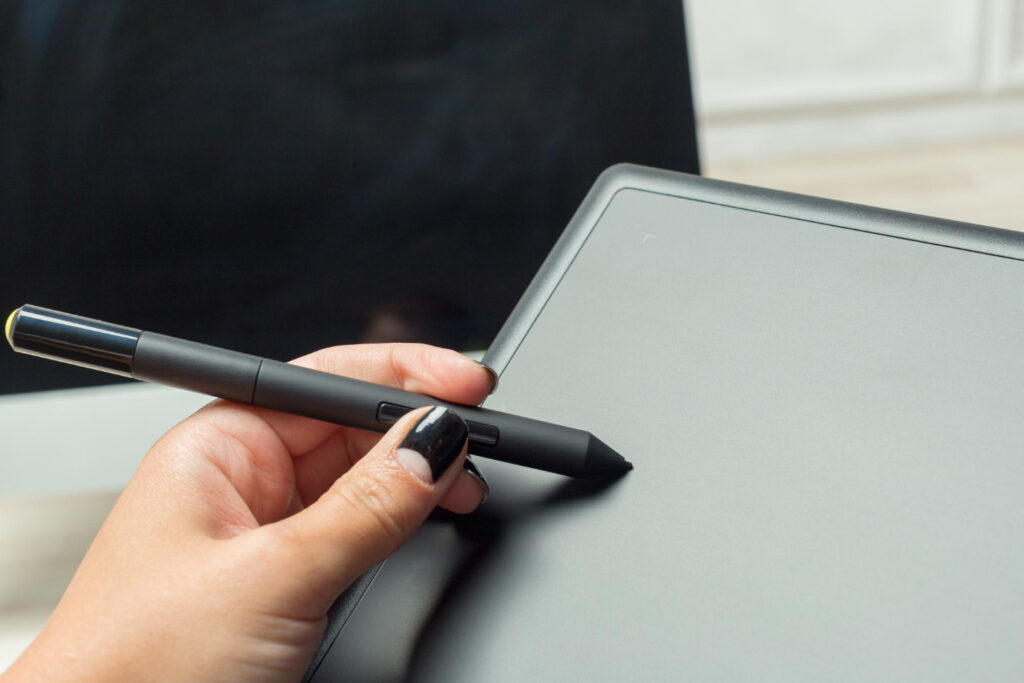
Pen or Pencil
Selecting a pen or pencil will serve as the foundation of your diy capacitive stylus. The choice between a pen and a pencil is a matter of personal preference. Some individuals appreciate the heft and tactile feel of a pen, while others favor the versatility of a pencil. Your choice will impact the overall weight and balance of your stylus.
Aluminum Foil
Aluminum foil plays a critical role as the conductive material that establishes a connection between the stylus tip and the pen or pencil. This common household item is readily available and highly conductive, making it a suitable choice for this DIY project.
Tape
You'll require tape to secure the conductive foam and aluminum foil to the pen or pencil securely. Opt for a strong and durable tape variety, such as electrical tape or duct tape, to ensure a reliable bond. The tape serves to maintain the integrity of your stylus and its functionality.
Optional: Decorative Elements
If you wish to infuse a personal touch into your stylus design, consider incorporating decorative elements. These can include colored tape, markers, or other creative additions that reflect your unique style and personality. While these elements are optional, they can enhance the aesthetics of create your own diy stylus and make it truly your own.
Step-by-Step Guide
With all your materials at the ready, let's delve into a detailed, step-by-step process for creating your personalized DIY stylus:
Step 1: Preparing the Pen or Pencil
- Begin by removing the ink cartridge from the pen or eraser from the pencil, ensuring that the writing instrument is completely empty.
- Ensure that the pen or pencil is clean and free from any residual ink or graphite, as any remaining marks may interfere with the stylus's performance.
Step 2: Creating the Conductive Foam Tip
- Cut a small piece of conductive foam, approximately 1 inch in length. This foam serves as the crucial element that interacts with your touchscreen.
- Carefully shape one end of the foam into a fine point. This pointed end will become the functional tip of your stylus, facilitating precise touch interactions.
- Prioritize cleanliness by ensuring that the foam tip is free from any debris or particles that might affect its responsiveness.
Step 3: Wrapping the Foam with Aluminum Foil
- Cut a small piece of aluminum foil, roughly measuring 2 inches by 2 inches.
- Gently but securely wrap the aluminum foil around the end of the conductive foam where you've shaped it into a fine point.
- Confirm that the foil covers the foam completely and is tightly secured, as it plays a pivotal role in enabling the stylus to conduct touch signals effectively.
Step 4: Attaching the Foam to the Pen or Pencil
- Apply a small amount of tape to the end of the pen or pencil where you previously removed the ink cartridge or eraser. This initial layer of tape provides a secure anchor for the foam.
- Press the wrapped end of the conductive foam onto the tape, ensuring a firm and reliable connection between the foam and the writing instrument.
- To guarantee a snug fit, wrap additional tape around the foam and the pen or pencil, securing the components together. This step is vital to maintain the integrity of your stylus.
Step 5: Optional – Decorating Your DIY Stylus
- If you're interested in infusing a touch of personalization and creativity into your stylus, this is your opportunity to get artistic.
- Consider using colored tape, markers, or any other decorative materials to make your stylus uniquely your own. Personalizing your stylus not only enhances its visual appeal but also adds a distinctive touch to your digital interactions.
Testing Your DIY Stylus
Touchscreen Compatibility Assessment:
- Screen Type Compatibility: Before diving into using your newly crafted DIY stylus, it's crucial to confirm that it's fully compatible with the touchscreen device you intend to use it on. Different touchscreen technologies (e.g., capacitive, resistive) may have varying requirements for stylus functionality.
- Test the Stylus: Begin by testing the stylus on your device to ensure it accurately registers touches and movements. Gently tap the screen with the stylus, swipe, and perform other common touchscreen gestures to verify its compatibility. Ensure that there is no lag or erratic behavior when using the stylus.
Responsiveness Evaluation:
- Versatility Assessment: Assess the responsiveness and versatility of your DIY stylus by trying it out with various touchscreen applications. This step is crucial to determine whether it performs comparably to a store-bought stylus across different use cases.
- Drawing: If you plan to use your stylus for artistic endeavors, test it with drawing applications. Pay close attention to the precision of lines and strokes, as well as any pressure sensitivity if applicable.
- Note-Taking: For note-taking purposes, experiment with writing or sketching apps. Check if the stylus allows for legible and accurate handwriting or drawing.
- Gaming: If gaming is your primary focus, try out interactive games that require precise touch inputs. Evaluate the stylus's ability to provide accurate control and responsiveness in gaming scenarios.
Comparison with Commercial Stylus:
- As a reference point, if possible, compare the performance of your DIY stylus with that of a commercial stylus designed for your specific touchscreen device. This comparison can provide insights into the effectiveness of your DIY creation.
- Latency and Accuracy: Pay attention to factors like latency (the delay between touch and response) and accuracy. While your DIY stylus may not match all the features of commercial styluses, it should offer a satisfactory level of performance.
Fine-Tuning if Necessary:
- If you notice any issues with touchscreen compatibility or responsiveness during testing, consider fine-tuning your DIY to make an ipad stylus. You can experiment with adjustments such as the size or shape of the foam tip or the application of additional conductive material to improve its performance.
Maintenance and Care
Ensuring the longevity and optimal performance of your DIY stylus involves some simple yet essential maintenance and care practices. Here's a detailed guide on how to keep your stylus in top-notch condition:
Regular Cleaning
Make it a habit to clean the stylus tip regularly. You can use a soft, lint-free cloth or a microfiber cloth for this purpose. Gently wipe the tip to remove any accumulated dirt, smudges, or debris. A clean tip ensures a smooth and responsive touchscreen interaction.
Avoid Excessive Pressure
When using your DIY stylus on a touchscreen, avoid applying excessive pressure. Unlike traditional writing or drawing tools, styluses work through capacitive touch technology, which responds to the electrical conductivity of your stylus tip. Gentle and controlled movements are all that's required to navigate and interact effectively with your device. Excessive pressure can potentially damage the screen or the stylus tip.
Storage
When your stylus is not in use, store it in a clean and dry place. Avoid leaving it exposed to excessive moisture, extreme temperatures, or direct sunlight, as these conditions can affect the performance and durability of the materials used in your stylus.
Check for Wear and Tear
Periodically inspect your stylus for any signs of wear and tear. Pay attention to the stylus tip, as it is the most critical component. If you notice any damage, such as a worn-out tip or loose connections, address it promptly to maintain optimal functionality. Depending on the materials you used to construct your stylus, replacements or repairs may be necessary.
Revisit Customization
If you added decorative elements or personalized features to your stylus, periodically revisit their condition. Over time, these elements may wear off or lose their vibrancy. If desired, refresh or modify the stylus's appearance to keep it looking as unique as you intended.
Keep It Hygienic
If you share your DIY stylus with others or use it in public spaces, consider keeping it hygienic. You can wipe it down with a disinfectant solution or a disinfectant wipe, especially during flu seasons or in situations where cleanliness is paramount.
FAQs
Q: What materials can be used as a stylus?
A: Stylus materials can vary, but they typically need to be electrically conductive or have a capacitive tip to work on touchscreens. Common materials include:
- Rubber or Silicone Tips: These are commonly found on commercial styluses and are effective on capacitive touchscreens.
- Metal Pens with a Conductive Tip: Some pens have conductive materials at the tip, making them suitable for capacitive screens.
- Aluminum Foil: Wrapping a small piece of aluminum foil around a non-conductive object can work as a basic stylus for capacitive screens.
- Anti-static Bags: The outside of anti-static bags can work as a capacitive stylus.
- Conductive Foam: Some DIY styluses use conductive foam materials for their tips.
- CD/DVD Discs: The reflective surface of an old CD/DVD can be used as an impromptu stylus on certain touchscreens.
Q: How do you make stylus?
A: Creating your own stylus can be a fun DIY project. Here's a basic guide:
- Gather Materials: You'll need a suitable material for the tip (e.g., conductive foam, aluminum foil, a metal pen), a non-conductive object as the stylus body (e.g., a wooden dowel or a plastic pen), and some adhesive (e.g., glue).
- Prepare the Tip: If you're using foam or foil, shape it into a small, rounded tip. Ensure it's clean and free from debris.
- Attach the Tip: Use adhesive to secure the tip to the non-conductive object. Make sure it's firmly in place.
- Trim and Test: If needed, trim any excess material from the tip to refine its precision. Then, test your stylus on a touchscreen device.
Q: What is a good homemade stylus?
A: A good homemade stylus is one that is both effective and comfortable to use. It should work well with your touchscreen device and be easy to handle. A few popular homemade stylus options include:
- Metal Pen with Conductive Tip: Attach a small piece of conductive material (like aluminum foil) to the tip of a metal pen or mechanical pencil. It offers good precision and conductivity.
- Paintbrush Stylus: Use a paintbrush with conductive bristles or attach conductive material to the bristles. This can provide a unique and artistic touch for digital art.
- Chopstick Stylus: Attach a small piece of conductive material to the end of a wooden chopstick. It's simple and works surprisingly well.
- Rubber Ball Stylus: Glue a small rubber ball (like those used in earbuds) to the end of a pen or stylus body. This creates a soft and precise tip.
Q: How do you make a stylus out of a pencil?
A: Making a stylus out of a pencil is a common DIY project. Here's how to do it:
- Materials Needed: You'll need a standard wooden pencil, a small piece of aluminum foil, and some adhesive (e.g., glue or tape).
- Prepare the Pencil: Remove any eraser and sharpen the pencil to a point.
- Wrap with Foil: Wrap the tip of the pencil with a small piece of aluminum foil. Ensure it's securely attached.
- Test It: Test your new pencil stylus on a touchscreen device. The aluminum foil acts as a conductive tip, allowing it to interact with the screen.
Conclusion
In conclusion, my journey into crafting a DIY stylus has not only saved me some hard-earned cash but has also ignited my creativity and resourcefulness. The satisfaction of holding a stylus that I designed and built myself is unparalleled.
Beyond the financial benefits, the ability to customize every aspect of the stylus, from its size to its appearance, has made it a truly personal tool that enhances my digital experiences. This project has also deepened my understanding of touchscreen technology and taught me valuable lessons in problem-solving and craftsmanship.
It's a reminder that sometimes, the most rewarding solutions are the ones we create with our own two hands. So, if you're up for a fun, educational, and budget-friendly project, give DIY stylus-making a try – you won't regret it!