DIY Bed Canopy with Lights
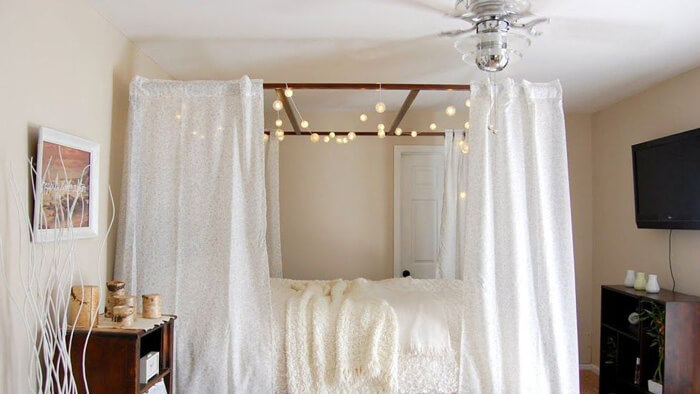
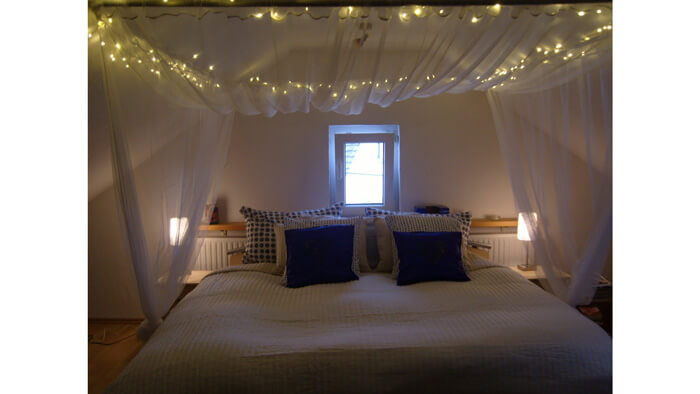
Imagine stepping into your bedroom and being greeted by a captivating and enchanting ambiance. With a DIY bed canopy adorned with twinkling lights, you can instantly add a touch of magic and create a dreamy haven in your own home. In this detailed guide, we will explore the step-by-step process of creating a DIY bed canopy, along with creative ideas to enhance its charm and create a cozy and whimsical atmosphere.
Why do we need to DIY Bed Canopy with Lights?
Creating a DIY bed canopy with lights offers several benefits and reasons why it is a popular choice for many individuals. Here are some reasons why you may consider DIYing a bed canopy with lights:
1. Personalization and Customization
DIY projects allow you to personalize and customize the bed canopy according to your unique style and preferences. You have the freedom to choose the fabric, lights, and decorative elements that match your bedroom decor or create a specific ambiance.
2. Affordability
DIY bed canopies with lights are often more affordable compared to purchasing pre-made canopies or professional installations. By selecting cost-effective materials and utilizing creative ideas, you can achieve a stunning result without breaking the bank.
3. Creativity and Self-Expression
Creating a DIY bed canopy with lights allows you to unleash your creativity and bring your vision to life. You can experiment with different fabrics, light placements, and decorative elements, showcasing your artistic side and making your bedroom truly unique.
4. Mood Enhancement
The soft and warm glow of lights in a bed canopy creates a cozy and enchanting atmosphere. It enhances the mood of your bedroom, transforming it into a peaceful retreat where you can relax, unwind, and enjoy a soothing ambiance before sleep.
5. Easy Installation and Versatility
DIY bed canopies with lights are relatively easy to install, especially with the availability of lightweight materials and wireless lighting options. You can adjust the canopy's size, shape, and design to fit your bed and bedroom layout, making it a versatile solution for any space.
6. Privacy and Comfort
A bed canopy provides an element of privacy, making your sleeping area feel more intimate and secluded. It helps create a cozy and secure space where you can retreat and have a sense of tranquility.
7. Aesthetics and Visual Appeal
A well-crafted bed canopy with lights adds a touch of elegance, romance, and magic to your bedroom. It serves as a beautiful focal point, enhancing the overall aesthetics and visual appeal of the space.
Benefits of a Bed Canopy with Lights
1. Instant Ambiance Upgrade
A bed canopy with lights instantly transforms the look and feel of your bedroom, creating a cozy and romantic atmosphere that promotes relaxation and tranquility.
2. Soft and Warm Lighting
The soft and warm glow of the lights adds a touch of elegance and serenity, making your bed the focal point of the room and creating an inviting space to unwind.
3. Privacy and Comfort
A bed canopy offers an element of privacy, making your bed feel like a secluded sanctuary within your room. It also helps reduce ambient light, providing a more restful sleep environment.
4. Versatile Decorative Element
A bed canopy with lights serves as a versatile decorative element, allowing you to showcase your personal style and creativity. It can be customized to match any bedroom decor theme.
Materials and Tools Needed
To create your own DIY bed canopy with lights, you will need the following materials and tools:
1. Materials
- Mosquito net or sheer fabric: Choose a fabric that suits your desired aesthetic, such as tulle, chiffon, or organza.
- Curtain rod or ceiling hooks: Select a rod or hooks that are sturdy enough to support the weight of the fabric and lights.
- Fairy lights or string lights: Opt for LED lights to ensure safety and energy efficiency.
- Command hooks or adhesive strips: These will be used to secure the lights and fabric to the wall or ceiling.
- Decorative elements (optional): Ribbons, flowers, or other decorative elements can be added to enhance the overall look.
2. Tools
- Measuring tape: For measuring the dimensions of your bed and the space where the canopy will be installed.
- Scissors: To cut the fabric to the desired length and shape.
- Drill or screwdriver (if using ceiling hooks): To install the hooks securely.
- Command hook applicator (if using command hooks): For easy and damage-free installation.
Step-by-Step Guide to Creating a DIY Bed Canopy
1. Measure and Prepare
- Measure the dimensions of your bed to determine the amount of fabric and lights needed.
- Clean the walls or ceiling where the canopy will be installed to ensure a clean and secure attachment.
2. Install the Curtain Rod or Ceiling Hooks
- Install the curtain rod above the headboard of your bed or attach ceiling hooks at the desired location. Ensure they are securely fastened.
3. Attach the Fabric
- Drape the fabric over the curtain rod or ceiling hooks, allowing it to cascade down the sides of the bed.
- Adjust the fabric to create an even and visually pleasing canopy shape. Trim any excess fabric if necessary.
4. Secure the Lights
- Attach the fairy lights or string lights to the walls or ceiling using command hooks or adhesive strips.
- String the lights along the fabric, creating a twinkling effect. Ensure the lights are evenly distributed and securely attached.
5. Customize and Decorate
- Add decorative elements such as ribbons, flowers, or other embellishments to the fabric or lights to further enhance the canopy's appeal.
- Use your creativity to personalize the canopy according to your desired style and theme.
Creative Ideas to Enhance Your Bed Canopy
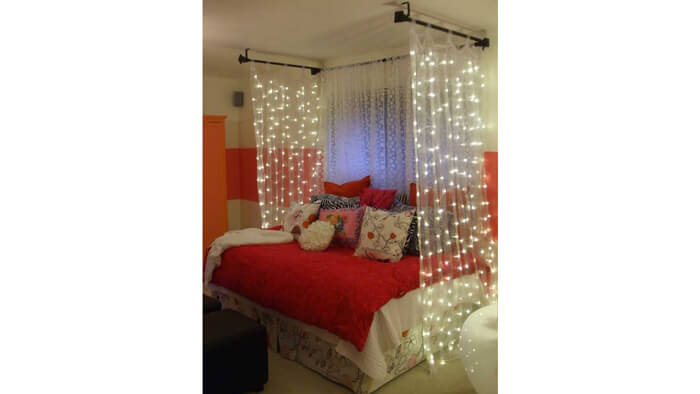
1. Add Sheer Curtains or Drapes
Hang sheer curtains or drapes on the sides of the bed canopy to create a more dramatic and elegant look. They can be tied back during the day for a softer appearance.
2. Incorporate Greenery and Flowers
Integrate faux or real greenery and flowers into the canopy to bring a natural and whimsical touch. Ivy vines or fairy lights intertwined with flowers can create a magical effect.
3. Utilize Canopy Bed Frame
If you have a canopy bed frame, you can enhance the canopy's allure by incorporating the lights and fabric onto the frame itself, creating a seamless and cohesive look.
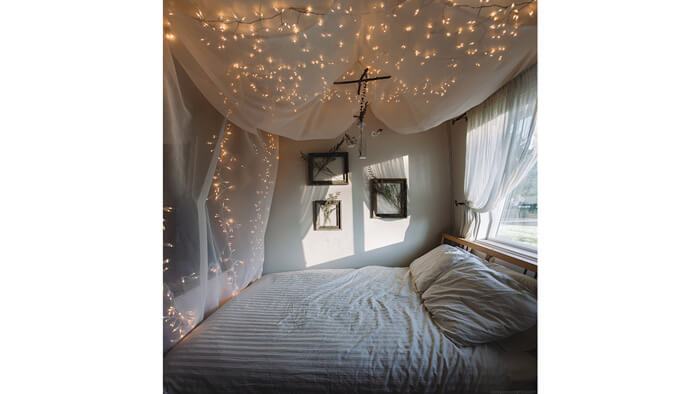
4. Hang Photos or Artwork
Use mini clothespins or clips to hang favorite photos, artwork, or inspirational quotes along the fabric, adding a personal touch and creating a unique display.
5. Experiment with Different Light Colors
Explore various light color options, such as warm white, soft pastels, or vibrant hues, to create different moods and atmospheres in your bedroom.
Lighting Techniques for Bed Canopies
1. Twinkle Lights
Wrap fairy lights or string lights around the fabric of the bed canopy, allowing them to create a soft and mesmerizing twinkle effect. This technique adds a touch of whimsy and enhances the enchanting atmosphere.
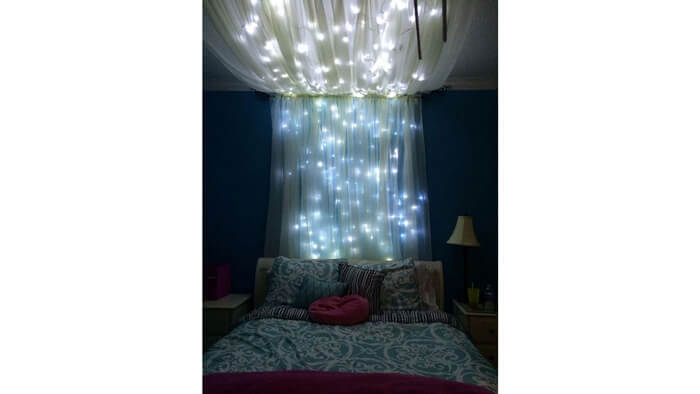
2. Backlighting
Install LED strip lights along the edges or behind the fabric of the bed canopy to create a stunning backlighting effect. This technique adds depth and enhances the visual appeal of the canopy.
3. Dimmer Switches
Incorporate dimmer switches for the lights in your bed canopy to control the brightness levels and create the desired mood. Dimming the lights can help create a cozy and intimate ambiance for relaxation or reading.
Safety Considerations and Care Tips
1. Fire Safety
Ensure that the lights used in your bed canopy are LED lights, as they emit less heat and pose a lower fire risk compared to traditional incandescent lights. Avoid using lights with damaged cords or frayed wires.
2. Proper Installation
Make sure all components, including the curtain rod, ceiling hooks, and adhesive strips, are securely installed to prevent the canopy from falling or causing any accidents. Follow the manufacturer's instructions for proper installation.
3. Electrical Safety
When connecting and arranging the lights, be mindful of electrical safety. Avoid overloading electrical outlets, use surge protectors, and follow proper electrical safety guidelines to minimize the risk of electrical hazards.
4. Cleaning the Canopy
Regularly dust or vacuum the fabric of the bed canopy to keep it clean and free from dust or allergens. Follow the manufacturer's instructions for cleaning the specific fabric type.
5. Checking Light Functionality
Periodically inspect the lights in your bed canopy to ensure they are functioning properly. Replace any burnt-out bulbs or faulty lights promptly to maintain the desired ambiance.
6. Seasonal Updates
Consider updating the fabric or decorative elements of your bed canopy to reflect different seasons or occasions. Swap out fabrics for a lighter or heavier material depending on the time of year, and add seasonal accents for a fresh and festive look.
Conclusion:
By following this step-by-step guide and incorporating creative ideas, you can effortlessly add a touch of magic and create a dreamy haven in your bedroom. A DIY bed canopy with lights not only enhances the ambiance but also provides privacy, comfort, and versatility in decor. So, unleash your creativity, let your imagination soar, and transform your bedroom into a serene and enchanting retreat.