DIY Replace Water Heater
Are you tired of enduring lukewarm showers and dealing with skyrocketing energy bills due to an old, temperamental water heater? Well, I was in the same boat not too long ago, until I decided to take matters into my own hands and embark on a DIY water heater replacement journey.
Let me tell you, it might sound intimidating at first, but armed with the right guidance and a bit of good old-fashioned elbow grease, I not only saved some hard-earned cash but also ensured my household had a dependable supply of piping hot water.
Throughout this comprehensive guide, I'll walk you through each step of the process, from getting ready to the final cleanup. By the time you finish reading, you'll have the knowledge and confidence you need to successfully tackle this project – just like I did!
Why Replace Your Water Heater?
Replacing your water heater is a significant decision that hinges on various factors. It's crucial to be well-informed about the reasons behind considering a replacement for your existing unit. Here are several key factors to help you determine if it's time to replace your water heater:
- Age: Water heaters have a finite lifespan, typically ranging from 8 to 15 years. The exact duration varies depending on the type of heater and how well it has been maintained. If your water heater is approaching or has exceeded this age range, it's wise to start thinking about replacement. Older units are more prone to breakdowns and inefficiencies.
- Inefficient Performance: If you've noticed a decline in your water heater's performance, such as it struggling to provide a consistent supply of hot water or a sudden increase in energy bills, this could be an indicator that your unit is no longer operating efficiently. Replacing it with a more energy-efficient model can lead to cost savings in the long run.
- Leaks or Corrosion: The presence of visible leaks or signs of corrosion on your water heater's tank should not be ignored. These are clear signals that your unit is compromised and in need of replacement. Ignoring leaks can result in costly water damage and potentially dangerous situations.
- Rusty or Discolored Water: If the hot water from your faucets appears discolored or has a metallic taste, it may suggest rust buildup inside your water heater. This buildup not only affects water quality but also indicates internal corrosion. In such cases, replacing the replacing a hot water heater is essential to maintain water safety and appliance longevity.
Now that you understand why you might need a new water heater, let's dive into the step-by-step process to replace it yourself.

Step-by-Step Process to Replace Water Heater
Step 1: Gather Your Tools and Materials
Embarking on any do-it-yourself (DIY) project necessitates meticulous planning and the assembly of all the essential tools and materials. Below is a detailed inventory of what you should have at your disposal before commencing your water heater installation:
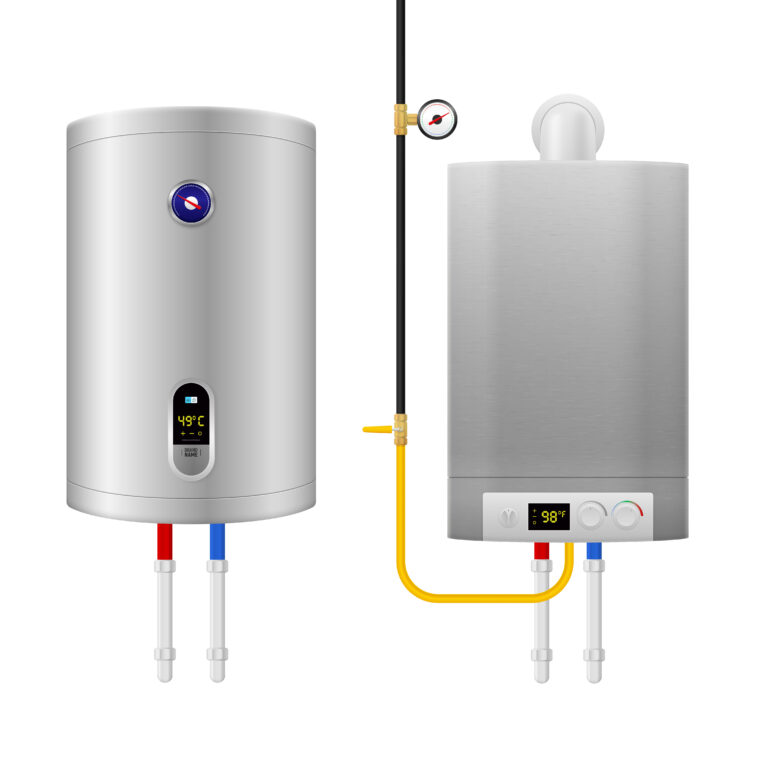
- New Water Heater Selection: Begin by selecting a water heater that aligns with your household's specific hot water requirements. Take into account the fuel type that suits your setup, whether it's gas or electric.
- Wrenches: Make sure you have both an adjustable wrench and a pipe wrench. These tools will prove indispensable when dealing with various connections during the installation.
- Pipe Cutter: You'll need a reliable pipe cutter to efficiently disconnect and remove the old plumbing connections that may be in place.
- Tape Measure: Ensure you have a tape measure on hand to take precise measurements of the available space and pipes. Accurate measurements are crucial for a successful installation.
- Pipe Thread Tape (Teflon Tape): This tape serves the important purpose of sealing pipe connections, preventing leaks, and ensuring a secure fit. It's a vital component in maintaining the integrity of your water heater system.
- Pipe Fittings and Connectors: If your new water heater differs in dimensions or connection types from your previous one, make sure you have the appropriate fittings and connectors ready. These components facilitate a seamless transition from the old to the new.
- Pipe Joint Compound: For threaded connections, a pipe joint compound is indispensable. It enhances the sealing of connections, adding an extra layer of protection against leaks.
- Screwdrivers: Keep both flathead and Phillips head screwdrivers readily available. These versatile tools will come in handy for various tasks during the installation.
- Adjustable Pliers: Having adjustable pliers within reach is beneficial for tasks such as tightening hose clamps and dealing with components that require a secure grip.
- Gloves and Safety Glasses: Prioritize safety by wearing appropriate protective gear. Gloves shield your hands, while safety glasses safeguard your eyes from potential hazards.
- Bucket and Towels: Prepare a bucket and a stack of towels to catch any water that may inadvertently spill during the installation process. This precaution helps keep your work area clean and minimizes potential water damage.
- A Helper: Given that water heaters can be heavy and awkward to maneuver, having an additional pair of hands is invaluable. Enlist the assistance of a helper to make the installation process smoother and safer.
Step 2: Turn Off Utilities
When it comes to replacing or servicing your water heater, prioritizing safety is paramount. To do this effectively, follow these steps to turn off the various utilities connected to your water heater:
Gas Water Heater
If your water heater is gas-powered, begin by turning off the gas supply. Locate the gas valve that leads to the unit; this valve is typically found along the gas line in close proximity to the water heater. By shutting off the gas supply, you prevent the flow of natural gas or propane to the heater, reducing the risk of gas leaks or combustion hazards.
Electric Water Heater
For install an electric water heater, your next step is to disconnect the power source. Head to your home's circuit breaker panel or fuse box and locate the appropriate circuit breaker or fuse that supplies power to the water heater. Switch off this breaker or remove the corresponding fuse. Additionally, if your electric water heater is equipped with a plug, unplug it from the electrical outlet to ensure complete disconnection from the power source. This step guarantees that no electrical current flows to the water heater during maintenance.
Cold Water Supply
To prevent any further influx of water into the water heater, close the cold water supply valve. You can typically find this valve situated above the water heater, often on a pipe or water line leading into the unit. Shutting off this valve ensures that no new water enters the tank while you work on it.
Hot Water Outlet
Lastly, close the hot water outlet valve located above the water heater. This valve controls the flow of hot water from the heater to your plumbing system. Turning it off helps contain the water within the heater, preventing any unwanted spills or leaks during the maintenance or water heater installation and replacement process.
Step 3: Drain the Old Water Heater
Draining your old water heater is a crucial step in the replacement or maintenance process to avoid a messy and potentially hazardous situation. Here's a detailed guide on how to drain the water heater properly:
- Locate the Drain Valve: First, identify the drain valve on your water heater. Typically, it's situated near the bottom of the tank. The drain valve may have a handle or knob that you can turn to open it.
- Connect a Garden Hose: To direct the water flow safely, attach a garden hose to the drain valve. Make sure the hose is securely connected to avoid any leaks.
- Choose a Suitable Drain Location: Determine a suitable location for the other end of the garden hose. It's essential to place the hose where the discharged water won't cause any damage, such as in a floor drain, sink, or outside in a designated drainage area.
- Vent the Tank: To facilitate a smooth and efficient drainage process, open a hot water faucet inside your home. This action allows air to enter the tank, helping the water flow out more freely.
- Open the Drain Valve: Carefully turn the handle or knob on the drain valve counterclockwise to open it. Water from the tank will start flowing out through the hose. Be patient during this step, as draining the entire tank can take some time, especially if it's a larger unit.
- Monitor the Draining: Keep a close eye on the draining process. You may notice sediment or debris coming out with the water, which is normal. This step helps flush out any accumulated deposits from the tank.
- Completion and Cleanup: Once the tank is fully emptied, turn off the hot water faucet you opened earlier. Then, disconnect the garden hose from the drain valve. Be cautious, as the water may still be hot. Finally, close the drain valve securely.
Step 4: Disconnect the Old Water Heater
Now that you've successfully drained the water heater, it's essential to disconnect it properly from both the plumbing and its energy supply, whether it's gas or electricity. Here's a comprehensive guide with additional details:
For Gas Water Heaters
- Turn Off the Gas: Before proceeding, ensure that you've already turned off the gas supply to the water heater. If not, do so by closing the gas valve leading to the unit. This precaution is vital for safety.
- Disconnect the Gas Line: Using an appropriately sized wrench, carefully disconnect the gas line from the water heater. This typically involves unscrewing the fitting that connects the gas line to the heater. Be cautious and work slowly to prevent damage to the gas line or fittings.
- Remove Remaining Gas Line Fittings: After detaching the gas line, check for any remaining gas line fittings or connectors. Remove them carefully to completely free the water heater from the gas supply.
For Electric Water Heaters
- Disconnect the Electrical Wires: Begin by disconnecting the electrical wires from the water heater. It's essential to do this safely to avoid electric shocks or damage to the wiring. Consider taking a photograph or labeling the wires to ensure correct reconnection during installation or replacement.
For Both Gas and Electric Water Heaters
- Disconnect the Cold Water Supply Pipe: Locate the cold water supply pipe that connects to the water heater. Use a pipe cutter if necessary to remove any pipes that are connected to the heater. This step ensures that no water can flow into the old water heater during removal.
- Disconnect the Hot Water Outlet Pipe: Similarly, locate the hot water outlet pipe connected to the water heater. Use a pipe cutter or appropriate tools to disconnect this pipe as well. By doing so, you prevent any remaining water from escaping as you remove the heater.
Step 5: Remove the Old Water Heater
Removing the old water heater can indeed be a challenging task due to its weight and size. However, with proper guidance, you can safely complete this step. Here's an in-depth look at how to remove the old water heater:
Assemble a Removal Team
It's highly advisable to enlist the assistance of a friend or family member for this task. Water heaters are often heavy and awkward to handle, making a two-person team more efficient and safer.
Assess the Path and Obstacles
Before you begin moving the water heater, carefully assess the path you'll take and identify any potential obstacles or hazards. Ensure there's a clear, unobstructed route from the old water heater's location to where you plan to place it temporarily or transport it for disposal.
Prepare for Safe Lifting
Prioritize proper lifting techniques to avoid straining your back or causing injury. Bend your knees, keep your back straight, and lift with your legs, not your back. Ensure both you and your helper are wearing appropriate clothing and closed-toe shoes for better grip and protection.
Lift and Maneuver
With your helper, carefully lift the old water heater, using the aforementioned lifting technique. Take your time and communicate clearly with your partner to ensure a coordinated effort. Slow and steady movements are key to preventing accidents.
Step 6: Prepare the New Water Heater
Before you proceed with installing the new water heater, it's crucial to ensure that the unit is in proper condition and positioned correctly. Here's a detailed guide on how to prepare the new water heater:
Unpack the New Water Heater
Begin by removing any packaging materials and protective coverings from the new water heater. Check for user manuals, installation instructions, and any included components or accessories.
Inspect for Damage or Defects
Carefully examine the new water heater for any signs of damage or defects. This includes checking the tank, valves, connections, and other components. If you notice any issues, such as dents, cracks, or missing parts, it's essential to address these concerns before proceeding with installation. Contact the manufacturer or retailer for guidance or replacement if necessary.
Position the New Water Heater
Before installation, ensure that the new water heater is correctly positioned. This involves several considerations:
- Level Placement: Use a level to confirm that the water heater is positioned horizontally and is not leaning or tilting in any direction. A level placement is essential for the proper functioning of the unit and to prevent any potential issues with water distribution.
- Clearance and Ventilation: Check that there is adequate clearance around the water heater. Proper clearance is crucial for ventilation and access for maintenance. Refer to the manufacturer's guidelines for specific clearance requirements based on the model of your water heater.
- Accessibility: Ensure that the new water heater is easily accessible for future maintenance or repairs. Avoid obstructing the unit with storage items or other appliances.
Step 7: Install the New Water Heater
Now that you've prepared the new water heater, let's delve into the detailed process of installing it in the same location as the old unit. This step is essential for ensuring a smooth transition to the new water heater:
- Position the New Water Heater: Carefully place the new water heater in the same orientation as the old one. Ensure that it's level and positioned securely to prevent any wobbling or instability.
- Reconnect the Plumbing:
- Cold Water Supply Pipe: Reattach the cold water supply pipe to the corresponding fitting on the new water heater. Use new pipe fittings and apply pipe joint compound if needed to ensure a secure and watertight connection.
- Hot Water Outlet Pipe: Similarly, reconnect the hot water outlet pipe to the corresponding fitting on the new water heater. As with the cold water supply, use new pipe fittings and joint compound if necessary to prevent leaks.
- Reconnect Gas Line or Electrical Wires:
- Gas Water Heaters: If you have a gas water heater, carefully reconnect the gas line following the manufacturer's instructions and adhering to all safety guidelines and local codes. Verify that the connections are tight and secure.
- Electric Water Heaters: For electric water heaters, reconnect the electrical wires as per the manufacturer's guidelines. Ensure that you follow proper wiring techniques, and if you labeled the wires during disconnection, ensure they are correctly matched.
- Open the Cold Water Supply Valve: Gradually open the cold water supply valve to allow water to fill the tank. Simultaneously, open a hot water faucet in your house. This step helps release trapped air from the system, allowing the tank to fill efficiently.
- Check for Leaks: Once the tank is full, closely inspect all the connections for any signs of leaks. This includes the cold water supply, hot water outlet, gas line (if applicable), and electrical connections. If you detect any leaks, immediately turn off the water supply or gas (if applicable) and address the issue by tightening connections or making necessary adjustments.
Step 9: Test Your New Water Heater
To guarantee the proper operation of your new water heater and ensure it's functioning correctly, follow these steps, which include a more detailed approach:
- Turn on a Hot Water Faucet: Begin by turning on a hot water faucet in your home. Be patient, as it may take a few minutes for the hot water to flow. Initially, you may experience cool or lukewarm water as the tank heats up. This is normal and should improve as the heater reaches the desired temperature.
- Monitor for Unusual Noises or Smells: During the first few hours of operation, pay close attention to your new water heater. Listen for any unusual noises, such as popping, banging, or hissing, which may indicate air or sediment displacement within the tank. Additionally, be vigilant for any unusual odors, particularly if you have a gas water heater, as unusual smells could indicate a gas leak. If you detect any unusual noises or odors, it's essential to investigate further or seek professional assistance if necessary.
- Check for Leaks: Once again, inspect all the connections around the water heater, including the cold water supply, hot water outlet, gas line (if applicable), and electrical connections. Ensure that there are no signs of leaks or dripping water. Address any leaks immediately to prevent water damage and potential safety hazards.
- Adjust the Temperature: If your new water heater allows for adjustable temperature settings, consider setting it to your preferred temperature. Refer to the manufacturer's instructions for guidance on adjusting the temperature safely.
- Review the User Manual: Take the time to review the user manual and installation guidelines provided by the manufacturer. Familiarize yourself with the operation, maintenance, and safety instructions specific to your water heater model. Following these guidelines will help ensure the long-term performance and efficiency of your new unit.
Conclusion
DIY replacing your water heater is a rewarding project that can save you money on installation costs. However, it's essential to approach this task with caution, follow safety guidelines, and adhere to local building codes. If you're not comfortable with any aspect of the replacement process, don't hesitate to seek professional help.
By following the steps outlined in this guide, you can successfully replace your water heater and enjoy the benefits of a reliable and efficient hot water supply. Remember to turn to trusted sources for guidance and consult your water heater manufacturer's instructions for specific details about your unit.
Sources
https://www.energy.gov/energysaver/selecting-new-water-heater