If you have ever been captivated by the warm glow and inviting scents of candles, you might be interested in trying your hand at candle making. Crafting your own candles not only allows you to customize their appearance and fragrance but also provides a satisfying and therapeutic creative outlet.
In this comprehensive guide, we will walk you through the process of making candles, offering valuable tips and techniques to help beginners achieve stunning results. Whether you're a complete novice or have dabbled in candle making before, this pillar content will equip you with the knowledge to create beautiful, aromatic candles that will light up your space.
Candle Making
Candle making is an age-old craft that combines artistry and science. By melting and molding wax, adding fragrance and color, and inserting a wick, you can create your own unique candles. Before diving into the candle making process, let's explore some of the reasons why it has become such a popular hobby:
- Creative Expression: Candle making allows you to express your creativity and personalize your living space with beautiful handmade creations.
- Therapeutic Benefits: Engaging in candle making can be a calming and therapeutic activity, providing a sense of relaxation and mindfulness.
- Gifts and Decor: Handmade candles make thoughtful gifts for loved ones and can be used to add ambiance and warmth to any room.
Now, let's delve into the step-by-step process of making candles, covering everything from selecting the right wax to troubleshooting common issues.
Understanding Candle Wax
Before you begin making candles, it's important to understand the different types of candle wax available. Here are some commonly used candle waxes:
- Paraffin Wax: Paraffin wax is the most widely used wax in candle making. It is affordable, readily available, and easy to work with. Paraffin wax produces a clean and long-lasting burn.
- Soy Wax: Soy wax is a natural and renewable option made from soybean oil. It is popular among those seeking a more eco-friendly and sustainable wax choice. Soy wax has a lower melting point, resulting in a longer burning time and better fragrance throw.
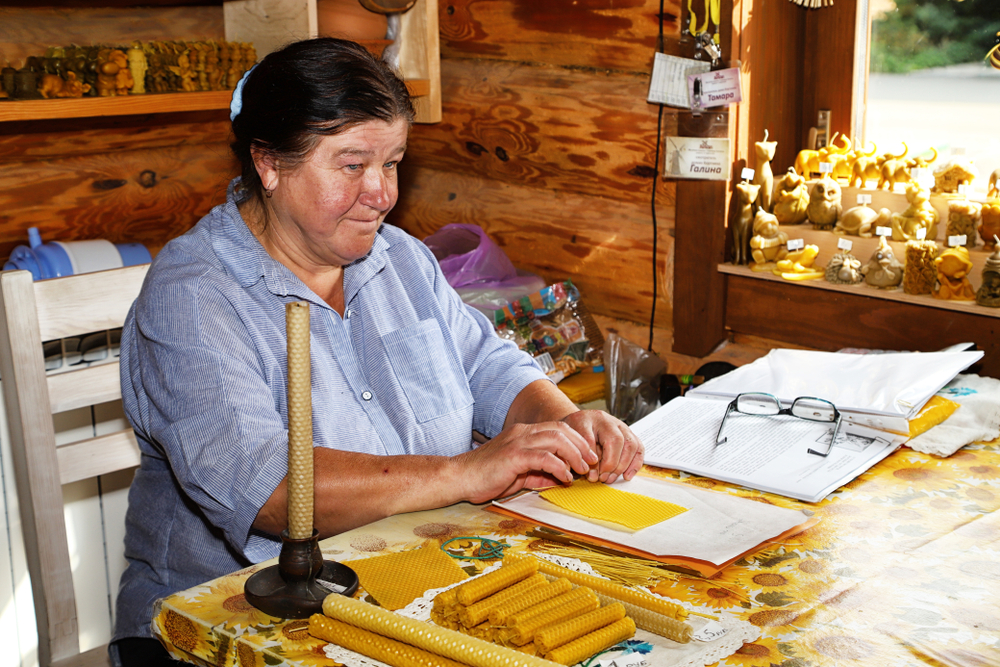
- Beeswax: Beeswax is a natural wax produced by bees. It is known for its subtle honey-like scent and clean burn. Beeswax candles have a naturally golden hue and a longer burn time compared to other waxes.
- Palm Wax: Palm wax is derived from the oil of palm trees. It produces unique crystalline patterns and has excellent fragrance retention. However, it's important to choose sustainably sourced palm wax to ensure environmental responsibility.
Consider the specific characteristics of each wax type, including melting point, burn time, scent throw, and eco-friendliness, when selecting the most suitable wax for your candle making projects.
Essential Candle Making Supplies
To get started with candle making, you will need a few essential supplies. Here is a list of must-have candle making materials:
- Double Boiler or Melting Pot: A double boiler or a dedicated melting pot is used to melt the candle wax gently and evenly. It helps prevent direct heat contact, reducing the risk of scorching or burning the wax.
- Thermometer: A thermometer is essential for monitoring the wax temperature. It ensures that the wax is melted at the correct temperature and helps achieve optimal fragrance throw and smooth texture.
- Candle Wicks: Candle wicks are the crucial element that sustains the flame. They come in various sizes and materials, such as cotton, linen, or wood. Choose wicks appropriate for the diameter of your candle and the type of wax you are using.
- Candle Containers: Select suitable containers for your candles, such as glass jars, tins, or ceramic vessels. Ensure they are heat-resistant and able to withstand the temperature of the melted wax.
- Fragrance Oils: Fragrance oils add delightful scents to your candles. Choose high-quality fragrance oils specifically designed for candle making. Consider a wide range of options, from floral and fruity scents to warm and cozy aromas.
- Dye or Colorants: If desired, add color to your candles using candle dyes or color blocks. These specially formulated colorants ensure even distribution and vibrant hues.
- Pouring Pitcher: A pouring pitcher with a spout makes it easier to transfer the melted wax into the candle containers without spills or mess.
- Stirring Utensils: Use heat-resistant utensils, such as stainless steel or silicone, to stir and mix the wax, fragrance, and colorants. Avoid using wooden utensils, as they can absorb the fragrance and colorants.
- Protective Gear: Wear protective gear, such as heat-resistant gloves and safety goggles, when handling hot wax to prevent burns and ensure personal safety.
Choosing the Right Candle Wicks
Selecting the appropriate candle wicks is crucial for ensuring a well-performing and long-lasting candle. Consider the following factors when choosing the right candle wicks:
- Candle Diameter: The size of your candle will determine the appropriate wick size. A wick that is too small may result in a weak flame, tunneling, or poor scent throw, while a wick that is too large can lead to excessive smoking, sooting, and an uneven burn. Consult a wick size guide or the manufacturer's recommendations based on the diameter of your candle.
- Candle Wax Type: Different wax types have varying melt temperatures and characteristics, which can affect the wick's performance. Some wicks are specifically designed for soy wax, while others work well with paraffin or beeswax. Consider using wicks that are suitable for the specific wax type you have chosen to ensure optimal burning and fragrance throw.
- Fragrance Load: If you plan to add fragrance oils to your candles, keep in mind that certain scents or higher fragrance concentrations may require wicks with a larger diameter to accommodate the increased heat needed for scent release.
- Candle Container Material: The material of your candle container can influence the choice of wick. For example, containers with a larger diameter, like wide-mouthed jars, may require a larger wick to provide sufficient heat distribution.
- Desired Burn Time: Consider the burn time you desire for your candles. Some wicks are designed for shorter burn times, while others are suitable for longer, more extended burns. Take into account the type of wax and container size to select wicks that will achieve your desired burn time.
- Testing and Experimentation: It is recommended to conduct small test burns using different wicks before committing to a specific size for your entire batch. This will help you observe how the wicks perform in terms of flame size, stability, and burn rate. Adjustments may be necessary based on your observations.
By considering these factors and conducting test burns, you can select the appropriate candle wicks that will contribute to the overall performance and aesthetics of your homemade candles.
Selecting the Perfect Candle Containers
Choosing the right candle containers not only enhances the visual appeal of your candles but also ensures safety and functionality. Here are some key factors to consider when selecting candle containers:
- Heat Resistance: Opt for containers that can withstand the heat generated by the burning candle. Glass jars, metal tins, and ceramic vessels are popular options due to their ability to handle high temperatures. Avoid using plastic or flammable materials that may melt or pose a fire hazard.
- Container Size: Consider the size of your candles and the intended use. Ensure that the chosen containers provide sufficient space for the wax to melt and pool evenly during burning. For optimal performance, leave some headspace between the wax and the top of the container.
- Visibility and Aesthetics: Choose containers that allow the beauty of the candle and its flame to shine through. Transparent or translucent containers, such as clear glass jars or frosted glass, can showcase the wax color and add an elegant touch to your candles. Alternatively, if you prefer a more rustic or vintage look, consider using metal tins or mason jars.
- Compatibility with Wax: Consider how well the chosen containers hold the type of wax you are using. Certain waxes, such as soy wax, may have specific requirements for adhesion to the container. Ensure a good bond between the wax and the container to prevent potential leakage or separation.
- Versatility and Reusability: Select containers that can be easily cleaned and reused. This allows you to repurpose the containers for future candle making projects or other creative endeavors.
- Safety Considerations: Keep in mind any safety requirements or regulations for candle containers in your region. Some jurisdictions may have specific guidelines regarding container size, labeling, or materials. Familiarize yourself with these regulations to ensure compliance.
Adding Color and Fragrance to Your Candles
Color and fragrance play a significant role in enhancing the beauty and ambiance of your candles. Here are some tips for adding color and fragrance to your homemade candles:
- Candle Dyes: Candle dyes are specifically formulated colorants that can be added to the melted wax to create vibrant and customized hues. They are available in various forms, including liquid dyes, color blocks, or powdered pigments. Start with a small amount and gradually add more to achieve the desired color intensity. Remember to stir the dye thoroughly into the melted wax to ensure even distribution.
- Liquid Colorants: Alternatively, you can experiment with liquid colorants, such as liquid watercolors or liquid fabric dyes. These can offer a broader range of colors and allow for more precise color mixing. Be cautious when using liquid colorants, as some may affect the burning properties of the candle. Test a small batch first to ensure compatibility with your wax and wick.
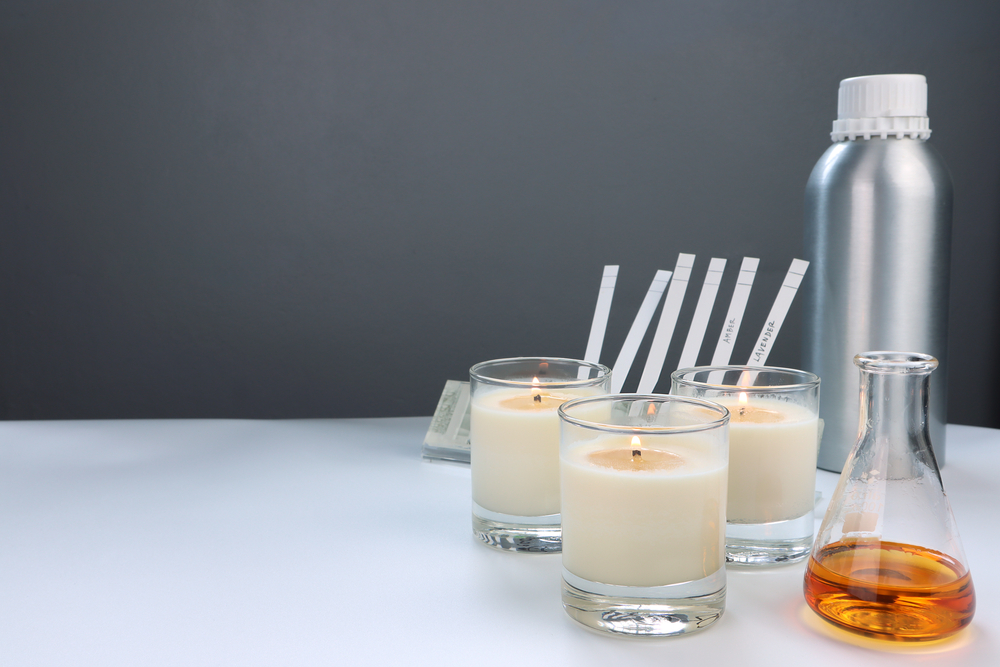
- Fragrance Oils: Fragrance oils are the key to infusing delightful scents into your candles. Choose high-quality fragrance oils specifically designed for candle making. They come in a wide range of scents, including floral, fruity, herbal, and seasonal aromas. Start with a lower percentage of fragrance oil and gradually increase it to find the ideal scent strength. Thoroughly mix the fragrance oil into the melted wax to ensure a well-blended fragrance.
- Scented Wax Melts: If you prefer a simpler approach, you can use pre-scented wax melts or wax tarts instead of fragrance oils. These are small, scented pieces of wax that can be melted and added to your candle wax. They offer convenience and pre-determined fragrance combinations, making it easy to create beautifully scented candles.
- Layered and Swirled Effects: Get creative with your candle designs by incorporating layered or swirled color effects. Pour different colored wax layers into your container, allowing each layer to cool and solidify before adding the next. Alternatively, you can swirl different colors together using a skewer or toothpick to create marbled or artistic patterns.
- Combining Colors and Scents: Experiment with combining different colorants and fragrance oils to create unique combinations. Consider the mood, theme, or season you want to capture with your candles. For example, combine blue dye with an ocean-scented fragrance oil for a beach-inspired candle, or mix red and green dyes with a holiday spice fragrance oil for a festive-themed candle.
Mastering the Candle Making Process
Now that you have gathered your supplies, selected the right wicks and containers, and decided on colors and fragrances, it's time to dive into the candle making process. Follow these step-by-step instructions to create your own beautiful candles:
- Prepare Your Workspace: Before you begin, ensure you have a clean and well-ventilated workspace. Protect the surface with newspaper or a heat-resistant mat. Set up your double boiler or melting pot and gather all your supplies within reach.
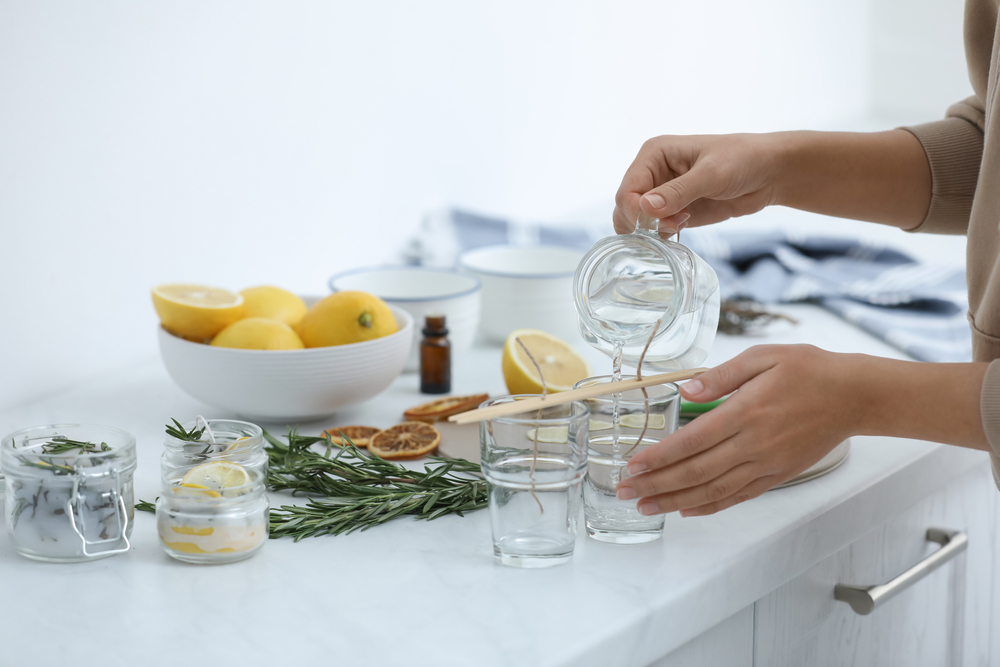
- Measure and Melt the Wax: Measure the desired amount of wax by weight or volume, following the instructions for your specific wax. Place the wax in the double boiler or melting pot and heat it over low to medium heat. Stir occasionally with a heat-resistant utensil until the wax is completely melted and smooth.
- Add Color and Fragrance: Once the wax has melted, add your chosen colorants and fragrance oils. Start with small amounts and gradually increase until you achieve the desired color and scent strength. Stir the mixture thoroughly to ensure even distribution.
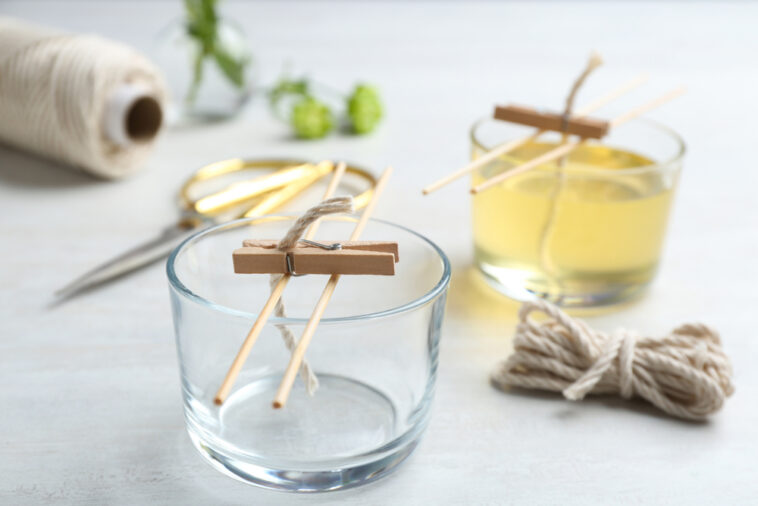
- Prep the Containers and Wicks: While the wax is melting, prepare your candle containers by ensuring they are clean and dry. Attach the wicks to the bottom center of each container using a suitable adhesive or wick sticker. Ensure the wicks are centered and upright.
- Cool the Wax: Allow the wax to cool slightly for a few minutes. Check the temperature with a thermometer and ensure it is within the recommended pouring temperature range for your specific wax. This step is crucial to prevent heat damage to your containers or premature setting of the wax.
- Pour the Wax: Slowly and carefully pour the melted wax into the prepared containers, ensuring that the wicks remain centered. Leave a small gap (about 1/2 inch) between the top of the wax and the rim of the container to prevent overflow during burning. If desired, use a pouring pitcher with a spout for precision.
- Center and Secure the Wicks: To keep the wicks in place during cooling, gently straighten them and use wick centering tools or pencil grips to hold them upright. Alternatively, tie the wicks to a chopstick or popsicle stick placed across the container's opening.
- Allow the Candles to Cure: Let the candles cool and solidify undisturbed for several hours or overnight. The cooling time may vary depending on the type and size of your candles. Avoid moving or disturbing the candles during this period to ensure a smooth and even finish.
- Trim the Wicks: Once the candles have completely cooled and hardened, trim the wicks to about 1/4 inch using scissors or a wick trimmer. This length promotes a clean and efficient burn, minimizing soot and excessive flame height.
- Label and Decorate: Add labels or tags to your candles to identify the fragrance, color, or any other special features. You can also decorate the containers with ribbons, charms, or personalized touches to add a unique flair to your homemade candles.
- Safety Precautions: Remember to practice proper candle safety. Never leave a burning candle unattended, keep them away from flammable objects, and place them on a heat-resistant surface. Always follow the safety guidelines and recommendations provided by the wax and fragrance manufacturers.

Troubleshooting Common Candle Making Issues
While candle making can be a rewarding and enjoyable process, it's not uncommon to encounter certain challenges along the way. Here are some common issues that may arise during candle making and their corresponding troubleshooting tips:
- Uneven Burning: If your candle burns unevenly, leaving excess wax on one side, there may be a few causes and solutions:
- Ensure that the wick is centered and upright during the pouring and cooling process.
- Trim the wick to the appropriate length before lighting the candle. A long wick can create an uneven burn.
- Make sure the candle has sufficient cooling time. Prematurely moving or disturbing the candle during the curing period can lead to uneven burning.
- Sooty or Smoking Flame: Excessive smoke or soot can be a result of several factors:
- Trim the wick to the recommended length (around 1/4 inch) before lighting the candle. A long wick can produce more soot.
- Avoid placing the candle in drafty areas where air movement can disturb the flame and cause excess smoking.
- Ensure that the wick is appropriate for the candle's diameter and wax type. A wick that is too large can create a smoky flame.
- Tunneling or Poor Wax Pool: Tunneling occurs when the candle burns down the center, leaving a significant amount of unmelted wax along the sides. To prevent this:
- Ensure that the first burn of the candle is long enough to create a full wax pool that reaches the edges of the container. This helps establish a memory burn and prevents tunneling in subsequent burns.
- Choose the appropriate wick size for the diameter of your candle. A wick that is too small may not generate enough heat to melt the wax evenly.
- Fragrance Throw Issues: If you find that your candle's scent is not as strong as desired, consider the following:
- Increase the fragrance oil percentage in your candle. Start with the recommended amount and gradually adjust to find the desired scent strength.
- Use high-quality fragrance oils specifically formulated for candle making. Lower quality oils may have weaker scent throw.
- Experiment with different fragrances and scent combinations to find those that provide the desired level of fragrance throw.
- Adhesion Issues: Sometimes, the wax may not properly adhere to the container, resulting in uneven surfaces or separation. To address this:
- Ensure that the containers are clean and dry before pouring the melted wax. Moisture or residue can affect adhesion.
- Use appropriate adhesives or wick stickers to secure the wicks to the bottom of the containers. Properly secured wicks help prevent wax separation.
Safety Tips for Candle Making
Candle making involves working with heat and potentially flammable materials. It's important to prioritize safety to ensure a risk-free and enjoyable candle making experience. Follow these safety tips to protect yourself and your surroundings:
- Work in a Well-Ventilated Area: Candle making can release fumes and odors, so it's important to work in a space with good ventilation. Open windows or use fans to ensure proper airflow and reduce the concentration of fumes.
- Protective Gear: Wear protective gear, including heat-resistant gloves and safety goggles, to shield your hands and eyes from hot wax and potential splashes. Long sleeves and closed-toe shoes can also offer additional protection.
- Fire Safety: Keep a fire extinguisher nearby and know how to use it. Never leave a burning candle unattended. Keep flammable materials, such as paper or fabric, away from the candle-making area. Always have a fire safety plan in place.
- Heat Sources: Use caution when working with heat sources, such as double boilers or melting pots. Never leave them unattended while heating wax. Ensure that the heating equipment is stable and placed on a heat-resistant surface.
- Candle Wax Temperature: Monitor the temperature of the melted wax using a thermometer. Do not overheat the wax, as it can become flammable. Follow the recommended melting temperature for your specific wax type.
- Avoid Water Contact: Keep water away from the melting wax, as it can cause splattering and potentially lead to burns. Water can also cause the wax to splutter and create a fire hazard.
- Handling Hot Wax: Be cautious when handling hot wax. Use heat-resistant utensils to stir and pour the wax. Avoid contact with bare skin. If any wax comes into contact with your skin, immediately rinse with cool water.
- Candle Containers: Choose heat-resistant containers that can handle the heat of the burning candle. Avoid using containers that are easily breakable or can't withstand high temperatures. Glass containers are a popular choice due to their durability and heat resistance.
- Proper Wick Placement: Ensure that the wick is centered and upright in the candle container. This helps prevent the flame from coming into contact with the container's walls, reducing the risk of overheating or shattering.
- Clean and Organized Workspace: Maintain a clean and organized workspace to minimize the risk of accidents. Keep flammable materials, such as paper towels or fabric scraps, away from open flames or hot surfaces.
- Read and Follow Instructions: Always read and follow the instructions provided by the wax and fragrance manufacturers. They may have specific safety guidelines or recommendations for their products.
Storing and Caring for Your Finished Candles
Once you have successfully made your candles, it's important to store and care for them properly to maintain their quality and prolong their shelf life. Follow these tips to ensure the longevity and enjoyment of your homemade candles:
- Cool and Cure Completely: Allow your candles to cool and cure fully before handling or storing them. This process typically takes 24 to 48 hours. Avoid moving or disturbing the candles during this time to prevent surface imperfections or indentations.
- Label and Date: Label your candles with their fragrance, color, and date of creation. This will help you keep track of the candles' age and ensure you use the oldest ones first.
- Storage Location: Store your candles in a cool, dry place away from direct sunlight, extreme temperatures, and humidity. Avoid storing them in areas prone to temperature fluctuations, such as attics or basements, as this can affect their appearance and scent.
- Container Protection: If your candles are in glass jars or containers, consider using lids or covers to protect them from dust and debris. This will also help preserve their fragrance over time.
- Avoid Sunlight: Exposure to direct sunlight can cause candles to fade or discolor. Store them in a shaded area or use protective coverings, such as opaque bags or boxes, to shield them from sunlight.
- Separate Fragrances: If storing multiple scented candles, keep them separated to prevent fragrance blending. Airtight containers or individual packaging can help maintain the integrity of each scent.
- Avoid Extreme Temperatures: High temperatures can cause candles to soften, warp, or melt, while low temperatures can make them brittle. Aim for a storage temperature between 50°F (10°C) and 80°F (27°C).
- Prevent Dust Accumulation: To keep your candles clean and free from dust, cover them with a clean cloth or place them in sealed containers. Regularly wipe the containers or jars to remove any dust that may accumulate.
- Trim Wicks Before Use: Before lighting your candles, trim the wicks to around 1/4 inch each time. This will help promote a clean and even burn and prevent excessive sooting or smoking.
- Burn Candles Safely: When burning your candles, follow safety guidelines, such as never leaving them unattended, keeping them away from flammable materials, and placing them on heat-resistant surfaces. Always extinguish candles before leaving the room
Conclusion
Congratulations! You have now learned the essential tips and techniques for making beautiful candles from scratch. From choosing the right wax and wicks to adding color and fragrance, and mastering the candle making process, you are well-prepared to embark on your candle making journey.
Remember to prioritize safety throughout the entire process and follow the recommended guidelines and instructions. With practice and experimentation, you'll develop your own unique style and create candles that reflect your personal taste and creativity.
Making candles at home not only allows you to unleash your artistic side but also provides a therapeutic and rewarding experience. Whether you're making candles for yourself or as gifts for loved ones, the joy of crafting something with your own hands is truly fulfilling.