Flowers add beauty and charm to any occasion or space. While fresh flowers are stunning, they are not always accessible or long-lasting. That's where DIY paper flowers come in. Making your own paper flowers allows you to unleash your creativity and create beautiful blooms that can be enjoyed indefinitely. Whether you're looking to decorate your home, create stunning event decor, or gift someone a handmade bouquet, learning how to make paper flowers is a rewarding and enjoyable craft. In this comprehensive guide, we will walk you through the step-by-step process of creating various paper flower designs, providing you with the skills and inspiration to bring your creations to life.
Make Paper Flowers DIY
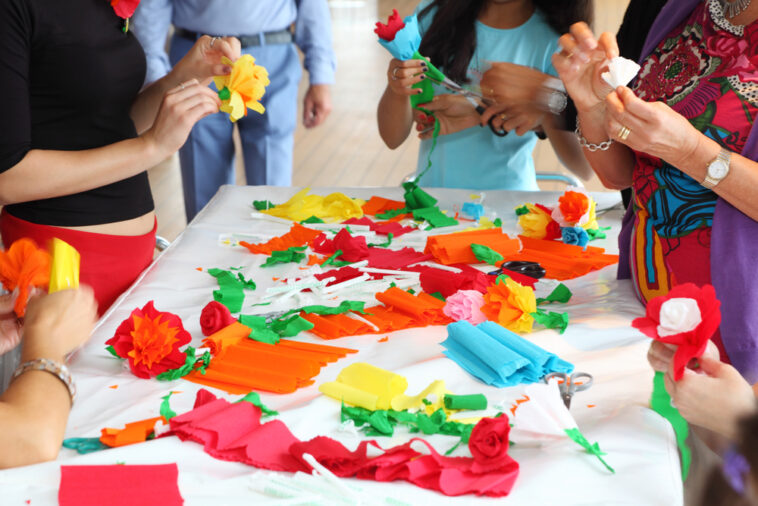
Paper flowers have been used for centuries as a way to add color and vibrancy to celebrations and decorations. Today, paper flower crafting has evolved into a popular DIY craft that allows individuals to showcase their creativity and personalize their floral arrangements. Making paper flowers offers a multitude of benefits, including cost-effectiveness, customization options, and the ability to enjoy your creations for an extended period. Whether you're a beginner or an experienced crafter, learning how to make paper flowers opens up a world of possibilities for expressing your artistic flair.
Benefits of Making Paper Flowers
Before we dive into the techniques and designs, let's explore the advantages of making paper flowers:
- Cost-Effective: Making your own paper flowers is a budget-friendly alternative to purchasing fresh or artificial flowers. The materials required for paper flower crafting are generally affordable and readily available, allowing you to create beautiful blooms without breaking the bank.
- Unlimited Creativity: With paper flowers, you have complete creative control. You can choose from a wide range of colors, patterns, and textures of paper to suit your personal style or match a specific theme or event. Customizing your flowers enables you to create unique and personalized arrangements that reflect your individuality.
- Long-Lasting Beauty: Unlike fresh flowers that wilt and fade over time, paper flowers retain their beauty indefinitely. They can be cherished as keepsakes or used repeatedly for various occasions without the need for maintenance or replacement.
- Endless Variety: With paper flower crafting, you can replicate the look of any flower you desire, regardless of its seasonality or availability. You can create exotic blooms, unique hybrids, or fantasy-inspired flowers that aren't found in nature. The possibilities are limited only by your imagination.
- Eco-Friendly: By using paper as the primary material, you contribute to a more sustainable approach to floral decorations. Paper can be recycled, reducing waste and minimizing the environmental impact associated with traditional flower production and disposal.
The benefits of making paper flowers make it a captivating and eco-friendly craft that allows you to explore your creativity and bring lasting beauty to any space or occasion.
Choosing the Right Paper
Choosing the right paper is crucial for creating realistic and durable paper flowers. Consider the following factors when selecting paper for your projects:
- Weight and Thickness: Choose paper that is sturdy enough to hold its shape but still flexible enough to be manipulated. Medium-weight cardstock or text-weight paper is commonly used for paper flower crafting.
- Color and Pattern: Select paper in colors and patterns that match your desired flower designs. Solid-colored paper provides a classic and elegant look, while patterned paper adds visual interest and depth to your flowers.
- Texture: Consider the texture of the paper as it can enhance the realism of your flowers. Some papers have a smooth finish, while others have textured surfaces like linen, vellum, or embossed patterns.
- Acid-Free and Archival Quality: If you intend to preserve your paper flowers for an extended period, choose acid-free and archival-quality paper. These papers are less likely to yellow or deteriorate over time, ensuring the longevity of your creations.
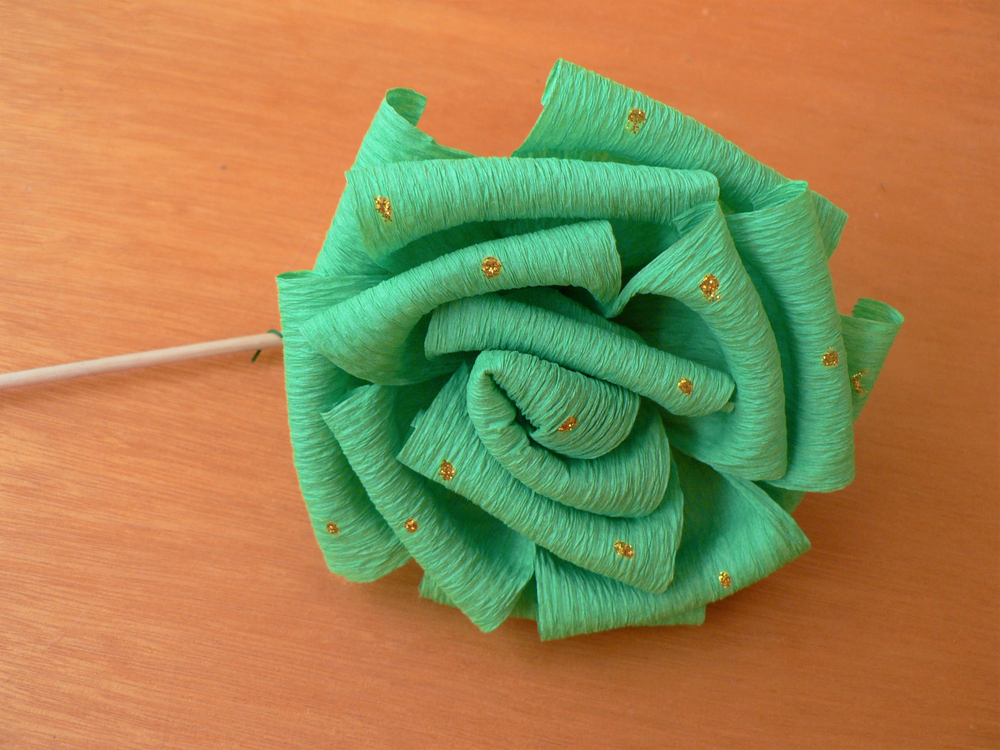
- Specialty Papers: Explore specialty papers, such as crepe paper or tissue paper, that are specifically designed for paper flower crafting. These papers offer flexibility, delicate textures, and natural movement to your flowers.
When selecting paper for your paper flower projects, experiment with different types to achieve the desired results and bring your creations to life.
Essential Tools and Materials
To embark on your paper flower journey, you'll need a few essential tools and materials. Gather the following items before starting your projects:
Tools:
- Scissors (sharp, precision-tip scissors are recommended)
- Craft knife or paper trimmer (for precise cuts)
- Cutting mat or self-healing mat (to protect your work surface)
- Craft glue or adhesive (preferably a strong, quick-drying glue)
- Hot glue gun and glue sticks (for secure and instant bonding)
- Floral wire or floral stems (for creating sturdy stems)
- Wire cutters or pliers (for cutting and shaping floral wire)
- Curling tool or round object (to curl petals and create natural shapes)
- Ruler or measuring tape (for accurate measurements)
- Bone folder (for creasing and shaping paper)
Materials:
- Paper (cardstock, text-weight paper, crepe paper, tissue paper, etc.)
- Floral tape (for wrapping and securing stems)
- Floral foam or styrofoam (for arranging and displaying paper flowers)
- Decorative elements (ribbon, beads, glitter, etc. for embellishments)
Having these tools and materials on hand will make the paper flower crafting process smooth and enjoyable.
Basic Paper Flower Techniques
Before diving into specific designs, mastering a few basic paper flower techniques will lay the foundation for creating various blooms. These techniques include:
- Petal Shapes: Learn how to cut and shape petals of different sizes and shapes, such as teardrop, heart-shaped, oval, or pointed petals. These shapes will form the foundation of your paper flowers.
- Petal Curling: Practice curling the edges of petals using a curling tool or a round object like a pencil. This technique adds natural curves and dimension to your petals.
- Assembly and Gluing: Understand the process of assembling individual petals and attaching them to create a cohesive flower. Use craft glue or hot glue to secure the petals together, layer by layer.
- Stem Creation: Learn how to attach floral wire or stems to your paper flowers. This allows you to create sturdy stems and arrange your flowers in various ways.
Mastering these basic techniques will give you the confidence to tackle more intricate and complex paper flower designs.
Simple Paper Flower Designs
Start your paper flower journey with simple designs that are perfect for beginners. Here are a few popular options:
- Daisy: Create delicate daisy blooms using circular petals and a contrasting center. Experiment with different colors and sizes to add variety to your daisy bouquet.
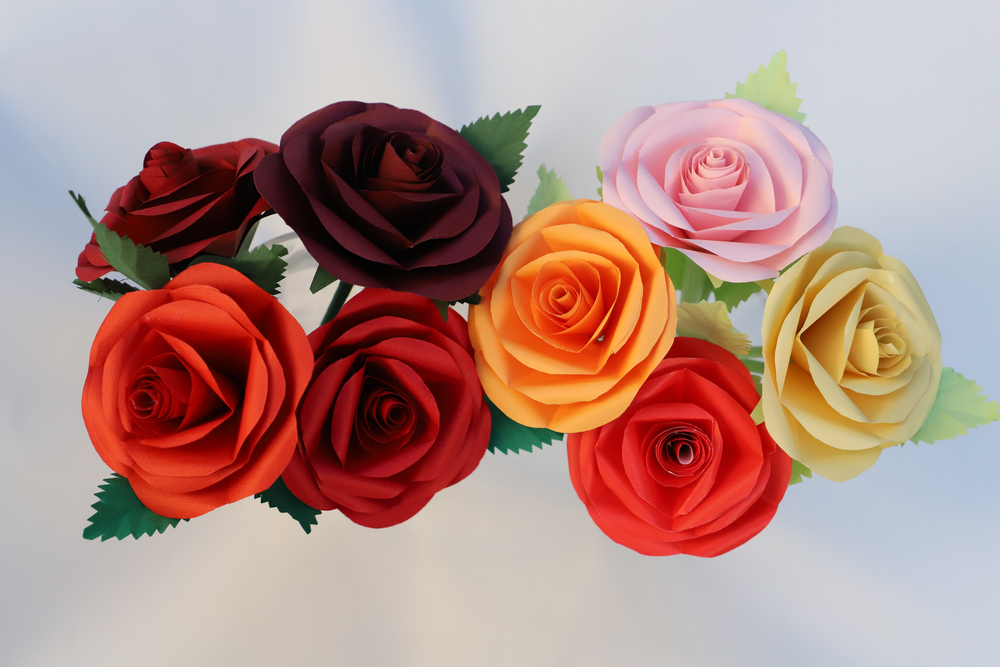
- Roses: Craft beautiful paper roses by shaping and curling individual petals and assembling them into a blooming rose. Play with different shades and textures to create realistic-looking roses.
- Sunflowers: Make vibrant sunflowers by cutting large, pointed petals in yellow and adding a brown center. These cheerful flowers are perfect for adding a pop of color to your paper flower arrangements.
- Tulips: Craft elegant tulip blooms with elongated petals and a slender stem. Experiment with different colors to create a bouquet of stunning tulips.
- Carnations: Create intricate paper carnations by layering small, fringed petals to mimic the ruffled appearance of real carnations. These flowers add a touch of elegance to any arrangement.
Mastering these simple designs will lay the foundation for more advanced paper flower creations.
Intermediate Paper Flower Designs
Once you've gained confidence with the basic techniques, challenge yourself with intermediate-level paper flower designs. These designs often require more petals and intricate assembly. Here are a few examples:
- Peonies: Craft lush and voluminous peonies with layers of delicate petals. Experiment with various colors and petal sizes to create stunning peony blooms.
- Lilies: Make graceful lily flowers with their distinctive trumpet-shaped petals. Use gradient-colored paper to add depth and realism to your lilies.
- Orchids: Create exotic and elegant orchid blooms using intricate petal shapes and patterns. Orchids offer a unique and striking addition to your paper flower collection.
- Anemones: Craft delicate anemone flowers with their dark center and contrasting petals. Experiment with different colors and textures to create captivating anemone blooms.
- Chrysanthemums: Make intricate and textural chrysanthemums by layering and arranging multiple petal shapes. Chrysanthemums are known for their variety of colors and petal styles, making them a versatile choice for paper flowers.
These intermediate-level designs will push your creativity and paper flower crafting skills to new heights.
Advanced Paper Flower Designs
For those seeking a challenge and the opportunity to create show-stopping paper flowers, advanced designs are the way to go. These designs often involve intricate petal shaping, assembly techniques, and attention to detail. Here are a few examples:
- Gardenias: Craft intricate gardenia flowers with their layered petals and delicate fragrance. Pay attention to the unique shapes and textures of each petal to create realistic gardenia blooms.
- Ranunculus: Make multi-layered ranunculus flowers with their densely packed petals. Experiment with different colors and petal sizes to achieve a realistic and vibrant look.
- Lotus: Create ethereal and serene lotus flowers with their beautiful layers of petals. Pay attention to the intricate details and delicate shaping to capture the essence of these sacred flowers.
- Protea: Craft exotic protea flowers with their distinctive shapes and textures. Experiment with different paper colors and techniques to replicate the intricate appearance of protea blooms.
- Magnolias: Make large and elegant magnolia flowers with their broad, showy petals. Pay attention to the subtle color variations and the smooth shaping of the petals to create stunning magnolia blooms.
These advanced designs require patience and precision but result in breathtaking paper flower creations that will leave a lasting impression.
Adding Details and Embellishments
To take your paper flowers to the next level, consider adding details and embellishments. These extra touches add visual interest and elevate the overall look of your blooms. Here are a few ideas:
- Centers and Stamen: Add a touch of realism by incorporating centers and stamen into your flowers. Use small beads, buttons, or rolled paper to create the center details that mimic the reproductive structures of real flowers.
- Veining and Texture: Enhance the texture of your petals by adding veining details. Use a fine-tip pen or embossing tool to create lines or indentations that mimic the natural veins found in flower petals.
- Foliage and Leaves: Include leaves or foliage in your paper flower arrangements for added authenticity. Craft simple or intricate leaf shapes using green paper and attach them to the stems or beneath the flowers.
- Sparkle and Shine: Incorporate glitter, sequins, or metallic paints to add a touch of sparkle and shine to your paper flowers. This works particularly well for special occasions or festive decorations.
- Scented Oils: For an extra sensory experience, consider adding scented oils or perfumes to your paper flowers. Lightly spray or dab scented oils onto the petals to mimic the fragrance of real flowers.
Adding these details and embellishments will make your paper flowers truly stand out and capture the attention of anyone who sees them.
Creating Paper Flower Arrangements
Once you've mastered the art of making paper flowers, it's time to arrange them into beautiful displays. Consider the following tips for creating stunning paper flower arrangements:
- Choose a Focal Point: Select a standout flower as the focal point of your arrangement. This could be the largest or most visually striking flower in your collection.
- Consider Height and Size: Vary the height and size of the flowers within your arrangement to create visual interest and balance. Taller flowers can be placed towards the back, while shorter blooms can be placed towards the front.
- Group Similar Flowers: Arrange flowers of the same type together to create impact and cohesion. Grouping similar flowers enhances the overall aesthetic and allows individual blooms to shine.
- Add Foliage and Fillers: Incorporate foliage, leaves, or filler flowers to add depth and fill any gaps between the main blooms. These elements provide a natural look and add volume to your arrangement.
- Experiment with Vases and Containers: Consider different types of vases or containers to complement the style and theme of your paper flowers. Transparent glass vases can showcase the stems, while rustic containers add a charming touch.
- Play with Colors and Textures: Experiment with color combinations and textural contrasts to create visually appealing arrangements. Try pairing complementary or contrasting colors to make your paper flowers pop.
- Create Bouquets or Centerpieces: Arrange your paper flowers into bouquets or centerpieces for special occasions or as a gift. Secure the stems together with floral tape or ribbon, and wrap them in decorative paper or fabric for a finishing touch.
By applying these tips and experimenting with different arrangements, you can create captivating displays that highlight the beauty of your paper flowers.
Preserving and Caring for Paper Flowers
To ensure the longevity of your paper flowers, it's essential to take proper care and storage measures. Follow these guidelines to preserve your creations:
- Protect from Moisture: Paper flowers are delicate and can be damaged by moisture. Keep them away from humid environments, water, or direct contact with liquids.
- Avoid Direct Sunlight: Prolonged exposure to direct sunlight can cause the colors of your paper flowers to fade. Display them in areas where they are shielded from direct sunlight or use UV-resistant sprays for added protection.
- Dust Regularly: Dust your paper flowers gently using a soft brush or a can of compressed air. Regular dusting prevents the buildup of dirt and maintains their pristine appearance.
- Store in a Dust-Free Environment: When not in use, store your paper flowers in a clean and dust-free environment. Place them in boxes or containers lined with acid-free tissue paper or bubble wrap to protect them from damage.
- Handle with Care: Handle your paper flowers with care, especially when transporting or arranging them. Avoid excessive bending, squeezing, or pulling, as this can cause the petals or stems to tear or deform.
By following these preservation and care tips, your paper flowers can be enjoyed for years to come.
Conclusion
Learning how to make paper flowers is a delightful and rewarding craft that allows you to create stunning blooms that last indefinitely. From simple designs to advanced creations, the possibilities for paper flower crafting are endless. By mastering basic techniques, exploring different designs, and adding personal touches, you can create a bouquet of beautiful paper flowers for any occasion or decor.