Macrame, the art of decorative knotting, has experienced a resurgence in popularity due to its versatility and aesthetic appeal. One of the simplest and most rewarding macrame projects to start with is a keychain. This blog post provides a step-by-step guide to making your DIY macrame keychain.
Introduction to Macrame
Macrame is a centuries-old technique, dating back to the 13th century. It involves the use of knotting to create intricate patterns and designs. While it was traditionally used for creating wall hangings, plant hangers, and decorative accessories, it is now commonly used in a wide range of applications, including making jewelry and keychains.
What You'll Need
Before we dive into the steps, let's gather the necessary materials. To create your macrame keychain, you'll need:
- Macrame Cord: A 3mm cotton cord is perfect for keychains due to its durability and easy handling.
- Key Ring: Choose a durable metal key ring.
- Scissors: A sharp pair will ensure clean cuts.
- Measuring Tape: To measure your cords accurately.
- Comb or Brush: To comb out the ends of your keychain for a frayed effect.
Basic Macrame Knots
For a macrame keychain, you'll need to know two basic macrame knots – the lark's head knot and the square knot. Here's a brief tutorial on how to make these knots:
Lark's Head Knot
- Fold your cord in half: This will create a loop at one end.
- Push the loop through your keyring: Ensure the two tail ends of your cord are still below the keyring.
- Bring the tails over the keyring and through the loop: Pull it tight, and you have your lark's head knot.
Square Knot
- Cross the left cord over the middle two cords and under the right cord.
- Take the right cord under the middle cords and through the loop on the left side.
- Pull it tight – that's the first half of your square knot.
- Now do the opposite – cross the right cord over the middle cords and under the left cord.
- Take the left cord under the middle cords and through the loop on the right side.
- Pull it tight, and you've completed your square knot.

Making Your Macrame Keychain
Now that we've got the basics covered, it's time to dive into creating your Macrame keychain. Follow these detailed steps:
Step 1: Cutting Your Cord
Cut four lengths of cord measuring around 30 inches each. This measurement will give you enough cord to work with for your knots and still have a bit left over to create a tassel at the end.
Step 2: Attaching the Cords to the Keyring
Take your first cord and fold it in half, creating a loop at the top. Slip this loop through the keyring, and then thread the ends of the cord through the loop, pulling tight to secure it to the ring. This is your lark's head knot. Repeat this with the remaining three cords.
Step 3: Making the Square Knots
Take your leftmost cord (your left working cord) and cross it over the two middle cords and under the rightmost cord (your right working cord). Next, take the right working cord, move it under the middle cords and up through the loop created by the left working cord. Pull both working cords tight to secure the first half of your square knot.
Repeat the process but reverse the roles of your cords: the right cord goes over the middle and under the left, the left cord goes under the middle and through the loop. Pull it tight to finish your square knot. Continue making square knots until you've reached your desired length.
Step 4: Finishing the Keychain
Once you've reached your desired length of square knots, it's time to finish off your keychain. Cut the ends of the cords to your desired length for the tassel, making sure they're even. Using your comb or brush, fray the ends of the cords to create a fluffy tassel effect.
Tips for Perfecting Your Macrame Keychain
To make your macrame keychain look professional and polished, keep these helpful tips in mind:
- Even Knotting: Ensure all your knots are of equal tightness for a consistent look. Loose or tight knots can make the pattern appear uneven.
- Cord Length: Always cut longer cords than you think you'll need. It's better to have excess cord that you can trim later than to run out mid-project.
- Fraying the Tassel: For a fuller tassel, spend extra time fraying the ends. The more you fray, the fluffier your tassel will be.
- Finishing Knot: Consider adding a finishing knot at the end of your keychain to secure the tassel and give a neat appearance.
- Customization: Feel free to experiment with different colors, knot patterns, and even adding beads to make your keychain uniquely yours.
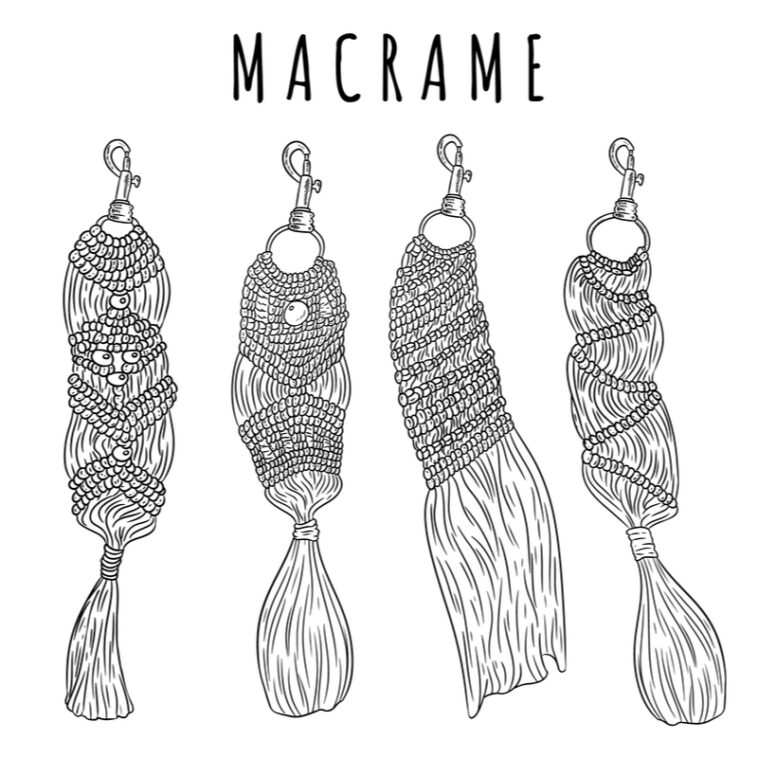
Macrame Keychain Variations
Once you've mastered the basic macrame keychain, consider trying these creative variations:
- Spiral Keychain: By alternating the starting cord of your square knots, you can create a lovely spiral effect.
- Beaded Keychain: Add wooden or glass beads in between your knots for an extra touch of creativity.
- Multi-Colored Keychain: Use different colored cords to create vibrant and eye-catching patterns.
- Tassel Keychain: Instead of just one tassel at the end, consider making several tassels along the length of the keychain.
- Feathered Keychain: Instead of a straight tassel, cut your cords into a feather shape for a unique finish.
Macrame Keychain Care and Maintenance
To ensure your macrame keychain lasts, follow these care and maintenance tips:
- Regular Cleaning: If your keychain becomes dirty, gently clean it with a mild soap and warm water. Avoid using harsh detergents that could damage the cord.
- Avoid Excessive Moisture: Although cotton cord is fairly durable, try to avoid getting your keychain excessively wet as this could weaken the cord over time.
- Regular Inspections: Check for any frayed knots or worn areas regularly. If you notice any damage, consider repairing or replacing the affected section.
- Proper Storage: If you're not using the keychain, store it in a cool, dry place out of direct sunlight. Sunlight can fade the colors of your cord.
- Cord Treatment: Some macrame cords may benefit from a fabric protectant spray to resist stains and water damage. Always test this on a small piece of cord first.
Troubleshooting Common Macrame Problems
If you're experiencing some challenges during your macrame keychain project, these detailed tips and tricks should prove useful:
- Managing Knot Tightness: If your knots are consistently too tight or loose, remember that practice makes perfect. Gradually, you'll learn to apply the right amount of tension while knotting to achieve consistent tightness. Consider practicing on spare cords to hone your technique without affecting your main project.
- Dealing with Twisted Cords: Twisted cords can disrupt your knotting flow and distort your pattern. Ensure you're working on a flat, clean surface to minimize cord tangling. If you notice a twist, take a moment to untwist your cords before proceeding. Regular checks can help keep your cords straight and your knots clean.
- Achieving Even Knots: Uneven knots can make your macrame keychain look inconsistent or misshapen. This often occurs when cords aren't lying flat while you're forming your knots. Prior to starting each knot, make a habit of arranging your cords neatly. This small step can have a significant impact on the evenness of your knots.
- Preventing Shortage of Cords Mid-Project: Running out of cords in the middle of your project can be a frustrating setback. To avoid this, always overestimate when cutting your cords. A good rule of thumb is to cut cords around four times the desired finished length for square knots. This allowance will cater for any misjudgments and ensure you have ample cord to complete your keychain.
- Correcting Pattern Errors: If your pattern doesn't seem correct, it's likely due to an error in your knotting sequence. It's important to remember that even a single reversed knot can disrupt your pattern. When in doubt, always double-check your knotting sequence before proceeding. If you discover a mistake, it's easier to correct it immediately rather than having to untie a series of knots later on.
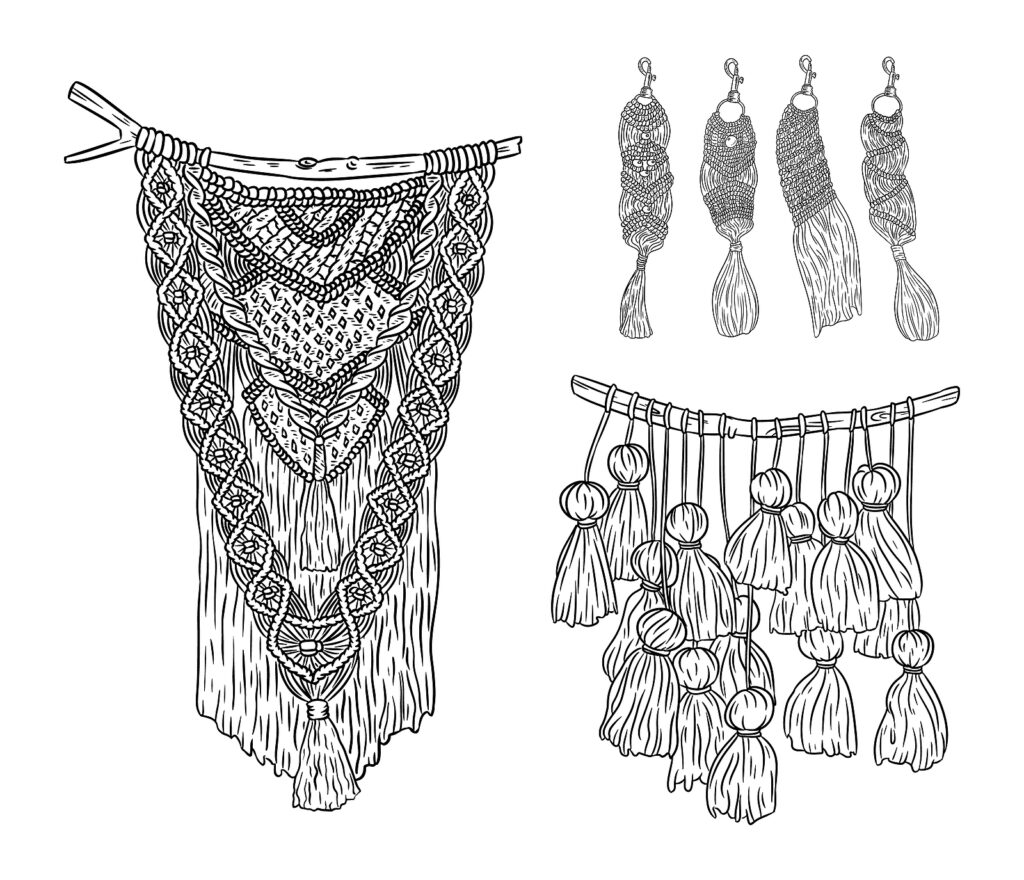
Expanding Your Macrame Skills
Once you have mastered the skill of making macrame keychains, you can challenge yourself with a variety of other intriguing projects that will further develop your macrame skills:
- Diving into Macrame Wall Hangings: Macrame wall hangings are highly sought-after pieces in home decor due to their versatility and visual appeal. The designs can vary from simplistic patterns to more intricate and complex works of art, each adding a unique touch to your home.
- Creating Macrame Plant Hangers: Turn your favorite plants into floating pieces of art with macrame plant hangers. Showcasing your plants in these handmade hangers adds a beautiful touch to any indoor or outdoor space, while also providing an aesthetically pleasing way to save floor space.
- Designing Macrame Jewelry: Why not wear your art? With your knotting skills, you can create unique pieces of jewelry like necklaces, bracelets, and earrings. Choose your own colors, beads, and charms to design unique pieces that reflect your personal style.
- Constructing a Macrame Bag or Purse: Take your macrame skills to a new level with a larger and more challenging project. A macrame bag or purse not only lets you practice various knotting techniques on a bigger scale, but also leaves you with a fashionable accessory that you can proudly say you made yourself.
- Building a Macrame Hammock or Chair: This is a project for the advanced macrame artist looking for a substantial challenge. Crafting a hammock or chair from macrame not only tests your skills and patience, but also rewards you with a functional piece of furniture. Just imagine the satisfaction of lounging on a piece of furniture you wove yourself!
Conclusion
And there you have it – your very own DIY macrame keychain! Not only is this project a fun and creative way to pass the time, but it also produces a practical item you can use every day or give as a thoughtful, handmade gift.
By mastering the art of macrame, you can create many other beautiful items, from wall hangings and plant hangers to jewelry. The possibilities are endless!