Christmas is a time of joy, celebration, and beautiful decorations. While traditional Christmas trees are popular, crafting your own DIY Christmas tree can add a unique touch to your holiday decor. Whether you have limited space, want to embrace sustainability, or simply enjoy the creative process, a DIY Christmas tree offers endless possibilities. In this detailed guide, we will explore various DIY Christmas tree ideas and provide step-by-step instructions to help you craft a stunning centerpiece for the holiday season.
DIY Christmas Tree
A DIY Christmas tree allows you to unleash your creativity and showcase your personal style while adding a festive touch to your home. By crafting your own tree, you have the freedom to choose the size, materials, and design that best suit your preferences. Whether you prefer a traditional or modern look, there are various DIY Christmas tree ideas that will bring holiday cheer to your space. Get ready to embark on a joyful crafting journey and create a one-of-a-kind Christmas tree that will become the centerpiece of your holiday decor.
Benefits of Crafting a DIY Christmas Tree
Crafting a DIY Christmas tree offers several advantages over traditional store-bought trees. Here are some key benefits:
- Creativity and Personalization: Crafting your own Christmas tree allows you to express your creativity and personalize it to match your unique style and home decor.
- Cost-Effective: DIY Christmas trees can be more budget-friendly compared to purchasing a traditional tree, especially if you use materials you already have or repurpose items.
- Sustainability: Crafting a DIY Christmas tree promotes sustainability by reducing the demand for natural or artificial trees. You can choose eco-friendly materials and reuse them in future years.
- Versatility: DIY Christmas trees offer versatility in terms of size, shape, and design. You can create a tree that fits perfectly in your space, whether you have limited room or want to make a bold statement.
- Memorable Experience: Crafting a DIY Christmas tree is a memorable experience that can be enjoyed with family and friends. It's an opportunity to bond, create traditions, and make lasting memories.
The benefits of crafting a DIY Christmas tree go beyond aesthetics, providing a fulfilling and meaningful experience during the holiday season.

Essential Supplies for DIY Christmas Tree Crafting
Before you start crafting your DIY Christmas tree, gather the essential supplies. The specific materials will depend on the chosen tree design, but here are some common supplies:
- Base Material: Choose a base material that suits your design, such as cardboard, wood pallets, books, fabric, or wall hanging materials.
- Measuring Tools: A ruler or tape measure will help ensure accurate dimensions for your tree.
- Cutting Tools: Depending on the chosen material, you may need scissors, a craft knife, a jigsaw, or a handsaw for cutting.
- Decorative Materials: Gather ornaments, lights, garlands, ribbons, and other decorations to adorn your DIY Christmas tree.
- Adhesive: Select an appropriate adhesive for securing the materials together, such as glue, hot glue gun, or tape.
- Paint and Brushes: If desired, prepare paint and brushes for adding color and patterns to your tree.
- Tree Topper: Consider a tree topper, such as a star, angel, or decorative object, to crown your DIY Christmas tree.
Remember to adapt the supplies based on the chosen DIY Christmas tree design to ensure a successful crafting experience.
DIY Christmas Tree Ideas
Now let's explore five creative DIY Christmas tree ideas that you can craft for your holiday decor:
1. Cardboard Christmas Tree
A cardboard Christmas tree is an excellent option for those seeking a lightweight, inexpensive, and eco-friendly alternative to traditional trees. Here's how to make a cardboard Christmas tree:
- Materials:
- Large cardboard sheets or boxes
- Craft knife or scissors
- Ruler
- Adhesive (glue or tape)
- Paint and brushes (optional)
- Decorations (ornaments, lights, garlands, etc.)
- Instructions:
- Draw a Christmas tree shape on the cardboard sheets or boxes.
- Use a craft knife or scissors to carefully cut out the tree shape.
- If desired, paint the tree with green or any preferred color. Allow it to dry.
- Decorate your cardboard tree with ornaments, lights, garlands, and other festive embellishments.
- Place the cardboard tree against a wall or attach it to a base for stability.
- Add a tree topper to complete the look.
A cardboard Christmas tree offers endless possibilities for creativity and can be easily customized to fit your space.
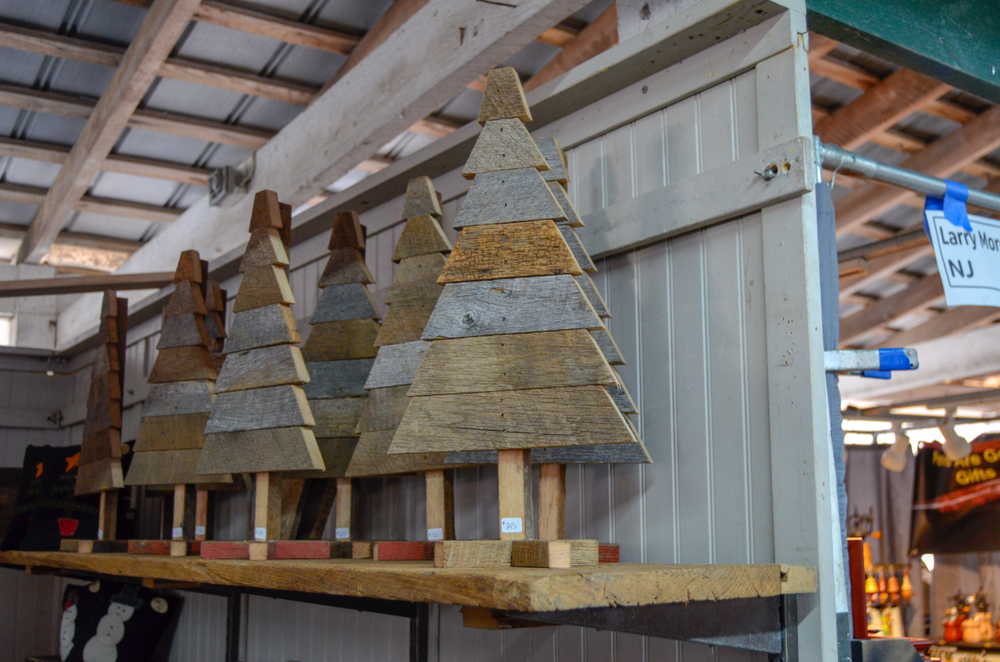
2. Wood Pallet Christmas Tree
If you prefer a rustic and charming Christmas tree, a wood pallet tree is an excellent choice. Here's how to create a wood pallet Christmas tree:
- Materials:
- Wooden pallet
- Saw or jigsaw
- Sandpaper
- Nails or screws
- Paint or wood stain
- Paintbrushes
- Decorations (ornaments, lights, garlands, etc.)
- Instructions:
- Disassemble the wooden pallet, separating the individual boards.
- Trim the boards to the desired lengths, decreasing in size from bottom to top to create a tree shape.
- Sand the boards to remove rough edges and create a smooth surface.
- Arrange the boards in a tree formation, starting with the longest at the bottom and gradually decreasing in length.
- Attach the boards together using nails or screws, ensuring stability.
- If desired, paint the boards in green or any preferred color, or apply wood stain to enhance the natural wood appearance.
- Decorate your wood pallet tree with ornaments, lights, garlands, and other festive decorations.
- Place the wood pallet tree against a wall or secure it with a stand for stability.
- Complete the tree by adding a tree topper of your choice.
A wood pallet Christmas tree adds a touch of rustic charm to your holiday decor and can be customized to fit your style.
3. Book Christmas Tree
For book lovers, a book Christmas tree combines the festive spirit with literary delight. Here's how to make a book Christmas tree:
- Materials:
- Sturdy hardcover books of varying sizes
- Hot glue gun or adhesive
- Decorations (ornaments, lights, ribbons, etc.)
- Tree topper (optional)
- Instructions:
- Collect hardcover books of varying sizes, with the largest at the bottom and the smallest at the top.
- Start by placing the largest book flat on a surface to serve as the base.
- Stack the subsequent books on top, gradually decreasing in size as you go up to create a tree shape.
- Use a hot glue gun or adhesive to secure the books together, ensuring stability.
- Decorate your book tree with ornaments, lights, ribbons, and other decorative elements.
- Add a tree topper, such as a miniature book or a literary-themed object.
A book Christmas tree is a whimsical and literary-inspired alternative that celebrates the joy of reading during the holiday season.
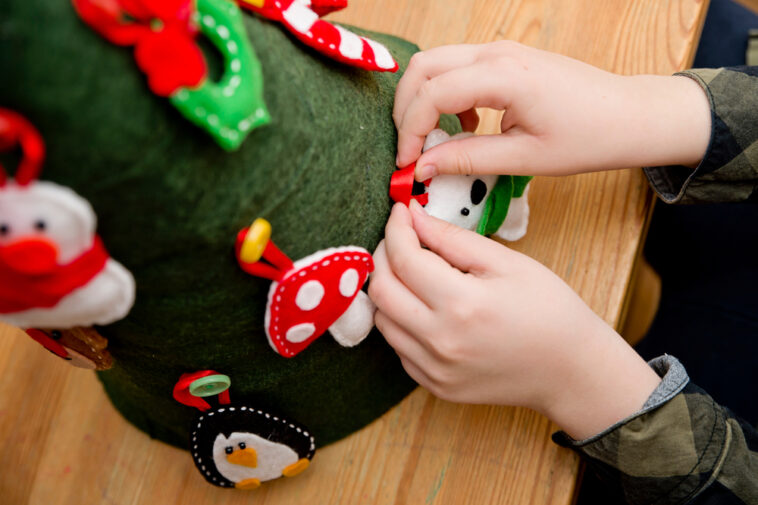
4. Wall Hanging Christmas Tree
If space is limited or you prefer a unique wall decor piece, a wall hanging Christmas tree is a creative choice. Here's how to create a wall hanging Christmas tree:
- Materials:
- Green felt or fabric
- Scissors
- Hot glue gun or adhesive
- Decorations (ornaments, lights, ribbons, etc.)
- Tree topper (optional)
- Instructions:
- Cut a large triangular shape from green felt or fabric, representing the Christmas tree.
- Use a hot glue gun or adhesive to attach the tree shape to the wall.
- Decorate your wall hanging tree with ornaments, lights, ribbons, and other festive decorations.
- Add a tree topper, such as a star or an angel, to complete the look.
A wall hanging Christmas tree is perfect for small spaces or as a unique focal point in your holiday decor.
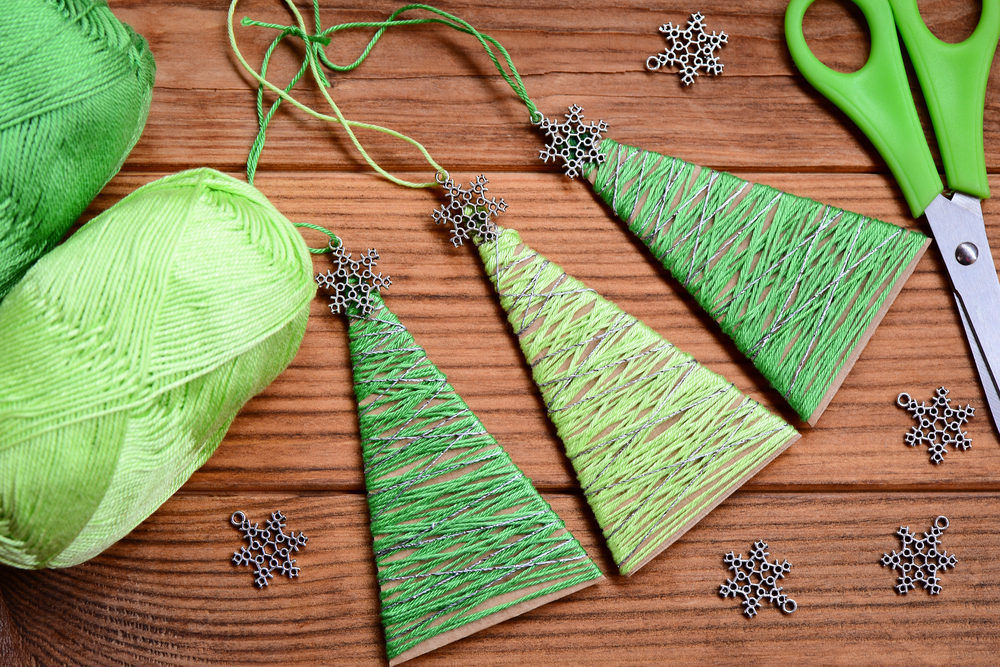
5. Fabric Christmas Tree
If you enjoy sewing and fabric crafts, a fabric Christmas tree offers a soft and cozy alternative. Here's how to make a fabric Christmas tree:
- Materials:
- Fabric of various colors and patterns
- Cardboard or foam cone
- Scissors
- Pins
- Needle and thread or sewing machine
- Decorations (buttons, ribbons, beads, etc.)
- Tree topper (optional)
- Instructions:
- Cut fabric into small squares or circles, varying in size and color.
- Starting from the base of the cardboard or foam cone, use pins or adhesive to attach the fabric pieces in layers, overlapping slightly.
- Continue layering the fabric pieces, gradually moving upward to create a tree shape.
- Secure the fabric pieces with pins or by sewing along the edges.
- Decorate your fabric tree with buttons, ribbons, beads, or other embellishments.
- Add a tree topper, such as a fabric bow or a decorative fabric object.
A fabric Christmas tree brings warmth and texture to your holiday decor and allows you to showcase your sewing skills.
Step-by-Step Instructions for Crafting a DIY Christmas Tree
Now that we've explored different DIY Christmas tree ideas, let's provide general step-by-step instructions for crafting a DIY Christmas tree, regardless of the specific design you choose:
- Plan Your Design: Determine the size, shape, and materials you'll use for your DIY Christmas tree. Consider the available space, your desired aesthetic, and the materials you have on hand.
- Gather Materials: Collect all the necessary supplies and materials based on your chosen DIY Christmas tree design. Ensure you have the tools, adhesive, decorations, and any additional components required.
- Prepare the Base: If applicable, prepare the base or structure for your tree. This may involve cutting, assembling, or preparing the base material, such as cardboard, wood pallets, books, fabric, or a wall hanging mount.
- Build the Tree Structure: Follow the specific instructions for your chosen DIY Christmas tree design to construct the tree structure. This may involve cutting, arranging, and securing the materials together using adhesive, screws, or other appropriate methods.
- Add Decorative Elements: Once the tree structure is complete, it's time to decorate your DIY Christmas tree. Add ornaments, lights, garlands, ribbons, and other festive decorations according to your personal style and preference.
- Personalize and Customize: Put your own creative touch on the tree by incorporating personal ornaments, handmade decorations, or sentimental items that hold special meaning to you and your family.
- Consider Safety: Ensure that the finished DIY Christmas tree is stable, especially if it will be placed in a high-traffic area. Take precautions to prevent it from tipping over, especially if you have young children or pets.
- Enjoy and Share: Once your DIY Christmas tree is complete, take a step back and admire your handiwork. Share the joy by inviting friends and family to enjoy your beautiful creation during the holiday season.
Remember, these step-by-step instructions serve as a general guide, and the specific process may vary depending on the chosen DIY Christmas tree design. Adapt the instructions to suit your project and let your creativity shine.
Decorating Your DIY Christmas Tree
Decorating your DIY Christmas tree is a delightful process that allows you to showcase your personal style and add a touch of magic to your holiday decor. Here are some decorating tips to consider:
- Lights: Wrap twinkling lights around your DIY Christmas tree to create a warm and festive ambiance.
- Ornaments: Hang ornaments of various shapes, sizes, and colors on the branches of your tree. Choose ornaments that reflect your personality, traditions, or themes that resonate with your family.
- Garlands: Drape garlands, such as tinsel, beads, or popcorn strings, around the tree for added texture and visual interest.
- Tree Skirt: Place a decorative tree skirt around the base of your DIY Christmas tree to conceal the support structure and create a polished look.
- Tree Topper: Crown your DIY Christmas tree with a tree topper of your choice, such as a star, angel, bow, or other decorative object that complements your tree's design.
Remember to balance the distribution of ornaments, lights, and decorations throughout the tree, and step back periodically to assess the overall appearance and make adjustments as needed.
Safety Considerations
While crafting and decorating your DIY Christmas tree, it's important to prioritize safety. Keep the following considerations in mind:
- Stability: Ensure that your DIY Christmas tree is stable and secure, especially if it's freestanding or placed in a high-traffic area. Consider using a sturdy base or anchoring it to prevent tipping.
- Fire Safety: If using lights, choose LED lights or ensure that traditional lights are in good working condition and comply with safety standards. Avoid leaving lights unattended and turn them off when you're away or asleep.
- Childproofing: If you have young children or pets, take extra precautions to prevent them from accessing or pulling down the tree. Avoid using small or fragile ornaments that could be a choking hazard.
- Electrical Safety: When connecting lights or other electrical components, follow proper electrical safety guidelines and avoid overloading electrical outlets.
By considering these safety measures, you can enjoy the holiday season with peace of mind and ensure a safe environment for everyone.
Conclusion
Crafting a DIY Christmas tree is a wonderful way to embrace creativity, personalize your holiday decor, and create lasting memories with your loved ones. Whether you opt for a cardboard tree, a wood pallet tree, a book tree, a wall hanging tree, or a fabric tree, the possibilities are endless. With a little imagination and some festive flair, you can create a unique Christmas tree that adds charm and joy to your home during the holiday season. So gather your supplies, invite your family and friends, and embark on a joyful journey of DIY Christmas tree crafting. Enjoy the process, embrace the holiday spirit, and let your creativity shine!