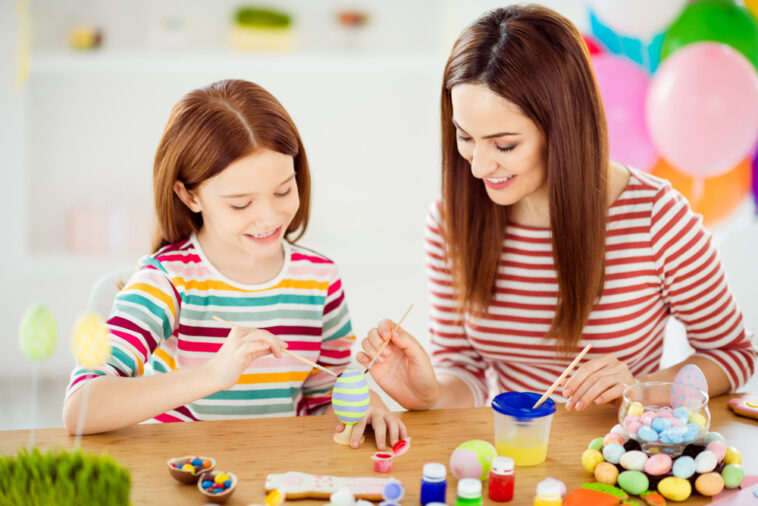
Crafting provides a wonderful opportunity for teenagers and their parents to engage in a fun and creative activity while strengthening their bond. Whether you're looking for a weekend project or a way to spend quality time together, exploring crafts offers endless possibilities. In this detailed blog post, we'll dive into a wide range of craft ideas that are perfect for teenagers and their parents. Get ready to unleash your creativity and create lasting memories through crafting!
Crafts for Teens and Their Parents
Crafting is not only a creative outlet but also a fantastic way for teenagers and parents to bond and create lasting memories together. It provides an opportunity to explore new skills, express individuality, and collaborate on unique projects. This blog post aims to inspire families with a diverse range of craft ideas suitable for teenagers and parents of all skill levels. So, gather your supplies, set aside some dedicated crafting time, and let the creative journey begin!
Benefits of Crafting for Teens and Parents
Crafting together offers numerous benefits for both teenagers and parents. Here are some advantages that make it a worthwhile activity:
- Quality Time and Bonding: Crafting provides an opportunity for teenagers and parents to spend quality time together, away from distractions. It fosters open communication, strengthens relationships, and creates a space for shared experiences and conversations.
- Boosts Creativity and Self-Expression: Engaging in crafts allows teenagers to explore their creativity, experiment with different mediums, and express themselves. Parents can also tap into their creative side, fostering a sense of self-expression and inspiring their teenagers to do the same.
- Enhances Problem-Solving and Critical Thinking: Craft projects often require problem-solving and critical thinking skills. Working together on a project encourages teenagers and parents to think creatively, find solutions, and overcome challenges.
- Builds Confidence and Self-Esteem: Successfully completing craft projects boosts self-confidence and self-esteem. Accomplishing a task together reinforces a sense of achievement, instilling a positive mindset in teenagers and reinforcing their abilities.
- Teaches Patience and Persistence: Crafting teaches patience and the value of perseverance. It encourages teenagers and parents to be patient with the creative process, learn from mistakes, and persist in achieving their desired outcomes.
- Promotes Relaxation and Stress Relief: Engaging in crafts provides a therapeutic and calming experience. It allows teenagers and parents to escape daily stresses, focus on the present moment, and enjoy a sense of relaxation and mindfulness.
Craft Ideas for Teens and Parents
Now, let's explore a variety of craft ideas suitable for teenagers and parents to enjoy together:
1. Painting and Drawing
- Collaborative Canvas Art: Work on a large canvas together, taking turns adding brushstrokes and creating a unique masterpiece.
- Watercolor Techniques: Experiment with various watercolor techniques, such as washes, gradients, or wet-on-wet painting, and create vibrant artworks.
- Zentangle Drawing: Explore the meditative art of Zentangle by creating intricate patterns and designs using black ink pens.
2. Jewelry Making
- Beaded Bracelets: Design and create personalized beaded bracelets using a variety of beads, charms, and string materials.
- Wire-Wrapped Pendants: Learn wire-wrapping techniques to make stunning wire-wrapped pendants using gemstone beads or crystals.
- Friendship Necklaces: Craft matching friendship necklaces using polymer clay, allowing each person to customize their pendant design.
3. DIY Home Decor
- Macrame Wall Hangings: Learn macrame techniques and create bohemian-inspired wall hangings to decorate any room in the house.
- Customized Throw Pillows: Transform plain throw pillows into unique pieces by adding fabric paint, embroidery, or applique designs.
- Photo Collage Frames: Design and assemble personalized photo collage frames using wooden frames, scrapbook paper, and family photos.
4. Scrapbooking and Memory Journals
- Family Scrapbook: Compile family photos, mementos, and handwritten notes into a beautiful scrapbook that captures cherished memories.
- Gratitude Journal: Create gratitude journals together, decorating the covers and writing down daily reflections and things to be grateful for.
- Travel Journal: Design personalized travel journals to document family trips, incorporating maps, ticket stubs, and handwritten entries.
5. Candle Making
- Scented Soy Candles: Explore the art of candle making by melting soy wax, adding fragrances, and pouring them into custom containers or molds.
- Decorative Candle Holders: Decorate plain glass candle holders using techniques like decoupage, painting, or etching to create unique designs.
6. Sewing and Embroidery
- Embroidered Tote Bags: Embellish plain canvas tote bags with embroidery designs, adding a personal touch to everyday accessories.
- Hand-Sewn Pouches: Learn basic hand-sewing techniques to create fabric pouches for storing small items or as personalized gifts.
- Upcycled Clothing: Revamp old garments together by adding fabric patches, embroidery, or trendy embellishments.
7. Pottery and Clay Crafts
- Handmade Ceramic Mugs: Attend pottery classes as a family and learn to handcraft ceramic mugs, adding personalized designs and glazes.
- Clay Sculptures: Sculpt unique clay figurines or animals using air-dry clay or polymer clay, allowing each person's creativity to shine.
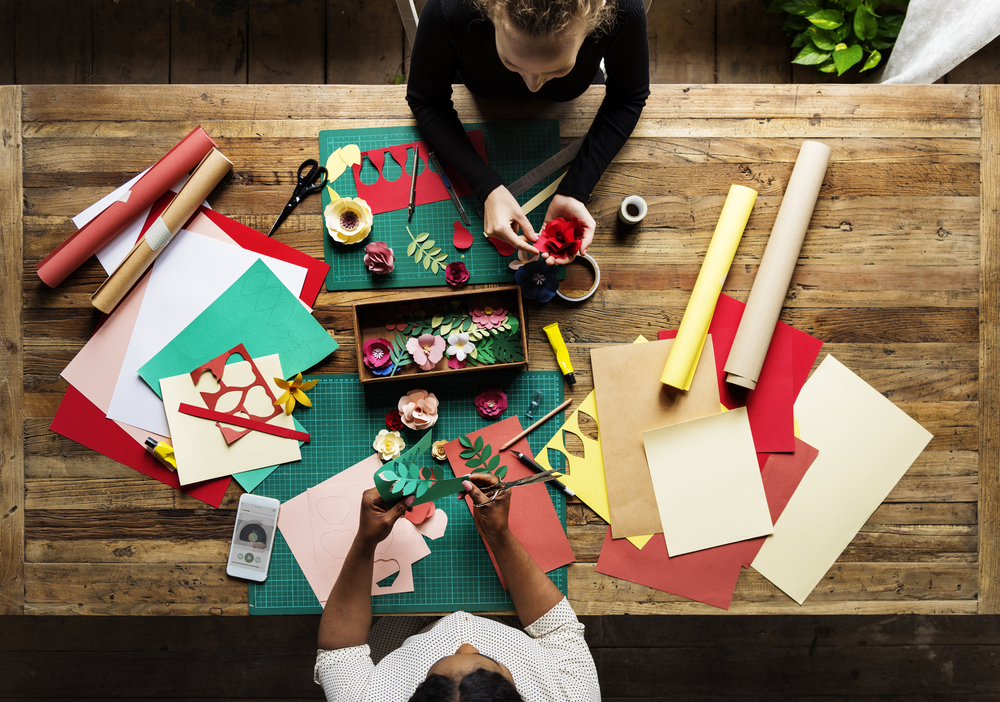
8. Paper Crafts
- Origami Creations: Learn origami techniques to create intricate paper models, such as animals, flowers, or geometric shapes.
- Handmade Greeting Cards: Design and craft personalized greeting cards for special occasions, incorporating paper quilling, stamping, or collage techniques.
- Paper Marbling: Experiment with paper marbling techniques using shaving cream or liquid paints, creating stunning patterns for various paper crafts.
9. Upcycling and Repurposing Projects
- Upcycled Planters: Repurpose old containers, such as tin cans or glass jars, by transforming them into unique planters for indoor or outdoor use.
- Repurposed Furniture: Give old furniture pieces a new lease on life by refinishing or repainting them, incorporating creative techniques like stenciling or distressing.
- Magazine Collage Art: Create collages using cut-out images and text from old magazines, transforming them into vibrant and eclectic art pieces.
10. Outdoor Nature Crafts
- Pressed Flower Art: Collect and press flowers to create beautiful pressed flower artwork, such as framed designs or personalized bookmarks.
- Nature-inspired Dream Catchers: Craft dream catchers using natural materials like twigs, feathers, and beads, incorporating elements found in nature.
- Bird Feeders: Build bird feeders using recycled materials, creating a welcoming space for birds and observing their visits.
Tips for Successful Crafting Sessions
To make your crafting sessions enjoyable and successful, consider the following tips:
- Plan Ahead: Discuss and decide on a craft project together, ensuring you have all the necessary materials and tools before starting.
- Create a Dedicated Space: Set up a designated crafting area with ample workspace and good lighting to create a comfortable environment for creativity.
- Encourage Creativity: Allow each person to express their individual creativity and ideas, embracing unique approaches and outcomes.
- Offer Guidance and Support: Help teenagers navigate new techniques and provide guidance, but also encourage them to explore and problem-solve independently.
- Celebrate Achievements: Celebrate each completed craft project, appreciating the effort, creativity, and time invested by each family member.
- Embrace Imperfections: Remember that crafting is about the process and enjoyment rather than achieving perfection. Embrace imperfections as part of the creative journey.
DIY Fashion and Accessories
- Tie-Dye Creations: Experiment with tie-dye techniques on clothing items like t-shirts, socks, or tote bags, creating vibrant and personalized fashion pieces.
- Embroidered Denim Jackets: Transform plain denim jackets by adding embroidered designs, names, or motifs, turning them into stylish and unique fashion statements.
- Beaded Hair Accessories: Design and create beaded hair clips, headbands, or hair ties, adding a touch of sparkle and individuality to everyday hairstyles.
- Customized Sneakers: Personalize plain white sneakers with fabric markers, paint, or fabric patches, expressing personal style and creativity with each step.
Recycled Crafts
- CD or Vinyl Record Art: Upcycle old CDs or vinyl records by turning them into wall art or unique decorative pieces using paint, decoupage, or other creative techniques.
- Magazine Coasters: Create coasters by rolling up and gluing strips of magazine pages, forming unique patterns and protecting surfaces in an eco-friendly way.
- Plastic Bottle Planters: Cut and decorate plastic bottles to transform them into quirky and colorful planters, repurposing materials and adding greenery to your space.
- Jar Lanterns: Repurpose glass jars into lanterns by painting them, adding fairy lights or candles, and creating a cozy and atmospheric ambiance for outdoor evenings.
Collaborative Art Projects
- Family Mural: Collaborate on a large-scale mural by dividing a wall into sections and assigning each family member a space to create their own artwork, resulting in a cohesive and visually stunning masterpiece.
- Storybook Illustrations: Create a storybook together, with each family member contributing their own illustrations to bring the story to life.
- Group Collage: Gather magazines, photographs, and other materials to create a collaborative collage that reflects each family member's interests, experiences, and personalities.
- Puzzle Piece Art: Each family member can decorate their own puzzle piece, and when combined, they form a larger artwork that symbolizes unity, togetherness, and the unique contributions of each family member.
Holiday and Seasonal Crafts
- Handmade Holiday Ornaments: Craft personalized ornaments for special occasions such as Christmas, Easter, or Halloween, using various materials like clay, felt, or recycled materials.
- Festive Wreaths: Create seasonal wreaths using natural materials like branches, flowers, or pinecones, decorating them with ribbons, ornaments, or themed accents.
- Holiday Greeting Cards: Design and craft handmade greeting cards for holidays and special occasions, incorporating techniques like paper cutting, quilling, or stamping.
- Seasonal Table Centerpieces: Construct unique and eye-catching centerpieces for your dining table using seasonal elements like flowers, foliage, or themed decorations.
Conclusion
Crafting for teenagers and their parents offers a fantastic way to bond, unleash creativity, and create lasting memories together. Whether you choose painting and drawing, jewelry making, DIY home decor, or any other craft category, the key is to enjoy the process and the time spent together. So gather your crafting supplies, choose a project that excites you, and embark on this creative adventure as a family. Let your imagination soar, and cherish the moments shared during your craft sessions.