Looking to add a unique and charming ambiance to your outdoor space or home decor? DIY beer bottle string lights are the perfect solution! These creative and eco-friendly lights combine the rustic charm of beer bottles with the warm glow of string lights, creating a captivating display that is both decorative and functional.
In this comprehensive guide, we'll take you through the step-by-step process of creating your own DIY beer bottle string lights, allowing you to illuminate your creativity and transform your space into a cozy and enchanting haven.
What is DIY Beer Bottle String Light?
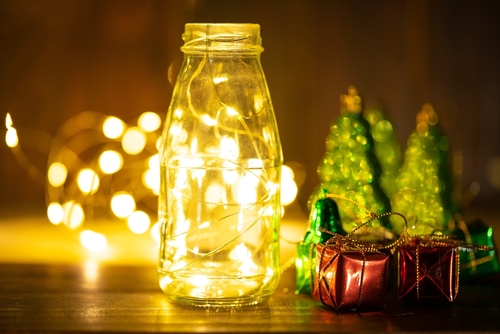
DIY Beer Bottle String Lights are a creative and eco-friendly lighting solution that involves repurposing empty beer bottles into decorative light fixtures. By drilling holes in the beer bottles and inserting string lights, you can transform them into enchanting and captivating light displays. The warm glow of the string lights illuminates the bottles, creating a cozy and charming ambiance in any space.
These DIY string lights are a popular choice for outdoor gatherings, patio decorations, home decor, and even special occasions. They offer a unique way to upcycle empty beer bottles, adding a touch of creativity and personalization to your lighting setup. With various design options and creative variations, you can customize the appearance of the beer bottle string lights to suit your style and preferences.
Materials and Tools
Before you start the DIY project, ensure you have all the necessary materials and tools ready for the task. Here's a detailed list of what you'll need:
Materials
- Empty beer bottles: Make sure the labels are removed, and the bottles are thoroughly cleaned to create a polished end product.
- String lights: LED lights are recommended for their energy efficiency and long-lasting durability, ensuring your project will shine brightly for a long time.
- Sandpaper or glass etching cream (for optional decoration): If you want to add decorative elements to your bottles, you can use sandpaper or glass etching cream to achieve the desired effect.
- Adhesive remover: In case the labels on your beer bottles are stubborn and challenging to remove, having adhesive remover on hand can make the process easier.
Tools
- Safety goggles: Protect your eyes from any potential hazards during the project.
- Gloves: Wear gloves to keep your hands safe and clean while handling glass and chemicals.
- Drill with a diamond drill bit: The size of the drill bit you need will depend on the diameter of the string lights you plan to insert into the bottles. Ensure you have the appropriate bit for a precise fit.
- Tape measure or ruler: Accurate measurements are essential for ensuring the string lights fit snugly into the bottles.
- Marker or pen: Use these to mark the drilling points on the bottles accurately.
- Sandpaper or emery cloth: If you choose to decorate your bottles, these materials will help you achieve the desired finish.
- Sponge or cloth: If you decide to use glass etching cream for decoration, you'll need a sponge or cloth to apply it evenly.
- Safety pin or wire (for poking holes in the bottle caps, if necessary): Some bottle caps may need holes for threading the string lights, and a safety pin or wire can be helpful for this task.
- Wire cutter or scissors (for cutting the string lights, if needed): You may need to adjust the length of the string lights to fit the bottles properly, so keep wire cutters or scissors on hand for this purpose.
Preparing the Beer Bottles
Properly preparing your beer bottles is crucial to ensure the success and longevity of your DIY beer bottle string lights. Here are detailed steps to guide you through the preparation process:
Cleaning
Begin by thoroughly rinsing the beer bottles to remove any residual liquid or debris. Pay special attention to the interior of the bottles as well. If the labels on the bottles are stubborn and challenging to remove, consider soaking the bottles in warm soapy water for an extended period or use a specialized adhesive remover to loosen them. After soaking, gently scrub the bottles with a sponge or cloth to ensure they are clean and free from any lingering adhesive or label remnants. This step is essential for a polished and pristine finished product.
Optional Decoration
If you wish to personalize your beer bottle string lights, you can take this opportunity to decorate the bottles. Two popular decorative options are sanding and glass etching cream:
- Sanding: To create a frosted or textured effect on the bottles, lightly sand the surface using sandpaper. This technique can give your string lights a unique and diffused glow. Be cautious not to overdo it, as excessive sanding may weaken the glass.
- Glass Etching Cream: For a more intricate and artistic touch, consider using glass etching cream. Follow the manufacturer's instructions carefully to etch designs or patterns onto the bottles. This method allows you to add a personalized and elegant touch to your string lights.
Drying
After cleaning and decorating (if desired), it's crucial to let the beer bottles dry completely before moving on to the next phase. Ensure that there is no moisture or water residue inside the bottles, as even a small amount can affect the integrity and longevity of the string lights. Placing the bottles upside down on a clean and dry surface for several hours or overnight is an effective way to ensure they are thoroughly dry.
Drilling the Holes
When embarking on the creative project of turning beer bottles into charming string light holders, drilling the holes to accommodate the lights is a critical step. Here, we provide a detailed guide with safety precautions and step-by-step instructions to help you achieve the best results:
Safety Precautions:
- Protective Gear: Always prioritize safety. Before starting, don safety goggles and gloves to shield yourself from potential injuries.
- Location: Work in a well-ventilated area or outdoors to minimize the risk of inhaling glass dust or debris.
Choosing the Right Drill Bit:
- Opt for a diamond drill bit that matches the diameter of your string lights. Diamond drill bits are the preferred choice for drilling into glass as they ensure clean and precise holes.
Marking Hole Placement:
- Measure and Plan: Begin by measuring and marking the desired location for the hole on the bottom of each beer bottle. Consider the size of the hole carefully, ensuring it's large enough for the string lights to pass through but small enough to hold the lights securely.
- Center Marking: To maintain symmetry, it's recommended to mark the center of the bottle's bottom as the starting point for your hole.
The Drilling Process:
- Steady Setup: Position the beer bottle on a stable surface to prevent wobbling or slipping during drilling.
- Slow Start: Begin drilling at a slow speed. Applying gentle and even pressure, keep the drill perpendicular to the bottle's surface.
- Patience is Key: Continue drilling steadily until you successfully penetrate the glass. It's essential to avoid rushing and to maintain a steady hand throughout this process.
- Avoid Excessive Force: Be cautious not to exert excessive force, as this could cause the bottle to crack or shatter. Let the drill bit do the work.
Finishing Touches:
- Clearing Debris: After successfully drilling the hole, remove any glass debris or shards from both the interior and exterior of the bottle.
- Smooth Edges: To ensure the edges of the hole are safe to handle, gently sand them using sandpaper or emery cloth. This step guarantees a polished and secure finish to your project.
Adding the String Lights
Now that you've successfully drilled holes in your beer bottles, let's move on to the next exciting step of transforming them into enchanting light fixtures with string lights. Here's a detailed guide to help you through the process:
Preparing the String Lights
Before you start, unroll the string lights and carefully inspect them for any damaged or non-working bulbs. If you come across any issues, refer to the manufacturer's instructions to replace the faulty bulbs with new ones. Ensuring that all the bulbs are in good working condition is essential for a seamless lighting display.
Inserting the Lights
With your beer bottles ready, it's time to add the magical illumination. Begin at the bottom of each beer bottle and thread the string lights through the pre-drilled holes. Exercise caution and take your time to gently push the lights through the openings. It's important not to force them or inadvertently damage the delicate glass bottles during this step.
Arranging the Lights
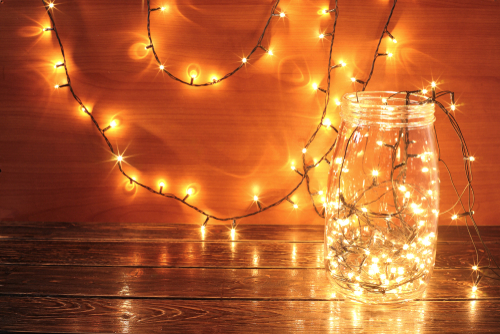
While threading the lights through each bottle, consider the desired arrangement and spacing. You have the creative freedom to decide whether you want the lights to be snugly packed inside the bottles, creating a mesmerizing and cozy glow, or if you prefer a more dispersed illumination by spacing them out. Experiment with different patterns and designs to achieve the ambiance you envision.
Securing the Lights
To ensure that the string lights stay securely in place within the beer bottles, there are a couple of effective methods you can employ. You can tie a small knot at the base of each light on the inside of the bottle, which will prevent them from slipping out. Alternatively, you can use a drop of hot glue around the base of each light for added security. This step not only helps keep the lights in position but also adds a touch of durability to your DIY project.
Hanging and Displaying the Beer Bottle String Lights
Now that your beer bottle string lights are ready, it's time to hang and display them creatively. Consider the following options:
- Outdoor Spaces: Create a cozy and inviting atmosphere on your patio, deck, or garden by hanging the beer bottle string lights along fences, trellises, or tree branches. Use zip ties, hooks, or adhesive clips to secure the lights in place.
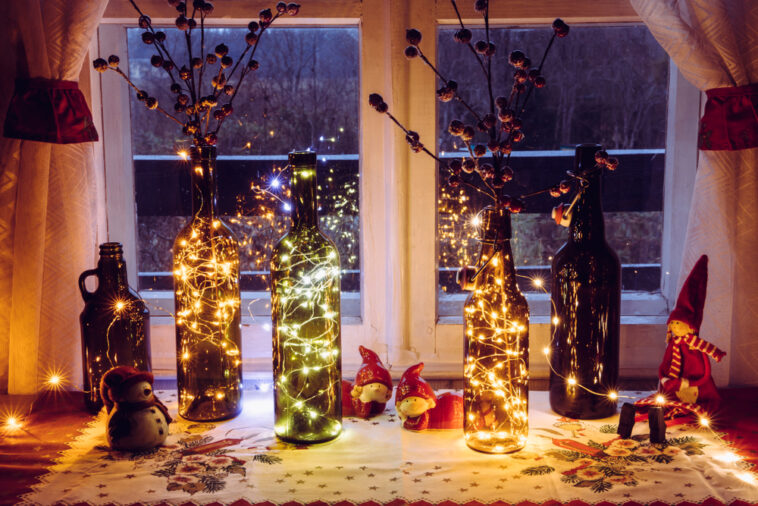
- Indoor Decor: Add a touch of charm to your home interior by displaying the beer bottle string lights on mantels, shelves, or as a centerpiece on your dining table. Arrange them creatively, using decorative items like books, vases, or planters to complement the ambiance.
- Special Occasions: Make your celebrations memorable by incorporating beer bottle string lights into your event decor. Whether it's a wedding, birthday party, or festive gathering, hang the lights across the venue or use them as table centerpieces to create a captivating and magical atmosphere.
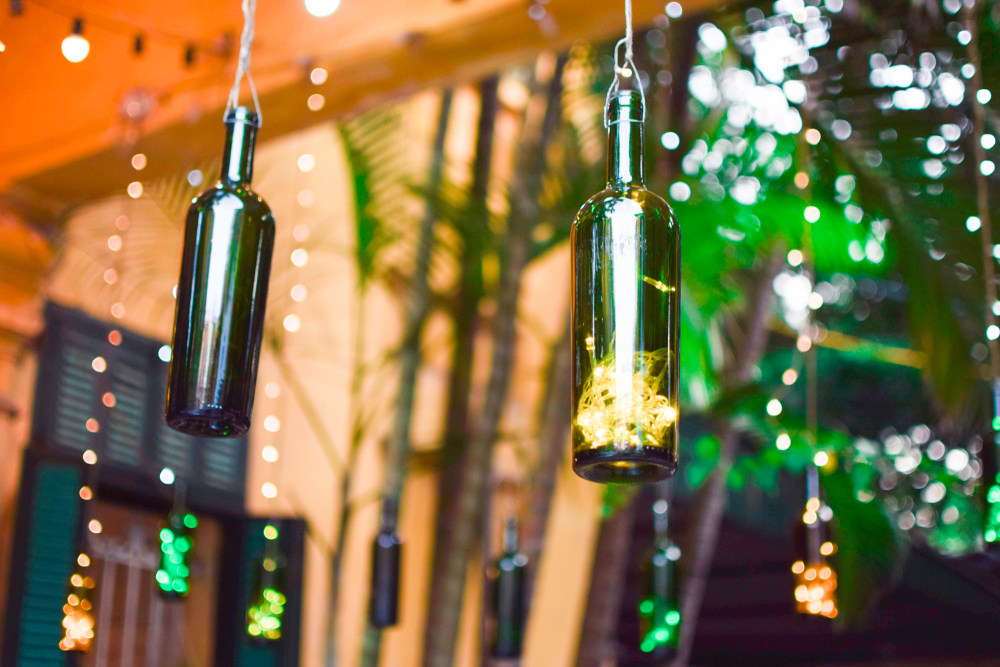
- Creative Installations: Let your imagination run wild and experiment with unique installations. For example, suspend the beer bottle string lights vertically to create a cascading curtain effect or hang them in patterns and shapes that suit your style and taste.
- DIY Chandeliers: Take your beer bottle string lights to the next level by crafting a stunning DIY chandelier. Attach the bottles to a wooden frame or metal hoop, and hang it from the ceiling for a statement piece that will mesmerize your guests.
Remember to ensure a safe and sturdy installation when hanging the beer bottle string lights. Securely fasten them using appropriate hooks, clips, or fasteners, and check for any potential hazards or loose connections regularly.
Maintenance and Safety Tips
Maintaining your beer bottle string lights is not only essential for their longevity but also crucial for ensuring the safety of your decorative lighting setup. Here's a comprehensive guide that provides additional information on maintenance and safety:
Cleaning and Care
To keep your beer bottle string lights looking their best, perform regular maintenance. Dust the beer bottles gently and wipe them down with a damp cloth to remove any accumulated dirt or debris. It's important to avoid using harsh chemicals or abrasive materials that could scratch or damage the glass bottles or affect the lights' appearance.
Weather Protection
If you plan to use your beer bottle string lights outdoors, it's vital to consider weather protection. Ensure that the string lights you choose are either weatherproof or shielded from the elements. Carefully review the manufacturer's specifications to confirm their suitability for outdoor use. Additionally, consider placing them under a covered area or using outdoor-rated string lights designed to withstand various weather conditions.
Electrical Safety
Prioritize electrical safety when connecting your string lights to a power source. Use a Ground Fault Circuit Interrupter (GFCI) outlet or an extension cord with GFCI protection to minimize the risk of electrical hazards, especially when used outdoors. Avoid overloading electrical circuits, as this can lead to overheating and potential fire hazards.
Unsupervised Operation
It's crucial never to leave your beer bottle string lights unattended while they are illuminated. Turning off the lights when you leave the area or when going to bed is a responsible safety measure. This practice helps minimize the risk of fire accidents or any unforeseen incidents that may occur when the lights are left on without supervision.
Replacing Bulbs
Over time, individual bulbs may burn out or malfunction. When this happens, replace the faulty bulb promptly with one of the same wattage and type. Consistently using the correct replacement bulbs ensures that your string lights maintain their overall performance and aesthetic appeal.
Creative Variations and Ideas
While beer bottle string lights in their basic form are undeniably captivating, you can take their visual appeal to the next level by exploring a variety of creative variations and ideas:
Colorful Bottles
To infuse your string lights with vibrancy and diversity, consider using beer bottles in a range of different colors. Experiment with amber, green, or even colored glass bottles to create a unique and eye-catching display. This variation can add a playful and lively atmosphere to your space.
Patterned Bottles
Elevate the artistic dimension of your beer bottle string lights by applying adhesive stencils or using glass paint to craft intricate patterns or designs on the bottles before inserting the string lights. This personal touch not only adds a dose of creativity but also allows you to tailor the lights to match your style and decor theme.
Themed Displays
Customize your beer bottle string lights to suit specific themes or occasions. For instance, for a gathering of beer enthusiasts, utilize craft beer bottles to evoke a beer-centric ambiance. Alternatively, decorate the bottles with seasonal motifs, such as pumpkins for Halloween or festive designs for Christmas, to create a captivating atmosphere during special occasions.
Mixing Light Colors
Experiment with different colored string lights to create a captivating and multicolored effect. Mix warm white, cool white, or even colored LED lights to align with your desired ambiance. This variation adds a dynamic and playful element to your beer bottle string lights, allowing you to adapt the lighting to various moods and settings.
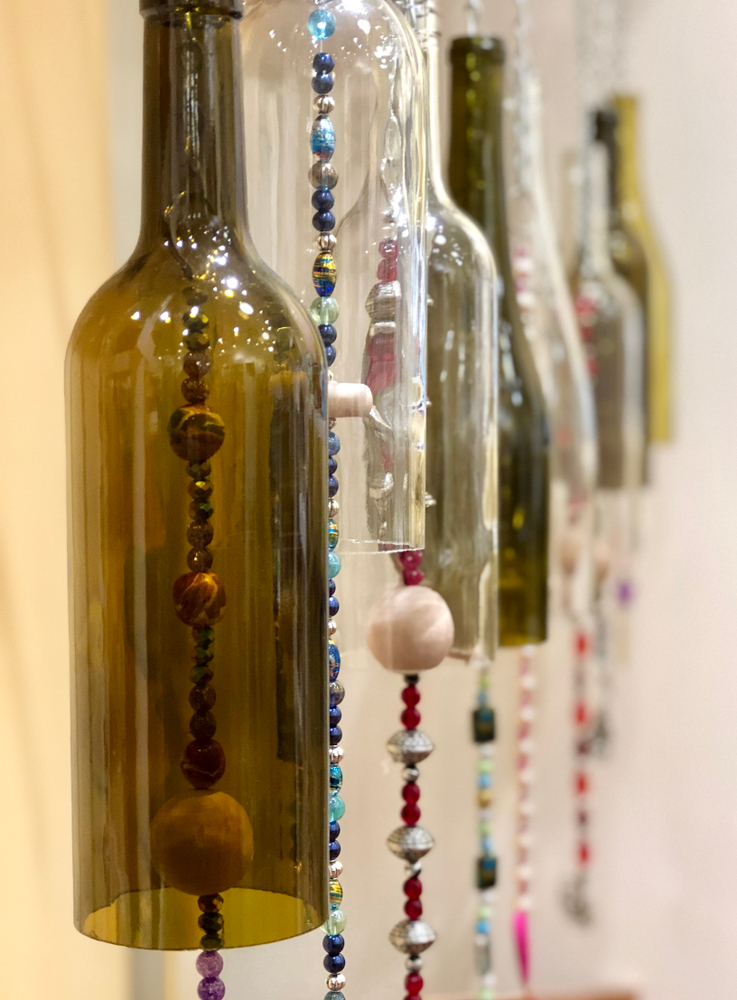
Upcycled Bottles
Go beyond traditional beer bottles and explore the world of upcycling by repurposing wine bottles, soda bottles, or other glass containers for your string lights. This not only introduces variety into your display but also promotes an eco-friendly approach to lighting decor. Embracing upcycled bottles allows you to craft a unique and environmentally conscious lighting arrangement that stands out in any space.
Conclusion
Congratulations! You have now mastered the art of creating your own DIY beer bottle string lights. With just a few simple steps, you can transform empty beer bottles into captivating and enchanting light fixtures that add warmth and character to any space. From outdoor gatherings to cozy indoor decor, these homemade string lights provide a unique and eco-friendly way to illuminate your creativity.
Remember to exercise caution and prioritize safety when handling the beer bottles, drilling the holes, and installing the string lights. Regular maintenance and adherence to electrical safety guidelines will ensure that your beer bottle string lights remain a delightful and safe addition to your surroundings.