15 Woodworking Projects for Beginners
Woodworking is a rewarding and fulfilling hobby that allows you to create beautiful, functional pieces from scratch. Whether you're a complete novice or have some basic skills, there are plenty of woodworking projects that are perfect for beginners. In this detailed guide, we'll explore 15 simple and enjoyable woodworking projects that will help you develop your skills, unleash your creativity, and produce unique pieces that you can proudly showcase in your home or give as heartfelt gifts.
Introduction to Woodworking
Woodworking is the art of creating objects from wood using various tools and techniques. It's a craft that has been practiced for centuries and offers a sense of accomplishment and satisfaction as you transform raw materials into functional or decorative pieces.
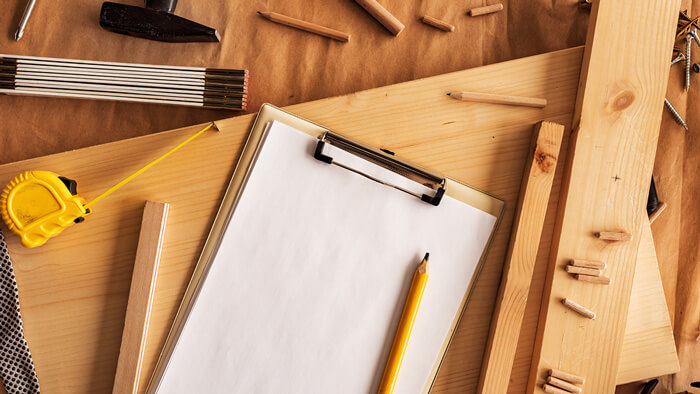
Essential Tools for Beginners
To get started with woodworking, you'll need a few basic tools. Here are the essential tools for beginners:
- Workbench: A sturdy workbench provides a stable surface for your projects.
- Measuring Tools: Invest in a tape measure, combination square, and a speed square for accurate measurements.
- Hand Tools: Essential hand tools include a chisel set, mallet, coping saw, block plane, and a set of screwdrivers.
- Power Tools: Start with a drill/driver, jigsaw, and orbital sander. These versatile power tools will handle a wide range of woodworking tasks.
- Safety Gear: Always prioritize safety by wearing protective gear, including safety glasses, hearing protection, and a dust mask.
Wood Selection and Preparation
Choosing the right wood for your projects is crucial. Softwoods like pine and cedar are great for beginners due to their affordability and ease of working. Hardwoods like oak and maple offer durability and beauty but may require more advanced techniques.
Before working with wood, it's important to prepare it properly. This involves cutting it to size, planing the surfaces, and sanding to achieve a smooth finish.
Safety Precautions
Woodworking involves working with sharp tools and potentially dangerous machinery. Prioritize safety by following these precautions:
- Wear Protective Gear: Use safety glasses, hearing protection, and a dust mask to protect yourself from flying debris and harmful dust particles.
- Keep Your Workspace Organized: A clean and organized workspace reduces the risk of accidents and allows you to work more efficiently.
- Use Tools Properly: Read and understand the manufacturer's instructions for all tools and machinery. Always use them as intended.
- Take Your Time: Rushing through a project can lead to mistakes and accidents. Practice patience and focus on each step.
Now that we've covered the basics, let's explore 15 woodworking projects that are perfect for beginners.
15 Woodworking Projects for Beginners
Project 1: Rustic Wooden Picture Frame
Creating a personalized picture frame adds a unique touch to your cherished photographs. Follow these detailed steps to build a rustic wooden picture frame:
- Gather Your Materials:
- Wood: Choose a suitable wood type, such as pine or oak, with dimensions appropriate for your desired frame size.
- Miter Saw: Use a miter saw to cut the wood pieces at 45-degree angles to form the frame corners.
- Sandpaper: Prepare different grits of sandpaper (e.g., 120, 220, and 320) to smooth the wood surfaces.
- Wood Glue: Use wood glue to join the frame corners securely.
- Clamps: Apply clamps to hold the frame together while the glue dries.
- Stain or Paint: Select a stain or paint color to achieve the desired rustic look.
- Varnish or Sealant: Apply a varnish or sealant to protect the wood and enhance its appearance.
- Measure and Cut the Wood:
- Measure the dimensions of the photo or artwork you intend to display in the frame.
- Add an additional 1/4 inch to each side to create an overlap for the photo to fit snugly.
- Use a miter saw to cut the wood pieces at a 45-degree angle to create the frame corners.
- Ensure that the opposite sides of the frame are of equal length.
- Sand the Wood:
- Begin with a coarse-grit sandpaper (around 120) to remove any rough edges or splinters.
- Gradually move to finer-grit sandpapers (220 and 320) to achieve a smooth and polished finish.
- Pay attention to the corners and edges to ensure they are rounded and free of sharp edges.
- Assemble the Frame:
- Apply a thin layer of wood glue to the mitered ends of the wood pieces.
- Join the corners of the frame, making sure the angles align correctly.
- Use clamps to hold the frame securely while the glue dries, following the manufacturer's instructions.
- Apply the Finish:
- Choose a stain or paint color that complements your desired rustic aesthetic.
- Apply the stain or paint evenly using a brush or cloth, following the product instructions.
- Allow the stain or paint to dry completely before proceeding to the next step.
- Protect and Enhance the Frame:
- Apply a layer of varnish or sealant to protect the wood from moisture and enhance its appearance.
- Use a brush to apply the varnish or sealant evenly, following the product instructions.
- Allow the frame to dry completely before inserting your photo or artwork.

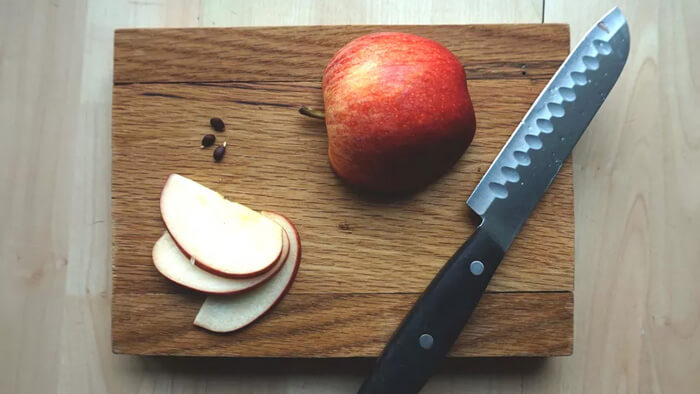
Project 2: Simple Cutting Board
- Gather Your Materials: Collect wooden strips of your choice, such as maple, walnut, or cherry. Ensure the strips are of equal thickness and approximately the same length. You will also need food-safe wood glue, clamps, sandpaper, and a food-grade finish.
- Prepare the Wood Strips: Using a table saw or miter saw, cut the wooden strips to the desired length and width. Aim for a thickness of around ¾ inch for a sturdy cutting board.
- Arrange the Strips: Lay out the wooden strips side by side, arranging them in the desired pattern or alternating colors for a visually appealing design.
- Glue the Strips: Apply a thin, even layer of food-safe wood glue to the edges of the wooden strips. Press them together firmly, ensuring they are aligned. Use clamps to hold the strips in place as the glue dries. Follow the manufacturer's instructions for drying time.
- Remove Excess Glue: Once the glue has dried, carefully remove any excess glue from the surface of the cutting board using a scraper or chisel. This step is essential to achieve a smooth, even surface.
- Sand the Surface: Use progressively finer grits of sandpaper to sand the entire surface of the cutting board. Start with a coarse grit to remove any roughness or unevenness, then move to finer grits for a smooth finish. Sand in the direction of the grain to avoid scratches.
- Apply a Food-Safe Finish: To protect the wood and make it safe for food contact, apply a food-grade finish. Mineral oil or a food-grade cutting board oil are popular choices. Follow the manufacturer's instructions for application and drying time. Apply multiple coats if necessary, allowing each coat to dry completely before adding the next.
- Final Touches: Once the finish has dried, inspect the cutting board for any rough edges or imperfections. Use sandpaper to smooth out any remaining rough spots.
Project 3: Elegant Wine Rack
Follow these detailed steps to build a customized wine rack:
- Plan Your Design: Determine the size and capacity of your wine rack based on the number of bottles you want to store. Consider the available space in your home and any specific design preferences you have.
- Choose Your Wood: Select a high-quality wood that complements your interior decor. Popular choices include hardwoods like oak, walnut, or cherry. Ensure that the wood is properly kiln-dried to prevent warping or splitting.
- Measure and Cut the Wood: Use precise measurements to mark and cut the wooden pieces for the wine rack. A miter saw or circular saw can help achieve accurate cuts. Remember to account for the thickness of the wood when determining the dimensions of the wine bottle slots.
- Sand and Smooth the Wood: Use sandpaper or a sanding block to smooth any rough edges or surfaces. Sanding will create a clean and polished look for your wine rack.
- Assemble the Wine Rack: Begin by arranging the cut pieces according to your design plan. Use wood glue and clamps to secure the joints, ensuring a strong bond. Consider adding screws or nails for extra reinforcement.
Project 4: Decorative Wooden Shelf
To get started, follow these step-by-step instructions:
- Plan Your Design: Determine the dimensions and style of your shelf. Consider the available space and the items you plan to display. Sketch out your design or find inspiration from woodworking resources.
- Gather Your Materials: Select high-quality wood that suits your preferences. Common choices include pine, oak, or birch. Choose a finish that matches your desired aesthetic, such as natural, stained, or painted.
- Prepare the Wood: Measure and mark the wood according to your design. Use a saw to cut the pieces to the desired lengths and angles. Ensure that the edges are smooth and even.
- Assemble the Shelf: Begin by attaching the shelf supports to the wall using screws and wall anchors. Position them securely and level using a spirit level. Next, attach the shelf itself to the supports, ensuring it is level and centered. Use screws or nails for this step.
- Sand and Finish: Sand the wooden surfaces to achieve a smooth finish. Start with coarse-grit sandpaper and gradually move to finer-grit sandpaper for a polished look. Wipe away any dust and apply your chosen finish, whether it's a clear sealant, paint, or stain. Follow the manufacturer's instructions for application and drying times.
- Mount the Shelf: Once the finish is dry, carefully mount the assembled shelf onto the supports. Double-check that it is level and securely attached.
- Decorate and Enjoy: Now comes the fun part! Arrange your small objects, books, or decorative items on the shelf. Play with different arrangements and take pride in your unique display.
Project 5: Wooden Plant Stand
- Determine the Dimensions: Consider the size and weight of your plants to determine the appropriate dimensions for your plant stand. Measure the width and depth required to comfortably accommodate your plant pots.
- Choose the Wood: Select a type of wood that suits your aesthetic preferences and budget. Popular options include pine, oak, or birch plywood. Ensure the wood is sturdy enough to support the weight of your plants.
- Plan the Design: Sketch out different design ideas, considering the overall style of your space. Decide on the height and shape of your plant stand—whether you prefer a simple, straight stand or a more elaborate design with multiple tiers or angles.
- Gather the Materials: Once you have your design finalized, gather the necessary materials. This may include wood boards, screws, wood glue, a saw, sandpaper, and a drill.
- Cut the Wood: Use the measurements from your design to cut the wood into the appropriate pieces. Take care to make accurate and clean cuts for a professional finish.
- Assemble the Plant Stand: Begin by constructing the base or legs of the plant stand. Use wood glue and screws to secure the pieces together. Make sure the joints are tight and stable.
Project 6: Personalized Wooden Coasters
Create your own unique and personalized wooden coasters with this fun and customizable woodworking project. Follow these steps:
- Gather Materials: Collect small wood slices or square pieces, sandpaper, wood stain or paint, and protective finish.
- Prepare the Wood: Sand the wood pieces to smooth out any rough edges and create a clean surface.
- Design Personalization: Get creative with your coaster designs. Consider using stencils, freehand drawing, or even engraving techniques to add personalized patterns, names, or images.
- Apply Stain or Paint: Apply wood stain or paint to enhance the natural beauty of the wood or add vibrant colors to match your decor. Allow it to dry completely.
- Protective Finish: Apply a protective finish, such as polyurethane or varnish, to seal the wood and protect it from moisture and spills. Follow the manufacturer's instructions for application and drying times.
- Add Felt Pads: Attach adhesive felt pads to the bottom of each coaster to prevent scratches on surfaces and provide stability.
- Enjoy and Gift: Once your personalized wooden coasters are complete, use them in your home or give them as thoughtful and unique gifts to family and friends.
Project 7: Small Storage Box
- Gather Materials: Collect the necessary materials, including wood panels, hinges, screws, and a latch.
- Measure and Cut: Measure and mark the dimensions for your box sides, bottom, and lid. Use a saw or a suitable cutting tool to carefully cut the pieces to size.
- Assemble the Box: Begin by attaching the sides to the bottom piece. Use wood glue and secure the joints with screws for added strength.
- Add the Lid: Create a hinged lid by attaching hinges to the back of the box and lid. Ensure the lid opens smoothly and stays open when needed.
- Finishing Touches: Sand the surfaces to achieve a smooth finish. Apply your choice of wood stain or paint to enhance the box's appearance and protect it from wear and tear.
- Attach a Latch: Install a latch or clasp on the front of the box to keep it securely closed.
Project 8: Adirondack Chair
Build a timeless Adirondack chair to enhance your outdoor space. Follow these steps to create your own:
- Gather Materials: Collect the necessary materials, including wood boards, screws, and waterproof adhesive.
- Obtain Detailed Plans: Find detailed plans for an Adirondack chair that provide precise measurements and assembly instructions.
- Measure and Cut Wood: Use the plans as a guide to measure and cut the wooden pieces according to the specified dimensions.
- Prepare Chair Components: Sand the edges and surfaces of the wooden pieces to ensure a smooth finish. Pre-drill holes for screws to prevent wood from splitting.
- Assemble the Chair: Follow the step-by-step instructions provided in the plans to assemble the chair components. Use waterproof adhesive and screws to securely attach the pieces together.
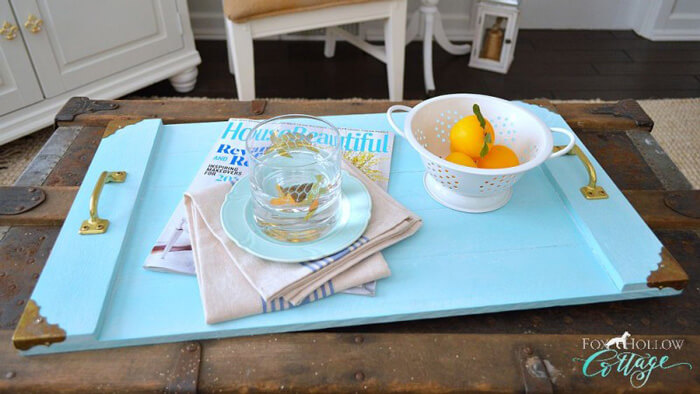
Project 9: Wooden Serving Tray
- Gather Materials: Collect the necessary materials, including wooden boards, screws, wood glue, and handles. Choose wood that suits your aesthetic preferences and desired tray size.
- Measure and Cut: Measure and mark the dimensions of the tray base on the wooden boards. Use a saw to carefully cut the boards to the desired size.
- Assemble the Base: Apply wood glue to the edges of the boards and carefully align them. Secure the boards together with screws to create the tray base.
- Attach Handles: Position the handles on opposite sides of the tray. Mark the screw hole locations and drill pilot holes. Attach the handles securely using screws.
- Finishing Touches: Sand the surface of the tray to create a smooth, even finish. Apply a food-safe finish or sealant to protect the wood and enhance its appearance.
- Optional Additions: For added flair, you can personalize the tray with decorative elements like woodburning designs or inlay work.
Project 10: Floating Wall Shelves
- Measure and Plan: Determine the desired length and number of shelves you want to install. Measure the wall space to ensure a proper fit.
- Gather Materials: Collect the necessary materials, including wood boards for the shelves, brackets for mounting, screws, a level, a drill, and a stud finder.
- Cut the Shelves: Using a saw or having your local hardware store cut the boards to the desired length. Sand the edges for a smooth finish.
- Attach Mounting Brackets: Install the mounting brackets on the back of each shelf according to the manufacturer's instructions. Ensure the brackets are level and securely attached.
- Locate Wall Studs: Use a stud finder to locate the wall studs. It's essential to anchor the shelves securely to the studs for stability.
- Mark and Drill Holes: Mark the locations for the mounting holes on the wall, aligning them with the wall studs. Use a drill to create pilot holes for the screws.
Project 11: Birdhouse
Here's how you can create a cozy haven for feathered friends in your garden:
- Choose the Right Design: Select a birdhouse design that suits the bird species you want to attract. Different birds have varying preferences for entrance hole size, interior dimensions, and perch requirements.
- Gather the Materials: Collect the necessary materials, including wood boards, screws or nails, and non-toxic wood glue. Opt for untreated wood to ensure the safety of the birds.
- Measure and Cut the Wood: Using a measuring tape, mark the required dimensions for the front, back, sides, and roof panels. Use a saw or a miter saw to cut the wood pieces accurately.
- Assemble the Birdhouse: Begin by attaching the sides to the back panel using screws or nails. Then, secure the front panel, leaving enough space for the entrance hole. Finally, attach the roof panel.
- Add a Perch and Entrance Hole: Some bird species prefer perches, while others do not. Research the species you aim to attract and decide whether to add a perch accordingly. Install an entrance hole of the appropriate size for your target bird species.
Project 12: Smartphone Docking Station
- Gather Materials: Collect the necessary materials for your docking station, such as wood boards, sandpaper, wood glue, and a saw.
- Measure and Cut: Measure your smartphone and accessories to determine the appropriate dimensions for your docking station. Use a saw to cut the wood boards accordingly.
- Design the Slots: Consider the number of charging cables you want to accommodate and other small accessories you want to store. Mark and carve slots into the wood boards to securely hold your items.
- Assemble the Docking Station: Apply wood glue to the edges of the cut wood pieces and carefully attach them together, forming the shape of your docking station. Use clamps to hold them in place while the glue dries.
- Sand and Finish: Once the glue has fully dried, use sandpaper to smooth the surfaces of your docking station. Remove any rough edges and ensure a clean finish.
- Apply a Protective Finish: Apply a protective finish, such as varnish or wood sealant, to enhance the durability and appearance of your docking station.
- Test and Personalize: Place your smartphone and accessories into the designated slots to ensure a proper fit.
Project 13: Wooden Utensil Holder
Here's how to get started:
- Gather Your Materials: Collect the necessary materials for your utensil holder project. You'll need wood boards of suitable size, screws or wood glue, and basic woodworking tools.
- Design Your Utensil Holder: Plan the layout and design of your utensil holder. Consider the types and sizes of utensils you want to store and create compartments that accommodate them efficiently.
- Measure and Cut the Wood: Measure and mark the dimensions for your utensil holder compartments on the wood boards. Use a saw or a suitable cutting tool to carefully cut the pieces according to your measurements.
- Assemble the Compartments: Begin assembling the compartments by attaching the cut wood pieces together. You can use screws or wood glue, depending on your preference and the desired strength of the holder.
- Sand and Finish: Sand the surfaces of the utensil holder to create a smooth finish. Pay attention to any sharp edges or rough areas. Once sanded, apply a suitable finish, such as food-safe wood oil or varnish, to protect the wood and enhance its appearance.
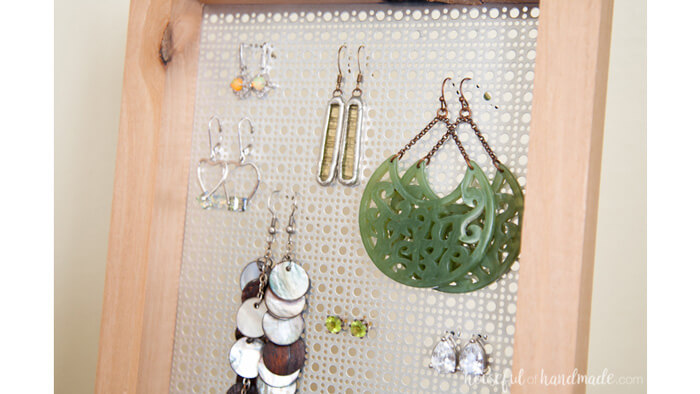
Project 14: Jewelry Organizer
- Design Planning: Start by envisioning the ideal jewelry organizer for your needs. Consider the types of jewelry you have and how you prefer to organize them. Sketch out a design that incorporates hooks, compartments, and a mirror.
- Materials: Gather the necessary materials, including a wooden board or frame, hooks, small containers or compartments, a mirror, screws, and a screwdriver.
- Measurements and Markings: Measure and mark the desired positions for the hooks, compartments, and mirror on the wooden board or frame. Ensure that the spacing is appropriate for the size of your jewelry pieces.
- Attach Hooks and Compartments: Use screws and a screwdriver to securely attach the hooks and compartments to the wooden board or frame. Arrange them in a way that allows for easy access and organization of your jewelry.
- Mount the Mirror: If using a mirror, mount it on the board or frame using suitable brackets or adhesive, ensuring it is positioned at a convenient height for your use.
- Finishing Touches: Sand any rough edges or surfaces and apply a protective finish or paint to the wooden board or frame to enhance its appearance and durability.
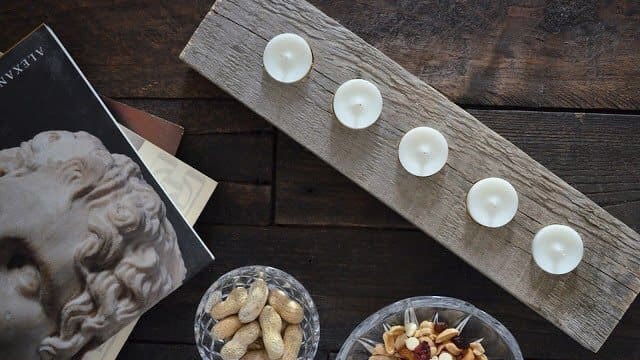
Project 15: Wooden Candle Holders
- Plan Your Design: Consider the style and theme of your home decor. Decide on the shape and size of the candle holders. You can opt for simple cylindrical holders, intricate carved designs, or geometric shapes.
- Select Your Wood: Choose a wood species that suits your aesthetic preferences. Popular options include oak, maple, walnut, or exotic woods for a more unique look.
- Measure and Mark: Use precise measurements to mark the dimensions of your candle holders on the wood. Ensure that the measurements are accurate to achieve a snug fit for the candles.
- Cutting and Shaping: Using a saw or other appropriate tools, carefully cut out the wooden pieces according to your marked measurements. If you desire more intricate designs, consider incorporating decorative cuts or carvings.
- Sanding and Smoothing: Sand the wooden pieces using progressively finer grits of sandpaper to achieve a smooth surface. Pay attention to the edges and corners to avoid any rough spots.
- Finishing Touches: Apply your chosen finish to the wooden candle holders. You can use wood stain for a natural look, paint them to match your decor, or apply a protective clear coat for added durability.
Tips For Woodworking Projects
- Start Small: Begin with simple projects to build your skills and confidence before tackling more complex ones.
- Follow Plans and Instructions: Use detailed plans and follow step-by-step instructions to ensure accuracy and a successful outcome.
- Practice Proper Techniques: Learn and practice proper woodworking techniques, such as measuring, cutting, and joining, for quality results.
- Take Breaks: Woodworking requires focus and attention to detail. Take regular breaks to rest and recharge.
- Embrace Mistakes: Mistakes are learning opportunities. Embrace them, make adjustments, and learn from each project.
Conclusion
In conclusion, woodworking offers a world of creativity and fulfillment, allowing you to bring your ideas to life and create unique pieces that reflect your personal style. With the right tools, materials, and a willingness to learn, you can embark on a woodworking journey as a beginner.
We covered the basics of woodworking, including essential tools, wood selection, and safety precautions. Armed with this knowledge, you can confidently dive into the world of woodworking and start creating beautiful projects.